
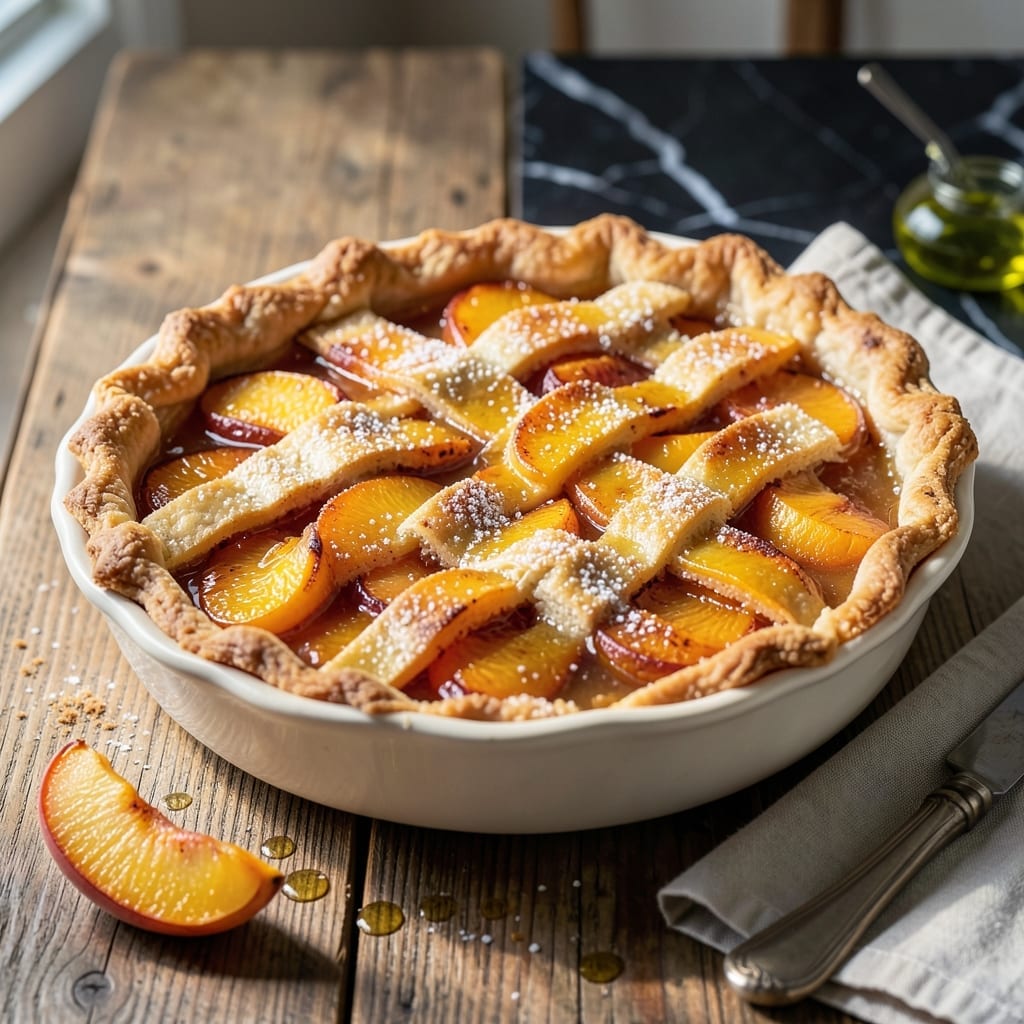
This pie proves canned peaches can create a flawless dessert with minimal effort. The buttery crust and sweet filling come together beautifully.
Using canned peaches simplifies the process while delivering consistent results. The filling maintains its rich flavor and perfect texture every time.
Ingredients for Recipe for Peach Pie Made with Canned Peaches
Canned peaches and pantry staples create this dessert with a buttery, flaky crust.
| Ingredient | Amount | Notes |
|---|---|---|
| Canned Peach Slices 🍑 | 4 cups | Drained, juice reserved |
| Granulated Sugar 🍚 | 1 ½ cups | Divided for filling and topping |
| All-Purpose Flour 🌾 | 2 ½ cups | Plus extra for dusting |
| Unsalted Butter 🧈 | 1 cup | Cold, cubed for crust |
| Cornstarch 🌽 | ¼ cup | For thickening filling |
| Ground Cinnamon 🌿 | 1 tsp | For warm spice note |
| Salt 🧂 | ½ tsp | Fine sea salt preferred |
| Lemon Juice 🍋 | 1 tbsp | Freshly squeezed brightens filling |
| Vanilla Extract 🌿 | 1 tsp | Pure extract for depth |
| Large Egg Yolk 🥚 | 1 whole | For egg wash on crust |
| Heavy Cream 🥛 | 1 tbsp | Optional for egg wash |
The canned peaches are the foundation here. Look for slices in heavy syrup—they maintain texture better than crushed. Del Monte and Muir Glen are reliable brands with consistent quality. Drain them well but save the juice for adjusting filling sweetness. The butter should be European-style for superior flakiness in the crust. Always use cold ingredients for pastry to prevent tough crust formation.
No fresh peaches? That’s the point here—canned work perfectly. Frozen peaches at half the volume can substitute but may require additional cornstarch. For the crust, shortening replaces butter at 1:1 ratio if avoiding dairy. The cinnamon is optional but adds warmth. If the filling seems too thin, increase cornstarch to 1/3 cup for better thickening power.
The pie keeps at room temperature for 2 days or refrigerated for 5 days. Freeze slices wrapped tightly for up to 3 months. For best texture, warm slightly before serving to restore that buttery crust crispness.
Why You’ll Love This Recipe
- No-Fuss Filling: I just dump the canned peach slices straight in—no peeling, no pitting, and the cornstarch thickens them up perfectly.
- Buttery Crust Magic: The flour and butter crust bakes up flaky and golden, while the sugar pulls out all the sweetness from the peaches.
- Potluck Hero: I bring this to picnics and it’s always the first to disappear. Honestly, even my picky nephew asks for seconds.
- Pantry Staples: All the ingredients are already in my cupboard, and it costs me less than $5 to make. I’ll be real: that’s cheaper than a store-bought pie.
Step-by-Step Instructions for Peach Pie With Canned Peaches
This method ensures a flaky crust and perfectly set filling with canned fruit.
Step 1: Prepare the Double Crust
Cut the 1 cup Unsalted Butter into 2.5 cups All-Purpose Flour and 0.5 tsp Salt using a pastry cutter or fork until the mixture resembles coarse crumbs with pea-sized butter pieces visible. This texture is critical for flakiness.
Gradually add ice water 1 tablespoon at a time, mixing just until the dough comes together. Overworking develops gluten, which makes the crust tough. Divide the dough into two discs, wrap in plastic, and refrigerate for 1 hour to relax the gluten and firm the butter.
Step 2: Make the Peach Filling
Drain the 4 cups Canned Peach Slices, reserving the juice. In a saucepan, combine 1 cup Granulated Sugar, 0.25 cup Cornstarch, and 1 tsp Ground Cinnamon. Slowly whisk in 1 cup of the reserved peach juice until smooth.
Stir in the 4 cups Canned Peach Slices, 1 tbsp Lemon Juice, and 1 tsp Vanilla Extract. Cook over medium heat for 5-7 minutes, stirring constantly, until the mixture thickens to the consistency of pudding and becomes glossy and translucent.
Step 3: Assemble and Top the Pie
On a floured surface, roll one dough disc into a 12-inch circle and fit it into a 9-inch pie dish. Trim the edges, leaving a ½-inch overhang. Spoon the warm filling into the crust, mounding it slightly in the center.
Roll the second dough disc into another 12-inch circle. For a lattice top, cut the dough into 1-inch strips and weave them over the filling. Alternatively, place the whole top crust over the filling, trim the edges, and crimp with the bottom crust. Cut several ½-inch slits in the top to allow steam to escape.
Brush the crust with an egg wash made from 1 whole Large Egg Yolk and 1 tbsp Heavy Cream. Sprinkle with the remaining 0.5 cups Granulated Sugar for a crisp, caramelized finish.
Step 4: Bake to Golden Perfection
Place the pie on a parchment-lined baking sheet to catch any drips. Bake at 375°F for 25 minutes. Then, reduce the temperature to 350°F and bake for an additional 30-40 minutes, until the crust is deep golden brown and the filling bubbles through the vents.
If the edges brown too quickly, cover them with a pie shield or foil ring. The pie is done when the juices are thick and bubbling, not thin and runny. Cool on a wire rack for at least 2 hours to allow the filling to set completely before slicing.
Pro Tips For Making Recipe For Peach Pie Made With Canned Peaches
- Drain the Peaches: Rinse and drain the canned peaches thoroughly, then pat them dry with a paper towel to prevent a watery filling—I learned this the hard way after my first pie turned into soup.
- Thicken with Cornstarch: Mix 2 tablespoons of cornstarch with the sugar before adding it to the peaches, or you’ll end up with a runny mess instead of a luscious, sliceable filling.
- Chill the Dough: Give your pie crust at least 30 minutes in the fridge before rolling it out, or it’ll shrink and toughen up in the oven—my grandmother swore by this, and she was right.
- Vent the Top: Cut a few slits or a small lattice in the top crust so steam can escape, or your pie might burst at the seams like my first attempt did.
Essential Equipment for This Dish
Must-Have Tools
To whip up a delicious peach pie with canned peaches, start with a few kitchen essentials. A 9-inch pie dish (glass or ceramic works best) is non-negotiable for baking that perfect crust. You’ll also need a mixing bowl for combining your filling and a rolling pin to flatten your dough evenly. Don’t forget a sharp knife and cutting board for prepping any additional ingredients!
Nice-to-Have Gadgets 🎯
For a smoother process, consider a pastry blender to cut cold butter into flour effortlessly, ensuring a flaky crust. A pie crust shield or aluminum foil can prevent over-browning on the edges. If you love precision, a kitchen scale helps measure ingredients accurately, and a pastry brush is great for that golden egg wash finish.
Budget Alternatives ✨
No fancy tools? No problem! Use a fork or two butter knives to cut butter into flour if you lack a pastry blender. A clean wine bottle can substitute for a rolling pin in a pinch. For a pie dish, any oven-safe cake pan or even a cast-iron skillet can work—just adjust baking times slightly.
Nutrition Facts

- 6 Egg Cake Recipe with Oil: Light as Air With Buttery Moisture - October 4, 2026
- 4 Bean Casserole Recipe: One-Pan Heartiness With Smoky Paprika Depth - October 4, 2026
- 3-Ingredient Keto Mug Cake Recipe: Microwave Magic in 2 Minutes - October 4, 2026