
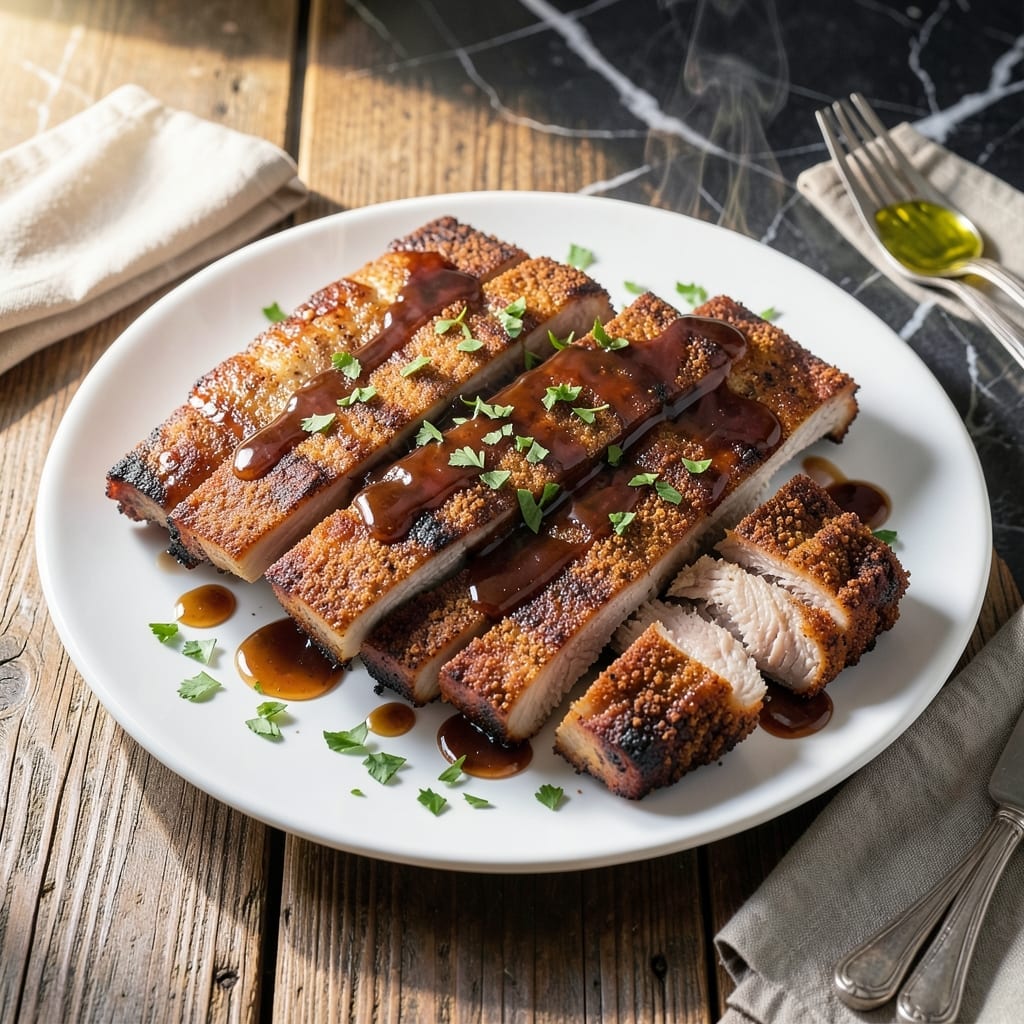
Achieving tender, fall-off-the-bone ribs in the oven is simpler than you think. This method delivers consistent results without a smoker or grill.
I’ve refined the technique to use a dry rub that creates a flavorful crust while keeping the meat juicy. The key is low and slow cooking, allowing the spices to penetrate deeply.
The process involves seasoning the ribs, wrapping them tightly, and baking until perfectly tender. A final finish under the broiler adds the ideal touch of caramelization.
What you get is a dish that rivals any barbecue joint—savory, smoky, and undeniably satisfying. Ready to transform your next meal?
Ingredients for Recipe for St Louis Ribs in the Oven
Pantry staples plus fresh ribs create that fall-off-the-bone magic you crave.
| Ingredient | Amount | Notes |
|---|---|---|
| St Louis Style Pork Spareribs 🥩 | 4 lb | Membrane removed, trimmed of excess fat |
| Brown Sugar 🍚 | ½ cup | Light or dark variety works |
| Smoked Paprika 🌶️ | 2 tbsp | For depth of flavor |
| Garlic Powder 🧄 | 1 tbsp | Not garlic salt |
| Onion Powder 🧅 | 1 tbsp | Adds savory base |
| Ground Black Pepper 🌶️ | 1 tbsp | Freshly ground preferred |
| Kosher Salt 🧂 | 1 tbsp | Diamond Crystal preferred |
| Chili Powder 🌶️ | 1 tbsp | Mild or hot variety |
| Ground Cumin 🌿 | 1 tsp | Toasted for extra aroma |
| Cayenne Pepper 🔥 | ½ tsp | Adjust for heat preference |
| Apple Cider Vinegar 🍏 | ¼ cup | For balancing rub flavors |
| Olive Oil 🫒 | 2 tbsp | For binding dry rub |
| Aluminum Foil 📜 | 1 sheets | Heavy-duty for wrapping ribs |
The ribs are the star here. St Louis style spareribs have the perfect meat-to-bone ratio and are widely available at Costco or your local butcher. Look for racks with good marbling—this ensures they stay juicy during the long cook. The membrane on the bone side needs to come off (use a paper towel for grip). Most butchers will do this for you if you ask. 4 lbs feeds four with leftovers for sandwiches.
No smoked paprika? Regular paprika plus a pinch of liquid smoke works in a pinch. Out of apple cider vinegar? White vinegar or lemon juice can substitute, though the flavor will be slightly different. The brown sugar can be swapped for coconut sugar or even white sugar (but the caramelization won’t be as deep). For extra smokiness, add half a teaspoon of chipotle powder to your dry rub.
The dry rub keeps in an airtight container for up to 3 months. Ribs can be prepped a day ahead—just wrap them in foil and refrigerate. Leftovers? They’ll stay good in the fridge for 4 days and freeze beautifully for 3 months.
Why You’ll Love This Recipe
- Set It and Forget: I just rub the ribs with brown sugar and spices, pop them in the oven, and let the heat do all the work. Honestly, it’s the easiest way to get fall-off-the-bone tenderness without babysitting a grill.
- Smoky Sweet Crust: That mix of smoked paprika and brown sugar caramelizes into this ridiculous crust—sweet, smoky, and just a little sticky. It’s the kind of flavor that makes you lick your fingers mid-bite.
- Crowd-Pleasing Dish: Whether it’s a lazy Sunday supper or a last-minute get-together, these ribs always disappear first. My picky nephew even asks for seconds, and he hates everything.
- Budget Feast: St. Louis ribs are cheaper than baby backs, and this recipe stretches to feed a group. Leftovers? They reheat like a dream, so I get two meals out of one effort.
Step-by-Step Instructions for St Louis Ribs in the Oven
This method delivers fall-off-the-bone ribs with a perfect bark using just your oven.
Step 1: Prepare and Season the Ribs
Start by patting the 4 lb St Louis Style Pork Spareribs completely dry with paper towels. This crucial step ensures the dry rub adheres properly and promotes better browning. With the membrane already removed, you’re ready for seasoning.
In a bowl, combine the 0.5 cup Brown Sugar, 2 tbsp Smoked Paprika, 1 tbsp Garlic Powder, 1 tbsp Onion Powder, 1 tbsp Ground Black Pepper, 1 tbsp Kosher Salt, 1 tbsp Chili Powder, 1 tsp Ground Cumin, and 0.5 tsp Cayenne Pepper. The mixture should be fragrant and evenly blended.
Drizzle the 2 tbsp Olive Oil over the ribs and rub it in thoroughly, then apply the dry rub mixture generously to all sides. Press it in firmly so it forms a crust. Let the seasoned ribs sit at room temperature for 30 minutes while your oven preheats.
Step 2: Initial Oven Roast to Develop Flavor
Preheat your oven to 275°F. Place the ribs meat-side up on a baking sheet lined with the 1 sheets Aluminum Foil. The foil makes cleanup easier and helps concentrate the heat.
Roast the ribs uncovered for 2 hours. This low-and-slow start allows the spices to penetrate the meat while the collagen begins to break down. You’ll notice the rub darkening and forming a beautiful crust—the beginning of that coveted bark.
Step 3: Wrap and Tenderize
After the initial roast, remove the ribs from the oven. The meat should be pulling away from the bones slightly at the ends. Now it’s time to wrap them tightly in the Aluminum Foil with the 0.25 cup Apple Cider Vinegar poured over the top.
The vinegar adds a subtle tang and helps tenderize the meat further. Seal the foil completely to trap steam, which will finish breaking down the tough fibers. Return the wrapped ribs to the oven and cook for another 1.5 to 2 hours.
Step 4: Uncover and Finish for Perfect Texture
Carefully unwrap the ribs and return them to the oven, meat-side up, for a final 30 minutes at 275°F. This step is crucial for achieving that ideal texture—the meat should be tender enough to pull apart with a fork but still hold its shape.
Watch for the edges to caramelize slightly and the bark to set. The internal temperature should reach about 195-203°F for perfect doneness. If the ribs start to darken too much, tent them loosely with foil.
Step 5: Rest and Serve
Remove the ribs from the oven and let them rest for 10-15 minutes before slicing. This rest period allows the juices to redistribute throughout the meat, ensuring each bite is moist and flavorful.
Slice between the bones and serve immediately. The ribs should have a beautiful mahogany color with a slightly sticky, spice-crusted exterior. The meat should pull cleanly from the bone with just a gentle tug, revealing the tender, juicy flesh underneath.
Pro Tips For Making Recipe For St Louis Ribs In The Oven
- Low and Slow First: Start at 275°F for 2.5 hours wrapped tight in foil—this breaks down the connective tissue in St. Louis ribs without drying them out. After burning a few batches at higher temps, I learned patience here actually changes the outcome.
- Dry the Ribs Well: Pat the ribs completely dry before applying the brown sugar and spice rub. Sounds weird, but it works: moisture is the enemy of a good bark, and this helps it form properly.
- Skip the Overcrowding: Arrange ribs meat-side down on the rack with space between them—steer clear of stacking or they’ll steam instead of roast. I was skeptical until I tried it and saw the difference in texture.
- Finish with Broil: After the slow cook, uncover and broil for 3-4 minutes to caramelize the brown sugar and smoked paprika. This isn’t the prettiest method, but it’s the tastiest way to get that sticky, smoky crust.
Essential Equipment for Perfect Results
Oven Thermometer
A reliable oven thermometer is non-negotiable for perfect ribs. Home ovens often run 25-50°F off their set temperature. I use a Taylor Classic hanging thermometer to monitor the actual heat, ensuring my 275°F setting stays consistent. 🌡️
Heavy-Duty Foil
Don’t skimp on heavy-duty aluminum foil for wrapping. Regular foil tears too easily, risking juice leaks. Reynolds Wrap is my go-to—it handles the long cooking time without ripping. You’ll need about 2 feet per rack for a tight seal.
Baking Sheet
A sturdy half-sheet pan (13×18 inches) with a wire rack prevents the ribs from sitting in their own juices. I recommend Nordic Ware for its durability. The rack elevates the ribs, allowing air circulation for even cooking.
Meat Thermometer
An instant-read meat thermometer ensures perfect doneness. I trust my ThermoWorks ThermoPop to check the internal temp reaches 195-203°F. This avoids overcooking or dry ribs.
Mixing Bowls
For the dry rub, a medium mixing bowl (2-3 quart) gives plenty of room to combine all spices. I prefer Pyrex glass bowls—they’re easy to clean and don’t absorb odors. Whisk the spices thoroughly for even distribution.
These tools make all the difference between good ribs and unforgettable ones. 💪
Nutrition Facts
Frequently Asked Questions
Do I need to remove the membrane before cooking?
Yes, always remove the tough membrane on the bone side first. Slide a butter knife under it, lift, then grip with a paper towel and pull. This lets the rub penetrate and ensures tender results.
Can I use a different cut of ribs?
Baby back ribs work but require less cooking time. Reduce total time by 30-45 minutes since they’re smaller. The dry rub and method remain the same.
Why wrap the ribs in foil?
Wrapping traps steam to break down collagen for fall-off-the-bone texture. The apple cider vinegar adds moisture and tenderizes. Skip this step for firmer ribs.
How do I know when they’re done?
The meat should pull back from the bones by 0.5 inch and reach 195-203°F internally. A toothpick should slide in like butter.

- 6 Egg Cake Recipe with Oil: Light as Air With Buttery Moisture - October 4, 2026
- 4 Bean Casserole Recipe: One-Pan Heartiness With Smoky Paprika Depth - October 4, 2026
- 3-Ingredient Keto Mug Cake Recipe: Microwave Magic in 2 Minutes - October 4, 2026