
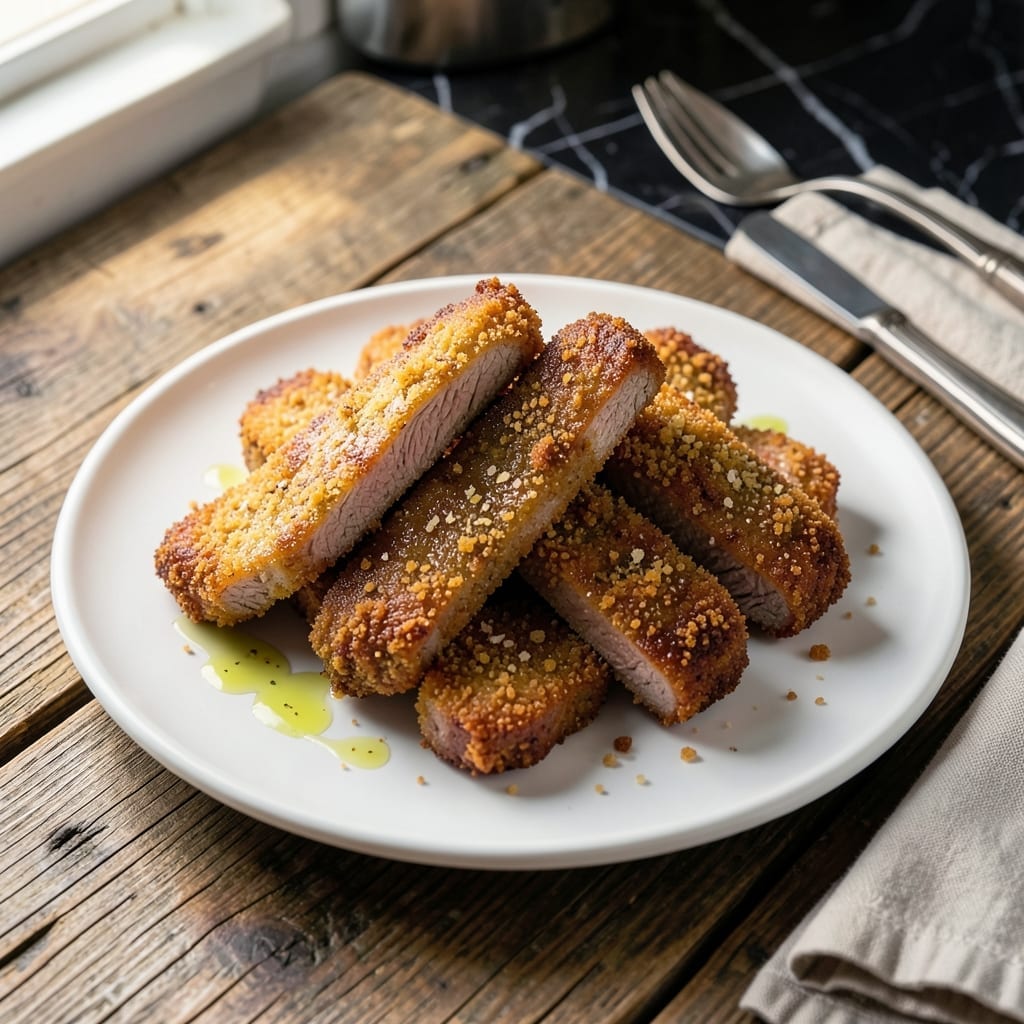
This recipe transforms tender beef into crispy steak fingers with a perfectly seasoned coating that delights every time. The secret lies in a simple breading technique that guarantees a golden, crunchy exterior while keeping the meat juicy.
I developed this method after testing various flour and spice combinations to find the ideal balance. A quick pan-fry at high heat ensures the breading sets properly without overcooking the beef inside.
Each bite delivers a satisfying crunch followed by savory, well-seasoned beef that’s tender and full of flavor. The result is a dish that’s impossible to resist, whether served as an appetizer or main course.
Serve with your favorite dipping sauce for a meal that’s both comforting and crowd-pleasing. Here’s how to make these irresistible bites.
Ingredients for Recipe for Steak Fingers
Tender beef strips meet a perfectly seasoned, golden breading for irresistible crunch in every bite.
| Ingredient | Amount | Notes |
|---|---|---|
| Sirloin Steak 🥩 | 1 ½ lb | Cut into 1-inch strips |
| All-Purpose Flour 🌾 | 1 ½ cups | For initial dredging |
| Large Eggs 🥚 | 2 whole | Beaten for egg wash |
| Panko Breadcrumbs 🍞 | 2 cups | For crispy coating |
| Garlic Powder 🧄 | 1 tbsp | For savory depth |
| Onion Powder 🧅 | 1 tbsp | Balances the seasoning |
| Paprika 🌶️ | 1 tbsp | Sweet or smoked variety |
| Salt 🧂 | 1 ½ tsp | Diamond Crystal preferred |
| Black Pepper 🌶️ | 1 tsp | Freshly ground for best flavor |
| Vegetable Oil 🫒 | 2 cups | For frying, high smoke point |
| Buttermilk 🥛 | 1 cup | For tenderizing meat |
| Cayenne Pepper 🔥 | ¼ tsp | Optional for heat |
The beef is the foundation—sirloin offers the ideal balance of tenderness and flavor for these strips. Costco or Whole Foods carry high-quality cuts, but any well-marbled sirloin from your local butcher works. For the breading, Panko delivers superior crunch compared to standard breadcrumbs. Ensure your oil has a high smoke point to handle the frying temperature without burning.
No buttermilk? Thin plain yogurt with milk or use a splash of milk with 1 tbsp vinegar to mimic the tang. Almond flour can replace all-purpose flour for a gluten-free version, though the texture will differ slightly. If you prefer extra heat, increase the cayenne to half a teaspoon. Swap paprika for smoked paprika to add depth (worth the extra minute).
The breaded strips fry best fresh but can be par-cooked and refrigerated for 1 day before finishing. Store leftovers in an airtight container for up to 3 days—reheat in the oven to revive crispiness. Freezing isn’t recommended as it softens the breading.
Why You’ll Love This Recipe
- 20-Minute Meal: I can get these from fridge to table faster than ordering takeout. Honestly, the panko crisp is worth the minimal effort.
- Garlic-Kissed Crunch: That first bite with the garlic powder in the breading? Ridiculously good—like a steakhouse appetizer at home.
- Crowd-Pleasing Staple: My picky nephew and my foodie sister both ask for seconds. Between us, it’s the panko that sells it.
- Budget Steak Fix: Sirloin cut into strips means I can serve steak for four without the premium price tag. One pound goes a long way.
Step-by-Step Instructions for Steak Fingers
Master the technique for achieving a crispy exterior while keeping the steak tender and flavorful inside.
Step 1: Prepare and Season the Sirloin Strips
Cut the 1.5 lb Sirloin Steak into 1-inch strips of even thickness. This ensures uniform cooking and consistent texture in every bite. I use a sharp chef’s knife and slice against the grain for maximum tenderness.
In a shallow dish, combine the 1.5 cups All-Purpose Flour, 1 tbsp Garlic Powder, 1 tbsp Onion Powder, 1 tbsp Paprika, 1.5 tsp Salt, 1 tsp Black Pepper, and 0.25 tsp Cayenne Pepper. Whisk until evenly distributed—this seasoned flour is your first layer of flavor and crispiness.
Step 2: Create the Breading Station
Set up a breading station with three shallow dishes. Place the seasoned flour in the first, pour 1 cup Buttermilk into the second, and add the 2 cups Panko Breadcrumbs to the third. The buttermilk acts as a tenderizer while helping the coating adhere.
Beat the 2 whole Large Eggs directly into the buttermilk until fully incorporated. This creates a rich, tangy wash that binds the flour and breadcrumbs to the steak. The panko’s coarse texture guarantees an extra-crispy finish, so don’t substitute regular breadcrumbs.
Step 3: Bread the Steak Fingers Thoroughly
Dredge each strip in the seasoned flour, pressing lightly to adhere. Shake off any excess—too much flour creates a gummy layer under the coating. Next, dip the floured strip into the buttermilk-egg wash, letting any excess drip off for 5 seconds.
Finally, roll the strip in the panko breadcrumbs, pressing gently to ensure full coverage. Place the breaded fingers on a wire rack set over a baking sheet. This setup allows air circulation, preventing the coating from becoming soggy before frying.
Step 4: Fry to Golden Perfection
Heat 2 cups Vegetable Oil in a deep, heavy-bottomed skillet over medium-high heat until it reaches 350°F. A deep-fry thermometer is ideal, but you can test the oil by dropping in a pinch of panko—it should sizzle immediately and float to the surface.
Fry the steak fingers in batches to avoid crowding the pan, which lowers the oil temperature. Cook for 3-4 minutes per side until the coating is deep golden brown and the internal temperature of the steak reaches 145°F. Use tongs to turn them—this maintains the crispy texture.
Step 5: Drain and Serve Immediately
Transfer the fried steak fingers to a paper towel-lined plate to drain excess oil. The coating should be audibly crisp when it hits the towels. Let them rest for 2 minutes to set the crust and allow the juices in the steak to redistribute.
Serve immediately while hot and crispy. The contrast between the tender steak and shatteringly crisp panko coating is what makes this dish irresistible. Pair with your favorite dipping sauce for the ultimate experience.
Pro Tips For Making Recipe For Steak Fingers
- Slice Against the Grain: Cut the sirloin into thin strips against the grain for tender steak fingers—this shortens muscle fibers so they’re easier to chew. I learned this the hard way after my first batch came out tough.
- Double Dredge for Crunch: Coat the steak in flour, dip in beaten egg, then roll in panko mixed with garlic powder. Do it twice for a thicker, crispier crust that actually stays put when frying.
- Skip the Overcrowding: Fry in batches with about an inch of space between pieces—it keeps the oil hot and prevents soggy breading. After burning my first few, I finally figured out that patience pays off.
- Rest Before Serving: Let the steak fingers drain on a wire rack for 2-3 minutes after frying. Sounds weird, but it works: it keeps them crispy instead of steaming under a paper towel.
Troubleshooting This Dish
Breading Not Sticking
If your coating slides off, the beef may be too wet. Pat the strips completely dry with paper towels before dredging in flour. Also, let the floured strips rest for 5 minutes before dipping in buttermilk—this creates a tacky surface that the breadcrumbs cling to better. 💡
Soggy Coating
This usually happens when oil temperature is too low. Use a thermometer to maintain 350°F oil temperature. If you don’t have one, test with a panko crumb—it should sizzle and brown within 30 seconds. Fry in small batches to prevent temperature drops.
Uneven Cooking
Cut your sirloin into even 1-inch strips for uniform cooking. If some pieces cook faster, they were likely cut thinner. Use tongs to flip each piece only once during frying to maintain the crispy texture.
Oil Absorption
If your fingers soak up too much oil, your oil may be too cool. Heat the oil until it shimmers before adding the first batch. Also, drain on a wire rack instead of paper towels to allow excess oil to drip away from all sides.
Dry Meat
Overcooking is the culprit. Sirloin only needs 3-4 minutes per side at 350°F. Use an instant-read thermometer to pull the meat at 145°F internal temperature. The buttermilk marinade also helps prevent dryness. 🔥
For extra juiciness, let the breaded fingers rest for 10 minutes before frying to allow the buttermilk to work its magic.
Nutrition Facts
Frequently Asked Questions
Can I use a different cut of beef?
Yes, but choose tender cuts like ribeye or tenderloin. Sirloin is ideal for its balance of flavor and affordability. Avoid tough cuts like chuck as they won’t yield tender fingers.
How do I keep them crispy after cooking?
Drain on a wire rack, not paper towels, to prevent steam buildup. Serve immediately, or keep warm in a 200°F oven for up to 15 minutes while finishing batches.
Can I bake instead of fry?
Bake at 400°F for 12-15 minutes, flipping halfway. Use a wire rack on a baking sheet for even airflow. The texture won’t be as crispy, but it’s a healthier option.

- 6 Egg Cake Recipe with Oil: Light as Air With Buttery Moisture - October 4, 2026
- 4 Bean Casserole Recipe: One-Pan Heartiness With Smoky Paprika Depth - October 4, 2026
- 3-Ingredient Keto Mug Cake Recipe: Microwave Magic in 2 Minutes - October 4, 2026