
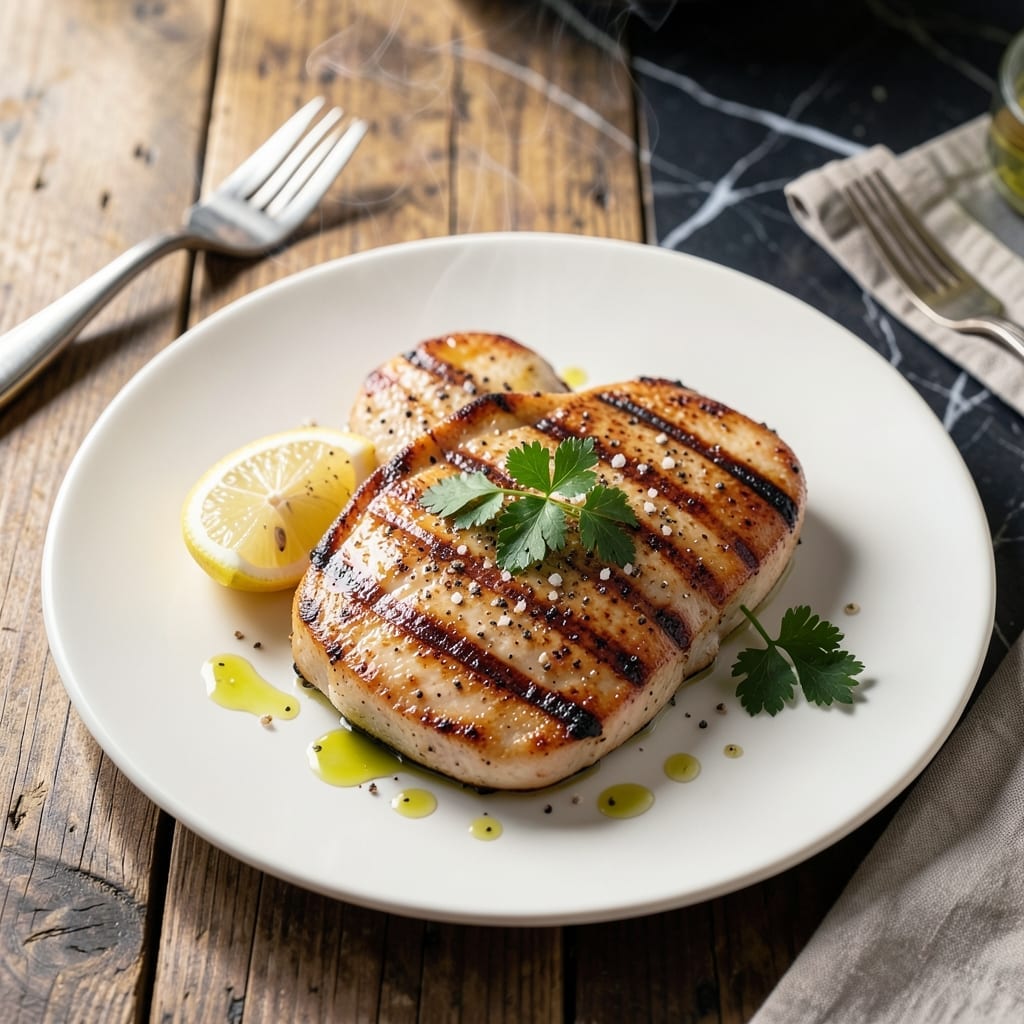
Thin chicken breast often falls victim to dry, rubbery results, but this method guarantees juicy meat every time. The secret lies in precise timing and proper heat control to prevent overcooking.
I’ve tested countless approaches, and the most reliable involves high heat searing followed by a quick finish in the oven. This creates a golden crust while locking in moisture inside.
The result is perfectly cooked chicken with no dry spots—tender, flavorful, and ready in under 20 minutes. It’s the kind of reliable technique that works for weeknight dinners or meal prep.
Serve it sliced over salads, tucked into sandwiches, or paired with your favorite sides. Here’s how to get it right.
Ingredients for Recipe for Thin Chicken Breast
Simple ingredients for chicken that stays juicy, never dry or rubbery.
| Ingredient | Amount | Notes |
|---|---|---|
| Boneless Skinless Chicken Breasts 🍗 | 1 ½ lb | Pounded to 1/2-inch thickness |
| Olive Oil 🫒 | 2 tbsp | Divided for searing and finishing |
| Kosher Salt 🧂 | 1 tsp | Plus more to taste |
| Black Pepper 🌶️ | ½ tsp | Freshly ground preferred |
| Garlic Powder 🧄 | 1 tsp | Or 2 fresh cloves minced |
| Paprika 🌶️ | 1 tsp | Sweet or smoked variety |
| Dried Thyme 🌿 | ½ tsp | Or 1 tsp fresh thyme |
| Dried Oregano 🌿 | ½ tsp | For depth of flavor |
| Lemon Juice 🍋 | 1 tbsp | Freshly squeezed preferred |
| Unsalted Butter 🧈 | 1 tbsp | Optional for extra richness |
| Fresh Parsley 🌿 | 2 tbsp | Chopped, for garnish |
| Chicken Broth 🍲 | ½ cup | Low-sodium preferred |
The chicken itself is the star—look for even thickness (or pound it yourself with a rolling pin). I grab mine from Whole Foods or Costco when I’m stocking up. The key is starting with similar-sized pieces so they cook uniformly. Don’t skip the drying step (pat with paper towels) or the crust won’t form right.
No kosher salt? Sea salt works, but go easy—it’s saltier by volume. Swap garlic powder for granulated garlic at half the amount. Fresh herbs can replace dried (use triple the quantity). The broth is optional but adds moisture—vegetable broth if that’s what you’ve got. Butter haters? Skip it, the olive oil’s enough.
Prep the chicken the morning of, or the night before—keeps 2 days in the fridge. Cooked leftovers? 3-4 days max. Freeze raw chicken for up to 9 months, but it’s best fresh. Always let it rest 5 minutes before slicing.
Why You’ll Love This Recipe
- Minimal Effort: I just pound the chicken thin, toss it in olive oil, salt, pepper, and garlic powder—no fancy steps.
- Garlicky Perfection: That garlic powder crust with the juicy chicken underneath? Ridiculously good every time.
- Meal Prep MVP: I make a batch Sunday and it’s ready for salads, wraps, or pasta all week.
Step-by-Step Instructions for Thin Chicken Breast
Here’s the method that keeps them moist and flavorful every time.
Step 1: Pound and Season the Chicken
Place the boneless skinless chicken breasts between two sheets of plastic wrap. Using a meat mallet or rolling pin, pound them to an even ½-inch thickness. This ensures they cook quickly and evenly without drying out.
Pat the chicken dry with paper towels—this helps the seasoning stick and prevents steaming. Rub both sides with 1 tsp kosher salt, ½ tsp black pepper, 1 tsp garlic powder, 1 tsp paprika, ½ tsp dried thyme, and ½ tsp dried oregano. Let them sit for 10 minutes to absorb the flavors.
Step 2: Sear the Chicken to Golden Perfection
Heat 1 tbsp olive oil in a large skillet over medium-high heat until it shimmers. Add the seasoned chicken breasts and cook undisturbed for 3-4 minutes per side. You’ll know they’re ready to flip when the edges look opaque and they release easily from the pan.
Resist the urge to move them around—this builds a golden crust that locks in juices. When done, the internal temperature should read 160°F on an instant-read thermometer. Transfer the chicken to a plate and tent with foil to keep warm.
Step 3: Make the Pan Sauce
In the same skillet, reduce heat to medium and add 1 tbsp olive oil and 1 tbsp unsalted butter. Once the butter melts, pour in ½ cup chicken broth and 1 tbsp lemon juice. Scrape up any browned bits from the bottom of the pan—this adds depth to the sauce.
Let it simmer for 2-3 minutes until slightly thickened. Taste and adjust seasoning with a pinch more salt if needed. The sauce should be tangy and rich, coating the back of a spoon.
Step 4: Rest and Serve
Return the chicken to the skillet and spoon the sauce over the top. Let it rest for 3-5 minutes off heat—this allows the juices to redistribute and keeps the meat tender. Sprinkle with 2 tbsp fresh parsley for a pop of color and freshness.
Serve immediately while warm. The chicken should be juicy with a light, flavorful sauce that complements every bite. This method guarantees no dryness, just perfectly cooked thin chicken breasts.
Pro Tips For Making Recipe For Thin Chicken Breast
- Pound Even Thickness: Use a meat mallet to gently pound the chicken to ¼-inch thickness—this guarantees even cooking and prevents dry edges while the center finishes.
- Salt Before Cooking: Season the chicken with kosher salt at least 10 minutes before cooking; it draws out moisture then reabsorbs, keeping the meat juicy.
- Skip the Cold Pan: Heat the olive oil in the pan until shimmering before adding the chicken—cold oil makes the meat steam instead of sear, and nobody wants rubbery chicken.
- Rest Under Foil: Tent the cooked chicken with foil for 5 minutes before slicing; it redistributes the juices so they don’t all spill onto the cutting board.
Pro Cooking Tips for This Dish
Perfect Heat Control
I always start with a medium-high heat sear to develop a golden crust quickly without drying out the meat. Use a heavy skillet like cast iron for even heat distribution. The oil should shimmer but not smoke when ready.
Thermometer Precision
An instant-read thermometer is your best friend here. Pull the chicken at 160°F internal temperature—it’ll rise to 165°F while resting. I use a ThermoWorks Thermapen for accuracy. 🌡️
Resting Matters
Let your chicken rest for 3-5 minutes after cooking. This allows juices to redistribute throughout the meat. Tent with foil to keep warm during this crucial step.
Even Thickness
Pound your breasts to an exact ½-inch thickness using a mallet or rolling pin. This ensures uniform cooking and prevents dry spots. Place between plastic wrap to avoid tearing.
Seasoning Timing
Season your chicken 10 minutes before cooking. This gives the salt time to penetrate the surface. Pat dry first—wet chicken won’t brown properly.
Sauce Integration
Deglaze with ½ cup chicken broth and 1 tbsp lemon juice to create a flavorful pan sauce. Scrape up those browned bits—they’re packed with flavor. 💡
Nutrition Facts
Frequently Asked Questions
How do I prevent thin chicken from drying out?
Cook over medium-high heat for just 3-4 minutes per side. Use a thermometer and pull at 160°F—it’ll rise to 165°F while resting.
Can I skip pounding the chicken?
Not recommended. Pounding to ½-inch thickness ensures even cooking. Without it, thicker parts may dry out before thinner areas finish.
What if my chicken sticks to the pan?
Your pan isn’t hot enough or you moved it too soon. Heat oil until shimmering and let chicken sear undisturbed for 3-4 minutes before flipping.
How long should I rest the chicken?
Rest for 3-5 minutes tented with foil. This lets juices redistribute, keeping every bite tender and flavorful.

- 6 Egg Cake Recipe with Oil: Light as Air With Buttery Moisture - October 4, 2026
- 4 Bean Casserole Recipe: One-Pan Heartiness With Smoky Paprika Depth - October 4, 2026
- 3-Ingredient Keto Mug Cake Recipe: Microwave Magic in 2 Minutes - October 4, 2026