
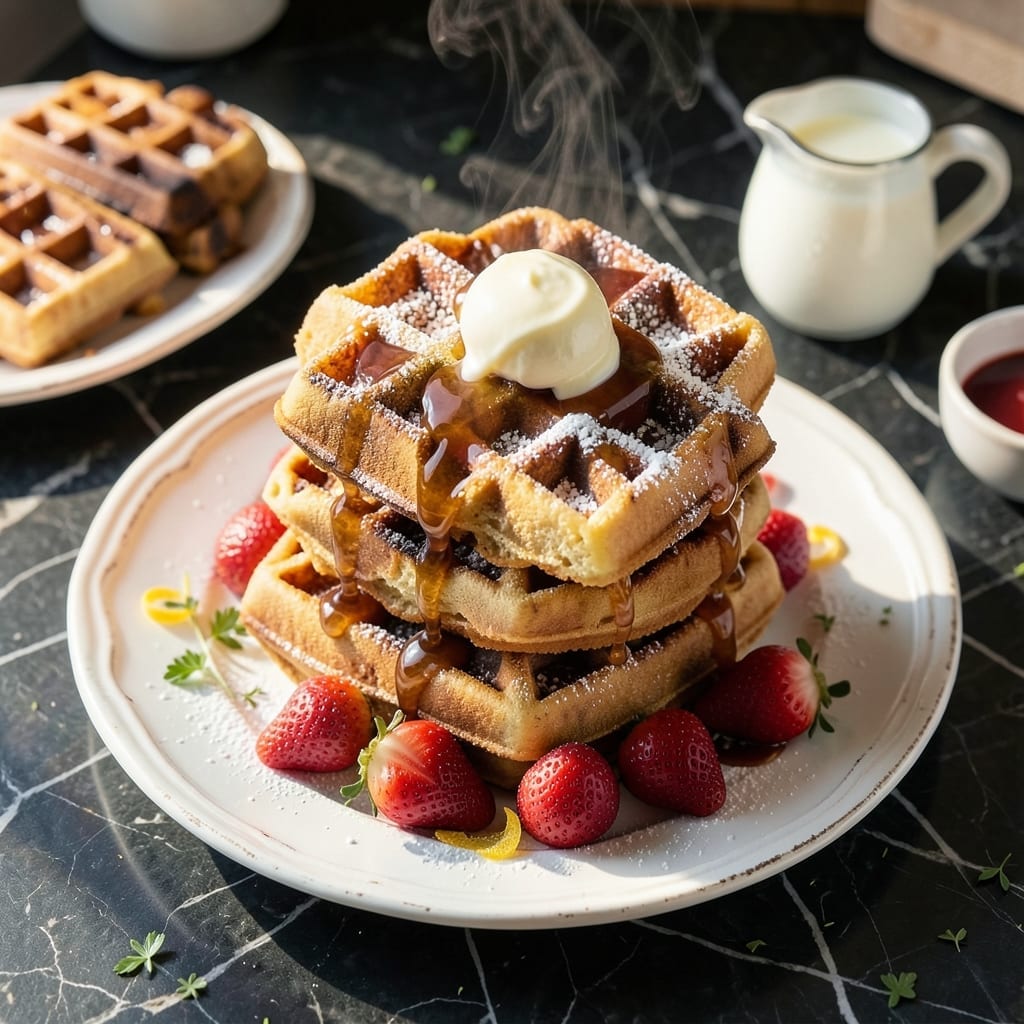
Achieve golden crisp waffles with minimal effort using your waffle machine. This method delivers consistent results every time.
With a simple batter and proper temperature control, you can create perfectly textured waffles in minutes. No special skills required.
Ingredients for Recipe for Waffle Machine
Everyday staples transform into crisp, golden grids with ease.
| Ingredient | Amount | Notes |
|---|---|---|
| All-Purpose Flour 🌾 | 2 cups | Sifted for lighter texture |
| Baking Powder 🧂 | 2 tbsp | Ensures fluffy interior |
| Granulated Sugar 🍚 | 2 tbsp | Balances flavor profile |
| Salt 🧂 | ½ tsp | Fine sea salt preferred |
| Large Eggs 🥚 | 2 whole | Room temperature for best results |
| Whole Milk 🥛 | 1 ¾ cups | Full-fat for richness |
| Unsalted Butter 🧈 | ½ cup | Melted and cooled slightly |
| Vanilla Extract 🌿 | 1 tsp | Pure extract recommended |
| Vegetable Oil 🫒 | 2 tbsp | For greasing the machine |
| Cornstarch 🌽 | 2 tbsp | For extra crispiness |
The flour is the foundation here. King Arthur’s all-purpose is my go-to for consistent results (no weird aftertastes). Baking powder loses potency over time, so check the expiration date—Clabber Girl or Rumford are reliable brands. For the milk, I’d avoid skim here; the fat helps with that tender interior. Most grocery stores carry everything you need.
No whole milk? Oat milk at a 1:1 ratio works surprisingly well. Swap the butter for coconut oil if you’re dairy-free, though the flavor will shift slightly. Out of vanilla extract? Vanilla bean paste at half the amount adds a nice visual touch too. The cornstarch can be skipped, but you’ll lose some of that signature crunch.
Batter keeps in the fridge for 12-24 hours—just give it a good whisk before using. Leftover waffles? Freeze them in a single layer first, then stack. Reheat in the toaster for up to 3 months.
Why You’ll Love This Recipe
- Five Ingredient Magic: I love that I only need flour, baking powder, sugar, salt, and eggs—no fancy shopping required.
- Crispy Golden Edges: The baking powder gives them that perfect lift and crunch that makes every bite satisfying.
- Breakfast or Brinner: Honestly, these work just as well for a lazy Sunday morning as a quick weeknight dinner.
- Freezer Friendly: I double the batch, freeze extras, and pop them in the toaster for a 60-second win on busy mornings.
Step-by-Step Instructions for Waffle Machine
Here’s my tested method for achieving those perfect golden grids every time.
Step 1: Combine Dry Ingredients for Structure
In a large mixing bowl, whisk together the 2 cups All-Purpose Flour, 2 tbsp Baking Powder, 2 tbsp Granulated Sugar, 0.5 tsp Salt, and 2 tbsp Cornstarch until thoroughly combined. I sift these first for that ultra-light texture you want in a great waffle.
The cornstarch is my secret weapon here—it creates that extra crispness that makes these stand out. Make sure there are no visible streaks of baking powder or cornstarch in the mixture. This even distribution ensures every bite has the right balance of fluffiness and crunch.
Step 2: Mix Wet Ingredients for Richness
In a separate bowl, beat the 2 whole Large Eggs until they’re pale yellow and slightly frothy. Then whisk in the 1.75 cups Whole Milk, 0.5 cup Unsalted Butter (melted and cooled to room temperature), and 1 tsp Vanilla Extract.
The melted butter should be just warm to the touch, not hot—otherwise it’ll cook the eggs. I always use full-fat milk here because the extra richness makes a noticeable difference in both flavor and texture. The vanilla adds that subtle warmth that makes these taste like they’re from a specialty brunch spot.
Step 3: Combine Wet and Dry for Perfect Batter
Create a well in the center of your dry ingredients and pour in the wet mixture. Using a silicone spatula, gently fold everything together until just combined. It’s okay if there are a few small lumps—overmixing will develop the gluten and make your waffles tough.
The batter should be thick but pourable, with a consistency similar to pancake batter. If it seems too thick, resist the urge to add more milk. The baking powder will create lift during cooking, and the cornstarch will crisp up beautifully on the hot waffle iron.
Step 4: Cook to Golden Perfection
Preheat your waffle machine according to manufacturer’s instructions. When it’s fully heated, brush the grids lightly with vegetable oil using a pastry brush. This prevents sticking and helps achieve that gorgeous golden-brown finish.
Pour enough batter to fill the grids about ¾ full—it’ll spread as it cooks. Close the lid and cook for 3-5 minutes (timing varies by machine) until the waffles are deep golden brown and release easily from the iron. Don’t lift the lid too early or you’ll tear the waffle.
Transfer the cooked waffles to a wire rack set in a 200°F oven to keep warm while you cook the remaining batter. This prevents them from getting soggy. Serve immediately with your favorite toppings while they’re still crispy.
Pro Tips For Making Recipe For Waffle Machine
- Preheat the Iron: I learned this the hard way—always give your waffle machine a full 10 minutes to heat up before adding batter. Cold spots mean uneven cooking and sad, pale waffles.
- Whip the Eggs: Separate the yolks and whites, then beat the whites until stiff peaks form before folding them in. Sounds fussy, but it makes the waffles light as a cloud.
- Skip Overmixing: Stir the batter just until the flour disappears—lumps are fine. Overmixing develops gluten, and suddenly you’ve got tough, chewy waffles instead of tender ones.
- Rest the Batter: Let the batter sit for 5-10 minutes after mixing. The baking powder activations fully, and the flour absorbs the liquid, so your waffles come out crisp, not gummy.
Make-Ahead Tips for Leftovers
🔪 Week Before
Start by checking your pantry for staples like flour, sugar, baking powder, and salt. Take 10 minutes to jot down any missing ingredients for your next grocery run. If your recipe calls for buttermilk, you can also prep a DIY version by mixing 1 tablespoon of lemon juice or vinegar with 1 cup of milk and letting it sit for 5 minutes. Store this in the fridge until ready to use.
🥘 Day Before
Mix your dry ingredients—flour, sugar, baking powder, and salt—in a bowl and cover tightly. For the wet ingredients, whisk eggs, milk, and melted butter in a separate container. Refrigerate both mixtures overnight to streamline your morning prep. If you’re adding mix-ins like chocolate chips or berries, measure them out and store them in small bags for easy access.
⏰ Day Of
Combine the prepped dry and wet ingredients, stirring just until smooth. Let the batter rest for 10 minutes while your waffle machine heats up. This short pause helps the gluten relax for fluffier results. If your machine requires greasing, do this now to avoid sticking.
🔥 Last-Minute Tasks
Once the batter is ready, pour it onto the hot waffle iron and cook according to the manufacturer’s guidelines. Keep cooked waffles warm in a 200°F oven on a wire rack to maintain crispness. Serve immediately with toppings like maple syrup, fresh fruit, or whipped cream for the best texture and flavor! 💡 Pro tip: Avoid stacking waffles directly on top of each other to prevent sogginess.
Nutrition Facts

- 6 Egg Cake Recipe with Oil: Light as Air With Buttery Moisture - October 4, 2026
- 4 Bean Casserole Recipe: One-Pan Heartiness With Smoky Paprika Depth - October 4, 2026
- 3-Ingredient Keto Mug Cake Recipe: Microwave Magic in 2 Minutes - October 4, 2026