
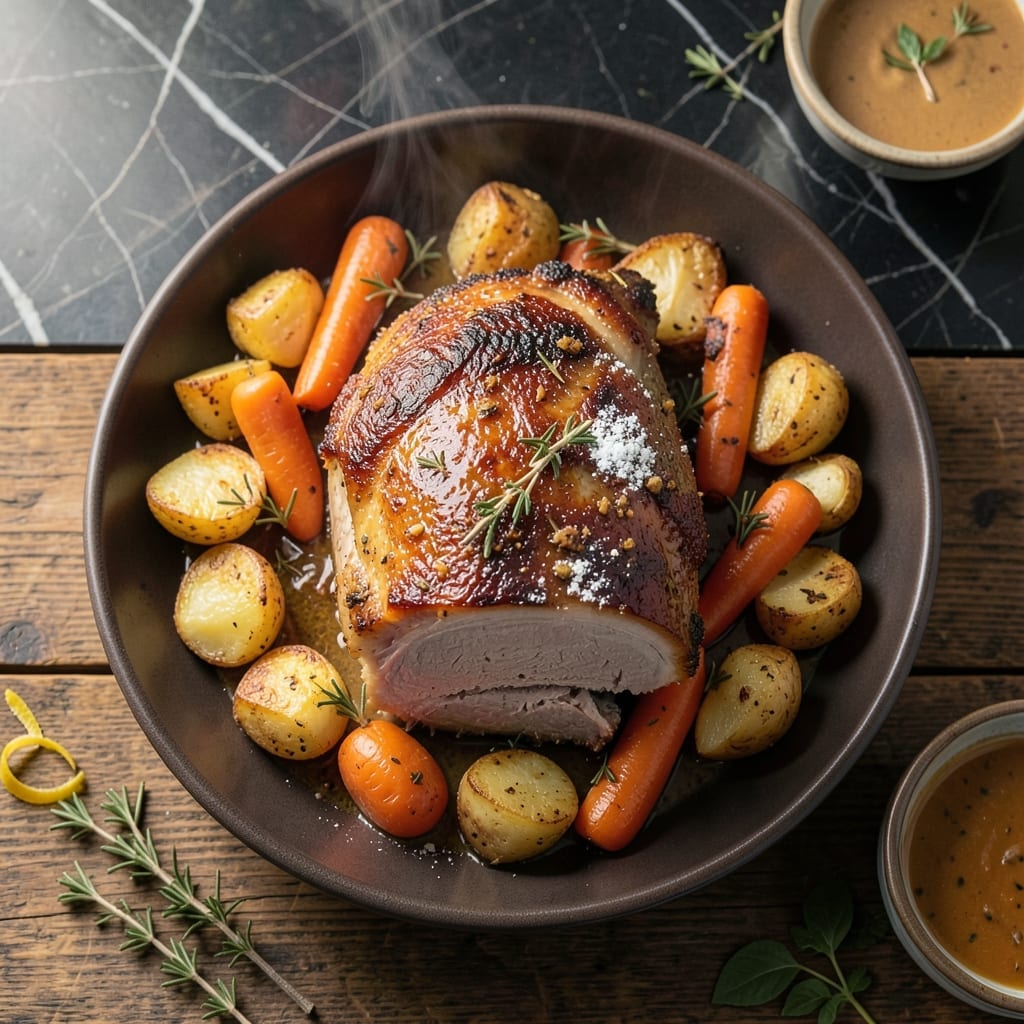
This proven method delivers juicy pork roast with minimal effort and no messy cleanup. The oven bag locks in moisture while creating a self-basting environment that ensures tender results every time.
I developed this technique after years of dry, overcooked roasts—now it’s my go-to for Sunday dinner. The process is simple: season, seal, and let the oven do the work. No special skills required.
What emerges is perfectly cooked pork with a golden crust, ready to serve with your favorite sides. The bag contains all the drippings, making gravy preparation effortless.
Ideal for feeding a family or meal prepping for the week. Here’s how to achieve professional results at home.
Ingredients for Reynolds Oven Bag Pork Roast
Simple ingredients for a foolproof oven bag roast with juicy, tender results.
| Ingredient | Amount | Notes |
|---|---|---|
| Pork Shoulder Roast 🥩 | 3 lb | Bone-in or boneless |
| Reynolds Oven Bag 🛍️ | 1 bag | Large size for 3-4 lb roast |
| All-Purpose Flour 🌾 | 2 tbsp | For thickening gravy |
| Salt 🧂 | 1 ½ tsp | Kosher or sea salt |
| Black Pepper 🌶️ | 1 tsp | Freshly ground preferred |
| Garlic Powder 🧄 | 1 tsp | Not garlic salt |
| Onion Powder 🧅 | 1 tsp | Adds depth to seasoning |
| Dried Thyme 🍃 | ½ tsp | Or substitute rosemary |
| Olive Oil 🫒 | 1 tbsp | For rubbing on pork |
| Carrots 🥕 | 3 whole | Peeled and cut into chunks |
| Potatoes 🥔 | 4 whole | Yukon Gold or Russet, quartered |
| Onions 🧅 | 2 whole | Yellow onions, quartered |
| Beef Broth 🥣 | 1 cup | Low-sodium preferred |
The pork shoulder is key here—bone-in gives extra flavor, but boneless works too. I grab mine from Costco or the local butcher. Look for good marbling (those white streaks of fat) which keeps it moist. The oven bag is non-negotiable—Reynolds is the standard, and the large size fits a 3-4 lb roast perfectly. Don’t skip the flour for the gravy (it’s the magic touch).
No pork shoulder? Pork loin works but cook it about 20% less time since it’s leaner. Out of thyme? Rosemary or sage at the same amount. No fresh veggies? Frozen carrots and potatoes are fine (no need to thaw). The beef broth can be swapped for chicken broth, but the darker color from beef looks better with the pork drippings (trust me on this).
Leftovers keep 4-5 days in the fridge, and the pork freezes beautifully for 3 months. I portion it into meal-sized containers so it’s ready when you are. The gravy might thicken in storage—just thin with a splash of broth when reheating.
Why You’ll Love This Recipe
- No-Mess Magic: I toss the pork in the bag with a little flour and seasoning, and the oven does the rest—no scrubbing pans later.
- Fallback Flavor: That slow-roasted pork shoulder in its own juices? Ridiculously tender with just salt, pepper, and a hint of caramelized crust.
- Feeds My Crew: One 4-pound roast in the bag stretched to sandwiches, tacos, and fried rice all week. Honestly, it’s my Sunday meal prep hero.
- Budget Friendly: Pork shoulder’s cheap, the bag’s reusable, and I’m not wasting a drop of those rich, savory drippings.
Step-by-Step Instructions for Reynolds Oven Bag Pork Roast
Here’s my no-fail method for perfectly juicy pork with almost zero cleanup.
Step 1: Season and Prepare the Pork Shoulder Roast
Pat the 3 lb Pork Shoulder Roast dry with paper towels. In a small bowl, combine the 1.5 tsp Salt, 1 tsp Black Pepper, 1 tsp Garlic Powder, 1 tsp Onion Powder, and 0.5 tsp Dried Thyme. Rub this mixture all over the roast, pressing it in so it adheres well.
Drizzle the 1 tbsp Olive Oil over the seasoned roast and rub it in evenly. This creates a barrier that locks in moisture during cooking. I always let it sit for 10-15 minutes at room temperature while I prep the vegetables—this takes the chill off for more even cooking.
Step 2: Prepare Vegetables and Oven Bag
Cut the 3 whole Carrots, 4 whole Potatoes, and 2 whole Onions into large chunks. There’s no need to peel the potatoes if you’re using Yukon Golds—the skin adds texture and flavor. Toss all the vegetables together in a large bowl.
Shake the 2 tbsp All-Purpose Flour into the 1 bag Reynolds Oven Bag and shake it around to coat the inside evenly. This flour coating will help thicken the juices into a rich gravy as the roast cooks. Place the bag in a roasting pan or baking dish.
Step 3: Assemble and Begin Roasting
Put the seasoned roast in the center of the floured oven bag. Arrange the vegetables around the meat, then pour in the 1 cup Beef Broth. The liquid creates steam that keeps the pork incredibly juicy while it roasts.
Close the oven bag with the provided tie, but cut six ½-inch slits in the top to allow steam to escape. This prevents the bag from bursting while still retaining enough moisture. Place the pan in a preheated 350°F oven.
Step 4: Roast to Tender Perfection
Roast for 2 to 2.5 hours, or until the internal temperature reaches 195-200°F. The pork is done when it’s fork-tender and the juices run clear. I check the temperature in the thickest part of the roast, avoiding the bone if using bone-in.
The vegetables should be tender and starting to caramelize from the concentrated flavors in the bag. If you notice the bag browning too much through the slits, tent it loosely with foil to prevent burning.
Step 5: Rest and Serve with Gravy
Carefully remove the pan from the oven. Let the roast rest in the bag for 15 minutes—this allows the juices to redistribute for maximum tenderness. Transfer the pork to a cutting board and slice or pull apart as desired.
Pour the juices and vegetables from the bag into a saucepan. Simmer for 3-5 minutes to thicken slightly into a gravy. Serve the pork with the vegetables and gravy spooned over the top. The meat should be fall-apart tender with a beautiful brown exterior.
Pro Tips For Making Reynolds Oven Bag Pork Roast
- Preheat the Bag: Shake 1 tablespoon of flour in the oven bag before adding the pork—this prevents sticking and makes a light gravy. I learned this the hard way after peeling half my roast off the plastic.
- Score the Fat: Cut shallow slits in the pork shoulder’s fat cap so the salt and pepper actually penetrate. Sounds weird, but it works: the seasoning gets into the meat, not just on the surface.
- Don’t Overfill: Keep the roast under 4 pounds or split it—overloading the bag steams the pork instead of roasting it. My first attempt was a 6-pounder; the texture was sad.
- Rest Before Slicing: Let the pork sit in the bag for 15 minutes after pulling it from the oven. I skip this when I’m lazy, but the juices stay put instead of running all over the cutting board.
Pro Cooking Tips for Great reynolds oven bag pork roast
Bag Selection
Always use a large Reynolds oven bag for a 3-4 lb roast—it provides enough space for steam circulation without crowding. I once tried a turkey-size bag and the pork steamed rather than roasted. The large size is perfect for this recipe. 💡
Sealing Technique
After adding all ingredients, gather the bag’s open end and secure it with the provided tie, but leave a 1-inch opening before the final knot. This allows excess steam to escape while maintaining the self-basting environment.
Slit Placement
Cut six ½-inch slits in the top of the bag before cooking. Space them evenly—this prevents the bag from bursting while letting steam vent. I use kitchen shears for clean cuts. Place the bag in a roasting pan to catch any drips.
Temperature Check
Use a meat thermometer to check doneness. The pork is ready at 195-200°F internal temperature. I check in the thickest part, avoiding the bone if using bone-in. The meat should pull apart easily with a fork. 🌡️
Resting Time
Let the roast rest in the bag for 15 minutes after removing from the oven. This step is crucial—it allows juices to redistribute. Skipping it results in dry meat, even with the oven bag method.
Gravy Thickening
After removing the pork, pour the juices into a saucepan. The flour in the bag will have created a light roux. Simmer for 3-5 minutes to reach your desired consistency. I often add a splash of broth to thin if needed.
Nutrition Facts
Frequently Asked Questions
What if I don’t have an oven bag?
Use a Dutch oven with a tight lid as an alternative. Add 1/2 cup liquid and maintain 350°F. The results won’t be identical but will still be juicy.
Can I use a different cut of pork?
Yes, pork loin works but requires 20% less cooking time. Shoulder is ideal for pull-apart tenderness. Avoid lean cuts like tenderloin.
How do I prevent the bag from bursting?
Cut six ½-inch slits in the top and don’t overfill. Leave 1-inch opening when tying to allow steam escape.
Can I make this ahead of time?
Refrigerate cooked pork in its juices for up to 4 days. Reheat gently in a covered dish.

- 6 Egg Cake Recipe with Oil: Light as Air With Buttery Moisture - October 4, 2026
- 4 Bean Casserole Recipe: One-Pan Heartiness With Smoky Paprika Depth - October 4, 2026
- 3-Ingredient Keto Mug Cake Recipe: Microwave Magic in 2 Minutes - October 4, 2026