
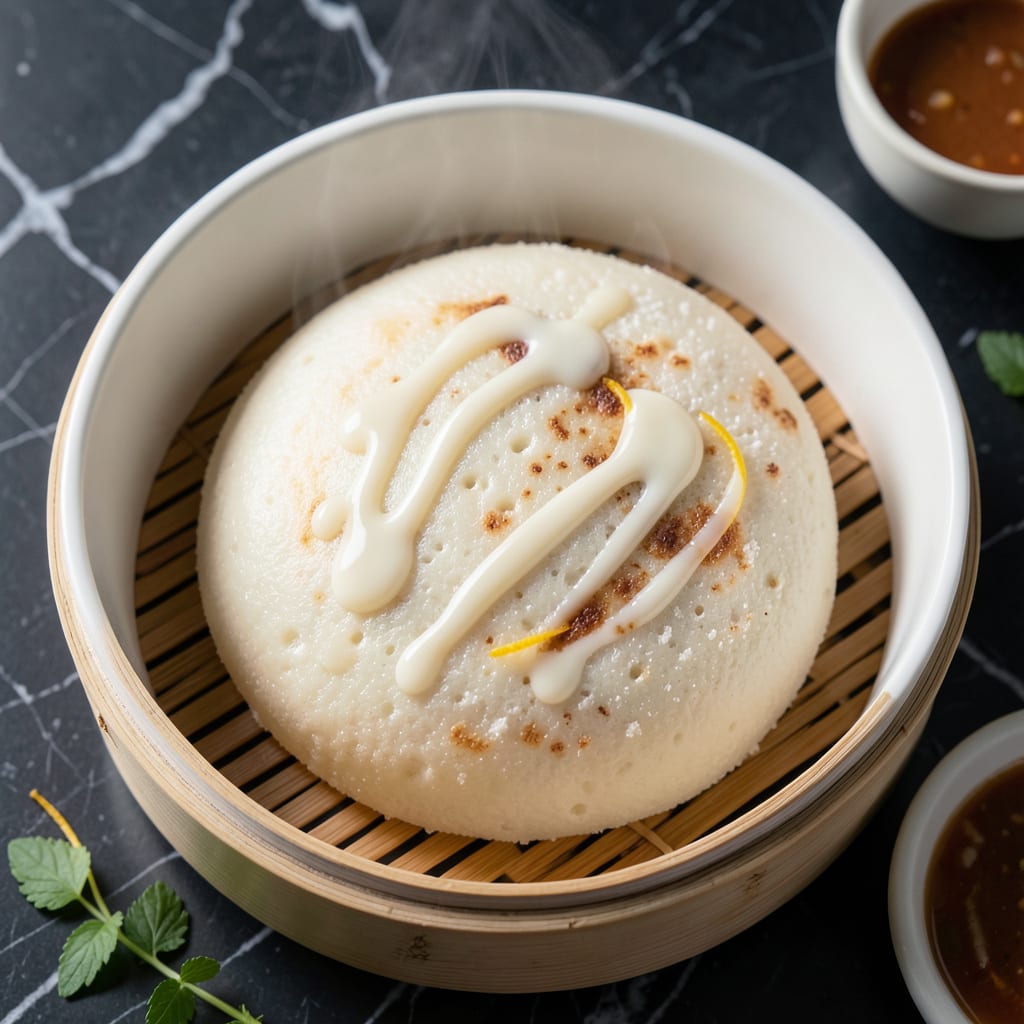
This steamed dish delivers pillowy soft texture with just a handful of simple ingredients. The rice flour base creates a naturally gluten-free treat that’s light yet satisfying.
Perfect for those avoiding wheat, this recipe proves that free-from baking can still be delicious. The steaming method ensures even cooking and a delicate, airy finish every time.
Ingredients for Rice Flour Steamed
A few pantry staples transform into something extraordinary with this steaming method.
| Ingredient | Amount | Notes |
|---|---|---|
| Rice Flour 🌾 | 2 cups | Fine, white variety preferred |
| Water 💧 | 1 ½ cups | Warm, for initial mixing |
| Sugar 🍚 | ¼ cup | Coconut or cane for vegan |
| Active Dry Yeast 🍞 | 1 tsp | Instant yeast works too |
| Baking Powder 🧂 | 1 tsp | Aluminum-free for clean taste |
| Coconut Milk 🥥 | ½ cup | Full-fat for richness |
| Vegetable Oil 🫒 | 2 tbsp | Neutral flavor, for greasing |
| Salt 🧂 | ½ tsp | Fine sea salt preferred |
| Vanilla Extract 🌿 | 1 tsp | Pure, not imitation |
| Apple Cider Vinegar 🍏 | 1 tsp | Balances sweetness naturally |
| Cornstarch 🌽 | 2 tbsp | For extra soft texture |
Rice flour is the foundation here. Bob’s Red Mill offers a consistent, fine grind that works beautifully for steamed recipes. Asian markets often carry high-quality rice flour at better prices if you’re making this often. Look for white rice flour specifically—brown rice flour has a grittier texture and different flavor profile. The yeast needs to be fresh; check the expiration date on the package.
No coconut milk? Almond milk or oat milk can substitute, though the texture may be slightly less rich. For a more neutral flavor, use unsweetened soy milk. If you don’t have apple cider vinegar, white vinegar or lemon juice works in a pinch. The sugar can be swapped for maple syrup at a 1:1 ratio, but reduce other liquids slightly. Cornstarch is optional but adds that extra softness.
Store rice flour in an airtight container in a cool, dark place for up to 6 months. The steamed cakes keep in the fridge for 3-4 days or can be frozen for 1 month. Reheat by steaming again or microwaving with a damp paper towel to retain moisture.
Why You’ll Love This Recipe
- Five Ingredient Magic: I love that this only needs rice flour, water, sugar, yeast, and baking powder—no fancy shopping trips.
- Soft Pillow Texture: The yeast and baking powder team up to give it that light, slightly chewy bite I crave with every warm piece.
- Breakfast or Snack: Honestly, it’s just as good with morning tea as it is packed in lunchboxes for the kids.
- Pocket-Friendly Batch: A bag of rice flour makes a dozen servings, and it costs pennies compared to store-bought steamed cakes.
Step-by-Step Instructions for Rice Flour Steamed Cake
Master this technique for a light, airy texture that defines authentic steamed desserts.
Step 1: Activate the Yeast and Combine Wet Ingredients
In a mixing bowl, whisk together the 1.5 cups Water with the 0.25 cup Sugar until fully dissolved. The warmth of the water helps activate the yeast while the sugar provides immediate nourishment for fermentation.
Sprinkle the 1 tsp Active Dry Yeast over the surface and let it sit for 5-7 minutes until frothy. This visual confirmation means the yeast is alive and ready to work. Then stir in the 0.5 cup Coconut Milk, 2 tbsp Vegetable Oil, 1 tsp Vanilla Extract, and 1 tsp Apple Cider Vinegar. The vinegar reacts with the baking powder later for extra lift.
Step 2: Create the Dry Mixture and Form the Batter
In a separate bowl, sift together the 2 cups Rice Flour, 1 tsp Baking Powder, 0.5 tsp Salt, and 2 tbsp Cornstarch. Sifting eliminates lumps and aerates the dry ingredients for a smoother final texture.
Gradually fold the dry mixture into the wet ingredients using a spatula. Mix just until no dry spots remain—overmixing develops the starches too much, resulting in a dense cake. The batter should be smooth and slightly thicker than pancake batter, with small bubbles forming from the active yeast.
Step 3: Proof the Batter for Maximum Airiness
Cover the bowl with a clean kitchen towel and let the batter rest at room temperature for 45-60 minutes. You’ll notice it rising slightly and developing a spongy texture. This proofing stage allows the yeast to ferment the sugars, creating carbon dioxide that makes the cake light.
The batter should nearly double in volume and appear slightly bubbles. If your kitchen is cool, place the bowl near a warm spot (like on top of the refrigerator) to encourage fermentation. The apple cider vinegar helps balance the sweetness while enhancing the rise.
Step 4: Steam to Perfection
Grease a heatproof dish that fits inside your steamer with a bit of the Vegetable Oil. Pour the batter into the dish, smoothing the top with a spatula. Bring 2-3 inches of water to a rolling boil in your steamer base before placing the dish inside.
Cover tightly and steam over medium-high heat for 30-35 minutes. Check for doneness by inserting a toothpick into the center—it should come out clean. The cake is finished when the top springs back when gently pressed and the edges pull slightly away from the dish.
Step 5: Cool and Serve
Turn off the heat and let the cake cool in the steamer with the lid on for 5 minutes. This prevents sudden temperature changes that could cause collapse. Then transfer to a wire rack to cool completely to room temperature.
The texture will be at its best when fully cooled—pillowy soft with a delicate crumb. Slice with a serrated knife for clean cuts. This gluten-free delight stays moist for days when stored in an airtight container at room temperature.
Pro Tips For Making Rice Flour Steamed
- Proof the Yeast: Always dissolve the active dry yeast in warm water with a pinch of sugar first and wait 5-10 minutes for it to foam—I learned this the hard way after a few dense, flat steamed cakes.
- Sift the Flour: Rice flour clumps easily, so sift it before mixing to avoid a lumpy batter. Sounds tedious, but it actually changes the outcome.
- Skip the Overmixing: Stir just until combined after adding baking powder—overmixing deflates the air and leaves your steamed recipe heavy instead of light.
- Steam on High: Use boiling water in your steamer and keep the heat high for a full 20 minutes. My grandmother swore by this, and she was right: low heat gives you a gummy texture.
Storing and Reheating Leftovers
Room Temperature Storage
Once completely cooled, place your cake in an airtight container lined with parchment paper. It stays moist at room temperature for 2-3 days. The natural humidity of the cake helps preserve its soft texture. 💪
Refrigerator Storage
For longer freshness, refrigerate in a sealed container for up to 5 days. I recommend wrapping individual slices in plastic wrap before storing to maintain moisture. Let it come to room temperature before serving for best texture.
Freezing for Later
Slice before freezing and wrap each piece tightly in plastic wrap, then in aluminum foil. Freeze for up to 1 month. This method prevents freezer burn while keeping portions ready for quick thawing.
Steam Reheating
Place slices in a steamer basket over 1 inch of boiling water for 5-7 minutes. Cover with a lid to trap steam. This revives the soft, pillowy texture beautifully. I find this method works best for larger portions. 🔥
Microwave Method
Wrap a slice in a damp paper towel and microwave on 50% power for 20-30 seconds. Check and repeat until warm. The moisture from the towel prevents drying out.
Oven Reheating
Preheat oven to 300°F and warm wrapped slices for 10-12 minutes. This works well when reheating multiple servings at once. Always check the center for warmth.
Nutrition Facts
Frequently Asked Questions
Can I make this without yeast?
Yes! Replace yeast with 1 tsp baking soda and increase apple cider vinegar to 1 tbsp for lift. The texture will be slightly denser but still soft.
Why did my cake turn out gummy?
Overmixing or insufficient steaming time causes gumminess. Mix just until combined and ensure 30-35 minutes of steam. Let it cool completely before slicing.
What can I use instead of coconut milk?
Any plant-based milk works. For richness, try almond or oat milk. For neutrality, use unsweetened soy milk. Adjust sweetness to taste.

- 6 Egg Cake Recipe with Oil: Light as Air With Buttery Moisture - October 4, 2026
- 4 Bean Casserole Recipe: One-Pan Heartiness With Smoky Paprika Depth - October 4, 2026
- 3-Ingredient Keto Mug Cake Recipe: Microwave Magic in 2 Minutes - October 4, 2026