
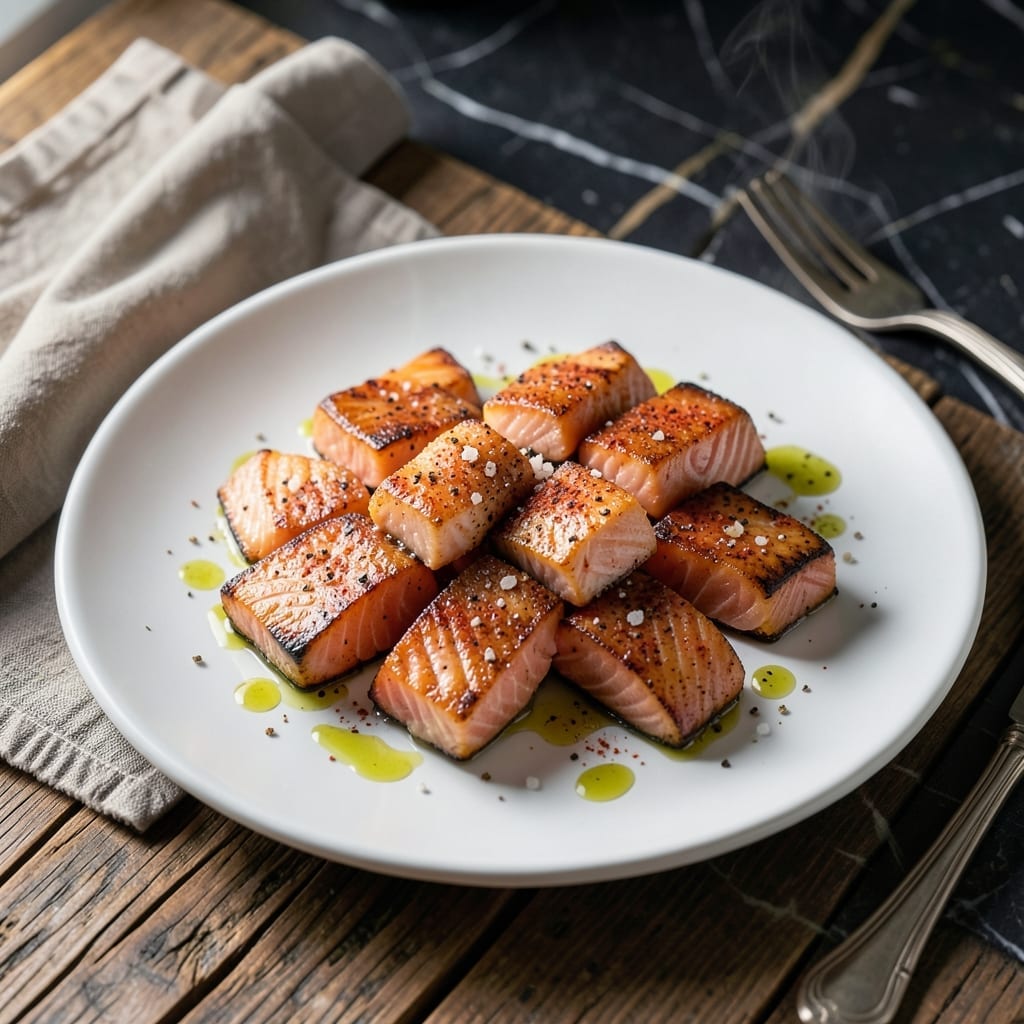
I discovered the magic of transforming salmon trimmings into a flavor-packed dish that reduces waste while delivering maximum taste. These often-discarded pieces contain the same rich, buttery flavor as the main fillet.
The key is treating them with the same care as premium cuts. A hot pan, simple seasoning, and quick cooking time prevent them from drying out while creating beautiful caramelization.
What emerges are golden, tender bites with crispy edges—perfect for tacos, salads, or pasta. This method turns what many toss aside into a dish that often outshines the original fillet.
Ready in 10 minutes, this approach proves that the best flavors sometimes come from the most unexpected places.
Ingredients for Salmon Trimmings
Transform discarded salmon pieces into golden, flavorful bites with these essentials.
| Ingredient | Amount | Notes |
|---|---|---|
| Salmon Trimmings 🐟 | 1 ½ lb | Skin-on or skinless, cut into bite-sized pieces |
| Olive Oil 🫒 | 2 tbsp | Divided for cooking and finishing |
| Kosher Salt 🧂 | 1 tsp | Diamond Crystal preferred for even seasoning |
| Freshly Ground Black Pepper 🌶️ | ½ tsp | Coarse grind for texture |
| Garlic Powder 🧄 | 1 tsp | Not garlic salt |
| Smoked Paprika 🌶️ | ½ tsp | For depth of flavor |
| Dried Oregano 🍃 | ½ tsp | Mediterranean variety ideal |
| Lemon 🍋 | 1 whole | Zested and juiced for brightness |
| Fresh Dill 🌿 | 2 tbsp | Chopped, for garnish |
| Red Pepper Flakes 🌶️ | ¼ tsp | Optional for heat |
| Unsalted Butter 🧈 | 1 tbsp | For basting, optional finish |
The salmon trimmings are the hero here. Ask your fishmonger to save the ends and belly pieces from filleting—they often give them away for free. Look for vibrant color and fresh scent; avoid anything with a fishy odor or dull flesh. These cuts cook fast, so uniform sizing (about 1-inch pieces) ensures even doneness. Whole Foods or local fish counters typically have the best selection if you’re not filleting your own.
No fresh dill? Dried dill at half the amount works, or substitute with fresh parsley or chives. Smoked paprika can be swapped for regular, but you’ll lose some depth. If you’re avoiding dairy, skip the butter finish—an extra drizzle of olive oil with lemon juice gives a similar richness. For heat lovers, cayenne pepper can replace the red pepper flakes at a 1:1 ratio.
Cooked trimmings keep in the fridge for 3-4 days in an airtight container. Reheat gently to preserve texture. For longer storage, freeze for up to 1 month—thaw in the fridge overnight before using. Best served immediately for that perfect crispy exterior.
Why You’ll Love This Recipe
- 5-Minute Prep: I just toss the trimmings with olive oil, salt, pepper, and garlic powder—no chopping, no fuss.
- Crave-Worthy Crisp: The edges get this irresistible crisp while the inside stays tender, and that garlic powder? Pure magic.
- Feeds My Crew: Between us, it’s my secret for stretching salmon into two meals—dinner tonight, salad topping tomorrow.
- Pennywise Protein: Honestly, I save a bundle using trimmings instead of full fillets, and it tastes just as rich.
Step-by-Step Instructions for Salmon Trimmings
Transform these flavorful scraps into restaurant-worthy bites with minimal effort and maximum impact.
Step 1: Season the Salmon Trimmings
Pat the 1.5 lb salmon trimmings completely dry with paper towels to ensure proper browning. Cut into uniform bite-sized pieces for even cooking, keeping any skin intact for texture.
In a large bowl, toss the pieces with 1 tbsp olive oil, 1 tsp kosher salt, 0.5 tsp freshly ground black pepper, 1 tsp garlic powder, 0.5 tsp smoked paprika, and 0.5 tsp dried oregano. The spices should coat each piece evenly—this creates a fragrant crust as it cooks.
Here’s the thing—salmon trimmings vary in thickness, so uniform sizing prevents overcooking the thinner pieces while waiting for thicker ones to finish.
Step 2: Sear to Develop Flavor
Heat the remaining 1 tbsp olive oil in a large skillet over medium-high heat until it shimmers but doesn’t smoke. Add the salmon trimmings in a single layer, working in batches if needed to avoid crowding the pan.
Sear undisturbed for 2-3 minutes per side until the edges turn opaque and golden brown. Resist the urge to stir too soon—this builds a flavorful fond on the pan that will enhance the final dish.
If using skin-on pieces, start with the skin side down to render the fat and crisp it properly. The salmon should release easily from the pan when ready to flip.
Step 3: Finish with Aromatics
Once all pieces are seared, reduce heat to medium. Add the zest of 1 whole lemon and 0.25 tsp red pepper flakes to the pan, stirring to bloom the flavors in the hot oil for 30 seconds.
Add 1 tbsp unsalted butter and let it melt, swirling the pan to coat the salmon. The butter adds richness and helps carry the spices. Squeeze in the juice of 1 whole lemon and toss gently to distribute the bright acidity.
Cook for an additional 1-2 minutes until the salmon is just cooked through—the interior should still appear slightly translucent but will finish cooking off the heat.
Step 4: Rest and Garnish
Transfer the salmon trimmings to a serving platter and let them rest for 2-3 minutes. This allows the juices to redistribute, ensuring each bite stays moist and tender.
Sprinkle with the 2 tbsp fresh dill, chopped, for a vibrant finish. The dill’s grassy notes complement the richness of the salmon beautifully. Serve immediately while the edges are still crisp and the aromatics are at their peak.
Real talk: This dish comes together faster than you expect—keep everything moving and don’t overcook. The residual heat will continue cooking the salmon slightly after you plate it.
Pro Tips For Making Salmon Trimmings
- Pat Them Dry: I learned this the hard way—wet trimmings steam instead of sear. Press them between paper towels for 30 seconds to guarantee that crispy crust.
- High Heat First: Crank the pan to medium-high before adding the oil. Salmon trimmings cook fast, and starting hot prevents that sad, pale finish.
- Season Generously: Sounds weird, but salmon trimmings need more salt than fillets—about 1/2 teaspoon kosher salt per pound. Their small size loses seasoning fast.
- Skip the Crowding: After burning three batches, I finally figured out that overcrowding the pan steams the pieces. Cook in batches if needed—it’s worth the extra 2 minutes.
Storing and Reheating This Dish
Refrigerator Storage
Let your salmon trimmings cool completely before transferring to an airtight container. I use glass containers with snap-tight lids for best results. Store in the fridge at 40°F or below for up to 3-4 days. The flavors actually deepen as they rest. ❄️
Freezer Storage
For longer storage, freeze cooked trimmings in a single layer on a tray first, then transfer to freezer bags. This prevents clumping. They’ll keep for up to 1 month without losing texture. Squeeze out excess air to prevent freezer burn.
Oven Reheating
Preheat your oven to 300°F and spread trimmings on a baking sheet. Drizzle with 1 tsp olive oil to prevent drying. Heat for 8-10 minutes until warmed through. This method preserves the crispy edges best.
Stovetop Reheating
Heat a skillet over medium-low heat with 1 tsp olive oil. Add trimmings and cook for 3-4 minutes, stirring gently. The direct heat revives the texture beautifully. I often add a splash of water to create steam.
Microwave Option
Place trimmings on a microwave-safe plate with a damp paper towel. Heat on 50% power for 1-2 minutes, checking frequently. This is the quickest method but may soften the crispy edges. 🔥
Best Practices
Never reheat more than once as it degrades texture. For salads or cold dishes, use straight from the fridge. The lemon and dill flavors brighten up beautifully when served chilled.
Nutrition Facts
Frequently Asked Questions
Can I use frozen trimmings?
Thaw frozen trimmings overnight in the fridge before cooking. Pat them very dry to ensure proper browning. Never cook from frozen as this leads to uneven cooking.
What’s the best pan for cooking?
A heavy stainless steel or cast iron skillet works best for even heat distribution. Avoid nonstick for high-heat searing. Make sure it’s large enough to hold pieces in a single layer.
How do I know when they’re done?
The edges turn opaque and golden brown in 2-3 minutes per side. The interior should flake easily with a fork but still appear slightly translucent. It finishes cooking off heat.
Can I make this ahead?
Cook and store in an airtight container for up to 3-4 days. Reheat gently using oven or stovetop methods. The flavors deepen beautifully overnight.

- 6 Egg Cake Recipe with Oil: Light as Air With Buttery Moisture - October 4, 2026
- 4 Bean Casserole Recipe: One-Pan Heartiness With Smoky Paprika Depth - October 4, 2026
- 3-Ingredient Keto Mug Cake Recipe: Microwave Magic in 2 Minutes - October 4, 2026