
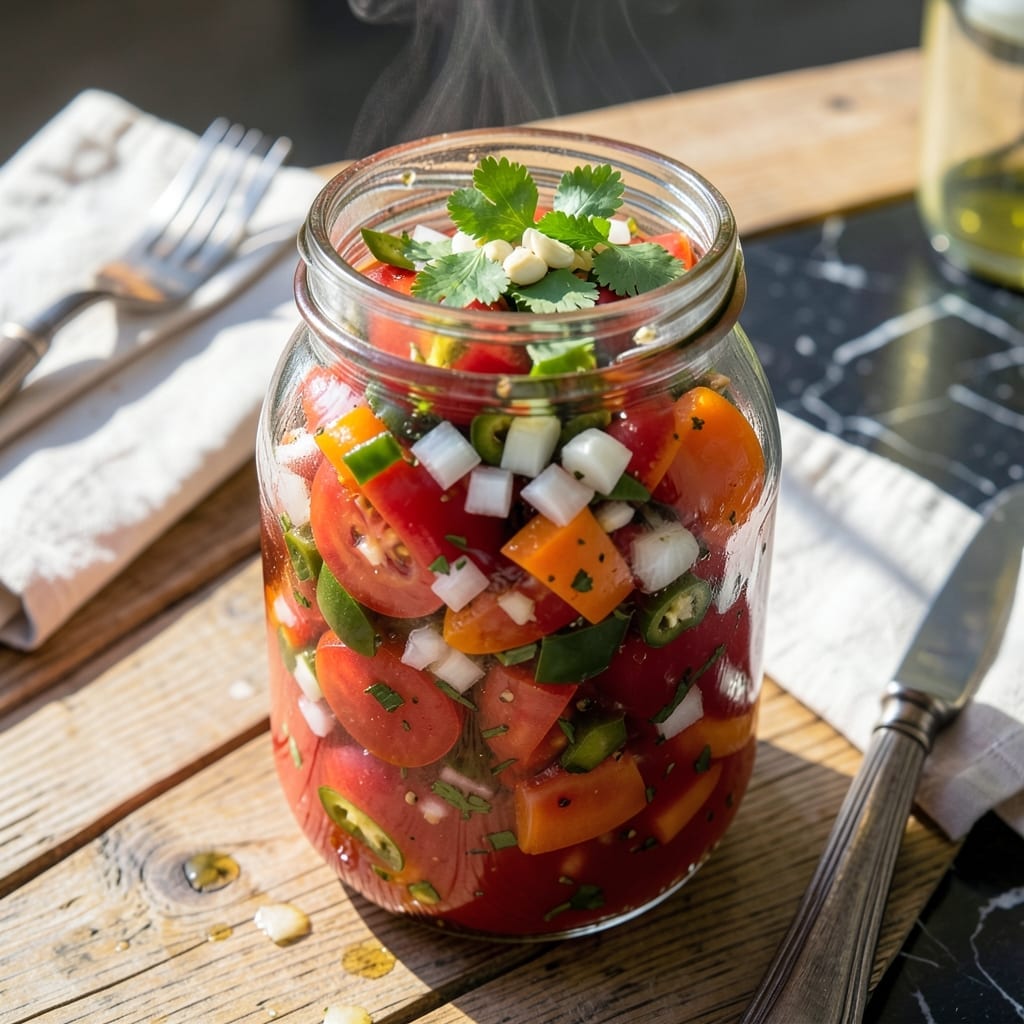
There is nothing like the satisfaction of opening a jar of homemade salsa in the middle of winter that tastes like summer. This proven canning method preserves garden-fresh flavor while ensuring food safety with proper sterilization.
I developed this recipe after years of perfecting the balance between acidity, vegetables, and spices to create a salsa that maintains its vibrant taste and texture. The key is using fresh, high-quality ingredients and following precise canning procedures.
You will end up with jars of bright, flavorful salsa that stays fresh for up to a year. The process is straightforward, but attention to detail ensures both safety and quality in every batch.
Follow these steps carefully, and you will have delicious, shelf-stable salsa ready to enjoy whenever the craving strikes.
Ingredients for Salsa Recipe for Canning
Fresh garden veggies and a few pantry staples make this bright, tangy canning classic.
| Ingredient | Amount | Notes |
|---|---|---|
| Roma Tomatoes 🍅 | 10 lb | Peeled, cored, chopped |
| White Onions 🧅 | 2 whole | Finely diced |
| Jalapeño Peppers 🌶️ | 4 whole | Seeds removed, minced |
| Bell Peppers 🌶️ | 2 whole | Any color, diced |
| Fresh Cilantro 🌿 | 1 cup | Chopped, packed |
| Garlic Cloves 🧄 | 6 cloves | Minced finely |
| White Vinegar 💧 | 1 ½ cups | 5% acidity required |
| Lime Juice 🍋 | ½ cup | Freshly squeezed |
| Canning Salt 🧂 | 1 tbsp | Pickling salt preferred |
| Ground Cumin 🌿 | 1 tbsp | Toasted for depth |
Roma tomatoes are the gold standard here—they’re meaty with less water, so your salsa won’t be soupy. Farmers markets are perfect for this in late summer, but grocery store tomatoes work too (look for vine-ripened). The peppers? Mix colors for visual pop. I grab mine at Trader Joe’s or Whole Foods when my garden isn’t overflowing.
Need to adjust the heat? Swap jalapeños for serranos for more fire or poblanos for milder. No fresh cilantro? Dried coriander at one-third the amount works in a pinch. The vinegar is non-negotiable for safety—never reduce the amount. Out of white? Apple cider vinegar is an okay substitute (same acidity).
This keeps for up to 1 year in a cool, dark place once sealed. Refrigerate after opening and use within 1 month. Pro tip: label jars with the date—trust me, you’ll forget. Always test seals before storing.
Why You’ll Love This Recipe
- No-Fuss Canning: I toss the Roma tomatoes, onions, and peppers in the pot—no blanching or peeling needed.
- Fresh Pop: That first crack of the jar months later? Still tastes like summer thanks to the cilantro and jalapeños.
- Pantry Staple: I pull it out for tacos, eggs, or even just chips when company drops by unannounced.
- Budget Victory: A flat of Roma tomatoes and a handful of peppers make gallons—way cheaper than store-bought.
Step-by-Step Instructions for Salsa for Canning
This method ensures bright flavor and safe preservation every time.
Step 1: Prepare and Chop the Vegetables
Start by peeling, coring, and chopping the 10 lb Roma Tomatoes. I recommend quartering them first for easier processing. Finely dice the 2 whole White Onions—you want small, uniform pieces so they distribute evenly in the final product.
For the peppers, remove seeds and membranes from the 4 whole Jalapeño Peppers and 2 whole Bell Peppers, then dice them into ¼-inch pieces. Mince the 6 cloves Garlic Cloves finely, and chop the 1 cup Fresh Cilantro until it’s finely minced. This prep work is crucial for consistent texture.
Step 2: Combine and Season the Salsa Base
In a large stockpot, combine the chopped Roma Tomatoes, White Onions, Jalapeño Peppers, Bell Peppers, minced Garlic Cloves, and Fresh Cilantro. Stir in the 1.5 cups White Vinegar and 0.5 cup Lime Juice—these acids are essential for safe canning.
Add the 1 tbsp Canning Salt and 1 tbsp Ground Cumin, stirring well to distribute the seasonings evenly. Bring the mixture to a gentle boil over medium-high heat, stirring occasionally to prevent sticking. You’ll notice the salsa start to thicken slightly as it cooks.
Step 3: Simmer to Develop Flavors
Once boiling, reduce heat to medium-low and let the salsa simmer for 20-25 minutes. Stir frequently to prevent scorching at the bottom of the pot. The goal is to cook the vegetables until they soften but still retain some texture.
As it simmers, the flavors will meld together beautifully. The vinegar and lime juice will balance the natural sweetness of the tomatoes and peppers. Taste and adjust seasoning if needed, but remember the flavors will intensify slightly during canning.
Step 4: Process for Safe Canning
Ladle the hot salsa into sterilized canning jars, leaving ½-inch headspace. Remove any air bubbles by running a clean knife or spatula around the inside of the jar. Wipe the rims with a clean, damp cloth to ensure a proper seal.
Process the jars in a boiling water bath for 15 minutes for pints or 20 minutes for quarts, adjusting for altitude if necessary. Once processed, let the jars cool undisturbed for 12-24 hours—you’ll hear the satisfying pop of the lids sealing as they cool.
Pro Tips For Making Salsa Recipe For Canning
- Acidify First: Add 1 tablespoon of bottled lemon juice per pint jar before filling with salsa—this guarantees safe acidity levels for canning, even with Roma tomatoes that vary in natural acidity.
- Drain the Tomatoes: After chopping Roma tomatoes, let them sit in a colander for 10 minutes to shed excess liquid, or your salsa will be watery and dull.
- Wear Gloves: I learned this the hard way—always wear gloves when handling jalapeños and then cilantro, unless you want to rub pepper oil in your eyes later.
- Skip the Blender: Pulse the onions and peppers in a food processor instead of a blender for chunky texture, and stir in hand-chopped cilantro at the end to keep it fresh and bright.
Flavor Customization for This Dish
Mild Salsa Option
Replace Jalapeño Peppers with 2 whole Anaheim peppers for a gentler heat. I also reduce the cumin to ½ tbsp to keep the flavor balanced. This version is perfect for kids or anyone sensitive to spice.
Smoky Chipotle Twist
Add 2 chipotle peppers in adobo (minced) and 1 tsp smoked paprika to the pot. The smoky depth pairs wonderfully with grilled meats. I love this variation for summer barbecues.
Fruity Mango Variation
Stir in 2 cups diced ripe mango during the last 5 minutes of simmering. The sweetness contrasts beautifully with the acidity. Use perfectly ripe mango for the best texture. 💛
Roasted Vegetable Depth
Roast the tomatoes, onions, and peppers at 400°F for 20 minutes before chopping. This caramelizes the natural sugars, adding a deeper, richer flavor to your canned salsa.
Herb-Forward Version
Add ¼ cup chopped fresh oregano along with the cilantro. I also include 1 tsp dried marjoram for an herbaceous boost. This gives the salsa a more complex, garden-fresh profile.
Extra Garlicky Kick
Double the garlic to 12 cloves for serious garlic lovers. I also add 1 tsp garlic powder for an extra punch. This version is amazing in cooked dishes like chili or tacos. 🔥
Nutrition Facts
Frequently Asked Questions
Can I use a different type of vinegar?
Apple cider vinegar is a safe substitute, but maintain the 5% acidity. Avoid balsamic or wine vinegars—they lack sufficient acidity for safe canning.
How do I adjust the heat level?
For milder salsa, remove all jalapeño seeds and membranes. For extra heat, add 1-2 minced serranos or leave some seeds in. Always wear gloves!
Why did my jars not seal properly?
Check that rims were clean and lids were new. Ensure ½-inch headspace and proper 15-20 minute processing time. Altitude adjustments may be needed above 1,000 feet.
Can I double the recipe?
Yes, but process in batches to maintain consistent heat. Overfilling the pot can prevent proper boiling, affecting safety and texture.

- 6 Egg Cake Recipe with Oil: Light as Air With Buttery Moisture - October 4, 2026
- 4 Bean Casserole Recipe: One-Pan Heartiness With Smoky Paprika Depth - October 4, 2026
- 3-Ingredient Keto Mug Cake Recipe: Microwave Magic in 2 Minutes - October 4, 2026