
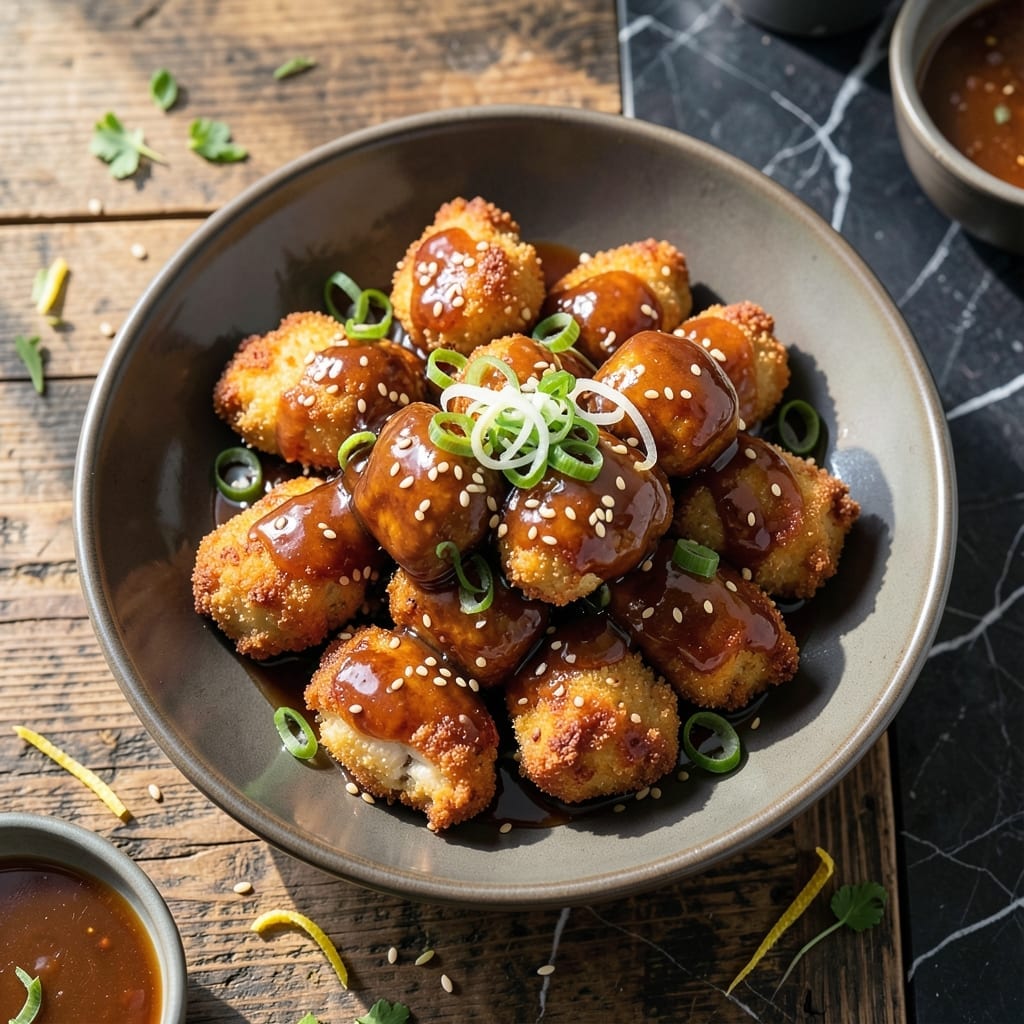
I’ve cracked the code for restaurant-style sesame chicken without the takeout price or mystery ingredients. This version delivers that sweet and sticky sauce with crispy bites of chicken, all in under 30 minutes.
No deep-frying here—just a simple pan-fry method that keeps things easy and mess-free. The sauce comes together in one bowl, and the whole dish tastes like it came from your favorite spot.
You’ll get golden, crispy chicken pieces coated in a glossy glaze that’s packed with garlic, ginger, and that signature sesame flavor. It’s the kind of meal that disappears fast.
Serve over rice for a complete dinner. Here’s how to make it happen.
Ingredients for Sesame Chicken Recipe Easy
Pantry raid time. A few fresh items and you’re set for that takeout taste.
| Ingredient | Amount | Notes |
|---|---|---|
| Boneless Skinless Chicken Thighs 🍗 | 1 ½ lb | Cut into bite-sized pieces |
| Cornstarch 🌾 | ½ cup | For coating chicken |
| All-Purpose Flour 🌾 | ¼ cup | Helps crisp the coating |
| Vegetable Oil 🫒 | ½ cup | For pan-frying chicken |
| Soy Sauce 💧 | ⅓ cup | Low-sodium preferred |
| Honey 🍯 | ⅓ cup | For sweetness in sauce |
| Rice Vinegar 💧 | 3 tbsp | Adds tang to sauce |
| Garlic Cloves 🧄 | 4 cloves | Minced for sauce |
| Fresh Ginger 🌿 | 1 tbsp | Grated or minced |
| Sesame Oil 🫒 | 1 tbsp | Toasted for flavor |
| Brown Sugar 🍚 | 3 tbsp | Packed for richness |
| Sesame Seeds 🌰 | 2 tbsp | Toasted for garnish |
| Green Onions 🧅 | 3 whole | Sliced for topping |
| Red Pepper Flakes 🌶️ | ½ tsp | Optional for heat |
The chicken is the star here. Thighs stay juicier than breasts after frying—look for boneless, skinless at any grocery store. I grab mine from Costco for bulk savings, but the regular supermarket packs work fine. For the cornstarch, any brand is good, but check it hasn’t been open for ages (it loses thickening power over time).
No honey? Maple syrup or agave swaps in perfectly. Out of rice vinegar? Apple cider vinegar at the same amount works. If you’re missing sesame oil, skip it entirely—don’t substitute another oil, as the flavor is unique. The ginger can be powdered at a pinch (1/4 tsp per tbsp fresh), but fresh tastes brighter.
Leftovers keep 4-5 days in the fridge, though the chicken softens a bit. Sauce thickens as it cools—just loosen with a splash of water when reheating. Freezes beautifully for 3 months (without the sesame seed topping).
Why You’ll Love This Recipe
- One Pan Wonder: I just toss the chicken in cornstarch and flour, fry it up, and coat it in soy sauce—done in one pan.
- Crave-Worthy Crisp: That golden, crispy crust from the cornstarch and flour combo? It pairs so well with the savory soy sauce.
- Weeknight Hero: Honestly, it’s my go-to for busy evenings when I need something quick but satisfying.
- Budget-Friendly Meal: Chicken thighs are cheap, and a little goes a long way—leftovers taste even better the next day.
Step-by-Step Instructions for Sesame Chicken
Here’s the method. Straightforward, tested, works every time.
Step 1: Coat and Fry the Chicken
Cut the 1.5 lb Boneless Skinless Chicken Thighs into bite-sized pieces and pat them dry with paper towels. In a shallow bowl, mix the 0.5 cup Cornstarch and 0.25 cup All-Purpose Flour until fully combined.
Dredge each piece of chicken in the cornstarch mixture, pressing lightly so the coating adheres well. Heat the 0.5 cup Vegetable Oil in a large skillet over medium-high heat until shimmering. Fry the chicken in batches for 4-5 minutes per side until golden brown and crispy. Transfer to a paper towel-lined plate to drain excess oil.
Don’t crowd the pan—this lowers the oil temperature and leads to soggy, steamed chicken instead of crispy pieces. The coating should be light and airy, not thick and gummy.
Step 2: Sauté the Aromatics for the Sauce
In a clean pan, heat the 1 tbsp Sesame Oil over medium heat. Add the minced 4 cloves Garlic Cloves and grated 1 tbsp Fresh Ginger, stirring constantly for 30 seconds until fragrant but not browned.
Be careful not to let the garlic burn—it turns bitter quickly. The ginger and garlic should sizzle gently in the oil, releasing their aromas without darkening. This builds the flavor base for your sauce.
Step 3: Build and Simmer the Sauce
Pour in the 0.33 cup Soy Sauce, 0.33 cup Honey, 3 tbsp Rice Vinegar, and 3 tbsp Brown Sugar. Stir well to combine and bring to a gentle simmer. Add the 0.5 tsp Red Pepper Flakes if using heat.
Let the sauce simmer for 3-4 minutes until it thickens slightly and coats the back of a spoon. The honey and brown sugar will create a glossy, sticky texture that clings perfectly to the chicken. Taste and adjust sweetness or tang as needed.
Step 4: Toss and Garnish
Return the crispy chicken to the skillet with the sauce. Toss everything together gently for 1-2 minutes until the chicken is fully coated and heated through. The sauce should bubble lightly and glaze each piece evenly.
Sprinkle with the 2 tbsp Sesame Seeds and sliced 3 whole Green Onions just before serving. The sesame seeds add a nutty crunch, while the green onions bring a fresh, sharp contrast to the rich, sweet sauce. Serve immediately over steamed rice for the full takeout experience.
Pro Tips For Making Sesame Chicken Recipe Easy
- Use Thighs, Not Breast: Boneless skinless chicken thighs stay juicy and tender even when overcooked slightly, while breast meat dries out fast. I learned this the hard way after serving rubbery chicken to guests.
- Double Coat the Chicken: Dip the chicken in cornstarch first, then flour for extra crispiness—this combo creates that perfect crunch without deep frying. Sounds weird, but it works.
- Hot Oil, Small Batches: Heat the vegetable oil until it shimmers (about 350°F) and fry in small batches to avoid steaming the chicken. After burning three batches, I finally figured out crowding was the culprit.
- Reduce the Sauce: Simmer the soy sauce mixture for 2-3 minutes before tossing with the chicken—this thickens it just enough to cling better. My grandmother swore by this, and she was right.
Make-Ahead Tips for Leftovers
Prep Ahead Coating
Mix the 0.5 cup Cornstarch and 0.25 cup All-Purpose Flour the night before and store in an airtight container. This saves 5 minutes on cooking day and ensures even coating. I keep it in my pantry for up to 1 week with no issues.
Chicken Pre-Cutting
Trim and cut the 1.5 lb Boneless Skinless Chicken Thighs into bite-sized pieces up to 2 days ahead. Store in a sealed container in the fridge. Pat them dry with paper towels just before coating for maximum crispiness.
Sauce Make-Ahead
Combine all sauce ingredients except garlic and ginger up to 3 days in advance. Store in the fridge. When ready to cook, just reheat the sauce base and add fresh aromatics for the best flavor.
Freezing Cooked Chicken
Cook and sauce the chicken completely, then cool and freeze in a single layer on a baking sheet before transferring to bags. This prevents clumping. Reheat from frozen in a 350°F oven for 15-20 minutes. 💡
Reheating Tips
For best texture, reheat in a skillet over medium heat with a splash of water for 3-4 minutes. Microwave works in 1-minute intervals, but the chicken loses some crispness. Always add fresh sesame seeds after reheating.
Garnish Last
Store sesame seeds and green onions separately. Toast the seeds just before serving for maximum crunch, and slice onions fresh. This keeps them vibrant and adds that restaurant-style finish. 🌟
Nutrition Facts
Frequently Asked Questions
Can I use chicken breasts instead of thighs?
You can, but thighs stay juicier. If using breasts, cut into 1-inch pieces and reduce frying time to 3-4 minutes per side to prevent dryness.
How do I make the sauce thicker?
Simmer it longer! Let it reduce for an extra 2-3 minutes until it coats the back of a spoon. A cornstarch slurry (1 tbsp cornstarch + 1 tbsp water) also works.
Can I bake the chicken instead of frying?
Toss coated pieces with 2 tbsp oil and bake at 400°F for 20-25 minutes, flipping halfway. It won’t be as crispy but still delicious.
What if my sauce is too salty?
Balance it with a touch more honey or brown sugar. Adding 1-2 tbsp water also dilutes saltiness without thinning too much.

- 6 Egg Cake Recipe with Oil: Light as Air With Buttery Moisture - October 4, 2026
- 4 Bean Casserole Recipe: One-Pan Heartiness With Smoky Paprika Depth - October 4, 2026
- 3-Ingredient Keto Mug Cake Recipe: Microwave Magic in 2 Minutes - October 4, 2026