
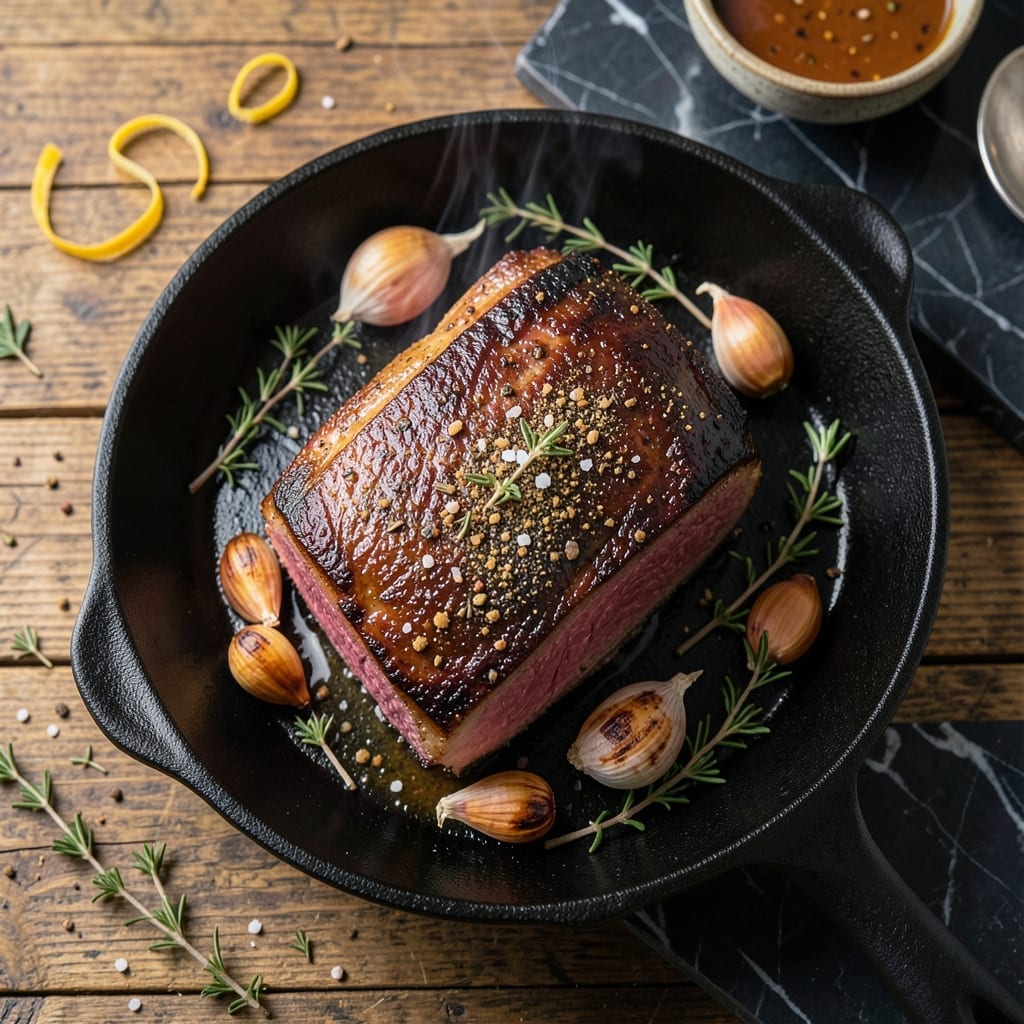
This recipe transforms an affordable sirloin tip roast into a centerpiece worthy of any Sunday dinner. The key is patience—low and slow cooking breaks down tough fibers into fork-tender perfection.
I’ve perfected the timing and temperature to ensure even cooking without drying out the meat. A simple seasoning blend enhances the beef’s natural richness while letting its flavor shine through.
What you’ll get is a perfectly cooked roast with a caramelized crust and juicy interior. The aroma alone will have everyone gathering around the table before it’s even done.
Serve with roasted potatoes and green beans for a complete meal that feels special but requires minimal effort.
Ingredients for Sirloin Tip Roast
Transform a budget-friendly cut into a showstopping centerpiece with these simple ingredients.
| Ingredient | Amount | Notes |
|---|---|---|
| Sirloin Tip Roast 🥩 | 3 lb | Trimmed of excess fat |
| Kosher Salt 🧂 | 1 ½ tsp | Diamond Crystal preferred |
| Black Pepper 🌶️ | 1 tsp | Freshly ground preferred |
| Garlic Powder 🧄 | 1 tsp | Not garlic salt |
| Onion Powder 🧅 | 1 tsp | For depth of flavor |
| Dried Thyme 🍃 | 1 tsp | Rubbed between fingers |
| Dried Rosemary 🌿 | 1 tsp | Crushed for aroma |
| Olive Oil 🫒 | 2 tbsp | For searing roast |
| Beef Broth 🥘 | 1 cup | Low-sodium preferred |
| Red Wine 🍷 | ½ cup | Dry variety recommended |
| Russet Potatoes 🥔 | 2 lb | Peeled and cubed |
| Green Beans 🫑 | 1 lb | Trimmed ends removed |
| Unsalted Butter 🧈 | 2 tbsp | For finishing vegetables |
The beef is everything here. Sirloin tip roast from Whole Foods or Costco has consistent quality and marbling. Look for a piece with even fat distribution—this ensures moisture during the long cook. I always ask the butcher to trim excess fat (leave a thin layer for flavor). The herbs should be freshly rubbed to release their oils, which cling better to the meat.
Out of beef broth? Water with a bouillon cube works in a pinch. No red wine? Extra broth plus a splash of balsamic vinegar mimics the acidity. For the potatoes, Yukon Golds can swap in for Russets (they hold shape better). Fresh rosemary or thyme? Use half the amount since dried is more concentrated. The butter on the veggies is optional but adds a restaurant-quality finish.
Leftovers keep 4-5 days tightly wrapped in the fridge. For longer storage, slice and freeze in portions for up to 3 months. Reheat gently in broth or gravy to prevent drying. Always bring the roast to room temperature before cooking for even doneness.
Why You’ll Love This Recipe
- Set It and Forget It: I rub the roast with salt, pepper, and those powders, pop it in the oven, and let it do its thing—no babysitting required.
- That Garlic-Pepper Crust: The mix of garlic and black pepper forms this crazy-good crust that makes every bite worth the wait.
- Feeds a Crowd: One roast, multiple meals—sandwiches tonight, tacos tomorrow, and maybe a stew the next day.
- Budget-Friendly Luxury: Honestly, sirloin tip gives you that rich, beefy flavor without the prime rib price tag.
Step-by-Step Instructions for Slow-Roasted Sirloin Tip Roast
Here’s the method that guarantees melt-in-your-mouth results with minimal effort.
Step 1: Season and Sear the Roast
Pat the 3 lb Sirloin Tip Roast completely dry with paper towels. This ensures a proper sear. In a small bowl, combine the 1.5 tsp Kosher Salt, 1 tsp Black Pepper, 1 tsp Garlic Powder, 1 tsp Onion Powder, 1 tsp Dried Thyme, and 1 tsp Dried Rosemary. Rub this mixture evenly over all surfaces of the roast, pressing gently to adhere.
Heat the 2 tbsp Olive Oil in a large Dutch oven over medium-high heat. When the oil shimmers, add the roast and sear for 3-4 minutes per side until deeply browned. You’ll know it’s ready to flip when it releases easily from the pot. This creates a flavorful crust that locks in juices.
Step 2: Deglaze and Add Aromatics
Transfer the seared roast to a plate. Reduce the heat to medium and carefully pour in the 0.5 cup Red Wine to deglaze the pot, scraping up all the browned bits with a wooden spoon. These fond bits dissolve into the liquid, adding incredible depth of flavor.
Pour in the 1 cup Beef Broth and stir to combine. Return the roast to the pot along with any accumulated juices. The liquid should come about halfway up the sides of the meat. This braising environment ensures even cooking and maximum tenderness.
Step 3: Slow-Roast to Perfection
Cover the Dutch oven with a tight-fitting lid and transfer it to a preheated 325°F oven. Cook for 2 to 2.5 hours, or until the internal temperature reaches 195-200°F on an instant-read thermometer. At this temperature, the connective tissues break down completely, yielding fork-tender meat.
Check the roast occasionally—if the liquid level drops too low, add a splash of water or additional beef broth. The meat is done when it shreds easily with a fork. This low-and-slow method is what transforms a tough cut into something extraordinary.
Step 4: Prepare and Add the Vegetables
While the roast cooks, peel and cube the 2 lb Russet Potatoes and trim the 1 lb Green Beans. About 45 minutes before the roast finishes, scatter the potatoes and green beans around the meat in the Dutch oven. The vegetables will absorb the rich, savory cooking liquid as they soften.
Stir the vegetables gently to coat them in the juices. They’re ready when the potatoes are tender when pierced with a knife and the green beans are bright green and slightly crisp. This timing ensures they finish cooking at the same time as the roast.
Step 5: Rest and Finish with Butter
Carefully transfer the roast to a cutting board and tent it loosely with foil. Let it rest for 15-20 minutes before slicing—this allows the juices to redistribute, keeping the meat moist. Skim excess fat from the cooking liquid if desired, then stir in the 2 tbsp Unsalted Butter to add a silky finish to the sauce.
Slice the roast against the grain into thick pieces and arrange it on a platter. Spoon the vegetables and some of the cooking liquid over the top. The result is a perfectly tender roast with rich, flavorful vegetables that soak up every bit of the savory sauce.
Pro Tips For Making Sirloin Tip Roast
- Let It Warm: Pull the sirloin tip roast out of the fridge 1-2 hours before cooking—cold meat seizes up in the oven and cooks unevenly. I learned this the hard way after serving dry edges and a raw center more times than I’d like to admit.
- Salt Generously: Use more kosher salt than you think, especially on a lean cut like sirloin tip. The seasoning won’t just sit on the surface; it’ll penetrate and actually change the outcome of the flavor.
- Skip the High Heat: Resist the urge to blast it at 450°F—sirloin tip is lean and toughens up fast. Stick to 325°F and give it time; the lower temp guarantees a tender result without turning it into shoe leather.
- Rest Under Foil: After pulling it from the oven, tent the roast with foil and let it sit for 15-20 minutes. Sounds weird, but it works: the juices redistribute, and you won’t lose half of them to the cutting board.
Pro Cooking Tips for This Dish
Perfect Searing Technique
Pat the roast completely dry with paper towels first—moisture is the enemy of a good sear. Heat your Dutch oven until the 2 tbsp olive oil shimmers but doesn’t smoke. I use Lodge enameled cast iron for even heat distribution. 🔥
Temperature Control
Maintain 325°F in your oven—any higher and the exterior will dry out before the interior tenderizes. Use an oven thermometer to verify your oven’s accuracy. I check mine weekly with a Taylor Precision model.
Internal Temp Matters
Aim for 195-200°F internal temperature for fork-tender perfection. A ThermoWorks Instant Read is my go-to for accuracy. Don’t rely on time alone—every roast cooks differently based on shape and thickness.
Resting is Non-Negotiable
Let the roast rest 15-20 minutes before slicing. This allows juices to redistribute throughout the meat. Tent loosely with foil to keep it warm while you finish the vegetables.
Slicing Against the Grain
Identify the grain direction (those long muscle fibers) and slice perpendicular to it. This shortens the fibers, making each bite more tender. Use a long, sharp slicing knife for clean cuts.
Liquid Level Check
If your braising liquid reduces too much during cooking, add ½ cup water or beef broth to maintain moisture. The liquid should always come about halfway up the roast to ensure even cooking.
Nutrition Facts
Frequently Asked Questions
What’s the best way to store leftovers?
Store in an airtight container in the fridge for 4-5 days. For longer storage, freeze in portions for up to 3 months.
Can I use a different cut of meat?
Chuck roast or bottom round work well as substitutes. Both benefit from slow cooking and have similar connective tissue that breaks down beautifully.
Why does the internal temperature need to reach 195-200°F?
At this range, the collagen in this tough cut melts into gelatin, creating that fork-tender texture. Lower temps won’t fully break down the fibers.
What if my Dutch oven isn’t oven-safe?
Transfer the seared roast and liquid to an oven-safe baking dish, cover tightly with foil, and continue cooking as directed.

- 6 Egg Cake Recipe with Oil: Light as Air With Buttery Moisture - October 4, 2026
- 4 Bean Casserole Recipe: One-Pan Heartiness With Smoky Paprika Depth - October 4, 2026
- 3-Ingredient Keto Mug Cake Recipe: Microwave Magic in 2 Minutes - October 4, 2026