
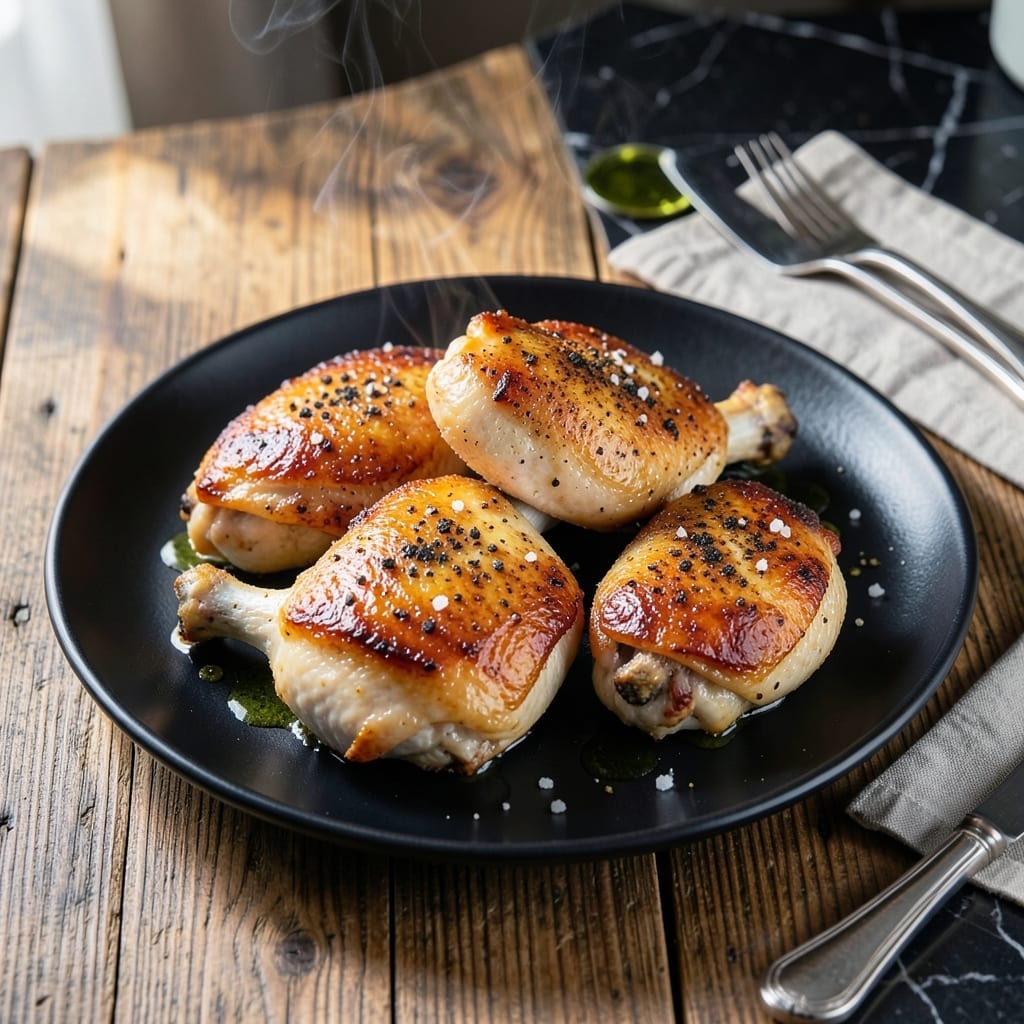
There’s a simple secret to achieving crispy skin on bone-in chicken thighs every time. The key lies in proper drying, high heat, and patience—no fancy equipment required.
I developed this method after years of trial and error, focusing on techniques that guarantee that coveted crackling skin while keeping the meat juicy and flavorful. The bone-in cut adds depth to the final dish.
By the time these thighs come out of the oven, you’ll have golden, shatteringly crispy skin giving way to tender, succulent meat that falls off the bone. It’s the kind of result that makes weeknight dinners feel special.
Serve with your favorite sides for a meal that’s both impressive and effortless. Here’s how to make it happen.
Ingredients for Skin on Bone in Chicken Thighs
Bone-in, skin-on chicken thighs plus a few pantry staples. Big flavor, minimal effort.
| Ingredient | Amount | Notes |
|---|---|---|
| Bone-In Chicken Thighs 🍗 | 2 lb | Skin-on, about 6-8 thighs |
| Kosher Salt 🧂 | 1 ½ tsp | Diamond Crystal preferred for even seasoning |
| Freshly Ground Black Pepper 🌶️ | 1 tsp | Coarse grind for texture |
| Garlic Powder 🧄 | 1 tsp | Not garlic salt |
| Onion Powder 🧅 | 1 tsp | Balances the seasoning blend |
| Smoked Paprika 🌶️ | 1 tsp | Adds depth and color |
| Olive Oil 🫒 | 2 tbsp | High smoke point for crisping |
| Fresh Thyme Sprigs 🌿 | 4 sprigs | Optional, for aromatic flavor |
| Lemon 🍋 | 1 whole | Zested and juiced for brightness |
| Butter 🧈 | 2 tbsp | Optional for basting |
The chicken is everything here. Bone-in, skin-on thighs are non-negotiable—they render fat as they cook, crisping that skin to perfection. Look for thighs with smooth, unbroken skin at your butcher or Whole Foods meat counter. I always grab a few extra pounds when they’re on sale and freeze them individually. The seasoning blend is simple but Diamond Crystal kosher salt makes a noticeable difference in even distribution.
No smoked paprika? Regular paprika plus a pinch of cayenne works in a pinch. Fresh garlic can replace the powders (use 2 cloves, minced), but dried is more consistent. The thyme is flexible—rosemary or sage bring their own charm. For extra crisp, some cooks swear by baking powder (about 1 tsp mixed into the seasoning), but I’ve never found it necessary. The lemon? Skip it if you must, but that zing cuts through the richness beautifully.
Pat the thighs very dry before seasoning (worth the extra minute). Cooked chicken keeps 4 days in the fridge, or freeze for 3 months. Reheat in the oven or air fryer to revive that crispy skin—microwaving is a tragedy here.
Why You’ll Love This Recipe
- 5-Minute Prep: I just toss the thighs with salt, pepper, garlic and onion powder—no chopping, no fuss.
- Crispy & Juicy: That skin renders out so crisp while the meat stays fall-off-the-bone tender.
- Weeknight Hero: Honestly, it’s my Tuesday lifesaver when I need dinner fast but still crave-worthy.
- Budget Stretcher: Bone-in thighs cost half what breasts do, and leftovers taste even better the next day.
Step-by-Step Instructions for Skin-On Bone-In Chicken Thighs
Here’s the method I use to get that perfect balance of crispy skin and juicy meat every time.
Step 1: Season and Prep the Chicken Thighs
Pat the 2 lb Bone-In Chicken Thighs completely dry with paper towels—this is non-negotiable for crispy skin. I like to press down firmly to remove every bit of moisture, especially under the skin where it tends to pool.
In a small bowl, combine the 1.5 tsp Kosher Salt, 1 tsp Freshly Ground Black Pepper, 1 tsp Garlic Powder, 1 tsp Onion Powder, and 1 tsp Smoked Paprika. Sprinkle this blend evenly over both sides of the thighs, massaging it into the meat and under the skin. Let the seasoned thighs rest at room temperature for 20-30 minutes while your oven preheats.
Step 2: Sear Skin-Side Down for Maximum Crisp
Place a large oven-safe skillet or cast-iron pan over medium-high heat. Add the 2 tbsp Olive Oil and swirl to coat the pan evenly. When the oil shimmers and just starts to smoke, carefully place the thighs in the pan skin-side down, leaving space between each piece.
Here’s the thing—don’t move them for at least 6-7 minutes. You want the skin to render its fat and turn a deep golden brown with crispy edges. If you try to flip too early, the skin will tear. When the skin releases easily from the pan and you see that beautiful crispy layer, it’s ready to flip.
Optional: Add the 4 sprigs Fresh Thyme Sprigs and zest of 1 whole Lemon to the pan during the last minute of searing for an aromatic boost.
Step 3: Finish in the Oven for Even Cooking
Preheat your oven to 400°F. Once the thighs are seared on both sides (about 2-3 minutes on the meat side), transfer the entire skillet to the preheated oven. If using, dot each thigh with small pieces of the 2 tbsp Butter for extra richness.
Roast for 15-20 minutes or until the internal temperature reaches 175°F when measured in the thickest part of the meat, avoiding the bone. The skin should be deeply browned and crispy all over, and the juices should run clear when pierced.
Step 4: Rest and Serve with Pan Juices
Transfer the thighs to a plate and let them rest for 5-10 minutes. This allows the juices to redistribute, ensuring moist meat with every bite. While they rest, you can make a quick pan sauce: pour off excess fat, leaving about 1 tablespoon, then add a splash of water or chicken broth and the juice of 1 whole Lemon. Simmer for 1-2 minutes, scraping up any browned bits.
Serve the thighs with the pan sauce spooned over the top. The skin should stay crispy for at least 10-15 minutes after cooking if served immediately. Each bite should deliver that perfect contrast of shatteringly crisp skin giving way to tender, succulent meat.
Pro Tips For Making Skin On Bone In Chicken Thighs
- Dry the Skin: Pat the thighs very dry with paper towels before seasoning—I learned this the hard way after my skin steamed instead of crisping.
- Season Generously: Use more kosher salt than you think, especially on the skin side, since bone-in thighs can handle it and it makes a real difference in flavor.
- Start Skin-Side Down: Place the thighs skin-side down in a cold pan, then turn the heat to medium-high; this renders fat slowly and prevents curling.
- Don’t Rush Resting: Give them 5-10 minutes under foil after cooking—yes, even if you’re hungry—so the juices redistribute instead of pooling on your plate.
Make-Ahead Tips for Leftovers
Overnight Dry Brine
For even deeper flavor, I dry brine the thighs up to 12 hours ahead. Pat them dry, season as directed, then refrigerate uncovered on a wire rack over a baking sheet. This gives the salt time to penetrate while the skin dries out further for extra crispiness. 💪
Pre-Seasoned Freezer Packs
When I find bone-in thighs on sale at Whole Foods, I buy in bulk. Season a batch with the dry rub, vacuum seal, and freeze for up to 3 months. Thaw overnight in the fridge before cooking—no additional seasoning needed.
Pre-Sear Method
To save time on busy nights, sear the thighs skin-side down in the morning. Let them cool, then refrigerate. Finish in the oven when ready—this still yields crispy skin while cutting active cooking time in half.
Par-Cooked Option
Partially cook the thighs to 160°F internal temperature, then cool and refrigerate for up to 2 days. Reheat in a 400°F oven for 10-12 minutes to crisp the skin and finish cooking. This is my go-to for meal prep.
Reheating for Crispiness
Store cooked thighs in an airtight container for up to 4 days. To revive, place on a wire rack in a 425°F oven for 8-10 minutes. The wire rack allows air circulation, keeping the skin crispy rather than soggy. 🔥
Cold Application Uses
Chop leftover thighs for salads, tacos, or fried rice. The meat stays juicy when cold, and the skin adds a delightful chewy texture. I love tossing pieces into a kale salad with lemon vinaigrette for a protein-packed lunch.
Nutrition Facts
Frequently Asked Questions
Why use bone-in instead of boneless thighs?
Bone-in thighs stay juicier during cooking and have more flavor. The bone acts as an insulator, keeping the meat moist while the skin crisps to perfection.
How do I keep the skin from sticking to the pan?
Ensure the pan is very hot before adding the thighs and don’t move them for 6-7 minutes. A well-seasoned cast-iron or stainless steel pan works best.
Can I use a different cooking method?
Yes! Try grilling over medium-high heat for 6-8 minutes per side or air frying at 375°F for 20-25 minutes. Both methods yield crispy skin.
What if my skin isn’t crispy enough?
Pat the thighs extra dry before cooking and finish under the broiler for 2-3 minutes. This guarantees a shatteringly crisp texture.

- 6 Egg Cake Recipe with Oil: Light as Air With Buttery Moisture - October 4, 2026
- 4 Bean Casserole Recipe: One-Pan Heartiness With Smoky Paprika Depth - October 4, 2026
- 3-Ingredient Keto Mug Cake Recipe: Microwave Magic in 2 Minutes - October 4, 2026