
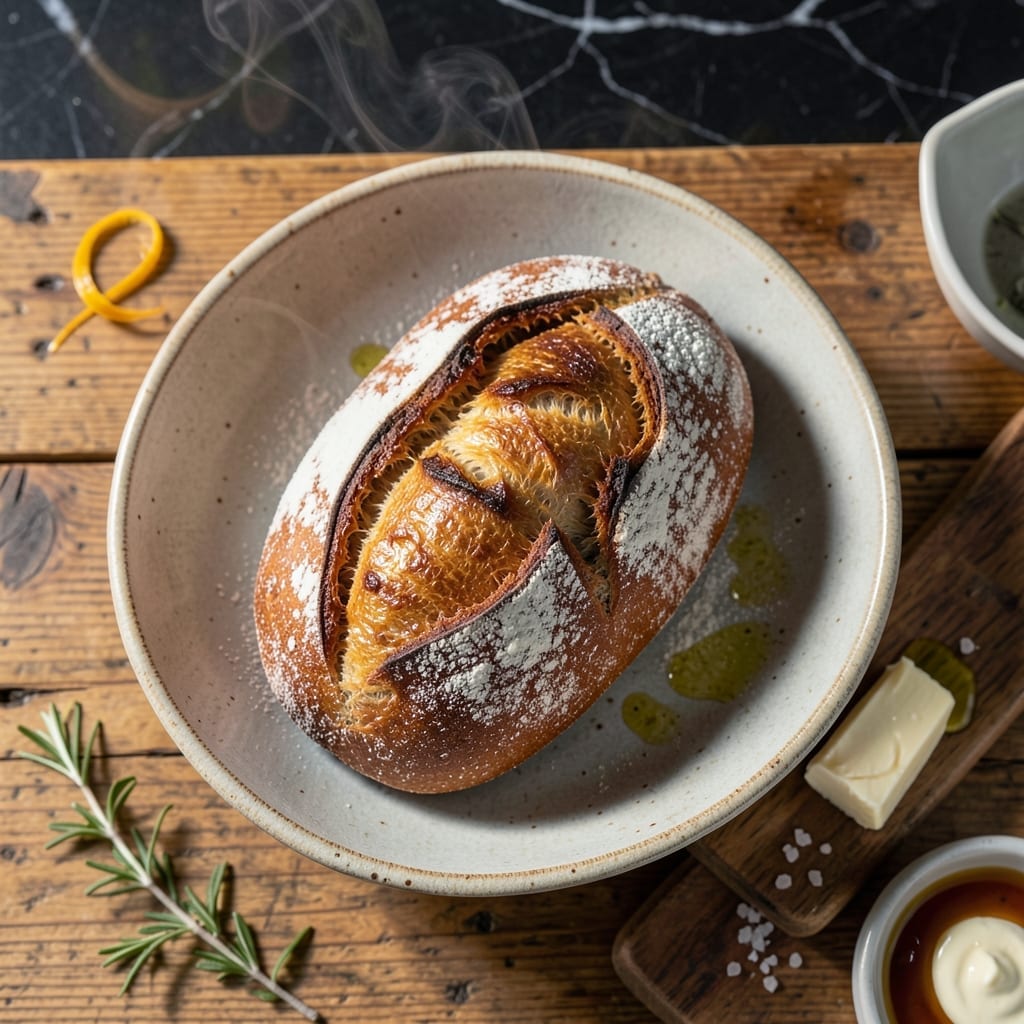
Mastering artisan sourdough at home is simpler than you think. This method delivers a crisp crust and airy crumb through careful fermentation.
The process requires patience, with overnight bulk fermentation and precise baking. The result is a loaf with professional-quality texture and flavor.
Ingredients for Sourdough Bread Recipe Paul Hollywood
Quality flour and a vibrant starter are the foundation of exceptional artisan bread.
| Ingredient | Amount | Notes |
|---|---|---|
| Bread Flour 🌾 | 4 cups | High-protein, unbleached preferred |
| Active Sourdough Starter 🍞 | ½ cup | Fed and bubbly, 100% hydration |
| Water 💧 | 1 ¾ cups | Filtered, room temperature |
| Fine Sea Salt 🧂 | 2 tsp | Diamond Crystal or kosher |
| Olive Oil 🫒 | 1 tbsp | For bowl lubrication |
| All-Purpose Flour 🌾 | ½ cup | For dusting work surface |
| Rice Flour 🌾 | ¼ cup | For banneton dusting |
| Ice Cubes ❄️ | 1 cup | For steam baking |
| Cornmeal 🌽 | 2 tbsp | For Dutch oven dusting |
| Honey 🍯 | 1 tsp | Optional for starter feed |
The flour is non-negotiable here. King Arthur Bread Flour is the gold standard for its 12.7% protein content, which develops the gluten structure needed for that open crumb. Your sourdough starter must be at peak activity—fed twice daily for 3-5 days prior to baking. Look for a starter that doubles in size within 4-6 hours after feeding. Most specialty baking supply stores carry high-quality flours, but bulk bins at Whole Foods work well too.
No bread flour? All-purpose flour with a tbsp of vital wheat gluten per cup gets you close. For the water, filtered is ideal but tap works if it’s not heavily chlorinated. The rice flour for dusting can be swapped with semolina or more all-purpose. If your starter is sluggish, try feeding it with whole wheat or rye flour to boost microbial activity. The honey in the starter feed is optional but helps kickstart fermentation.
Store flour in airtight containers in a cool, dark place for up to 6 months. Your sourdough starter needs weekly feedings if kept at room temperature, or monthly if refrigerated. Baked loaves keep for 3 days at room temperature in a bread box, or freeze for 1 month wrapped tightly in plastic and foil.
Why You’ll Love This Recipe
- Minimal Knead: I love that this recipe lets the sourdough starter do most of the work—just mix, fold, and let time work its magic.
- Crust Perfection: That crackly exterior with the airy, tangy crumb? It’s all thanks to the slow fermentation and a touch of olive oil in the dough.
- Meal Prep MVP: Between us, nothing beats having fresh sourdough on hand for sandwiches, toast, or even a quick garlic bread fix.
- Budget Baker: Honestly, with just flour, water, salt, and a bit of starter, I’m making bakery-quality loaves for pennies on the dollar.
Step-by-Step Instructions for Sourdough Bread
Master the artisan technique with precision and patience for professional results.
Step 1: Autolyse and Develop the Dough
In a large mixing bowl, combine the 4 cups Bread Flour and 1.75 cups Water until no dry bits remain. The dough will be shaggy and coarse—this is normal at this stage. Cover the bowl and let it rest for 1 hour at room temperature.
This autolyse period hydrates the flour fully and begins gluten development without kneading. You’ll notice the dough becomes more extensible and less rough as the proteins relax. After the rest, sprinkle the 2 tsp Fine Sea Salt evenly over the surface.
Step 2: Incorporate Starter and Perform Stretch and Folds
Add the 0.5 cup Active Sourdough Starter to the bowl. Using wet hands, dimple the starter into the dough, then perform a series of stretch and folds. Wet your hands, grab one side of the dough, stretch it upward, and fold it over itself. Rotate the bowl 90 degrees and repeat.
Complete 4 sets of stretch and folds, spaced 30 minutes apart. The dough will transform from slack to strong and elastic. By the final set, it should pull away from the bowl slightly and feel aerated. Lightly coat the bowl with 1 tbsp Olive Oil to prevent sticking during bulk fermentation.
Step 3: Bulk Ferment and Shape
Cover the bowl and let the dough ferment at room temperature for 4-6 hours, or until it has increased in volume by 50-75%. The surface should appear bubbly, and the dough should jiggle slightly when the bowl is gently shaken.
Turn the dough out onto a surface lightly dusted with 0.5 cup All-Purpose Flour. Shape it into a tight boule by pulling the edges toward the center and pinching them together. Rest the dough for 20 minutes, then shape again into a final boule or batard.
Step 4: Proof and Prepare for Baking
Place the shaped dough seam-side up in a banneton or bowl lined with a towel generously dusted with 0.25 cup Rice Flour. Cover and proof in the refrigerator for 12-18 hours. Cold proofing develops complex flavor and makes scoring easier.
Preheat your Dutch oven with the lid on in a 475°F oven for 1 hour before baking. Just before baking, turn the dough out onto a piece of parchment paper. The dough should hold its shape and feel slightly firm from the cold.
Step 5: Bake with Steam for Artisan Crust
Carefully transfer the dough and parchment into the preheated Dutch oven. Toss the 1 cup Ice Cubes into the bottom of the pot to create steam. The parchment prevents sticking while the steam ensures a thin, crisp crust.
Bake covered for 20 minutes, then remove the lid and bake for another 20-25 minutes until the crust is deep golden brown and the internal temperature reaches 205-210°F. For the final touch, dust the bottom of the Dutch oven with 2 tbsp Cornmeal before adding the dough to prevent sticking and add texture.
Cool on a wire rack for at least 1 hour before slicing to allow the crumb to set. The loaf should have an open, airy interior with a crisp, blistered crust. If using 1 tsp Honey, add it to the starter during feeding to enhance activity and flavor.
Pro Tips For Making Sourdough Bread Recipe Paul Hollywood
- Autolyse First: Mix the bread flour and water first and let it sit for 30-60 minutes before adding the starter and salt. I learned this the hard way—it kickstarts gluten development and makes the dough easier to handle.
- Use Ripe Starter: Make sure your sourdough starter is active and at its peak (floating in water) before mixing. After burning a few loaves, I finally figured out that a sluggish starter means flat, dense bread.
- Don’t Rush Bulk Ferment: Let the dough ferment at room temperature until it’s increased by about 50-75%—usually 4-6 hours depending on warmth. Sounds weird, but it works: under-proofing gives you a brick, not a loaf.
- Score Just Before Baking: Use a sharp razor or lame to score the dough right before it goes into the oven, not earlier. I was skeptical until I tried it—this prevents the loaf from bursting in odd places and gives that classic sourdough look.
Pro Cooking Tips for Perfect Results
💡 Master the Starter
A strong sourdough starter is the heart of Paul Hollywood’s recipe. Feed it 12 hours before baking to ensure peak activity. Use a 1:1:1 ratio of starter, flour, and water for consistency. If your starter floats in water, it’s ready to go!
🌡️ Perfect Proofing
Proof your dough at 75–80°F (24–27°C) for 4–6 hours, or until it’s doubled in size. For a slower, flavor-rich rise, refrigerate overnight. This cold proof enhances the sourdough’s tang and texture.
✨ Score with Precision
Use a sharp lame or razor to score the dough just before baking. Hold it at a 45-degree angle for clean cuts. Scoring controls expansion, giving your loaf that signature artisan look.
🔥 Bake Like a Pro
Preheat your Dutch oven at 475°F (245°C) for 30 minutes. Bake covered for 20 minutes, then uncover for a golden crust. Steam from the pot mimics a professional oven for a perfect rise.
Nutrition Facts

- 6 Egg Cake Recipe with Oil: Light as Air With Buttery Moisture - October 4, 2026
- 4 Bean Casserole Recipe: One-Pan Heartiness With Smoky Paprika Depth - October 4, 2026
- 3-Ingredient Keto Mug Cake Recipe: Microwave Magic in 2 Minutes - October 4, 2026