
St Louis Rib Recipe Oven: Fall-Off-The-Bone Tenderness With Dry Rub

St Louis Rib Recipe Oven: Fall-Off-The-Bone Tenderness With Dry Rub

Achieving fall-off-the-bone ribs in your oven starts with a dry rub that builds deep flavor before slow cooking. This method transforms tough cuts into tender perfection without a smoker.

The secret lies in the low-and-slow approach—wrapping the ribs tightly in foil to lock in moisture while the dry rub works its magic. Each bite delivers that signature St. Louis style texture.

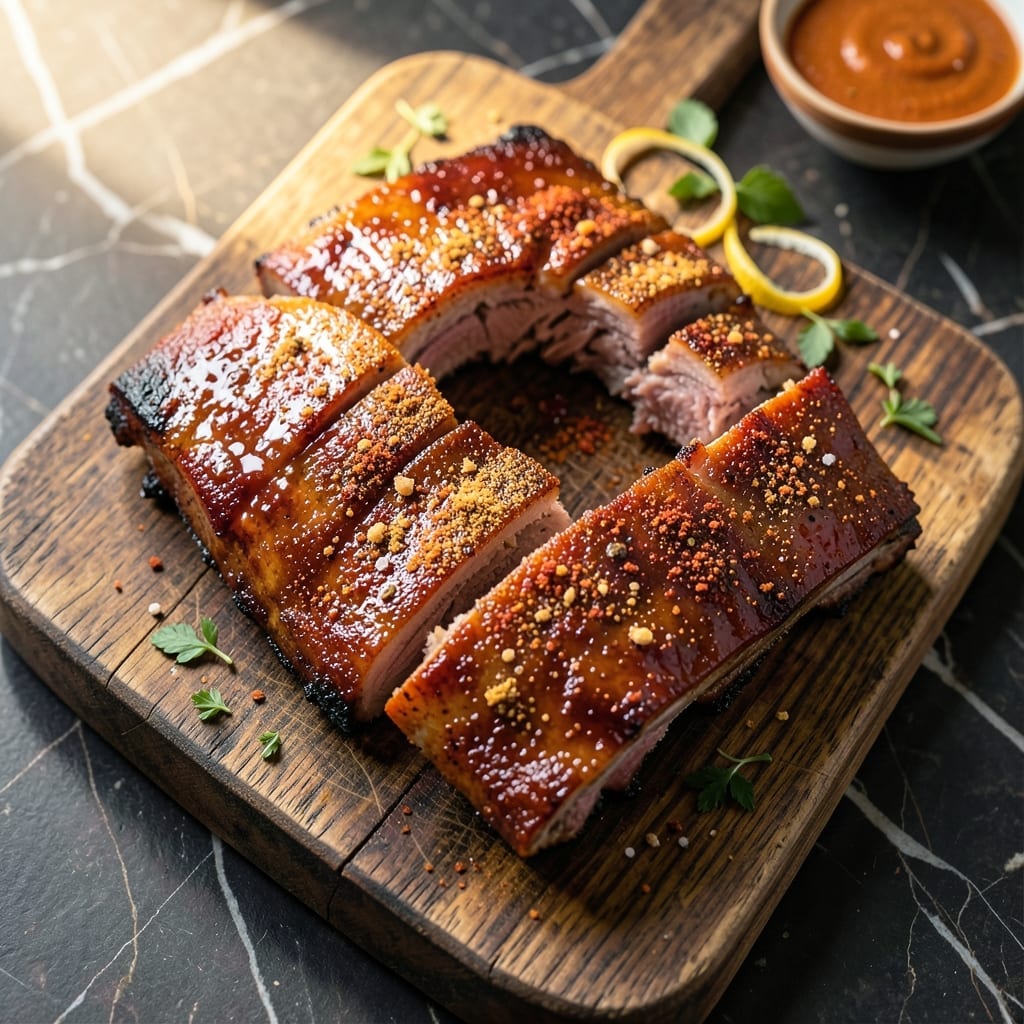
What emerges from the oven is meat so tender it nearly slips from the bone, with a caramelized crust that seals in every juicy detail. The dry rub creates a balanced, savory bark.

Serve with classic sides for a meal that feels like it came straight from a BBQ joint. Here’s how to make it happen.

👨‍🍳
Difficulty
Medium
🥩
Diet
Meat
⏱️
Total Time
30 min
🔥
Calories
Med Cal

Ingredients for St Louis Rib Recipe Oven

These classic ingredients deliver that signature St. Louis rib flavor without a smoker.

Ingredient Amount Notes
St. Louis Style Pork Ribs 🥩 2 lb Rack, membrane removed
Brown Sugar 🧈 ½ cup Light or dark variety
Paprika 🌶️ 2 tbsp Sweet or smoked variety
Garlic Powder 🧄 1 tbsp Not garlic salt
Onion Powder 🧅 1 tbsp Fresh ground preferred
Ground Black Pepper 🌶️ 1 tbsp Freshly ground preferred
Kosher Salt 🧂 1 tbsp Diamond Crystal preferred
Chili Powder 🌶️ 1 tbsp Mild or hot variety
Ground Cumin 🌿 1 tsp Toasted for deeper flavor
Yellow Mustard 🟡 ¼ cup For rub binder
Apple Cider Vinegar 🍏 2 tbsp For tenderness and tang
Olive Oil 🫒 2 tbsp For moisture and crust
Barbecue Sauce 🍯 1 cup For glazing, optional

The ribs are the foundation. St. Louis style (flat, rectangular cut) gives the best texture—avoid baby back ribs here. Look for racks with good marbling at Costco or Whole Foods. Always remove the membrane (that white film on the bone side) for maximum rub penetration. For the dry rub, Penzeys spices are top-tier, but standard grocery store brands work if they’re fresh.

No brown sugar? White sugar plus a teaspoon of molasses mimics the depth. Swap smoked paprika for regular if that’s what you’ve got. The apple cider vinegar can be white vinegar in a pinch, but it lacks the fruity tang. For extra heat, add half a teaspoon of cayenne. The mustard is just a binder—Dijon works too if you prefer.

Rubbed ribs keep 12-24 hours in the fridge before cooking. Leftovers? They reheat surprisingly well—3-4 days in the fridge, or freeze for 3 months. The dry rub itself stays potent for 6 months in a cool, dark place.

❤️

Why You’ll Love This Recipe

  • Set It and Forget: No babysitting the grill—just pop the ribs in the oven with the brown sugar rub and let them work their magic.
  • Sweet & Smoky: That brown sugar caramelizes with the paprika and garlic powder into this sticky, crave-worthy crust.
  • Feeds a Hungry Crowd: I made these for a Sunday football spread and had zero leftovers—St. Louis ribs are always a hit.
  • Budget-Friendly Feast: Pork ribs stretch farther than steak, and this oven method uses pantry staples I already had.

Step-by-Step Instructions for St Louis Style Pork Ribs in the Oven

Here’s the method I use to achieve competition-worthy tenderness with a perfect crust.

Step 1: Prepare the Ribs and Apply the Dry Rub

Start by patting the 2 lb St. Louis Style Pork Ribs dry with paper towels. This ensures the rub adheres properly and promotes even browning. In a bowl, combine 0.5 cup Brown Sugar, 2 tbsp Paprika, 1 tbsp Garlic Powder, 1 tbsp Onion Powder, 1 tbsp Ground Black Pepper, 1 tbsp Kosher Salt, 1 tbsp Chili Powder, and 1 tsp Ground Cumin.

Brush the ribs with 0.25 cup Yellow Mustard—this acts as a binder for the rub. Sprinkle the dry rub mixture evenly over both sides of the ribs, pressing firmly to create an even coating. Let the ribs sit at room temperature for 30 minutes to allow the flavors to penetrate.

Step 2: Slow-Roast the Ribs in the Oven

Preheat your oven to 275°F. Place the ribs meat-side up on a foil-lined baking sheet. Cover the ribs tightly with foil, creating a sealed packet. This traps steam, which helps break down the connective tissue for fall-off-the-bone tenderness.

Roast the ribs in the preheated oven for 2.5 to 3 hours. You’ll know they’re ready when the meat has shrunk back from the ends of the bones and the ribs bend easily when picked up with tongs. Resist the urge to peek—every time you open the oven, you lose valuable heat.

Step 3: Add Moisture and Finish Under the Broiler

Carefully remove the ribs from the oven and open the foil. Drizzle the ribs with 2 tbsp Apple Cider Vinegar and 2 tbsp Olive Oil. This adds moisture and helps create a beautiful glaze as they finish cooking.

Return the ribs to the oven, uncovered, and increase the temperature to 375°F. Roast for an additional 15-20 minutes to allow the surface to caramelize. For the final touch, brush the ribs with 1 cup Barbecue Sauce and place them under the broiler for 2-3 minutes until the sauce is bubbly and slightly charred.

Step 4: Rest and Serve

Transfer the ribs to a cutting board and let them rest for 10 minutes before slicing. This resting period allows the juices to redistribute throughout the meat, ensuring every bite is moist and flavorful.

Slice the ribs between the bones and serve immediately. The meat should pull away from the bone cleanly with minimal effort, delivering that promised fall-off-the-bone tenderness with a perfect balance of smoky, sweet, and tangy flavors.

👨‍🍳

Pro Tips For Making St Louis Rib Recipe Oven

  • Low and Slow Wins: Cook at 275°F for 3-4 hours—any higher and the ribs dry out before the collagen breaks down. I learned this the hard way after pulling tough ribs out of a 325°F oven.
  • Trim the Membrane: Peel off that tough silver skin on the bone side before seasoning, or your rub won’t penetrate and the texture suffers. A butter knife helps lift it if your fingers struggle.
  • Rest Before Serving: Let the ribs sit wrapped in foil for 15 minutes after baking—it redistributes the juices so they don’t run dry when you cut them. Sounds tedious, but it actually changes the outcome.
  • Double the Rub: Use twice as much brown sugar and spice mix as you think you need. The oven heat mellows the flavors, and St. Louis ribs can handle a bold crust.

Storing and Reheating This Dish

Refrigerator Storage

Let your ribs cool to room temperature within 2 hours of cooking. Store in an airtight container with their juices to maintain moisture. They’ll keep in the fridge at 40°F or below for 3-4 days, and the flavors will deepen over time. ❄️

Freezer Storage

For longer storage, wrap individual portions tightly in plastic wrap and place in a freezer-safe bag. Squeeze out excess air to prevent freezer burn. Your ribs will stay at peak quality for 3 months in the freezer.

Oven Reheating

Preheat your oven to 300°F and place ribs in a baking dish with ¼ cup water or broth. Cover with foil and reheat for 20-25 minutes until they reach 165°F internally. This method keeps them juicy and tender. 🔥

Microwave Reheating

For a quick meal, arrange ribs on a microwave-safe plate and cover with a damp paper towel. Heat on 50% power for 2-3 minutes, flipping halfway. Add a splash of water if they seem dry.

Serving Leftovers

Reheated ribs work great in tacos, sandwiches, or salads. Shred the meat and mix with a little extra barbecue sauce for pulled pork-style dishes. The dry rub’s bold flavors shine in any application.

Nutrition Facts

Servings 4
Amount Per Serving
Calories 580kcal
% Daily Value
Total Fat 32g41%
Saturated Fat 10g50%
Cholesterol 120mg40%
Sodium 1420mg62%
Total Carbohydrate 42g15%
Dietary Fiber 2g7%
Sugars 32g
Protein 38g76%
Percent Daily Values are based on a 2,000 calorie diet. Your daily values may be higher or lower depending on your calorie needs.

Frequently Asked Questions

1

Do I need to remove the membrane from the ribs?

Yes, always remove the membrane (the white film on the bone side) before applying the rub. This allows the seasoning to penetrate the meat fully and ensures even cooking. Use a butter knife to lift it, then pull it off with a paper towel for better grip.

2

Can I skip the foil wrapping step?

No, wrapping in foil is key for tenderness. The sealed environment traps steam, which breaks down connective tissue over the 2.5-3 hour cook time. Without it, the ribs may dry out.

3

What if my ribs aren’t falling off the bone?

They likely need more time. Return them to the oven at 275°F for another 30-45 minutes. True fall-off-the-bone tenderness happens when collagen fully melts, which can vary by rack size.

4

Can I use a different temperature for faster cooking?

Avoid higher temps—it risks tough, dry meat. The low-and-slow method at 275°F is essential for breaking down the fibers gently. Patience pays off with juicy results.

★★★★★5.0(5 reviews)
Tyler Parker

St Louis Rib Recipe Oven: Fall-Off-The-Bone Tenderness With Dry Rub

St Louis Rib Recipe Oven: Fall-Off-The-Bone Tenderness With Dry Rub

Achieving fall-off-the-bone ribs in your oven starts with a dry rub that builds deep flavor before slow cooking. This method transforms tough cuts into tender perfection without a smoker.

The secret lies in the low-and-slow approach—wrapping the ribs tightly in foil to lock in moisture while the dry rub works its magic. Each bite delivers that signature St. Louis style texture.

What emerges from the oven is meat so tender it nearly slips from the bone, with a caramelized crust that seals in every juicy detail. The dry rub creates a balanced, savory bark.

Serve with classic sides for a meal that feels like it came straight from a BBQ joint. Here’s how to make it happen.

👨‍🍳
Difficulty
Medium
🥩
Diet
Meat
⏱️
Total Time
30 min
🔥
Calories
Med Cal

Ingredients for St Louis Rib Recipe Oven

These classic ingredients deliver that signature St. Louis rib flavor without a smoker.

Ingredient Amount Notes
St. Louis Style Pork Ribs 🥩 2 lb Rack, membrane removed
Brown Sugar 🧈 ½ cup Light or dark variety
Paprika 🌶️ 2 tbsp Sweet or smoked variety
Garlic Powder 🧄 1 tbsp Not garlic salt
Onion Powder 🧅 1 tbsp Fresh ground preferred
Ground Black Pepper 🌶️ 1 tbsp Freshly ground preferred
Kosher Salt 🧂 1 tbsp Diamond Crystal preferred
Chili Powder 🌶️ 1 tbsp Mild or hot variety
Ground Cumin 🌿 1 tsp Toasted for deeper flavor
Yellow Mustard 🟡 ¼ cup For rub binder
Apple Cider Vinegar 🍏 2 tbsp For tenderness and tang
Olive Oil 🫒 2 tbsp For moisture and crust
Barbecue Sauce 🍯 1 cup For glazing, optional

The ribs are the foundation. St. Louis style (flat, rectangular cut) gives the best texture—avoid baby back ribs here. Look for racks with good marbling at Costco or Whole Foods. Always remove the membrane (that white film on the bone side) for maximum rub penetration. For the dry rub, Penzeys spices are top-tier, but standard grocery store brands work if they’re fresh.

No brown sugar? White sugar plus a teaspoon of molasses mimics the depth. Swap smoked paprika for regular if that’s what you’ve got. The apple cider vinegar can be white vinegar in a pinch, but it lacks the fruity tang. For extra heat, add half a teaspoon of cayenne. The mustard is just a binder—Dijon works too if you prefer.

Rubbed ribs keep 12-24 hours in the fridge before cooking. Leftovers? They reheat surprisingly well—3-4 days in the fridge, or freeze for 3 months. The dry rub itself stays potent for 6 months in a cool, dark place.

❤️

Why You’ll Love This Recipe

  • Set It and Forget: No babysitting the grill—just pop the ribs in the oven with the brown sugar rub and let them work their magic.
  • Sweet & Smoky: That brown sugar caramelizes with the paprika and garlic powder into this sticky, crave-worthy crust.
  • Feeds a Hungry Crowd: I made these for a Sunday football spread and had zero leftovers—St. Louis ribs are always a hit.
  • Budget-Friendly Feast: Pork ribs stretch farther than steak, and this oven method uses pantry staples I already had.

Step-by-Step Instructions for St Louis Style Pork Ribs in the Oven

Here’s the method I use to achieve competition-worthy tenderness with a perfect crust.

Step 1: Prepare the Ribs and Apply the Dry Rub

Start by patting the 2 lb St. Louis Style Pork Ribs dry with paper towels. This ensures the rub adheres properly and promotes even browning. In a bowl, combine 0.5 cup Brown Sugar, 2 tbsp Paprika, 1 tbsp Garlic Powder, 1 tbsp Onion Powder, 1 tbsp Ground Black Pepper, 1 tbsp Kosher Salt, 1 tbsp Chili Powder, and 1 tsp Ground Cumin.

Brush the ribs with 0.25 cup Yellow Mustard—this acts as a binder for the rub. Sprinkle the dry rub mixture evenly over both sides of the ribs, pressing firmly to create an even coating. Let the ribs sit at room temperature for 30 minutes to allow the flavors to penetrate.

Step 2: Slow-Roast the Ribs in the Oven

Preheat your oven to 275°F. Place the ribs meat-side up on a foil-lined baking sheet. Cover the ribs tightly with foil, creating a sealed packet. This traps steam, which helps break down the connective tissue for fall-off-the-bone tenderness.

Roast the ribs in the preheated oven for 2.5 to 3 hours. You’ll know they’re ready when the meat has shrunk back from the ends of the bones and the ribs bend easily when picked up with tongs. Resist the urge to peek—every time you open the oven, you lose valuable heat.

Step 3: Add Moisture and Finish Under the Broiler

Carefully remove the ribs from the oven and open the foil. Drizzle the ribs with 2 tbsp Apple Cider Vinegar and 2 tbsp Olive Oil. This adds moisture and helps create a beautiful glaze as they finish cooking.

Return the ribs to the oven, uncovered, and increase the temperature to 375°F. Roast for an additional 15-20 minutes to allow the surface to caramelize. For the final touch, brush the ribs with 1 cup Barbecue Sauce and place them under the broiler for 2-3 minutes until the sauce is bubbly and slightly charred.

Step 4: Rest and Serve

Transfer the ribs to a cutting board and let them rest for 10 minutes before slicing. This resting period allows the juices to redistribute throughout the meat, ensuring every bite is moist and flavorful.

Slice the ribs between the bones and serve immediately. The meat should pull away from the bone cleanly with minimal effort, delivering that promised fall-off-the-bone tenderness with a perfect balance of smoky, sweet, and tangy flavors.

👨‍🍳

Pro Tips For Making St Louis Rib Recipe Oven

  • Low and Slow Wins: Cook at 275°F for 3-4 hours—any higher and the ribs dry out before the collagen breaks down. I learned this the hard way after pulling tough ribs out of a 325°F oven.
  • Trim the Membrane: Peel off that tough silver skin on the bone side before seasoning, or your rub won’t penetrate and the texture suffers. A butter knife helps lift it if your fingers struggle.
  • Rest Before Serving: Let the ribs sit wrapped in foil for 15 minutes after baking—it redistributes the juices so they don’t run dry when you cut them. Sounds tedious, but it actually changes the outcome.
  • Double the Rub: Use twice as much brown sugar and spice mix as you think you need. The oven heat mellows the flavors, and St. Louis ribs can handle a bold crust.

Storing and Reheating This Dish

Refrigerator Storage

Let your ribs cool to room temperature within 2 hours of cooking. Store in an airtight container with their juices to maintain moisture. They’ll keep in the fridge at 40°F or below for 3-4 days, and the flavors will deepen over time. ❄️

Freezer Storage

For longer storage, wrap individual portions tightly in plastic wrap and place in a freezer-safe bag. Squeeze out excess air to prevent freezer burn. Your ribs will stay at peak quality for 3 months in the freezer.

Oven Reheating

Preheat your oven to 300°F and place ribs in a baking dish with ¼ cup water or broth. Cover with foil and reheat for 20-25 minutes until they reach 165°F internally. This method keeps them juicy and tender. 🔥

Microwave Reheating

For a quick meal, arrange ribs on a microwave-safe plate and cover with a damp paper towel. Heat on 50% power for 2-3 minutes, flipping halfway. Add a splash of water if they seem dry.

Serving Leftovers

Reheated ribs work great in tacos, sandwiches, or salads. Shred the meat and mix with a little extra barbecue sauce for pulled pork-style dishes. The dry rub’s bold flavors shine in any application.

Nutrition Facts

Servings 4
Amount Per Serving
Calories 580kcal
% Daily Value
Total Fat 32g41%
Saturated Fat 10g50%
Cholesterol 120mg40%
Sodium 1420mg62%
Total Carbohydrate 42g15%
Dietary Fiber 2g7%
Sugars 32g
Protein 38g76%
Percent Daily Values are based on a 2,000 calorie diet. Your daily values may be higher or lower depending on your calorie needs.

Frequently Asked Questions

1

Do I need to remove the membrane from the ribs?

Yes, always remove the membrane (the white film on the bone side) before applying the rub. This allows the seasoning to penetrate the meat fully and ensures even cooking. Use a butter knife to lift it, then pull it off with a paper towel for better grip.

2

Can I skip the foil wrapping step?

No, wrapping in foil is key for tenderness. The sealed environment traps steam, which breaks down connective tissue over the 2.5-3 hour cook time. Without it, the ribs may dry out.

3

What if my ribs aren’t falling off the bone?

They likely need more time. Return them to the oven at 275°F for another 30-45 minutes. True fall-off-the-bone tenderness happens when collagen fully melts, which can vary by rack size.

4

Can I use a different temperature for faster cooking?

Avoid higher temps—it risks tough, dry meat. The low-and-slow method at 275°F is essential for breaking down the fibers gently. Patience pays off with juicy results.

★★★★★5.0(5 reviews)
Tyler Parker