
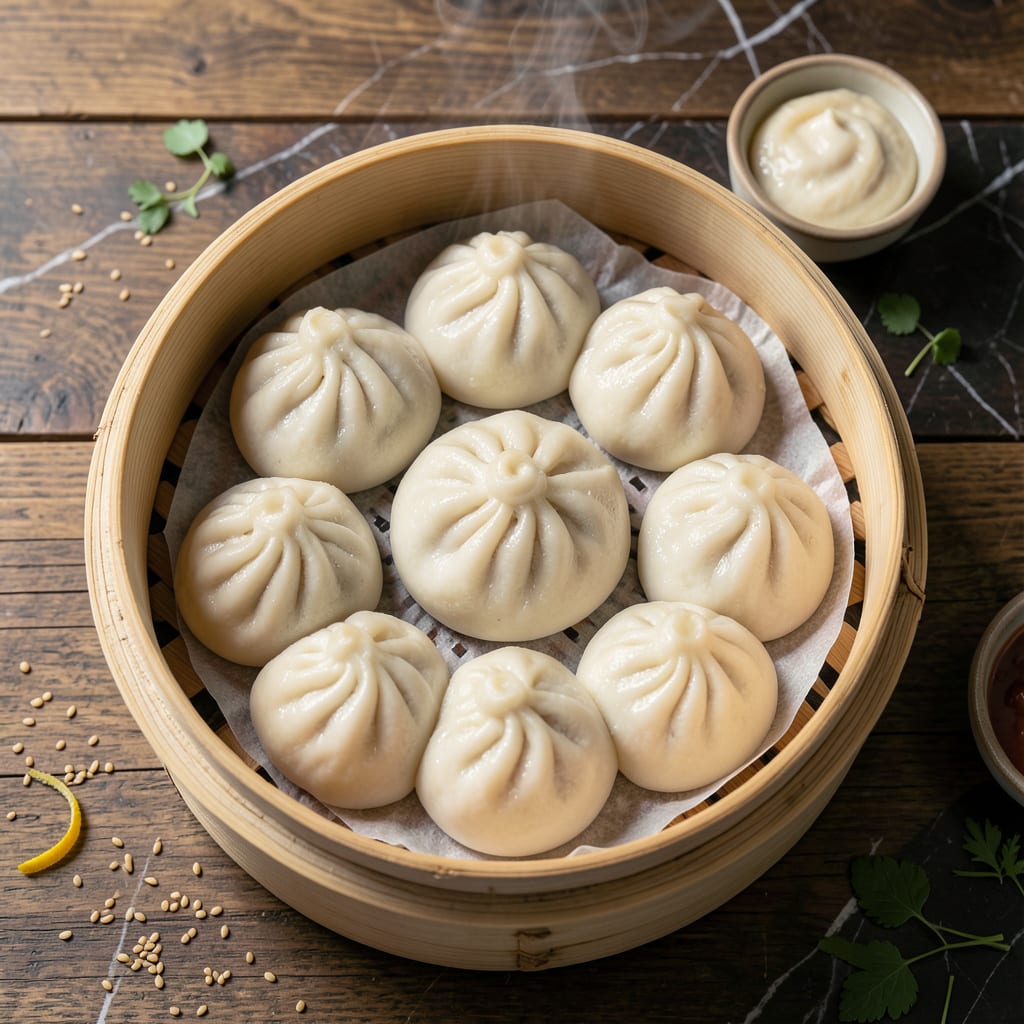
I’ve simplified the art of making pillowy soft steamed buns so anyone can achieve perfect results at home. This method eliminates guesswork with clear steps and foolproof techniques.
In under 2 hours, you’ll have cloud-like buns ready for sweet or savory fillings. The dough comes together easily and steams to a tender, fluffy texture every time.
Ingredients for Steamed Buns Recipe Easy
Pantry staples and a little patience yield these cloud-soft buns ready for any filling.
| Ingredient | Amount | Notes |
|---|---|---|
| All-Purpose Flour 🌾 | 3 cups | Plus extra for dusting |
| Granulated Sugar 🍚 | ¼ cup | Balances yeast activity |
| Active Dry Yeast 🍞 | 2 ¼ tsp | One packet, proofed in warm water |
| Lukewarm Water 💧 | 1 ¼ cups | 110°F for proofing yeast |
| Neutral Oil 🫒 | 2 tbsp | Vegetable or canola oil preferred |
| Baking Powder 🧂 | 1 tsp | For extra lift and fluffiness |
| Salt 🧂 | ½ tsp | Fine sea salt preferred |
| White Vinegar 🍋 | 1 tsp | Tenderizes the dough slightly |
| Sesame Oil 🫒 | 1 tsp | For aromatic depth |
| Cornstarch 🌽 | 2 tbsp | Prevents sticking during steaming |
| Sweet or Savory Fillings 🥟 | 1 cup | Red bean paste, pork, or veggies |
The flour is the foundation here. King Arthur all-purpose is my go-to—consistent protein content for that perfect chew. Yeast matters too: check the expiration date (yes, it expires). I grab mine from Whole Foods bulk section, but any grocery store packet works. Lukewarm water is key—too hot kills the yeast, too cold slows it down. Use a thermometer if you’re unsure (worth the extra minute).
No all-purpose flour? Bread flour at a 1:1 ratio adds chew but can be denser. Out of yeast? This isn’t a great substitute scenario—just wait for a store run. The sugar can be swapped for honey (1:1 ratio), but since this is vegetarian, honey’s fair game. For oil, melted coconut oil works in a pinch, though it adds a slight flavor.
Dough rises best in a warm, draft-free spot—I use my oven with the light on. Once shaped, buns can rest in the fridge for up to 24 hours before steaming. Steamed buns keep for 3 days in an airtight container, but they’re best fresh. Re-steam to revive!
Why You’ll Love This Recipe
- Minimal Ingredients: I already have everything in my pantry—flour, sugar, yeast, water, and oil. No last-minute grocery runs.
- Pillowy Perfection: The yeast and sugar work magic together for that soft, cloud-like texture I crave.
- Endless Fillings: Honestly, I’ve stuffed these with everything from BBQ pork to sweet red bean paste.
- Budget Stretcher: A batch costs pennies and feeds my family for days, or I freeze extras for later.
Step-by-Step Instructions for Steamed Buns
Here’s my foolproof method for achieving those pillowy soft results without the fuss.
Step 1: Proof the Yeast and Activate the Dough Base
In a large bowl, combine the 1.25 cups lukewarm water, 0.25 cup granulated sugar, and 2.25 tsp active dry yeast. Stir gently and let it sit for 5-7 minutes until the mixture becomes frothy and doubles in volume. You’ll see bubbles forming on the surface—that’s how you know the yeast is alive and active.
This step is crucial because inactive yeast won’t leaven your buns properly. The sugar feeds the yeast, creating the gas bubbles that make the dough rise. If you don’t see froth after 10 minutes, your water might have been too hot or cold—start over with fresh yeast.
Step 2: Combine Dry Ingredients and Create the Dough
In a separate bowl, whisk together the 3 cups all-purpose flour, 1 tsp baking powder, and 0.5 tsp salt. Create a well in the center and pour in the proofed yeast mixture, 2 tbsp neutral oil, 1 tsp white vinegar, and 1 tsp sesame oil.
Using a wooden spoon or your hands, mix until a shaggy dough forms. The vinegar tenderizes the gluten slightly, while the sesame oil adds that subtle aromatic depth that makes these buns special. The dough will be sticky at first—resist the urge to add more flour at this stage.
Step 3: Knead and First Rise
Turn the dough out onto a lightly floured surface and knead for 8-10 minutes until smooth and elastic. I like to use the heel of my hand to push the dough away, then fold it back over itself repeatedly. You’ll know it’s ready when the dough springs back slowly when pressed with a finger.
Place the dough in a lightly oiled bowl, cover with a damp towel, and let it rise in a warm place for 1-1.5 hours or until doubled in size. This first rise develops the gluten structure and creates those air pockets that make the buns light and fluffy.
Step 4: Shape and Fill the Buns
Punch down the risen dough to release the air, then turn it out onto a floured surface. Divide the dough into 12 equal portions (about 2.5 oz each). Roll each portion into a ball, then flatten into a 3-inch circle with your hands or a rolling pin.
Place 1-2 tablespoons of the sweet or savory fillings in the center of each circle. Pleat the edges to seal completely, twisting slightly at the top to ensure the filling stays inside. Dust each bun with cornstarch to prevent sticking during steaming.
Step 5: Final Rise and Steam to Perfection
Arrange the buns on parchment paper squares in a steamer basket, leaving 1 inch between each for expansion. Cover and let them rise for 30-45 minutes until puffy. They should look noticeably larger and feel light to the touch.
Bring 1-2 inches of water to a boil in a pot that fits your steamer. Place the basket over the boiling water, cover with a tight-fitting lid, and steam for 15-18 minutes. Don’t lift the lid during steaming—condensation can cause the buns to collapse. They’re done when the dough looks set and slightly translucent. Serve immediately while hot and steamy.
Pro Tips For Making Steamed Buns Recipe Easy
- Test Your Yeast: I learned this the hard way—always dissolve the active dry yeast in lukewarm water with a pinch of sugar first. If it doesn’t foam within 5 minutes, your buns won’t rise.
- Knead Until Smooth: Don’t rush the kneading process; work the dough for at least 8-10 minutes until it’s elastic and smooth. It’ll make shaping the buns way easier.
- Skip Cold Water: Lukewarm water is non-negotiable—too hot kills the yeast, too cold slows it down. Aim for around 110°F, or just warm to the touch.
- Use Parchment Squares: Cut small parchment squares to place under each bun before steaming. This prevents sticking and makes it easy to lift them out without tearing.
Pro Cooking Tips for steamed buns recipe easy
Yeast Activation
Always proof your yeast in 110°F water with sugar first. I use a thermometer to check temperature—too hot kills yeast, too cold slows activation. Look for frothy bubbles within 5-7 minutes, or start over with fresh yeast. This step guarantees your buns will rise properly. 💡
Dough Consistency
The dough should be slightly sticky after mixing. Resist adding extra flour during kneading—the stickiness decreases as you work it for 8-10 minutes. I dust my surface lightly and use a bench scraper to manage the dough.
Perfect Rise
Let the dough double in size in a warm, draft-free spot. My oven with the light on works perfectly. Test readiness by poking the dough—if it springs back slowly, it’s ready. This first rise takes 1-1.5 hours for optimal texture.
Steaming Tips
Use parchment paper squares under each bun to prevent sticking. Keep buns 1 inch apart in the steamer basket. Never lift the lid during steaming—the temperature drop causes collapse. Steam for 15-18 minutes over boiling water. 🔥
Sealing Fillings
When adding fillings, pleat edges tightly and twist at the top to seal. Dust with cornstarch before final rise. This prevents leaks and sticking. I use 1-2 tbsp filling per bun for balanced flavor.
Final Rest
After shaping, let buns rest 30-45 minutes until puffy. They should feel light to touch. This final rise ensures maximum fluffiness. Serve immediately while hot for best texture.
Nutrition Facts
Frequently Asked Questions
What if my yeast doesn’t bubble?
Your water was likely too hot or cold. Always use 110°F water and fresh yeast. If no bubbles appear after 10 minutes, start over with new yeast.
Can I use a different flour?
Bread flour works in a 1:1 ratio for extra chew, but may yield denser buns. Cake flour isn’t recommended as it lacks the protein needed for structure.
Why did my buns collapse after steaming?
Lifting the lid too soon causes temperature drops. Always wait 2 minutes after steaming before opening. Also ensure your yeast was active and dough rose properly.
How do I store leftovers?
Keep in an airtight container for up to 3 days. Re-steam for 5-7 minutes to restore softness before serving.

- 6 Egg Cake Recipe with Oil: Light as Air With Buttery Moisture - October 4, 2026
- 4 Bean Casserole Recipe: One-Pan Heartiness With Smoky Paprika Depth - October 4, 2026
- 3-Ingredient Keto Mug Cake Recipe: Microwave Magic in 2 Minutes - October 4, 2026