
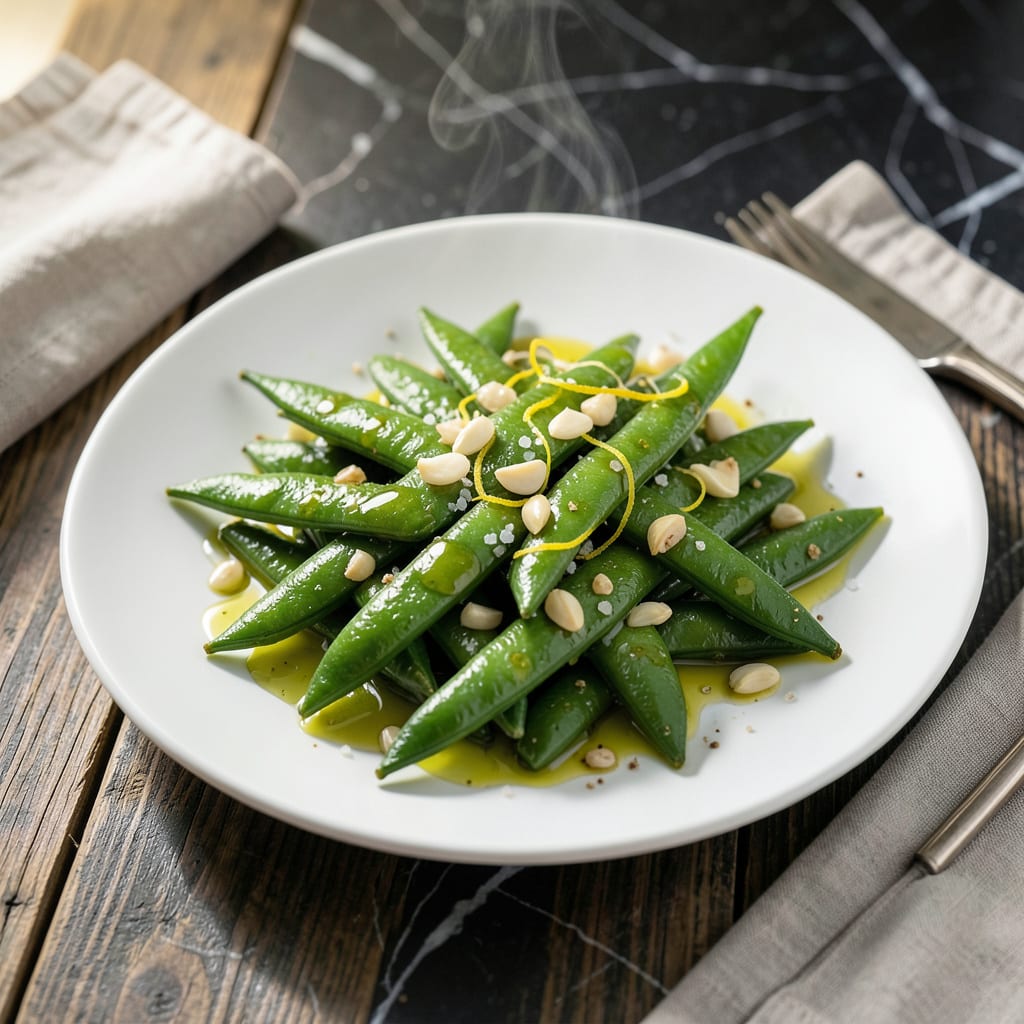
This method delivers perfectly crisp green beans every time with minimal effort and maximum flavor.
Using just a steamer basket and a few simple ingredients, you can achieve vibrant, tender-crisp beans that retain their natural sweetness and bright color.
Ingredients for Steamed Green Beans
Minimal ingredients, maximum flavor for vibrant, crisp green beans every time.
| Ingredient | Amount | Notes |
|---|---|---|
| Fresh Green Beans 🌱 | 1 ½ lb | Trimmed, uniform length |
| Extra-Virgin Olive Oil 🫒 | 2 tbsp | Cold-pressed for best flavor |
| Garlic Cloves 🧄 | 3 cloves | Minced for even distribution |
| Lemon Zest 🍋 | 1 tsp | Finely grated from organic lemon |
| Lemon Juice 🍋 | 1 tbsp | Freshly squeezed for brightness |
| Sea Salt 🧂 | ¾ tsp | Fine grain for even coating |
| Freshly Ground Black Pepper 🌶️ | ½ tsp | Coarse grind preferred |
| Vegetable Broth 🥫 | ¼ cup | Low-sodium for control |
| Toasted Almond Slices 🌰 | ¼ cup | For garnish and crunch |
| Red Pepper Flakes 🌶️ | ¼ tsp | Optional for heat |
The green beans are the star—choose slender, bright green pods without blemishes. Farmers markets have the best selection in season, but Whole Foods or Trader Joe’s carry quality organic options year-round. Look for beans that snap when bent; avoid limp or yellowing ones. The olive oil should be high-quality extra-virgin (California Olive Ranch or Colavita are reliable brands) for optimal flavor impact on the finished dish.
No fresh garlic? Garlic powder at one-third the amount works in a pinch. Lemon zest can be swapped for 1 tsp lemon extract if you’re out of fresh lemons. For the broth, water with a splash of soy sauce mimics the depth. Skip the almonds? Toasted cashews or hazelnuts add a similar crunch. Red pepper flakes can be replaced with a dash of cayenne for heat.
Store unwashed green beans in a perforated bag in the fridge for up to 5 days. The finished dish keeps well, covered, for 2-3 days—reheat gently to preserve crispness. Almonds and zest can be prepped a day ahead and stored separately.
Why You’ll Love This Recipe
- 5-Minute Steamer: I toss the fresh beans in the steamer basket, set the timer, and they’re ready before I finish prepping the garlic.
- Garlic-Lemon Zing: That first bite with the warm garlic, bright lemon zest, and a hit of olive oil? Ridiculously good.
- Pairs With Anything: Honestly, it’s my side for grilled chicken, roast salmon, or even scrambled eggs on a lazy Sunday.
- Penny-Pincher’s Friend: A pound of green beans costs less than a coffee and stretches to feed four—no waste, no fuss.
Step-by-Step Instructions for Steamed Green Beans
This method preserves color, texture, and nutrients with precision timing and technique.
Step 1: Prepare and Trim the Green Beans
Rinse the 1.5 lb Fresh Green Beans thoroughly under cold water to remove any dirt or debris. Pat them completely dry with a clean kitchen towel—excess water will cause steaming instead of searing later.
Trim the stem ends and, if desired, the tail ends for uniform appearance. I cut them into 3-inch lengths to ensure even cooking. This preparation step is crucial for consistent texture and presentation.
Step 2: Blanch the Green Beans to Perfection
Bring a large pot of water to a rolling boil and add the trimmed green beans. Blanch for 2-3 minutes until they turn vibrant green and are just tender-crisp. You want them to retain a slight bite—they’ll continue cooking in the next step.
Immediately drain the beans and plunge them into an ice bath to stop the cooking process. This shock preserves their bright color and crisp texture. Drain again thoroughly and pat dry with paper towels.
Step 3: Sauté Aromatics and Finish the Beans
In a large skillet, heat the 2 tbsp Extra-Virgin Olive Oil over medium heat. Add the 3 cloves Garlic Cloves and sauté for 30 seconds until fragrant but not browned. Stir in the 0.25 tsp Red Pepper Flakes for a subtle kick.
Add the blanched green beans to the skillet and toss to coat in the garlic oil. Pour in the 0.25 cup Vegetable Broth and cook for 1-2 minutes until the liquid reduces slightly. Season with 0.75 tsp Sea Salt and 0.5 tsp Freshly Ground Black Pepper.
Step 4: Add Bright Citrus Notes and Garnish
Remove the skillet from heat and stir in the 1 tsp Lemon Zest and 1 tbsp Lemon Juice. The acidity brightens the flavor and balances the richness of the olive oil. Toss gently to distribute evenly.
Transfer the green beans to a serving dish and sprinkle with the 0.25 cup Toasted Almond Slices for added crunch and visual appeal. The contrast of textures—tender beans, crisp almonds—elevates the dish significantly.
Pro Tips For Making Steamed Green Beans
- Trim the Ends First: Snap or cut off the stem ends of the green beans before steaming—I learned this the hard way when I bit into a tough, woody end mid-dinner.
- Steam for 4-5 Minutes: Don’t overdo it; 4-5 minutes in a steamer basket over boiling water keeps them crisp-tender. After mushy green beans one too many times, I finally started setting a timer.
- Slice Garlic Thin: Thinly slice the garlic instead of mincing so it infuses the oil gently without burning. Sounds fussy, but it actually changes the outcome.
- Zest Before Juicing: Always zest the lemon before cutting it open for juice—my grandmother swore by this, and she was right. It’s the only way to get that bright, citrusy punch without wasting half the flavor.
Common Mistakes When Making This Dish
Overcooking the Beans
Steaming beyond 5-6 minutes turns vibrant green beans into dull, mushy ones. I set a timer for 4 minutes and check for tenderness with a fork—you want a slight crunch. Remember, they continue cooking slightly off the heat. 🌡️
Skipping the Ice Bath
Omitting the ice bath after blanching means your beans keep cooking from residual heat. This step locks in color and crispness. I always have a bowl of ice water ready before I start. It takes 2 minutes but makes all the difference.
Crowding the Steamer
Packing too many beans into your steamer basket creates uneven cooking. I steam in batches, leaving space between beans for heat circulation. A 1.5 lb batch fits comfortably in a 12-inch basket.
Using Old Spices
Stale garlic or red pepper flakes lose their potency, resulting in bland flavor. I store my spices in airtight containers away from light and replace them every 6 months. Fresh minced garlic is always worth the effort.
Forgetting to Salt the Water
Unsalted blanching water produces flat-tasting beans. I add 1 tbsp sea salt per 4 quarts water to infuse flavor from the start. This is your first opportunity to season the dish properly.
Rushing the Drying Step
Wet beans steam instead of searing in the final sauté. I pat them thoroughly with paper towels after blanching. This ensures they get that beautiful glossy coating from the 2 tbsp olive oil rather than boiling in it.
Nutrition Facts
Frequently Asked Questions
How long should I steam the beans for crisp texture?
For perfect tender-crisp results, steam for 4-5 minutes only. Check at 4 minutes—they should bend slightly but still snap. Overcooking turns them mushy.
Can I use frozen green beans instead?
Yes, but thaw and pat completely dry first. Frozen beans release moisture, so skip the blanching step and steam directly for 3-4 minutes to prevent sogginess.
Why do my beans lose their bright color?
This usually means they were overcooked or not shocked in ice water. The ice bath stops cooking immediately, preserving that vibrant green. Always have it ready before steaming.
What can I substitute for almonds?
Try toasted cashews, hazelnuts, or pecans for similar crunch. For nut-free options, crispy fried shallots or breadcrumbs work well.

- 6 Egg Cake Recipe with Oil: Light as Air With Buttery Moisture - October 4, 2026
- 4 Bean Casserole Recipe: One-Pan Heartiness With Smoky Paprika Depth - October 4, 2026
- 3-Ingredient Keto Mug Cake Recipe: Microwave Magic in 2 Minutes - October 4, 2026