
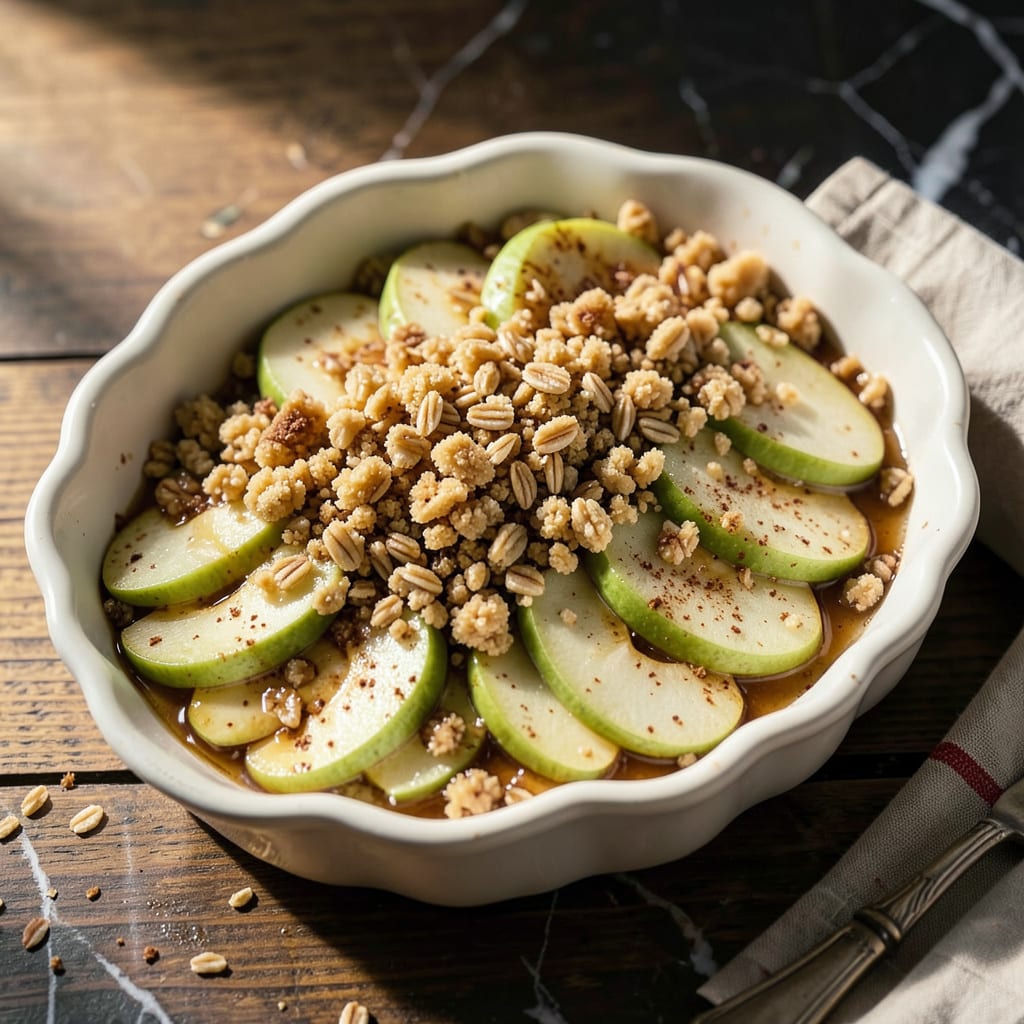
There’s something nostalgic about recreating Stouffer’s Harvest Apples at home—warm cinnamon-spiced apples topped with a buttery oat crumble that tastes just like childhood. This copycat recipe captures the exact balance of tender fruit and crisp topping that made the original so beloved, without any artificial ingredients or preservatives.
The secret lies in baking the apples until just soft while ensuring the oat topping develops a golden, crispy texture. Serve it warm with vanilla ice cream for the full experience, or enjoy it as-is for a comforting dessert that brings back memories with every bite. Perfect for fall gatherings or whenever you crave that familiar taste.
Ingredients for Stouffer’s Harvest Apples Copycat
This nostalgic dessert requires just twelve ingredients to recreate the iconic warm cinnamon-spiced apples with buttery crumble topping.
| Ingredient | Amount | Notes |
|---|---|---|
| Granny Smith apples 🍏 | 6 whole | Peeled, cored, and sliced 1/4-inch thick |
| light brown sugar 🧂 | ¾ cup | Packed for accurate measurement |
| ground cinnamon 🌿 | 2 tsp | Ceylon or Cassia variety acceptable |
| cornstarch 🌾 | 1 tbsp | For thickening apple juices |
| pure vanilla extract 💧 | 1 tsp | Madagascar bourbon preferred |
| old-fashioned rolled oats 🌾 | 1 ½ cups | Not quick-cooking or steel-cut |
| all-purpose flour 🌾 | ¾ cup | Unbleached recommended for texture |
| granulated sugar 🧂 | ½ cup | Superfine for even distribution |
| unsalted butter 🧈 | ¾ cup | Cold and cubed for crumble texture |
| chopped walnuts 🥜 | ½ cup | Toasted for enhanced flavor |
| kosher salt 🧂 | ½ tsp | Diamond Crystal brand preferred |
| fresh lemon juice 🍋 | 1 tbsp | For balancing sweetness |
The apple selection is critical for authentic texture. Granny Smiths provide the necessary tartness and structural integrity during baking, while light brown sugar contributes to the caramelized depth characteristic of the original. For the oat topping, old-fashioned rolled oats are non-negotiable—quick oats become mushy and steel-cut remain too firm. Professional kitchens recommend Diamond Crystal kosher salt for its clean flavor and precise measurement properties.
Substitutions require careful consideration to maintain the dish’s integrity. Gala or Honeycrisp apples may be used if Granny Smiths are unavailable, though baking time may reduce by 5-7 minutes. For nut allergies, raw pepitas offer comparable crunch without flavor compromise. The butter must remain unsalted to control sodium levels; vegan butter substitutes alter the crumble’s structural properties but provide acceptable results when chilled thoroughly before use.
Storage protocols ensure optimal quality retention. The assembled but unbaked dish may be refrigerated for 24 hours before baking, while baked portions maintain quality for 3 days at room temperature or 1 week refrigerated. For extended preservation, freeze baked portions in airtight containers for up to 3 months—reheat at 350°F until warmed through (15-20 minutes) to restore the signature crisp topping texture.
Why You’ll Love This Recipe
- One-Bowl Magic: I love that this comes together with just a mixing bowl and a baking dish—no fancy equipment, no complicated steps. The cornstarch does all the work thickening those tart Granny Smiths into something luscious while you barely lift a finger.
- That Cinnamon-Vanilla Hug: The first time I pulled this from the oven, the smell alone sold me. The brown sugar caramelizes just enough to make the apples tender but not mushy, and that hit of vanilla? It’s the kind of warmth that makes people ask for the recipe before they’ve even finished their first bite.
- Breakfast or Dessert? Yes.: I’ve served this warm with yogurt for a cozy morning, then again that night with vanilla ice cream. Honestly, it’s my secret weapon for potlucks because it’s just as happy on a brunch spread as it is after dinner—no last-minute adjustments needed.
- Leftovers (If They Last): Between us, I’ve stashed this in the fridge for up to four days and the flavors just get deeper. The apples soften a little more, the cinnamon mellows—perfect for spooning over oatmeal or eating straight from the container when no one’s looking. (Not that I’ve done that. Often.)
Step-by-Step Instructions for Stouffer’s Harvest Apples
Follow this precise method to recreate the signature warm cinnamon apple dish with perfect texture and balance.
Step 1: Prepare the Apple Filling
Begin by peeling, coring, and slicing the 6 whole Granny Smith apples into uniform ¼-inch thick slices. The consistent thickness ensures even cooking throughout the dish. Immediately toss the sliced apples with 1 tbsp fresh lemon juice to prevent browning and preserve their vibrant color.
In a large mixing bowl, combine the apples with 0.75 cup light brown sugar, 2 tsp ground cinnamon, 1 tbsp cornstarch, and 1 tsp pure vanilla extract. The cornstarch will thicken the natural juices released during baking, creating that characteristic syrupy consistency. Stir gently but thoroughly to coat all apple slices evenly without breaking them.
Step 2: Create the Oat Crumble Topping
In a separate bowl, combine 1.5 cups old-fashioned rolled oats, 0.75 cup all-purpose flour, 0.5 cup granulated sugar, 0.5 cup chopped walnuts, and 0.5 tsp kosher salt. Use your fingers to break up any clumps in the brown sugar and ensure even distribution of ingredients throughout the mixture.
Add 0.75 cup unsalted butter that has been cubed while cold. Work the butter into the dry ingredients using your fingertips or a pastry cutter until the mixture resembles coarse crumbs with pea-sized butter pieces visible. This texture is crucial for achieving the signature crispy-yet-tender topping that makes this dish so comforting.
Step 3: Assemble and Bake
Transfer the apple mixture to a 9×13-inch baking dish, spreading it evenly across the bottom. The apples should form a single layer without significant overlapping to ensure proper cooking. Pour any accumulated juices from the bowl over the apples to maximize flavor in every bite.
Sprinkle the oat crumble topping evenly over the apples, pressing down gently in spots to create some compacted areas. This variation in texture mimics the original dish’s combination of crispy and chewy elements. Place the dish on the middle rack of a preheated 375°F oven and bake uncovered for 40-45 minutes.
Step 4: Finish and Serve
The dish is properly baked when the topping develops a deep golden brown color and the apple juices bubble vigorously around the edges. These visual cues indicate that the cornstarch has fully activated to thicken the filling while the oats have achieved the perfect crispness.
Remove from the oven and let rest for 10 minutes before serving. This brief resting period allows the filling to set slightly and prevents the juices from running excessively when plated. Serve warm in bowls to showcase the layered textures, with the crisp topping contrasting beautifully against the tender, cinnamon-infused apples beneath.
Storing and Reheating This Dish
Room Temperature Storage
Once completely cooled, you can store this comforting apple dessert at room temperature for up to 2 days in an airtight container. I like using glass containers with snap-tight lids to keep the topping crisp. Just make sure the dish has cooled completely first—condensation from warm apples will make the topping soggy. 💡
Refrigerator Storage
For longer freshness, transfer your harvest apples to the refrigerator where they’ll keep beautifully for 4-5 days. I recommend storing in a shallow container to prevent the topping from getting compressed. When ready to enjoy, simply reheat portions in the microwave or oven to restore that just-baked warmth.
Microwave Reheating
Place individual portions on a microwave-safe plate and cover loosely with a damp paper towel. Heat on 50% power for 1-2 minutes, then check and continue in 30-second bursts until warmed through. The damp towel helps prevent the topping from drying out while ensuring the apples stay tender.
Oven Reheating
For best texture revival, preheat your oven to 350°F and place portions in an oven-safe dish. Cover with aluminum foil and warm for 10-15 minutes, then remove the foil for the last 2-3 minutes to crisp the topping. This method brings back that fresh-baked quality we all love.
Freezing for Later
You can freeze baked portions for up to 3 months in airtight containers or heavy-duty freezer bags. I recommend freezing in individual servings for easy reheating. When ready to enjoy, thaw overnight in the refrigerator before reheating using your preferred method. The texture remains remarkably close to fresh! ❄️
Make-Ahead Tips
Prepare the apple filling and topping separately up to 24 hours ahead, storing each in sealed containers in the fridge. Assemble and bake just before serving for maximum freshness. The flavors actually develop more overnight, making this perfect for holiday gatherings when you want to minimize day-of prep.
Nutrition Facts

- 6 Egg Cake Recipe with Oil: Light as Air With Buttery Moisture - October 4, 2026
- 4 Bean Casserole Recipe: One-Pan Heartiness With Smoky Paprika Depth - October 4, 2026
- 3-Ingredient Keto Mug Cake Recipe: Microwave Magic in 2 Minutes - October 4, 2026