
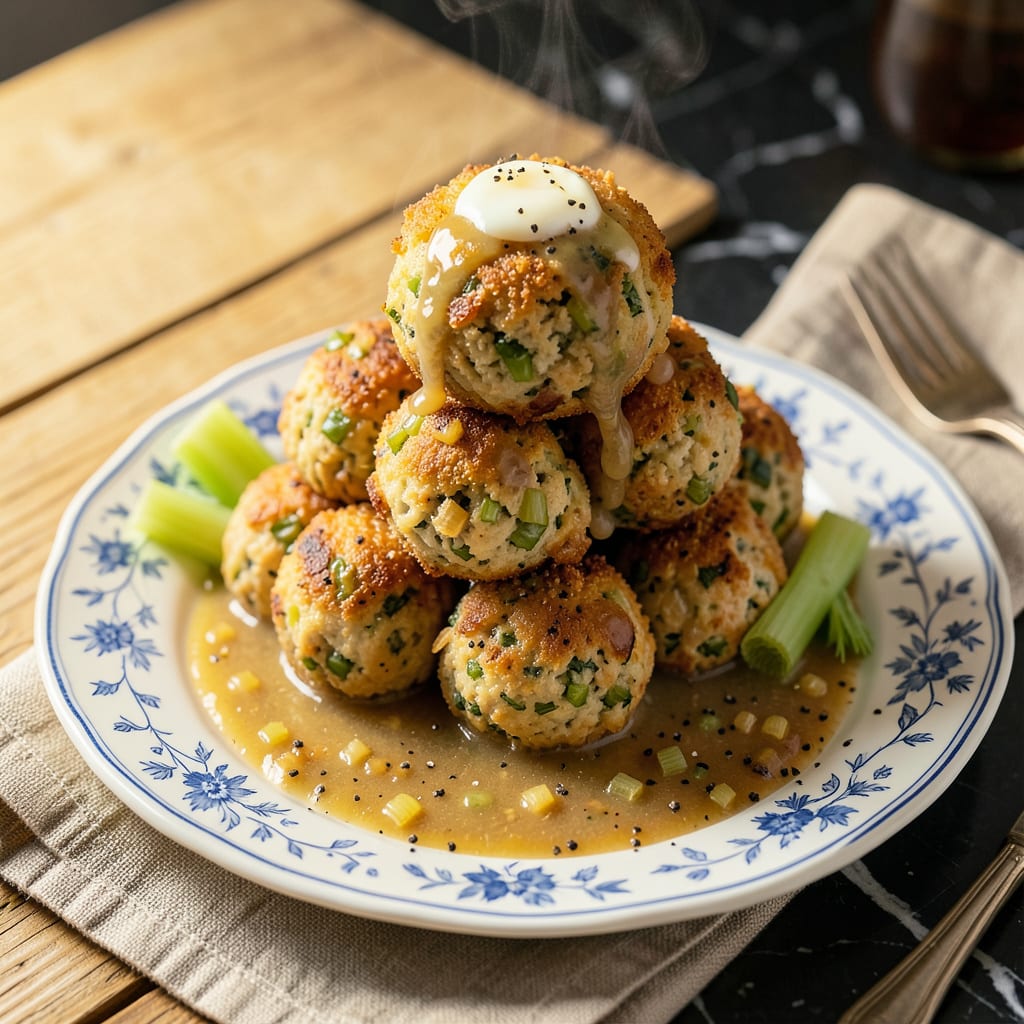
There’s a reason these stuffing balls have become my go-to holiday side—they deliver the perfect balance of crispy golden exteriors and tender, flavorful centers every time. This method transforms simple boxed stuffing mix into restaurant-worthy bites with minimal effort and maximum impact.
The secret lies in proper moisture control and high-heat cooking. By combining the stuffing mix with just enough liquid to bind without making it soggy, then pan-frying until golden, you achieve that ideal contrast of textures. These versatile bites pair beautifully with roasted meats or stand alone as an appetizer.
Ingredients for Stove Top Stuffing Balls
Boxed mix gets a gourmet upgrade with fresh herbs, veggies, and the perfect crispy coating.
| Ingredient | Amount | Notes |
|---|---|---|
| Stove Top Stuffing Mix 🍞 | 6 oz | Chicken or herb flavor preferred |
| Large Eggs 🥚 | 2 whole | Lightly beaten for binding |
| Low-Sodium Chicken Broth 🍲 | ¾ cup | Warm, for proper hydration |
| Unsalted Butter 🧈 | 2 tbsp | Melted, for moisture control |
| Yellow Onion 🧅 | ⅓ cup | Finely diced, sautéed until translucent |
| Celery Stalks 🌿 | 2 whole | Finely chopped for texture |
| Fresh Parsley 🍃 | 2 tbsp | Chopped, for freshness |
| Dried Sage 🌿 | ½ tsp | Rubbed between palms to release oils |
| Garlic Powder 🧄 | ½ tsp | For even flavor distribution |
| Kosher Salt 🧂 | ¼ tsp | Diamond Crystal preferred |
| Freshly Ground Black Pepper 🌶️ | ¼ tsp | Medium-coarse grind |
| Vegetable Oil 🫒 | ½ cup | For frying, high smoke point |
| All-Purpose Flour 🌾 | ¼ cup | For dredging before frying |
The stuffing mix is your shortcut, but the fresh add-ins make it special. I always use Stove Top Herb for that classic flavor—Kraft is the most reliable. The onion and celery need to be finely diced (almost minced) so they blend right into the texture. For the broth, Swanson’s low-sodium gives you control over salt. Don’t skip sautéing the veggies—it’s worth the extra 5 minutes for that depth of flavor (the raw onion taste disappears).
No chicken broth? Vegetable broth works perfectly—just use the same amount. Out of fresh parsley? Dried at half the quantity, though fresh really brightens it up. The flour dredge is key for that restaurant-style crust, but panko breadcrumbs make it extra crispy if you’ve got them. Egg substitute? Flax eggs (2 tbsp ground flax + 6 tbsp water) bind just as well for vegan versions.
Mix can be prepped 1 day ahead—keep it covered in the fridge. Fry just before serving for maximum crispiness. Leftovers reheat best in the air fryer (350°F for 3-4 minutes) to revive the crunch. The uncooked balls freeze well for up to 3 months—thaw overnight before frying.
Why You’ll Love This Recipe
- One Bowl Magic: I dump the Stove Top mix, sautéed onion, eggs, and broth straight into one bowl—no fancy prep, no extra dishes. The butter gets folded in last, and honestly? That’s the most complicated part.
- That Crispy-Golden Moment: When you bite into the buttery crust and hit the soft, herby center? It’s like Thanksgiving stuffing met a perfectly fried croquette. The onion adds just enough sweetness to balance the savory broth.
- Holiday or Tuesday Night: I’ve served these at Thanksgiving (crowd favorite) and as a quick side with rotisserie chicken on a random Wednesday. They reheat beautifully—if there are leftovers, which is rare.
- $5 Feeds Four: A box of Stove Top, an onion, and pantry staples? That’s it. I stretch this into a full meal with a salad or roasted veggies, and no one complains—especially my wallet.
Step-by-Step Instructions for Stove Top Stuffing Balls
Here’s the foolproof method for achieving that perfect balance of crispy exterior and tender, flavorful center.
Step 1: Sauté the Aromatic Base
Heat the 2 tablespoons unsalted butter in a large skillet over medium heat. When the butter stops foaming, add the 0.33 cup yellow onion and 2 whole celery stalks (finely chopped). Sauté for 5-6 minutes until the vegetables soften and the onion becomes translucent.
This step builds the flavor foundation. The celery should lose its raw crunch but still retain some texture. Stir in the 0.5 teaspoon dried sage, 0.5 teaspoon garlic powder, 0.25 teaspoon kosher salt, and 0.25 teaspoon freshly ground black pepper. Cook for 1 additional minute until fragrant.
Step 2: Prepare the Stuffing Mixture
Transfer the sautéed vegetables to a large mixing bowl. Add the 6 oz Stove Top Stuffing Mix, 0.75 cup low-sodium chicken broth, and 2 whole large eggs (lightly beaten). The mixture should be moist but still hold its shape when pressed together.
Use your hands to gently mix everything until evenly combined. The stuffing should feel slightly sticky but not wet. If it seems too dry, add 1 additional tablespoon of chicken broth. Fold in the 2 tablespoons fresh parsley at the end to preserve its fresh flavor.
Step 3: Form and Chill the Balls
Using your hands, shape the mixture into 1.5-inch balls (about the size of a golf ball). You should get approximately 16-18 balls from this mixture. Arrange them on a parchment-lined baking sheet.
Refrigerate the formed balls for at least 30 minutes (or up to 2 hours). This chilling step is crucial—it helps the balls hold their shape during frying and prevents them from falling apart. The surface will develop a slight crust that helps achieve that perfect crispy exterior.
Step 4: Fry to Golden Perfection
Heat the 0.5 cup vegetable oil in a deep skillet over medium-high heat until it reaches 350°F. While the oil heats, place the 0.25 cup all-purpose flour in a shallow dish. Lightly roll each chilled stuffing ball in the flour, shaking off any excess.
Fry the balls in batches (don’t overcrowd the pan) for 2-3 minutes per side until they’re deep golden brown all over. Use a slotted spoon to transfer them to a paper towel-lined plate to drain. The internal temperature should reach 165°F for perfect doneness.
Step 5: Serve Immediately for Best Texture
These stuffing balls are best served fresh from the fryer when they’re at their crispiest. Arrange them on a serving platter and garnish with any remaining fresh parsley. The exterior should have an audible crunch when bitten into, giving way to a moist, flavorful center.
For serving, provide toothpicks or small forks. If you need to keep them warm before serving, place them on a wire rack in a 200°F oven for up to 15 minutes—this prevents the bottoms from getting soggy while maintaining crispness.
Essential Equipment for stove top stuffing balls
Deep Skillet Essentials
A heavy-bottomed 12-inch cast iron skillet is my top choice for frying these stuffing balls—it maintains even heat and develops that perfect crust. I use my Lodge 12-inch because it’s naturally non-stick when properly seasoned. The deep sides prevent oil splatter while giving you room to fry in batches. 🔥
Precision Thermometer
Don’t guess your oil temperature—a digital instant-read thermometer is crucial for that 350°F sweet spot. I swear by my ThermoWorks ThermoPop because it gives accurate readings in 2-3 seconds. Too hot and the outside burns before the center cooks; too cool and you’ll get greasy results.
Mixing Bowl Setup
A large stainless steel mixing bowl (at least 4-quart capacity) gives you plenty of room to combine ingredients without spilling. I prefer Cuisinart’s stainless bowls because they’re lightweight yet durable. The wide surface area makes it easier to shape uniform balls without sticking.
Cooling Rack System
After frying, transfer balls to a wire cooling rack set over a baking sheet—not paper towels. This allows air circulation to maintain crispness on all sides. I use OXO’s non-slip rack because it’s sturdy and dishwasher-safe. The elevated design prevents soggy bottoms while excess oil drips away.
Portioning Tools
A 1.5-inch cookie scoop ensures perfectly sized balls every time. I love my OXO medium scoop—it releases cleanly and creates uniform portions. For shaping, keep a small bowl of water nearby to wet your hands slightly, preventing the mixture from sticking to your fingers.
Oil Management
Use a fine-mesh skimmer to remove any stray breadcrumbs between batches, keeping your oil clean. I store my frying oil in a glass jar with a pour spout for easy reuse. Never reuse oil more than 2-3 times—it breaks down and affects flavor. The 350°F temperature is non-negotiable for that ideal crunch. ✨
Nutrition Facts

- 6 Egg Cake Recipe with Oil: Light as Air With Buttery Moisture - October 4, 2026
- 4 Bean Casserole Recipe: One-Pan Heartiness With Smoky Paprika Depth - October 4, 2026
- 3-Ingredient Keto Mug Cake Recipe: Microwave Magic in 2 Minutes - October 4, 2026