
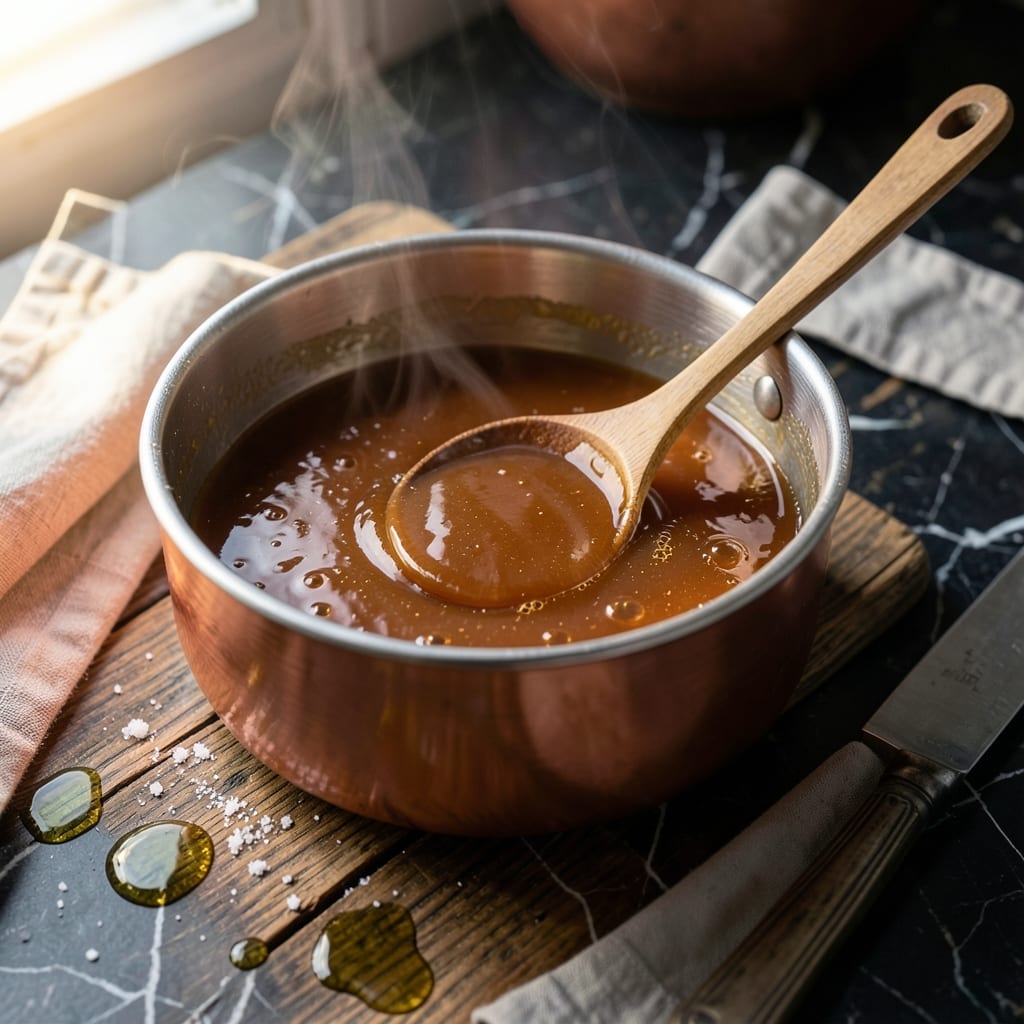
This sugar wax recipe uses only 3 simple ingredients to create an effective hair removal solution at home. No lemon means no skin irritation for sensitive users.
The mixture combines sugar, water, and a natural acid substitute to achieve the right consistency. The process requires careful heating and cooling to ensure proper texture.
You’ll achieve smooth results without the harsh chemicals found in commercial products. This method has been trusted for generations in many cultures.
The wax adheres only to hair, not skin, making removal less painful than other techniques. Cleanup is easy with warm water.
Ingredients for Sugar Wax Recipe Without Lemon
Three simple components deliver professional-grade hair removal without harsh additives or citrus irritation.
| Ingredient | Amount | Notes |
|---|---|---|
| Granulated White Sugar 🍚 | 2 cups | Fine grain for smooth texture |
| Water 💧 | ¼ cup | Filtered for purity |
| Apple Cider Vinegar 🍎 | 2 tbsp | Natural acid substitute for lemon |
The sugar must be fine granulated white sugar—organic or raw varieties can alter the melting point and texture. Domino or C&H brands work reliably. Use filtered water to prevent mineral deposits from affecting the wax consistency. Apple cider vinegar provides the necessary acidity without lemon’s potential skin irritation. Bragg is a trusted brand for quality.
No apple cider vinegar? White vinegar at the same amount works in a pinch, though the color may be slightly different. Avoid balsamic or wine vinegars—their flavors and colors will transfer to the wax. The sugar quantity is precise; do not reduce or the mixture won’t reach the proper consistency for effective hair removal.
Store the finished wax in an airtight container at room temperature for up to 3 months. Reheat gently in a microwave or double boiler before use. If the mixture crystallizes, add 1 tsp of water and stir while reheating (worth the extra minute).
Why You’ll Love This Recipe
- 3-Ingredient Magic: I just grab sugar, water, and apple cider vinegar—no hunting for lemon juice or fancy additives.
- Subtle Sweetness: The vinegar cuts the sugar just enough to make it smooth without that sharp citrus tang.
- Works Everywhere: Honestly, I use this for legs, arms, even brows—one batch covers all my waxing needs.
Step-by-Step Instructions for Sugar Wax Without Lemon
This method delivers professional-grade hair removal with ingredients you already have at home.
Step 1: Combine Ingredients in a Heavy-Bottomed Saucepan
In a medium, heavy-bottomed saucepan, add the 2 cups Granulated White Sugar, 0.25 cup Water, and 2 tbsp Apple Cider Vinegar. The heavy base prevents hot spots that can cause burning. Stir just enough to moisten the sugar—over-stirring can cause crystallization.
Use a wooden spoon or silicone spatula, as metal can react with the vinegar. The mixture will look like wet sand at this stage. Make sure all the sugar is submerged in the liquid to ensure even melting. This is the foundation of your wax, so precision here prevents graininess later.
Step 2: Heat and Melt the Sugar Mixture
Place the saucepan over medium heat and bring to a gentle simmer. Do not stir once the mixture starts heating—this can cause sugar crystals to form on the sides of the pan. Instead, gently swirl the pan occasionally to distribute heat evenly.
Watch for the sugar to dissolve completely, which takes about 5-7 minutes. The mixture will turn from cloudy to transparent as the sugar melts. If you notice any sugar crystals on the sides of the pan, use a pastry brush dipped in water to dissolve them. This step requires patience; rushing it risks burning the sugar.
Step 3: Cook to the Correct Temperature and Consistency
Once the sugar is fully dissolved, stop swirling the pan and allow the mixture to cook undisturbed. Insert a candy thermometer and cook until the temperature reaches 240-250°F (soft-ball stage). If you don’t have a thermometer, test by dropping a small amount into cold water—it should form a pliable ball.
The mixture will turn a light golden amber color, similar to honey. At this stage, the wax should be thick but still pourable. Avoid cooking beyond 250°F, as it will become too hard and difficult to spread. The vinegar helps stabilize the mixture, preventing it from turning brittle.
Step 4: Cool Slightly and Test the Wax
Remove the saucepan from heat and let the wax cool for 5-10 minutes. It should thicken slightly but still be warm enough to spread. To test, drip a small amount onto a plate and let it cool for 30 seconds. It should be tacky but not sticky, and it should hold its shape when pulled.
If the wax is too runny, return it to low heat for another 1-2 minutes, then test again. If it’s too thick, stir in a few drops of warm water to loosen it. The ideal consistency is similar to warm honey—smooth, spreadable, and slightly elastic.
Step 5: Store and Use for Hair Removal
Transfer the wax to a clean, heatproof container and let it cool completely to room temperature. The wax will continue to thicken as it cools. Store it in an airtight container at room temperature for up to 3 months.
To use, warm the wax slightly in the microwave or a double boiler until it’s spreadable but not hot. Apply a thin layer to the skin in the direction of hair growth, place a cloth strip over it, and pull quickly against the hair growth. The wax should remove hair cleanly with minimal discomfort, leaving skin smooth.
Pro Tips For Making Sugar Wax Recipe Without Lemon
- Use Medium Heat: I learned this the hard way—too high and the sugar burns before the vinegar can do its work, medium heat lets it melt evenly without scorching.
- Measure the Vinegar: After ruining a batch with too much, I now stick to 1 tablespoon apple cider vinegar per cup of sugar—it balances the sweetness without overpowering.
- Skip Stirring After Boiling: Resist the urge to stir once it starts boiling; it causes sugar crystals to form on the sides, which can ruin your smooth wax.
- Test with Cold Water: Drop a bit into ice water to check consistency—when it forms a firm but pliable ball, it’s ready, no guesswork needed.
Troubleshooting This Recipe
Too Runny Wax
If your wax is too thin, return it to low heat for 1-2 minutes. Test frequently by dripping a small amount on a plate. It should form a pliable ball when cooled for 30 seconds. Avoid high heat to prevent burning.
Overly Thick Wax
When the mixture becomes too thick, stir in 1 tsp of warm water at a time until it reaches a honey-like consistency. Reheat gently if needed, but don’t add cold water—it can cause crystallization.
Crystallization Issues
If sugar crystals form, dissolve them with a pastry brush dipped in warm water. Prevent this by avoiding stirring after the mixture begins heating. A heavy-bottomed saucepan also helps distribute heat evenly. 💡
Temperature Problems
Use a candy thermometer for precision, aiming for 240-250°F. Without one, test by dropping wax into cold water—it should form a soft ball. Cooking beyond 250°F makes the wax too hard.
Skin Irritation
If irritation occurs, it may be due to residue on the skin. Cleanse with warm water and a mild soap immediately after waxing. Patch-test a small area first to check for sensitivity.
Storage Troubles
If wax hardens in storage, reheat gently in the microwave or double boiler. Add 1 tsp water and stir to restore consistency. Store in an airtight container at room temperature. ❄️
Nutrition Facts
Frequently Asked Questions
Why skip lemon in sugar wax?
Lemon can irritate sensitive skin, especially after hair removal. Apple cider vinegar provides the needed acidity without the same risk. It’s gentler while still helping the wax reach the right consistency.
How long does homemade sugar wax last?
Stored in an airtight container at room temperature, it keeps for up to 3 months. If it hardens, reheat gently with a splash of water. Avoid refrigeration as it can introduce moisture.
Can I use white vinegar instead of apple cider?
Yes, white vinegar works in the same 2 tablespoon amount. The color may be slightly lighter, but the performance is identical. Avoid stronger vinegars like balsamic, which can discolor the wax.
What if my wax turns too dark?
Dark color means it’s overcooked. Unfortunately, there’s no fixing burnt wax—start fresh. Next time, watch the temperature closely and remove from heat at 250°F maximum.

- 6 Egg Cake Recipe with Oil: Light as Air With Buttery Moisture - October 4, 2026
- 4 Bean Casserole Recipe: One-Pan Heartiness With Smoky Paprika Depth - October 4, 2026
- 3-Ingredient Keto Mug Cake Recipe: Microwave Magic in 2 Minutes - October 4, 2026