
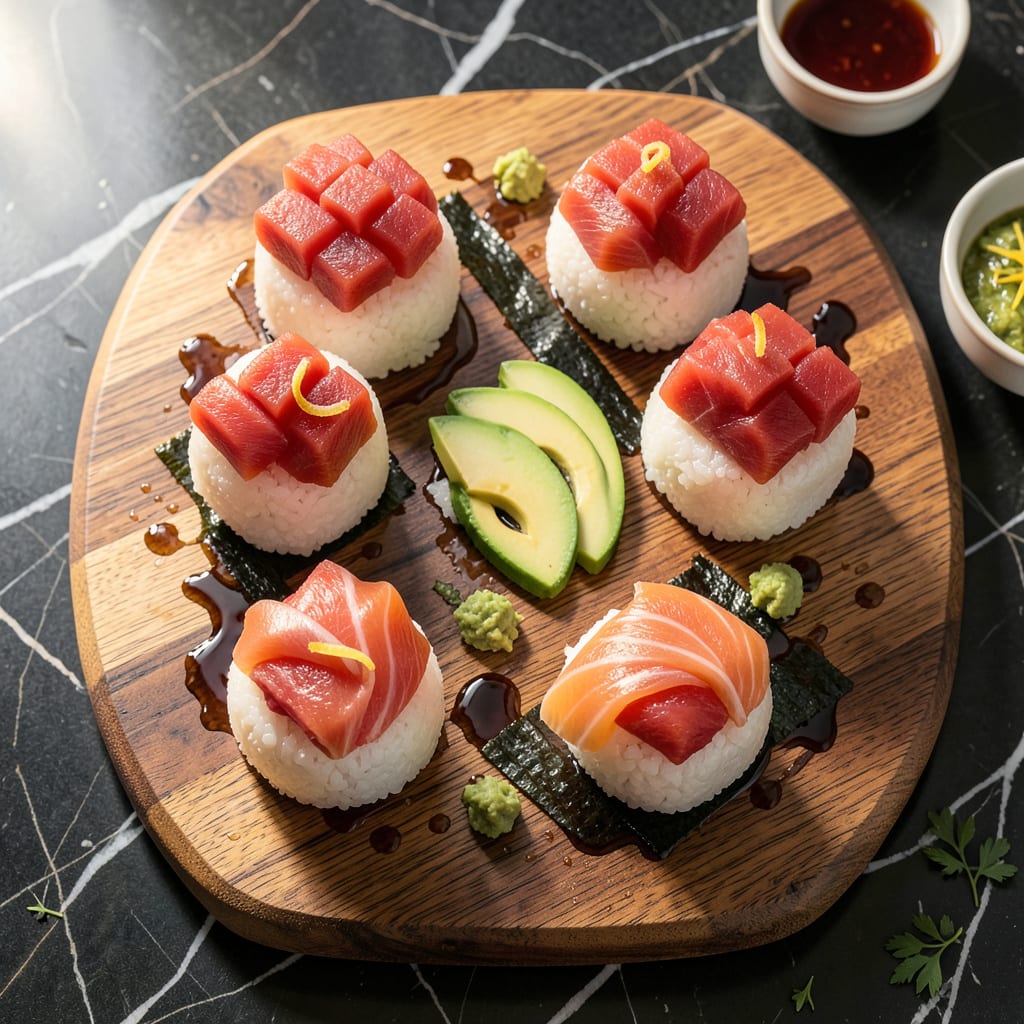
Creating perfect sushi balls at home delivers restaurant-quality flavor in a fun, handheld format. This method transforms traditional sushi ingredients into elegant, bite-sized spheres that impress guests while remaining approachable for home cooks. The technique balances precision with simplicity, ensuring each ball maintains its shape without sacrificing texture or taste.
The foundation lies in properly seasoned sushi rice—tender yet firm enough to hold fillings like fresh tuna, smoked salmon, or avocado. With just 20 minutes of active preparation, you can assemble a platter of these umami-packed bites. The presentation possibilities are endless, making them ideal for parties, appetizers, or creative weeknight meals.
Ingredients for Sushi Ball
These precise ingredients transform traditional sushi components into elegant, restaurant-quality bite-sized spheres with balanced umami and texture.
| Ingredient | Amount | Notes |
|---|---|---|
| Sushi Rice 🍚 | 2 cups | Short-grain, rinsed until clear |
| Rice Vinegar 🍶 | ⅓ cup | Unseasoned, for rice dressing |
| Granulated Sugar 🍬 | 2 tbsp | Dissolved in vinegar mixture |
| Sea Salt 🧂 | 1 tsp | Fine grain, for seasoning |
| Sashimi-Grade Tuna 🐟 | ½ lb | Diced into ¼-inch cubes |
| Smoked Salmon 🐟 | ¼ lb | Thinly sliced, flaked |
| Avocado 🥑 | 1 whole | Ripe but firm, diced |
| Japanese Mayonnaise 🥫 | 3 tbsp | Kewpie brand preferred |
| Sriracha Sauce 🌶️ | 1 tbsp | For spicy mayo blend |
| Nori Sheets 🌿 | 2 sheets | Toasted, cut into strips |
| Sesame Seeds 🌰 | 2 tbsp | Toasted, for garnish |
| Pickled Ginger 🌸 | ¼ cup | Thinly sliced, for serving |
| Soy Sauce 🫙 | ¼ cup | Low-sodium preferred |
| Wasabi Paste 🌿 | 1 tbsp | For optional heat |
| Cucumber 🥒 | ½ whole | Seeds removed, finely diced |
The sushi rice quality is paramount. Optimal results require short-grain Japanese rice—Nishiki or Koshihikari brands deliver superior texture and stickiness. Rice vinegar must be unseasoned; avoid pre-mixed sushi vinegar as it contains additives that alter flavor balance. For the fish components, sashimi-grade tuna and smoked salmon are non-negotiable for safety and flavor. Source from reputable seafood counters like Whole Foods or local Japanese markets where turnover is high, ensuring maximum freshness. The avocado should be Hass variety, selected for its creamy texture and mild flavor profile that complements rather than overpowers the fish.
Substitutions require careful consideration to maintain structural integrity. Imitation crab can replace tuna for budget-conscious preparations, though the flavor profile will shift. For vegetarian adaptations, substitute fish with marinated tofu cubes or mushroom duxelles for umami depth. Regular mayonnaise works in place of Japanese mayo, but the flavor will lack the signature tang. If nori sheets are unavailable, furikake seasoning provides similar oceanic notes. The cucumber can be omitted if water content is a concern, though it adds essential freshness. Always maintain the 2:1 rice-to-filling ratio to ensure proper ball formation and structural stability during assembly.
Storage demands precision to preserve texture and safety. Prepared sushi balls keep for 24 hours refrigerated in an airtight container with damp paper towels to prevent drying. Consume fish-filled versions within 12 hours for optimal freshness. Unused rice holds for 3 days refrigerated, while fillings like avocado should be prepared fresh. For presentation longevity, assemble components separately and compose balls immediately before serving. The sesame seeds and nori strips are best stored in cool, dark conditions to maintain their aromatic qualities and prevent rancidity.
Why You’ll Love This Recipe
- I’ll be real: my first attempt at sushi rolls ended with rice everywhere and a very sad kitchen. These balls? Just press the seasoned rice around the tuna—no bamboo mat, no frustration. The vinegared rice sticks together like magic when you pack it tight.
- No Rolling Required: I’ll be real: my first attempt at sushi rolls ended with rice everywhere and a very sad kitchen. These balls? Just press the seasoned rice around the tuna—no bamboo mat, no frustration. The vinegared rice sticks together like magic when you pack it tight.
- That First Bite: Honestly, the contrast gets me every time—the cool, buttery tuna against the slightly sweet, tangy rice, with a hit of salt to tie it all together. I skip the soy sauce sometimes just to taste the ingredients shine (yes, it’s that good).
- Party Trick or Solo Dinner: I’ve served these at game nights and also eaten four straight from the fridge at midnight. They’re just as at home on a platter with pickled ginger as they are in my lunchbox the next day. Between us, they impress way more than the effort suggests.
Step-by-Step Instructions for Sushi Balls
This method ensures perfectly seasoned rice and balanced flavor combinations in every bite-sized creation.
Step 1: Prepare the Sushi Rice Base
Begin by thoroughly rinsing the 2 cups Sushi Rice under cold water until the water runs clear. This removes excess starch and prevents gummy texture. Cook the rice according to package instructions, then transfer to a large wooden bowl.
In a small saucepan, combine the 0.33 cup Rice Vinegar, 2 tbsp Granulated Sugar, and 1 tsp Sea Salt. Heat gently until the sugar and salt fully dissolve. Immediately pour this mixture over the warm rice while folding gently with a rice paddle. The rice should glisten slightly and feel tacky but not wet. Allow it to cool to room temperature before proceeding.
Step 2: Prepare the Filling Components
Dice the 0.5 lb Sashimi-Grade Tuna into ¼-inch cubes and transfer to a chilled bowl. Thinly slice the 0.25 lb Smoked Salmon and gently flake it into small pieces. Cut the 1 whole Avocado into small dice just before assembly to prevent browning.
In a separate bowl, combine the 3 tbsp Japanese Mayonnaise with the 1 tbsp Sriracha Sauce to create a spicy mayo. Finely dice the 0.5 whole Cucumber after removing seeds, and cut the 2 sheets Nori Sheets into thin strips. Toast the 2 tbsp Sesame Seeds in a dry pan until fragrant and golden.
Step 3: Assemble the Sushi Balls
With damp hands to prevent sticking, take about 2 tablespoons of the seasoned rice and gently press it into a compact ball. Create a small indentation in the center and add your chosen filling – either the tuna, smoked salmon, or avocado. For the tuna version, add a small dollop of the spicy mayo mixture.
Carefully reshape the rice around the filling, applying gentle pressure to ensure the ball holds together without compacting too tightly. The finished balls should be approximately 1.5 inches in diameter. Immediately wrap each ball with a strip of nori, pressing lightly to adhere. The nori should wrap about three-quarters around the ball, leaving some rice visible.
Step 4: Garnish and Serve
Arrange the completed sushi balls on a serving platter. Lightly brush the exposed rice portions with a small amount of the 0.25 cup Soy Sauce and sprinkle with the toasted sesame seeds. The seeds should adhere to the moist rice surface, creating visual contrast and textural interest.
Serve immediately with the remaining soy sauce, 0.25 cup Pickled Ginger, and 1 tbsp Wasabi Paste on the side. For optimal flavor balance, encourage diners to combine a small amount of wasabi with soy sauce for dipping. The sushi balls are best enjoyed within 2 hours of assembly for peak freshness and texture.
Storing and Reheating sushi ball
Short-Term Refrigeration
After assembling your sushi balls, place them in a single layer on a tray lined with plastic wrap. Cover loosely with another layer of plastic wrap and refrigerate at 38-40°F for up to 4 hours. I like to add a damp paper towel over the tray to maintain humidity, which prevents the rice from drying out. 💡
Fish-Filled Storage
For sushi balls containing raw fish like tuna or smoked salmon, consume within 2 hours of preparation for safety. If you must store them, place in an airtight container with a paper towel to absorb excess moisture. The rice will firm up in the fridge, so let them sit at room temperature for 10 minutes before serving to restore texture.
Vegetarian Version Storage
Avocado-filled sushi balls keep slightly longer—up to 6 hours refrigerated. To prevent browning, brush the exposed avocado with a thin layer of lemon juice before storing. I recommend keeping the nori strips separate until serving to maintain their crispness. Store in a container with a tight-fitting lid to minimize air exposure.
Reheating Not Recommended
Sushi balls are best enjoyed cold or at room temperature. Reheating alters the delicate rice texture and can make fish fillings rubbery. If you must warm them, use a steam basket over simmering water for 30 seconds max—just enough to take the chill off. Never microwave, as this will ruin both texture and flavor.
Freezing Considerations
While not ideal, you can freeze the cooked rice portion alone for up to 1 month. Portion into 2-tablespoon balls on a tray, freeze solid, then transfer to a freezer bag. Thaw in the fridge overnight before assembling with fresh fillings. The rice texture will be slightly different but still usable for casual meals.
Presentation Refresh
If stored sushi balls look dry, lightly brush the rice with a mixture of 1 tsp soy sauce and 1 tsp water. Reapply toasted sesame seeds and fresh nori strips just before serving. This trick revives their appearance and adds that just-made freshness. ✨
Nutrition Facts
Frequently Asked Questions
Can I make these ahead for a party?
For best results, assemble sushi balls no more than 2 hours before serving. Store fish-filled versions in an airtight container with damp paper towels to maintain moisture. Vegetarian options with avocado can be prepped 4-6 hours ahead if you brush the avocado with lemon juice.
What’s the trick to keeping rice from sticking?
Damp hands are your best tool! Keep a bowl of water nearby and wet your palms between each ball. For extra insurance, rub a tiny amount of rice vinegar on your hands before shaping. The rice should feel tacky but never gummy when properly seasoned.
Can I bake the rice balls instead of shaping by hand?
Not recommended—baking would dry out the delicate rice texture. Instead, try using a 1.5-inch cookie scoop to portion rice evenly before shaping. This gives consistent sizing while maintaining the traditional hand-formed texture that makes sushi balls special.
Why do my balls keep falling apart?
This usually means either under-seasoned rice or overstuffing. Use exactly 2 tbsp rice per ball and 1 tsp filling max. Press firmly but don’t compact—think “gentle snowball” pressure. The rice should hold together when lightly squeezed but still feel tender.
What’s a good substitute for raw fish?
For safety or preference, try marinated tofu cubes (soaked in soy sauce + sesame oil) or cooked shrimp chopped fine. Smoked trout also works beautifully. Always maintain the 2:1 rice-to-filling ratio regardless of substitution to ensure proper structure.

- 6 Egg Cake Recipe with Oil: Light as Air With Buttery Moisture - October 4, 2026
- 4 Bean Casserole Recipe: One-Pan Heartiness With Smoky Paprika Depth - October 4, 2026
- 3-Ingredient Keto Mug Cake Recipe: Microwave Magic in 2 Minutes - October 4, 2026