
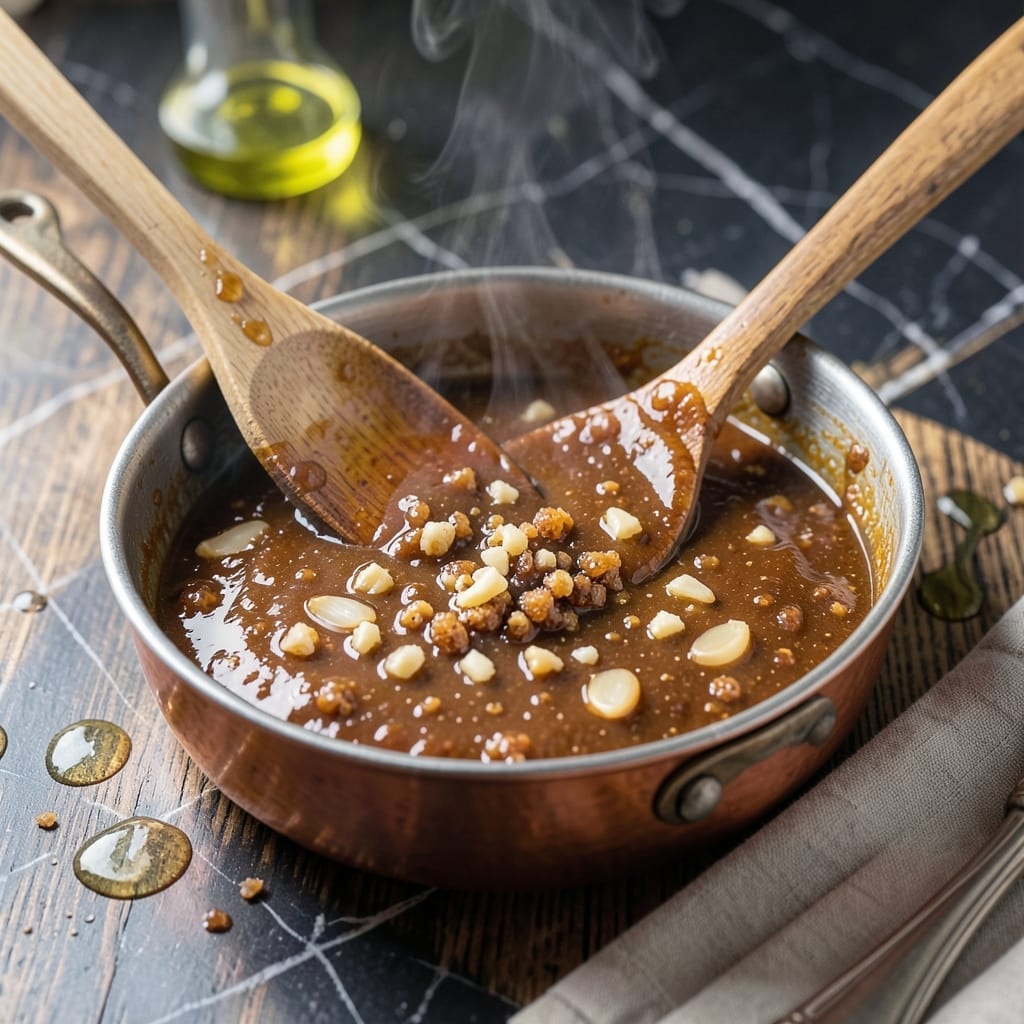
This teriyaki glaze transforms ordinary proteins into restaurant-quality dishes with minimal effort. The balance of sweet and savory comes from a simple blend of soy sauce, sugar, and fresh ginger, creating a versatile sauce that enhances without overpowering.
I developed this recipe for busy weeknights when I needed a foolproof way to add flavor quickly. The key is reducing the mixture to the perfect consistency—thick enough to cling but thin enough to drizzle beautifully over chicken, fish, or vegetables.
You’ll have a glossy, caramelized glaze that’s ready in under 15 minutes. It stores well in the fridge for up to two weeks, so you can make a batch ahead and use it whenever inspiration strikes.
Perfect for grilling, baking, or even as a stir-fry finisher. Here’s how to make it.
Ingredients for Teriyaki Glaze Recipe Easy
Nine simple ingredients for a glossy, restaurant-quality glaze in minutes.
| Ingredient | Amount | Notes |
|---|---|---|
| Soy Sauce 🥢 | ½ cup | Low-sodium preferred for balance |
| Brown Sugar 🍚 | ½ cup | Packed for sweetness depth |
| Fresh Ginger 🌿 | 1 tbsp | Grated or finely minced |
| Garlic Cloves 🧄 | 2 cloves | Minced for aromatic base |
| Rice Vinegar 🍯 | 2 tbsp | Balances sweetness with tang |
| Honey 🍯 | 2 tbsp | Substitute maple syrup if needed |
| Cornstarch 🌾 | 1 tbsp | Slurry with water to thicken |
| Water 💧 | 2 tbsp | For cornstarch slurry |
| Sesame Oil 🫒 | 1 tsp | Toasted for nutty finish |
Soy sauce is the backbone here. Kikkoman is my go-to for consistent flavor, but any brand works. The brown sugar needs to be packed—light or dark both work (I lean toward dark for a deeper molasses note). Fresh ginger is non-negotiable; the jarred stuff lacks the bright, spicy punch. Whole Foods usually has great ginger, but any supermarket will do.
No honey? Maple syrup or agave at a 1:1 ratio. Out of rice vinegar? Apple cider vinegar in a pinch, but use slightly less—it’s a bit sharper. For a thicker glaze, up the cornstarch to 1.5 tbsp. If you’re avoiding gluten, swap soy sauce for tamari and ensure your cornstarch is certified gluten-free.
This keeps like a champ. Fridge in an airtight jar for up to 2 weeks. It’ll thicken as it cools—just warm it gently with a splash of water to loosen. Freezes for 3 months if you want to make a big batch.
Why You’ll Love This Recipe
- 5-Minute Mix: I dump everything in one saucepan—soy sauce, brown sugar, ginger, garlic, rice vinegar—and it’s ready before the rice finishes.
- Sweet-Savory Magic: The brown sugar caramelizes just enough to balance the garlic’s bite and ginger’s zing. Honestly, I lick the spoon every time.
- Sticky Star: Slather it on chicken, salmon, or tofu—this glaze clings like a dream and turns weeknight proteins into restaurant-worthy dishes.
- Keeps Like a Champ: I make a double batch and stash the extra in the fridge. It lasts a week, so I’m never scrambling for a quick flavor boost.
Step-by-Step Instructions for Teriyaki Glaze
This method keeps it simple while delivering rich, glossy flavor every time.
Step 1: Combine the Base Ingredients
In a medium saucepan, whisk together the 0.5 cup Soy Sauce, 0.5 cup Brown Sugar, 2 tbsp Rice Vinegar, and 2 tbsp Honey. I like to use low-sodium soy sauce here—it lets you control the saltiness of the final glaze.
Place the pan over medium heat and stir until the brown sugar fully dissolves. You’ll notice the mixture start to bubble gently around the edges—that’s your cue to move to the next step. Don’t let it boil vigorously at this stage.
Step 2: Add Aromatics and Simmer
Stir in the 1 tbsp Fresh Ginger and 2 cloves Garlic Cloves. The ginger should be freshly grated or finely minced so it distributes evenly. Cook for 2-3 minutes, stirring frequently, until the mixture begins to thicken slightly and the aromatics become fragrant.
Watch for tiny bubbles forming across the entire surface—that means it’s at a gentle simmer. You’ll smell the garlic and ginger releasing their flavors into the sauce. This simmering step helps meld all the components together before thickening.
Step 3: Create and Add the Slurry
In a small bowl, whisk the 1 tbsp Cornstarch with the 2 tbsp Water until completely smooth with no lumps. This slurry will thicken the glaze to that perfect syrupy consistency we’re after.
Slowly pour the slurry into the simmering sauce while whisking constantly. The mixture will start to thicken almost immediately. Continue cooking for 1-2 minutes until it coats the back of a spoon and has a glossy appearance.
Step 4: Finish and Store
Remove the pan from heat and stir in the 1 tsp Sesame Oil. The toasted variety adds a beautiful nutty depth that complements the sweet-savory profile. Let the glaze cool for 5 minutes—it will thicken further as it cools.
Transfer to a jar or airtight container. The glaze will keep in the refrigerator for up to 2 weeks. For best results, let it come to room temperature before using, as cold glaze is thicker and harder to drizzle.
Pro Tips For Making Teriyaki Glaze Recipe Easy
- Simmer Low and Slow: Keep the heat at medium-low to let the brown sugar melt evenly without burning—I learned this the hard way after scorching two batches.
- Grate the Ginger: Fresh ginger can be fibrous, so finely grate it instead of mincing to avoid chewy bits in your glaze.
- Skip the Boiling: Resist the urge to crank the heat; boiling makes the glaze too thick and can separate the soy sauce from the sugar.
- Use Fresh Garlic: Jarred minced garlic works in a pinch, but fresh cloves crushed just before cooking give the glaze a brighter, more vibrant flavor.
Troubleshooting teriyaki glaze recipe easy
Too Thick Glaze
If your glaze turns out thicker than desired, whisk in 1-2 tbsp warm water while heating gently over low heat. I often add 1 tsp rice vinegar to restore balance if thinning with water dilutes the flavor too much. 💡
Lumpy Texture
Lumps usually mean the cornstarch didn’t dissolve properly. Strain through a fine-mesh sieve while warm, then return to heat. To prevent this, always mix cornstarch with cold water first—never add dry cornstarch directly to hot liquid.
Overly Salty
Balance excess salt with 1 tbsp honey or 1 tbsp brown sugar, then thin with 1-2 tbsp water if needed. Using low-sodium soy sauce from the start prevents this issue. I learned this the hard way with my first batch!
Burnt Flavor
If you detect bitter, burnt notes, you likely cooked it too hot. Start over with medium-low heat and stir constantly. The sugar in brown sugar and honey burns easily—gentle heat is key for that perfect caramelized flavor.
Weak Flavor
Boost underwhelming glaze by simmering 5-7 minutes longer to reduce and concentrate flavors. Add ½ tsp grated ginger or 1 extra garlic clove for more depth. Fresh aromatics make all the difference. 🔥
Separation Issues
If the glaze separates after storage, simply whisk in 1 tsp warm water until smooth. This happens when cornstarch settles—completely normal. Store in a jar you can shake vigorously before each use.
Nutrition Facts
Frequently Asked Questions
Can I use regular sugar instead of brown?
Yes, but brown sugar adds molasses depth. For a substitute, use 1/2 cup white sugar plus 1 tsp molasses to mimic the flavor. The texture will be slightly different but still delicious.
How long does it take to reduce?
Plan for 8-10 minutes total cooking time. The slurry thickens it quickly at the end, but don’t rush—gentle simmering develops the best flavor. Keep heat at medium-low to avoid burning.
Can I make this gluten-free?
Swap soy sauce for tamari and ensure your cornstarch is certified gluten-free. The texture and taste will be identical to the original.
Why did my glaze turn out too thin?
This usually means the slurry didn’t cook long enough. Return it to medium heat and simmer for 1-2 more minutes while stirring constantly. Patience is key for that perfect glossy finish.

- 6 Egg Cake Recipe with Oil: Light as Air With Buttery Moisture - October 4, 2026
- 4 Bean Casserole Recipe: One-Pan Heartiness With Smoky Paprika Depth - October 4, 2026
- 3-Ingredient Keto Mug Cake Recipe: Microwave Magic in 2 Minutes - October 4, 2026