
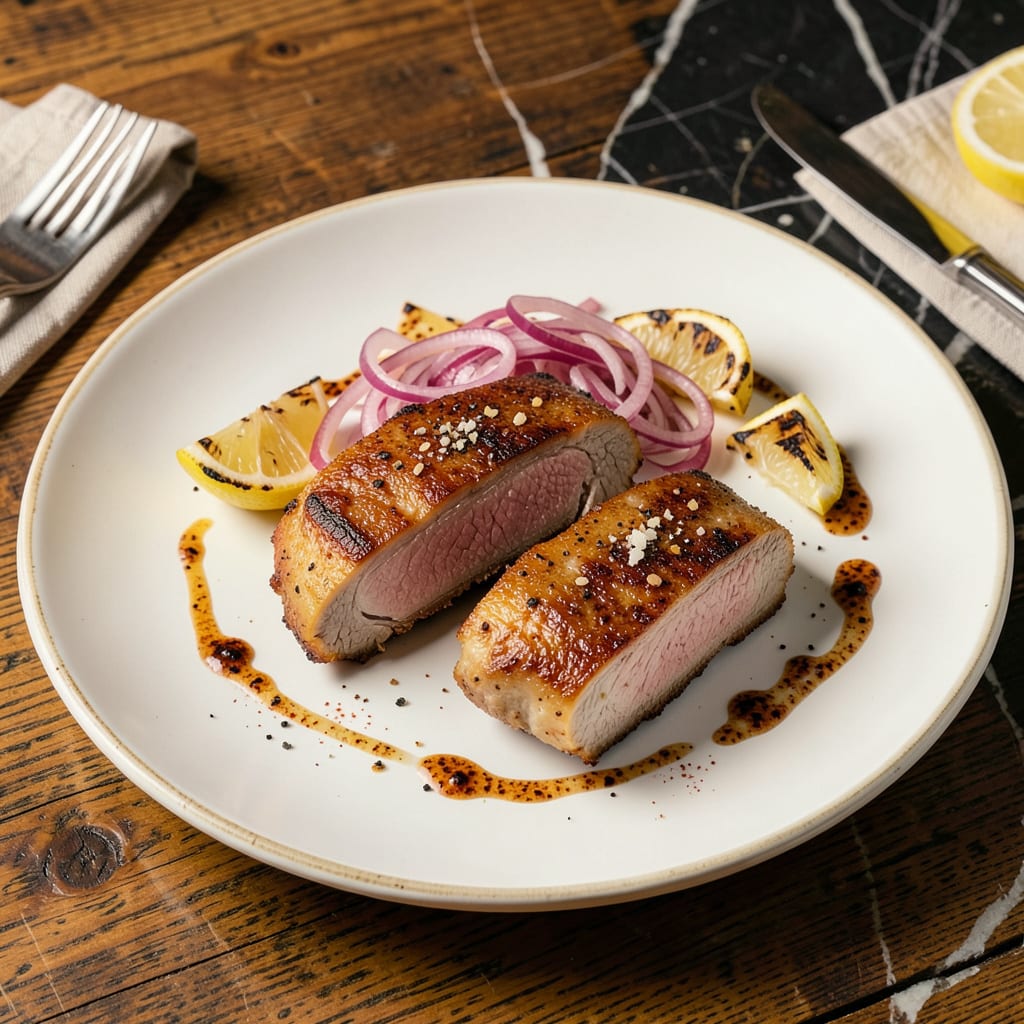
Cooking thin pork chops perfectly requires precision—too long on the heat and they dry out, too little and they lack flavor. This method delivers juicy, golden-brown results in under 15 minutes, every time. The secret lies in quick searing at high heat and a simple but effective seasoning blend.
With just a few pantry staples and a hot skillet, you’ll achieve restaurant-quality pork chops that are tender inside and crispy outside. No brining or marinating needed—just follow the technique, and you’ll have a foolproof weeknight dinner or elegant meal ready in minutes.
Ingredients for Thin Pork Chop
Optimal results require precision: thin-cut pork chops, high-heat oil, and a balanced seasoning blend for juicy, golden perfection.
| Ingredient | Amount | Notes |
|---|---|---|
| Bone-in Thin-Cut Pork Chops 🍖 | 1 ½ lb | 1/4-inch thick, patted dry |
| Diamond Crystal Kosher Salt 🧂 | 1 ½ tsp | Divided for seasoning and finishing |
| Freshly Ground Black Pepper 🌶️ | ¾ tsp | Coarse grind preferred |
| Smoked Paprika 🌶️ | 1 tsp | Sweet or hot variety |
| Garlic Powder 🧄 | 1 tsp | Not garlic salt |
| Onion Powder 🧅 | ½ tsp | Freshly opened for potency |
| Avocado Oil 🫒 | 2 tbsp | High smoke point required |
| Unsalted Butter 🧈 | 2 tbsp | European-style preferred |
| Fresh Thyme Sprigs 🌿 | 4 sprigs | Leaves stripped, stems discarded |
| Fresh Lemon 🍋 | ½ whole | For finishing juice |
| Extra-Virgin Olive Oil 🫒 | 1 tsp | For finishing drizzle |
The pork chops are the foundation—bone-in, 1/4-inch thick cuts ensure juiciness without drying. Source from Whole Foods or a trusted butcher with high turnover; avoid pre-packaged chops with excess moisture (they’ll steam instead of sear). Diamond Crystal kosher salt is non-negotiable for even seasoning and proper texture. The smoked paprika should be freshly opened (within 6 months) for vibrant color and depth. Professional kitchens use avocado oil for its neutral flavor and 520°F smoke point—critical for achieving the Maillard reaction without burning.
Substitutions must preserve the dish’s integrity. Boneless chops require 20% less cook time but sacrifice moisture—adjust heat accordingly. Replace avocado oil with refined coconut oil (same smoke point) or ghee if avoiding dairy isn’t a concern. For the butter, vegan butter sticks (like Miyoko’s) work but brown faster—reduce heat by 10%. No fresh thyme? Use 1/2 tsp dried thyme (added with seasoning), though fresh delivers superior aromatic brightness. The lemon finish is essential for balancing richness—bottled juice is unacceptable.
Preparation timing is critical. Pat chops dry immediately before seasoning to prevent moisture buildup. Seasoned chops can rest up to 30 minutes refrigerated before cooking. Store unused thyme wrapped in damp paper towels for 5-7 days; freeze lemon juice in ice cube trays for 6 months. Cooked chops hold 3 days refrigerated but are best consumed immediately—reheating compromises texture. For batch cooking, sear chops 80% through, then finish in a 350°F oven to maintain juiciness.
Why You’ll Love This Recipe
- 5-Minute Seasoning: I just mix the kosher salt, smoked paprika, and garlic powder in a bowl—no measuring cups, no fuss. The bone-in chops soak it up fast, so I can go from fridge to skillet while the pan heats.
- That Smoky Crust: Here’s what sold me—the first bite where the black pepper and smoked paprika caramelize into this crispy, slightly sticky edge. It’s the kind of flavor that makes you pause mid-chew and think, “Wait, did I actually make this?”
- Weeknight Lifesaver: Honestly, I keep these chops stashed for nights when takeout feels inevitable. They cook in 8 minutes flat, pair with roasted veggies or a sad desk salad, and still feel like a real meal. (Yes, even on a Tuesday night.)
- Budget Stretch: A pound of thin-cut chops costs me less than steak but feeds my family of four with leftovers for tacos or fried rice. I’ll be real: it’s the only protein I buy that doesn’t make me wince at the register.
Step-by-Step Instructions for Thin Pork Chops
This method delivers perfectly seared, juicy pork chops with minimal effort and maximum flavor.
Step 1: Season and Prepare the Pork Chops
Begin by patting the bone-in thin-cut pork chops completely dry with paper towels. This crucial step ensures proper browning and prevents steaming. Season both sides evenly with 1.5 tsp Diamond Crystal kosher salt, 0.75 tsp freshly ground black pepper, 1 tsp smoked paprika, 1 tsp garlic powder, and 0.5 tsp onion powder. The spices should adhere uniformly to the meat surface.
Allow the seasoned pork chops to rest at room temperature for 10 minutes while you prepare the cooking surface. This brief rest period helps the seasoning penetrate slightly and ensures more even cooking. The pork chops should develop a slightly tacky surface from the absorbed moisture and spices.
Step 2: Sear the Pork Chops to Golden Perfection
Heat 2 tbsp avocado oil in a large cast-iron or heavy stainless steel skillet over medium-high heat until the oil shimmers and you see the first wisps of smoke. Add the pork chops in a single layer, being careful not to overcrowd the pan. They should sizzle immediately upon contact with the hot oil.
Cook undisturbed for 2-3 minutes per side until a deep golden-brown crust forms. The pork chops are ready to flip when they release easily from the pan and the edges appear crisp. Use tongs to flip them carefully, as thin-cut pork chops can be delicate when hot. The second side will cook slightly faster than the first.
Step 3: Baste with Butter and Aromatics
Reduce the heat to medium and add 2 tbsp unsalted butter to the skillet. As the butter melts, add the stripped leaves from 4 sprigs fresh thyme. Tilt the pan slightly and spoon the foaming butter continuously over the pork chops for 1-2 minutes. This basting technique adds rich flavor and helps maintain moisture in the lean meat.
The butter should turn a light hazelnut brown and develop a nutty aroma. Watch carefully to prevent burning, as the milk solids in butter can scorch quickly. The pork chops should reach an internal temperature of 145°F when measured at the thickest part near the bone.
Step 4: Rest and Finish with Bright Acidity
Transfer the cooked pork chops to a warm plate and let them rest for 3-5 minutes before serving. This brief resting period allows the juices to redistribute throughout the meat. While the pork chops rest, squeeze 0.5 fresh lemon over them and drizzle with 1 tsp extra-virgin olive oil. The lemon juice adds necessary brightness to cut through the richness.
Serve the pork chops immediately while still warm. The exterior should be crisp and golden, while the interior remains juicy and tender. Each bite should offer a balance of smoky, herby, and citrus notes with a satisfying textural contrast between the crust and the moist interior meat.
Essential Equipment for This Dish
Perfect Skillet Choice
For thin pork chops, a heavy cast-iron skillet is my top recommendation—I use a 12-inch Lodge for even heat distribution. The thick walls prevent hot spots that could burn the delicate meat. If you don’t have cast iron, a stainless steel tri-ply pan (like All-Clad) works well too. Avoid nonstick pans—they don’t develop the same crust. 🔥
Avoid overcrowding: cook in batches if needed. The pork chops should have at least 1 inch of space between them to ensure proper browning. I learned this the hard way when my first batch steamed instead of seared!
Thermometer Essentials
An instant-read thermometer is non-negotiable for perfect results. I swear by my ThermoWorks Thermapen—it reads in 2 seconds and is accurate to ±0.5°F. Thin pork chops cook so quickly that guessing leads to overcooking. Check the thickest part near the bone for 145°F.
If you don’t have a thermometer, use the touch test: the meat should feel firm but still springy. Press the center with your finger—it should bounce back slightly. This takes practice, so I still recommend investing in a good thermometer.
Tongs Over Forks
Use 12-inch locking tongs (I prefer OXO) to handle the pork chops. Forks pierce the meat, causing precious juices to escape. The long handles keep your hands safely away from the hot oil. When flipping, do it confidently in one motion—hesitation leads to uneven cooking.
After cooking, use those same tongs to transfer chops to a warm plate. Never stack them—they’ll steam and lose their crispy crust. I keep a warm platter in my oven (set to 200°F) while I cook batches.
Butter Basting Tools
A large metal spoon is essential for basting. I use a stainless steel tablespoon from my flatware set—it’s deep enough to hold butter without spilling. Tilt the pan at a 45-degree angle to pool the butter, then spoon continuously for 1-2 minutes until the chops glisten.
For extra flavor, add a wooden spoon to your toolkit. Use it to scrape up any browned bits from the pan bottom while basting. Those fond bits add incredible depth to the final dish.
Resting Setup
Prepare your resting station before cooking: a warm plate (not room temp) lined with paper towels to absorb excess oil. I use stoneware plates that retain heat well. Cover loosely with aluminum foil to keep warm without trapping steam. The 3-5 minute rest is crucial for juiciness.
While the chops rest, use that time to finish your sides. I often toss together a quick salad or warm some crusty bread. This timing ensures everything hits the table hot and ready to serve. ✨
Safety Gear
Don’t overlook safety! Keep a silicone oven mitt nearby—the pan handle gets dangerously hot. I also recommend an oil splatter screen if you’re new to high-heat cooking. Thin pork chops can pop when they hit the hot oil, and nobody wants oil burns.
For cleanup, have paper towels and kosher salt ready. While the pan’s still warm, sprinkle 2 tbsp salt and scrub with a crumpled paper towel—the salt acts as a gentle abrasive to remove stuck-on bits without damaging your pan’s seasoning.
Nutrition Facts
Frequently Asked Questions
Why do my thin pork chops always turn out dry?
Overcooking is the most common culprit. Thin cuts cook in 2-3 minutes per side max. Use a thermometer to pull them at 145°F internal temp. Also, avoid crowding the pan—this causes steaming instead of searing. Let them rest 3-5 minutes after cooking too.
Can I use boneless chops instead of bone-in?
Yes, but reduce cook time by 20% since boneless cooks faster. Bone-in stays juicier due to the bone’s heat conduction. For boneless, sear 1.5-2 minutes per side and watch closely—they can go from perfect to overdone in seconds.
What’s the best way to reheat leftovers?
Use a skillet over medium-low heat with a splash of water or broth. Cover for 1-2 minutes, flipping once. Microwaving ruins the texture—it makes them rubbery. Store cooked chops in an airtight container for up to 3 days.
Do I need to brine thin pork chops?
Not necessary! Brining is better for thicker cuts. For thin chops, patting them completely dry before seasoning gives the best crust. The quick cook time doesn’t allow for moisture loss that brining prevents. Focus on high heat and proper timing instead.

- 6 Egg Cake Recipe with Oil: Light as Air With Buttery Moisture - October 4, 2026
- 4 Bean Casserole Recipe: One-Pan Heartiness With Smoky Paprika Depth - October 4, 2026
- 3-Ingredient Keto Mug Cake Recipe: Microwave Magic in 2 Minutes - October 4, 2026