
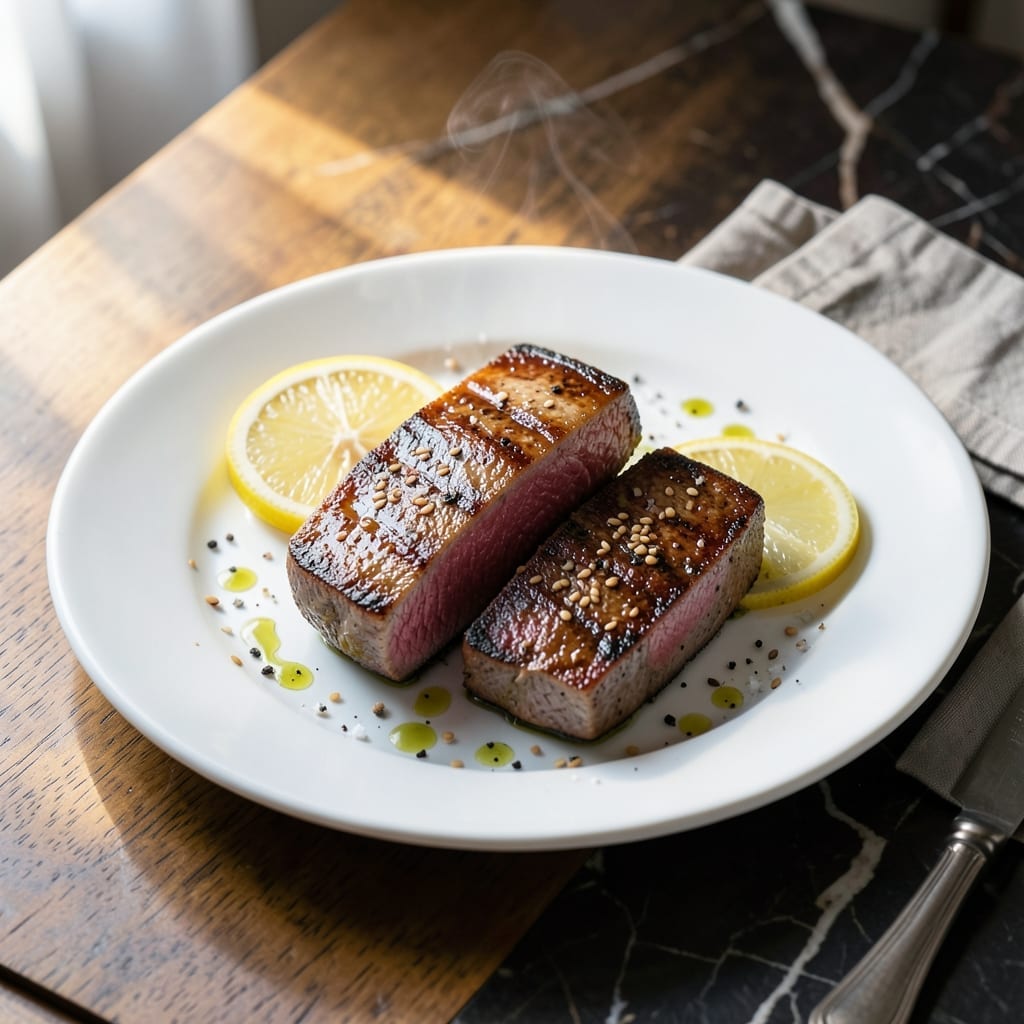
This tuna steak recipe delivers restaurant-quality results with minimal effort. I’ve perfected a technique that ensures a seared exterior and tender center every time, using just a few pantry staples.
The key is high heat and precise timing. With only 5 ingredients and 10 minutes of active cooking, you’ll achieve that coveted crust while keeping the inside moist and flaky.
What emerges is a dish that looks and tastes professional, yet requires no advanced skills. The steaks develop a beautiful golden crust while maintaining their natural juiciness.
Serve with a simple citrus sauce or alongside steamed vegetables for a complete meal. The process is as satisfying as the results.
Ingredients for Tuna Steak Easy
Five essential ingredients plus a few extras create this impressive seared dish in minutes.
| Ingredient | Amount | Notes |
|---|---|---|
| Sushi-Grade Tuna Steaks 🐟 | 1 ½ lb | 1-inch thick, skin removed |
| Olive Oil 🫒 | 2 tbsp | Divided for searing and finishing |
| Kosher Salt 🧂 | 1 tsp | Diamond Crystal preferred |
| Black Pepper 🌶️ | ½ tsp | Freshly cracked for best flavor |
| Lemon 🍋 | 1 whole | Cut into wedges for serving |
| Sesame Seeds 🌿 | 1 tbsp | Toasted, for garnish |
| Soy Sauce 💧 | 1 tbsp | Low-sodium recommended |
| Garlic Cloves 🧄 | 2 cloves | Minced, optional for crust |
| Fresh Ginger 🌱 | 1 tsp | Grated, optional for depth |
| Scallions 🧅 | 2 whole | Thinly sliced for garnish |
The tuna quality is non-negotiable here. Sushi-grade ahi from a trusted fishmonger or high-turnover seafood counter at Whole Foods or Wegmans ensures optimal freshness and safety for searing. Look for steaks with vibrant color, no fishy odor, and a firm texture. I prefer center-cut portions for even cooking. The thickness (1-inch) is critical—thinner steaks overcook, thicker ones won’t sear properly through the center.
No sushi-grade tuna available? Salmon steaks work with the same method (adjust cook time to 3-4 minutes per side). Olive oil can be swapped for avocado oil if you prefer a higher smoke point. For the soy sauce, tamari offers a gluten-free alternative with similar depth. The sesame seeds are optional but add a professional touch—toast them in a dry pan for 30 seconds to intensify their nutty flavor.
Serve immediately—tuna steaks are best fresh from the pan. Leftovers keep in the fridge for 1 day but lose their ideal texture. For food safety, don’t leave raw or cooked tuna at room temperature for more than 2 hours. The garnishes (lemon, scallions, sesame) can be prepped ahead and stored separately until serving.
Why You’ll Love This Recipe
- Minimal Effort: I sear these tuna steaks in 5 minutes flat—just salt, pepper, and a hot pan.
- Bright & Clean: That squeeze of lemon at the end cuts through the richness like magic.
- Date Night Ready: Honestly, it looks fancy but takes less time than ordering takeout.
- Leftovers? Nope: Between us, we never have any—it’s that good fresh out of the pan.
Step-by-Step Instructions for Seared Tuna Steaks
Master the technique for a restaurant-quality sear with minimal effort and maximum flavor.
Step 1: Prepare the Tuna Steaks for Searing
Pat the 1.5 lb Sushi-Grade Tuna Steaks completely dry with paper towels. Any moisture on the surface will prevent proper browning and create steam instead of a sear. Season both sides evenly with 1 tsp Kosher Salt and 0.5 tsp Black Pepper, pressing gently to adhere.
If using, finely mince the 2 cloves Garlic Cloves and grate the 1 tsp Fresh Ginger. Rub this mixture onto the surface of the tuna steaks to create an aromatic crust. This step is optional but adds depth of flavor that complements the natural richness of the fish.
Step 2: Sear the Steaks to Perfection
Heat 1 tbsp Olive Oil in a heavy skillet (cast iron works best) over high heat until it begins to shimmer. The oil should be nearly smoking—this ensures a proper sear without overcooking the interior. Carefully place the tuna steaks in the pan, leaving space between them to avoid steaming.
Sear for 1-2 minutes per side for medium-rare, or until the exterior develops a deep golden-brown crust while the center remains cool and red. Resist the urge to move the steaks; let them develop that perfect crust undisturbed. The tuna should release easily from the pan when ready to flip.
Step 3: Rest and Finish the Dish
Transfer the seared tuna steaks to a cutting board and let them rest for 2-3 minutes. This brief rest allows the juices to redistribute, ensuring every bite is moist and flavorful. While the tuna rests, drizzle the remaining 1 tbsp Olive Oil and 1 tbsp Soy Sauce over the steaks for added depth.
Slice the tuna against the grain into ½-inch thick pieces. This shortens the muscle fibers, making each bite more tender.
Step 4: Garnish and Serve Immediately
Arrange the sliced tuna on a serving platter. Garnish with 1 tbsp Sesame Seeds and thinly sliced 2 whole Scallions for a pop of color and texture. The sesame seeds add a nutty crunch that contrasts beautifully with the tender fish.
Serve with 1 whole Lemon cut into wedges on the side. The bright acidity of the lemon cuts through the richness of the tuna and enhances all the flavors. Serve immediately while the exterior is still warm and the interior remains cool and fresh.
Pro Tips For Making Tuna Steak Easy
- Sear 1-2 Minutes: High heat is non-negotiable—get your pan screaming hot and sear each side for 60-90 seconds max. I learned this the hard way after overcooking my first three attempts into sad, dry hockey pucks.
- Pat It Dry: Blot the tuna steaks with paper towels before seasoning. Sounds tedious, but it guarantees a proper crust instead of steaming in its own moisture.
- Skip the Overcrowding: Don’t cram the pan—cook one steak at a time if needed. Steer clear of this mistake or you’ll end up with uneven cooking and a greasy mess.
- Rest Before Slicing: Let the tuna rest 5 minutes on a cutting board before slicing. This keeps the juices inside where they belong instead of all over your plate.
Essential Equipment for Great tuna steak easy
High-Quality Skillet
A heavy cast iron skillet is my top choice for searing tuna steaks. Its excellent heat retention ensures a consistent high heat needed for that perfect crust. I’ve used my Lodge 12-inch for years with great results.
Tongs for Flipping
Use locking tongs (I prefer 12-inch for control) to flip the steaks. They give you a firm grip without piercing the fish. Avoid spatulas—they can break the delicate steaks.
Paper Towels
Pat the tuna completely dry before seasoning—this is non-negotiable. I use Bounty for its absorbency. Any moisture will steam the fish instead of searing it.
Instant-Read Thermometer
While not strictly necessary, a ThermoWorks Thermapen gives peace of mind. For tuna, aim for an internal temp of 110-125°F for rare to medium-rare. It’s a small investment that pays off in confidence.
Sharp Chef’s Knife
Slice against the grain with a razor-sharp 8-inch chef’s knife. I trust my Wüsthof for clean cuts every time. Dull knives crush the fish instead of slicing it.
Cutting Board
A large bamboo cutting board provides a stable surface for slicing and serving. Avoid plastic—it can slide around. The bamboo also absorbs excess juices beautifully. 💡
Nutrition Facts
Frequently Asked Questions
Do I need sushi-grade tuna for searing?
Yes, always use sushi-grade for raw or rare center. It’s handled with food safety in mind.
How do I know when to flip the steak?
Wait until a golden crust forms and the fish releases easily from the pan, about 1-2 minutes.
Can I cook tuna steaks from frozen?
Thaw completely in the fridge first. Cooking from frozen results in uneven doneness and poor texture.
What’s the best way to slice tuna steaks?
Use a sharp knife and cut against the grain into ½-inch pieces for maximum tenderness.

- 6 Egg Cake Recipe with Oil: Light as Air With Buttery Moisture - October 4, 2026
- 4 Bean Casserole Recipe: One-Pan Heartiness With Smoky Paprika Depth - October 4, 2026
- 3-Ingredient Keto Mug Cake Recipe: Microwave Magic in 2 Minutes - October 4, 2026