
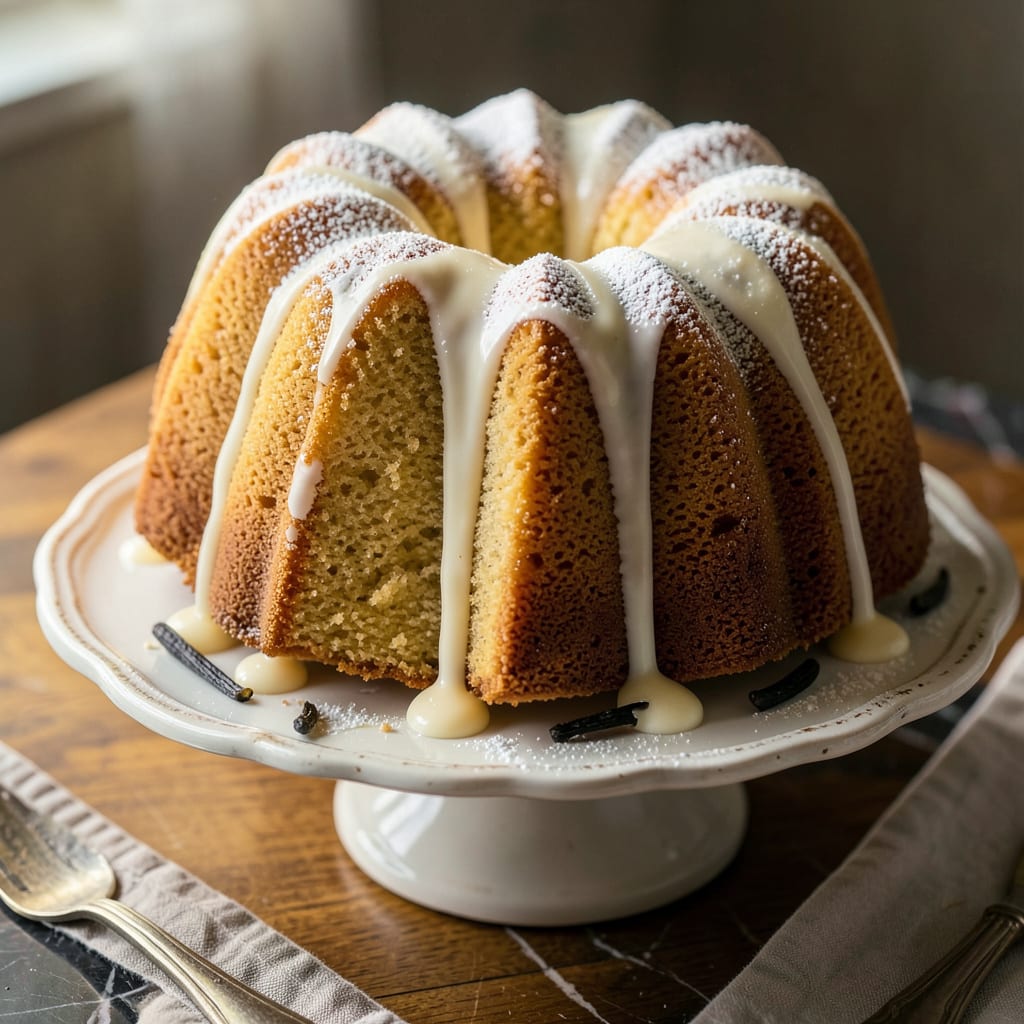
There’s nothing quite like the satisfaction of slicing into a perfectly baked vanilla bundt cake, revealing that signature moist crumb and elegant swirls. This recipe delivers the professional-quality results you’d expect from a bakery, right in your home kitchen. The secret lies in the precise balance of ingredients and a foolproof mixing method that ensures tenderness every time.
What sets this cake apart is its velvety texture and rich vanilla flavor that lingers in every bite. The batter comes together smoothly with standard pantry ingredients, and the baking process is straightforward—no advanced techniques required. Whether you’re celebrating a special occasion or simply treating yourself, this bundt cake promises to impress with its perfect structure and irresistible taste.
Ingredients for Vanilla Nothing Bundt Cake
These carefully selected ingredients create the signature moist crumb and rich vanilla flavor that define this professional-quality bundt cake.
| Ingredient | Amount | Notes |
|---|---|---|
| All-Purpose Flour 🌾 | 3 cups | Sifted for optimal texture |
| Granulated Sugar 🍚 | 2 cups | Ultra-fine for smooth batter |
| Unsalted Butter 🧈 | 1 cup | Room temperature, high-fat European style |
| Large Eggs 🥚 | 5 whole | Room temperature, grade AA preferred |
| Full-Fat Sour Cream 🥛 | 1 cup | For moisture and tenderness |
| Pure Vanilla Extract 🌿 | 2 tbsp | Madagascar bourbon vanilla recommended |
| Baking Powder 🧂 | 1 tbsp | Aluminum-free for clean flavor |
| Baking Soda 🧂 | ½ tsp | Fresh for proper leavening |
| Fine Sea Salt 🧂 | 1 tsp | Diamond Crystal brand preferred |
| Whole Milk 🥛 | ½ cup | Room temperature, 3.25% fat |
| Vanilla Bean Paste 🌿 | 1 tbsp | For visible specks and intense flavor |
| Confectioners' Sugar 🍚 | 1 ½ cups | For dusting finished cake |
The butter quality is paramount for achieving the velvety texture. European-style unsalted butter with 82-86% fat content yields superior results compared to standard butter. Plugra or Kerrygold are excellent choices available at most specialty grocers. The vanilla components require equal attention: use Madagascar bourbon vanilla extract for depth and vanilla bean paste for visual specks. Both should be pure extracts without artificial additives, readily found at Williams Sonoma or well-stocked baking sections.
For the dairy components, full-fat sour cream is non-negotiable—it provides both moisture and structural integrity. Daisy or Breakstone’s brands offer consistent quality. Whole milk should be 3.25% fat; avoid reduced-fat versions which compromise texture. In a pinch, full-fat Greek yogurt can substitute for sour cream at a 1:1 ratio, though the cake may be slightly denser. The flour must be all-purpose; cake flour produces insufficient structure for bundt cakes, while bread flour creates excessive density.
Store all ingredients at room temperature before beginning—this ensures proper emulsification. The baked cake maintains optimal moisture when stored at room temperature under a cake dome for up to 3 days. For longer storage, wrap individual slices in plastic wrap and freeze for up to 3 months. Thaw overnight in the refrigerator before bringing to room temperature. The confectioners’ sugar for dusting should be kept in an airtight container to prevent clumping from humidity.
Why You’ll Love This Recipe
- One-Bowl Magic: Honestly, I love that this comes together in a single bowl—no sifting flour or creaming butter separately. Just melt the butter, dump everything in (yes, even the sour cream straight from the tub), and stir. My kind of baking.
- That Sour Cream Secret: Here’s what sold me—the full-fat sour cream makes the crumb so tender it’s almost like pound cake, but with that classic Bundt structure. The vanilla shines because the butter and sugar caramelize just enough to add depth without overpowering.
- Brunch to Dessert: I’ve served this at 10 a.m. with coffee and again at 8 p.m. with ice cream, and both times it disappeared. No frosting needed (though a dusting of powdered sugar feels fancy), so it’s unfussy enough for a Tuesday but impressive enough for book club.
- Better the Next Day: Between us, this cake tastes even richer after sitting overnight—the flavors meld, the texture gets denser in the best way, and it keeps for days. I’ve stashed slices in the freezer for up to a month (wrapped tight) when I need a last-minute dessert. No waste, no stress.
Step-by-Step Instructions for Vanilla Nothing Bundt Cake
This professional method ensures a perfectly moist crumb with the signature dense-yet-tender texture that defines this classic cake.
Step 1: Prepare the Wet Ingredients Foundation
In a stand mixer fitted with the paddle attachment, cream the 1 cup unsalted butter with the 2 cups granulated sugar on medium-high speed for 4-5 minutes until the mixture becomes pale and nearly doubles in volume. The proper creaming technique incorporates air that creates the cake’s fine crumb structure.
Add the 5 whole large eggs one at a time, mixing for 30 seconds after each addition and scraping down the bowl between additions. This gradual incorporation prevents curdling and ensures complete emulsification. The mixture should appear thick, glossy, and slightly ribbony when the paddle is lifted.
Reduce speed to low and blend in the 1 cup full-fat sour cream, 2 tbsp pure vanilla extract, and 1 tbsp vanilla bean paste. The vanilla bean paste provides visible specks and intensified vanilla flavor, while the sour cream contributes essential moisture and tenderness to the final crumb.
Step 2: Combine Dry Ingredients and Create the Batter
In a separate bowl, whisk together the 3 cups all-purpose flour, 1 tbsp baking powder, 0.5 tsp baking soda, and 1 tsp fine sea salt. The aluminum-free baking powder ensures clean flavor without metallic aftertaste, while the precise balance of leavening agents creates the cake’s characteristic dense yet moist texture.
With the mixer on low speed, add the dry ingredients to the wet mixture in three additions, alternating with the 0.5 cup whole milk in two additions. Begin and end with the dry ingredients. Mix just until the flour disappears—overmixing would develop gluten and compromise the tender crumb.
The finished batter should be thick but pourable, with a smooth, velvety texture. Scrape the bowl thoroughly to ensure even distribution of ingredients, particularly the vanilla bean specks that contribute to the cake’s visual appeal.
Step 3: Bake with Precision for Optimal Texture
Preheat your oven to 325°F and thoroughly grease a 12-cup Bundt pan, paying special attention to the intricate crevices. The lower baking temperature prevents doming while allowing even heat distribution for a uniformly moist cake. Pour the batter into the prepared pan, filling it no more than two-thirds full to accommodate rising.
Bake for 55-65 minutes until a wooden skewer inserted near the center comes out with only a few moist crumbs attached. The cake should pull away slightly from the pan edges and spring back when gently pressed. Avoid opening the oven during the first 40 minutes to prevent temperature fluctuations that could cause uneven baking.
Remove from the oven and let the cake rest in the pan for 15 minutes. This brief cooling period allows the structure to set while still warm enough to release cleanly from the pan’s intricate design.
Step 4: Cool and Finish for Professional Presentation
Invert the cake onto a wire rack and let it cool completely, about 2 hours. The gradual cooling preserves the moist crumb structure. Place a plate beneath the rack to catch any confectioners’ sugar that might sift through during the finishing process.
Once completely cooled, use a fine-mesh sieve to dust the cake generously with the 1.5 cups confectioners’ sugar. The sugar should adhere to the cake’s surface while accentuating the Bundt pan’s decorative ridges. For the signature swirled appearance, apply the sugar in stages, allowing each layer to set before adding more.
Transfer the finished cake to a serving platter. The proper execution of these steps yields a cake with a velvety crumb, balanced sweetness, and the distinctive moistness that makes this recipe exceptional. Serve at room temperature for optimal flavor and texture.
Pro Cooking Tips for Great vanilla nothing bundt cake
Perfect Creaming Technique
The foundation of your cake’s texture begins with properly creaming the butter and sugar. Use a stand mixer with the paddle attachment and beat on medium-high speed for the full 4-5 minutes until the mixture becomes pale yellow and nearly doubles in volume. This step incorporates air that creates those fine, tender crumbs we all love. 💛
Room Temperature Matters
All your ingredients—eggs, butter, sour cream, and milk—must be at room temperature. Cold ingredients won’t emulsify properly, leading to a dense cake. I like to set my eggs in warm water for 10 minutes if I forget to take them out ahead of time. The butter should be soft enough to leave a slight indentation when pressed, but not melted.
Alternating Additions Secret
When combining dry and wet ingredients, always start and end with the flour mixture. Add the dry ingredients in three parts and the milk in two parts, mixing just until incorporated. This method prevents overdeveloping the gluten while ensuring even distribution. Scrape the bowl between additions to catch any hidden pockets of flour.
Bundt Pan Prep
The key to that perfect release is thorough greasing. Use a pastry brush to coat every crevice of your 12-cup Bundt pan with melted butter, then dust with flour. For extra insurance, I sprinkle in 2 tbsp fine breadcrumbs and tap out the excess. This creates a non-stick barrier that preserves all those beautiful swirls.
Baking Temperature Precision
Bake at 325°F for even heat distribution. Higher temperatures can cause doming or dry edges. Rotate the pan halfway through baking if your oven has hot spots. The cake is done when it pulls slightly from the sides and a skewer comes out with just a few moist crumbs—not wet batter. Avoid opening the oven before 40 minutes to prevent temperature drops. 🌡️
Cooling with Patience
Let the cake rest in the pan for exactly 15 minutes before inverting onto a rack. This brief wait allows the structure to set while still warm enough to release cleanly. Cool completely—about 2 hours—before dusting with confectioners’ sugar. Rushing this step can cause the sugar to melt into the cake rather than creating that signature snowy finish.
Nutrition Facts

- 6 Egg Cake Recipe with Oil: Light as Air With Buttery Moisture - October 4, 2026
- 4 Bean Casserole Recipe: One-Pan Heartiness With Smoky Paprika Depth - October 4, 2026
- 3-Ingredient Keto Mug Cake Recipe: Microwave Magic in 2 Minutes - October 4, 2026