
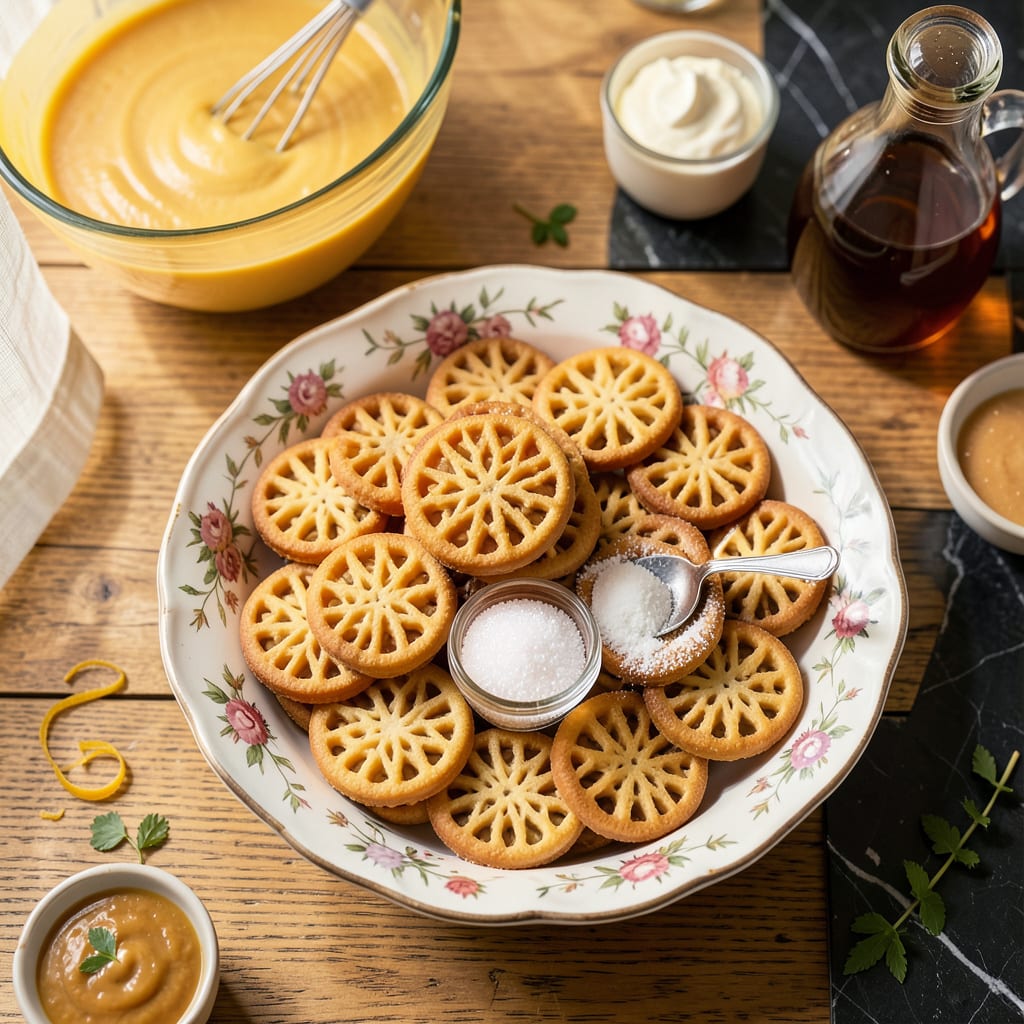
There’s something deeply satisfying about creating delicate, lace-like pizzelle—the traditional Italian waffle cookies that transform simple ingredients into edible art. This recipe delivers crispy, golden-brown cookies with a subtle vanilla warmth that makes them perfect for any occasion. The secret lies in achieving the right batter consistency and mastering the timing on your pizzelle iron.
Whether you’re using a Villaware iron or another brand, the process remains straightforward. The batter comes together quickly with pantry staples, and each cookie cooks in just 30-60 seconds. What emerges is a delicate, intricately patterned treat that’s as beautiful as it is delicious—ideal for serving with coffee, dusting with powdered sugar, or even shaping into elegant dessert cups.
Ingredients for Villaware Pizzelle
These pantry staples transform into delicate, crispy Italian lace cookies with just one special tool.
| Ingredient | Amount | Notes |
|---|---|---|
| All-Purpose Flour 🌾 | 1 ¾ cups | Sifted for lightness |
| Granulated Sugar 🍚 | ¾ cup | Fine white sugar preferred |
| Unsalted Butter 🧈 | ½ cup | Melted and cooled slightly |
| Large Eggs 🥚 | 3 whole | Room temperature |
| Pure Vanilla Extract 💧 | 1 ½ tsp | High-quality for best flavor |
| Baking Powder 🧂 | 1 tsp | Fresh for proper rise |
| Anise Extract 💧 | ½ tsp | Traditional flavor (optional) |
| Salt 🧂 | ¼ tsp | Fine sea salt preferred |
| Powdered Sugar 🍚 | ½ cup | For dusting finished cookies |
| Vegetable Oil 🫒 | 1 tsp | For iron greasing |
[recipeingredientscaler]
The butter is key here—European-style unsalted gives the best flavor and texture. I always use Plugra or Kerrygold when I can find it, but regular supermarket butter works fine too. The vanilla matters more than you’d think—Nielsen-Massey or Rodelle are worth the splurge (or whatever you’ve got open). Anise extract is traditional, but if you’re not a fan, skip it or swap in almond extract instead. The flour should be fresh—if it smells musty, toss it and grab a new bag.
No anise extract? Almond extract at half the amount works beautifully. Out of powdered sugar? Granulated sugar pulsed in a blender does the trick (add a pinch of cornstarch to prevent clumping). The baking powder must be fresh—test it by dropping a spoonful in hot water; if it doesn’t bubble vigorously, replace your can. For a citrus twist, add 1 tsp lemon zest to the batter. The eggs should be room temp—quick fix is soaking them in warm water for 10 minutes.
Batter keeps 2 days in the fridge (stir well before using). Cooked pizzelle stay crisp in an airtight container for 1 week—layer with parchment if stacking. Freeze undusted cookies for up to 3 months (dust with powdered sugar after thawing). Pro tip: if your cookies aren’t crisp, return them to the iron for 10-15 seconds. The iron itself? Wipe with a dry cloth while warm—never submerge.
Why You’ll Love This Recipe
- One-Bowl Magic: I toss everything—flour, sugar, melted butter, eggs, and that splash of vanilla—into a single bowl, mix, and boom. No fussing with multiple bowls or complicated steps, just straightforward baking that even my distracted morning self can handle.
- Buttery Vanilla Dream: That first bite where crisp edges give way to a tender center, all wrapped in rich butter and real vanilla? It’s the kind of flavor that makes you pause mid-conversation. The vanilla isn’t just background noise here—it’s the star, warm and fragrant, lingering just right.
- Holiday to Tuesday: Honestly, I’ve made these for Christmas cookie swaps and random weeknights when we crave something sweet with coffee. They’re fancy enough to gift in pretty tins but unfussy enough to throw together after work (yes, even on a Tuesday night).
- Freezer-Friendly Stash: A double batch fits perfectly in my freezer for up to a month—just pull out a few, let them sit for 10 minutes, and they’re back to that fresh-off-the-iron crispness. Between us, it’s my secret weapon for last-minute guests or when I need a dessert that feels homemade without the last-minute scramble.
Step-by-Step Instructions for Italian Waffle Cookies
Here’s how to make these delicate, crispy cookies with that signature vanilla-anise flavor.
Step 1: Prepare the Batter Base
In a large mixing bowl, whisk together the 1.75 cups all-purpose flour, 1 tsp baking powder, and 0.25 tsp salt. I always sift my flour first to prevent lumps and ensure a light, airy batter. The baking powder should be fresh—check the expiration date if you’re unsure.
In a separate bowl, cream the 0.75 cup granulated sugar with the 0.5 cup unsalted butter (make sure it’s melted but cooled to room temperature). You want this mixture to be smooth but not greasy. The sugar should dissolve completely into the butter, creating a pale yellow base for your batter.
Step 2: Incorporate Eggs and Flavorings
Add the 3 large eggs one at a time to the butter-sugar mixture, beating well after each addition. I use room temperature eggs because they incorporate more smoothly into the batter. After the eggs are fully mixed in, stir in the 1.5 tsp pure vanilla extract and 0.5 tsp anise extract.
The anise extract gives these cookies their traditional Italian flavor, but if you’re not a fan, you can omit it. The vanilla should be high-quality—this is where most of your flavor comes from. The batter should be thick but pourable at this stage, with a glossy sheen from the eggs.
Step 3: Combine Wet and Dry Ingredients
Gradually add the dry ingredients to the wet mixture, stirring just until combined. Don’t overmix—you want to avoid developing gluten in the flour, which would make the cookies tough instead of crisp. The finished batter should be smooth but slightly thick, similar to pancake batter.
Let the batter rest for 10 minutes while you preheat your pizzelle iron. This resting period allows the flour to fully hydrate and the baking powder to start activating. You’ll notice the batter thickens slightly during this time, which is exactly what you want for perfect cookie texture.
Step 4: Cook in the Pizzelle Iron
Preheat your pizzelle iron according to manufacturer’s instructions. Lightly brush both plates with the 1 tsp vegetable oil to prevent sticking. When the iron is fully heated (most models have an indicator light), spoon about 1 tablespoon of batter onto each cookie pattern.
Close the iron and cook for 30-45 seconds until the cookies are golden brown and crisp. The exact time depends on your iron—watch for the edges to turn a deep golden color and the centers to look set. Remove the cookies carefully with a fork and place them on a wire rack to cool completely.
Step 5: Finish and Serve
Once the cookies are completely cool, dust them lightly with the 0.5 cup powdered sugar. I like to use a fine-mesh sieve for this to get an even, snow-like dusting. The sugar should adhere to the cookies’ slightly oily surface from the butter in the batter.
Serve immediately for maximum crispness, or store in an airtight container at room temperature for up to 5 days. These cookies actually improve in texture after a day or two as they dry out slightly. For best results, keep them in a single layer to prevent them from softening.
Troubleshooting Great villaware pizzelle
Batter Too Thick
If your batter feels more like cookie dough than pancake batter, it’s likely too thick. I’ve found that adding 1-2 tablespoons of milk (whole milk works best) while stirring gently usually fixes this. The batter should pour slowly from a spoon but still spread slightly when dropped onto the iron. Don’t overmix after adding liquid—just stir until combined. 💡
Cookies Stick to Iron
Sticking is usually caused by either not enough oil or batter that’s too wet. First, make sure you’re brushing both plates with vegetable oil before each batch. If they’re still sticking, let your iron heat up for an extra 2-3 minutes between batches. The plates need to be properly hot to create that non-stick crust on the cookies.
Pale or Underdone
If your pizzelle come out pale instead of golden, your iron isn’t hot enough. Most models need 5-7 minutes to reach proper temperature—don’t rush it. I check by sprinkling a drop of water on the plates; if it sizzles and evaporates immediately, you’re ready. Also, resist the urge to open the iron early—wait until steam stops escaping before checking.
Cookies Too Soft
Soft pizzelle usually mean they need more cooking time or weren’t cooled properly. Try cooking them for 5-10 seconds longer until the edges are deep golden brown. After removing from the iron, place them on a wire rack in a single layer—they’ll crisp up as they cool. If they’re still soft after cooling, return them to the iron for 10-15 seconds to dry out. ❄️
Uneven Patterns
When the traditional lace pattern doesn’t form completely, it’s often because the batter is too thick or the iron isn’t closed firmly enough. Make sure you’re using exactly 1 tablespoon of batter per cookie and closing the iron with steady pressure. If your iron has adjustable thickness settings, try moving it to the thinnest setting for more defined patterns.
Burnt Edges
Burnt edges usually indicate the iron is too hot or the batter contains too much sugar. First, reduce your cooking time by 5-10 seconds and check frequently. If that doesn’t help, try reducing the sugar by 1 tablespoon in your next batch. Also, make sure you’re not overfilling the patterns—stick to that 1 tablespoon measure precisely. 🔥
Nutrition Facts

- 6 Egg Cake Recipe with Oil: Light as Air With Buttery Moisture - October 4, 2026
- 4 Bean Casserole Recipe: One-Pan Heartiness With Smoky Paprika Depth - October 4, 2026
- 3-Ingredient Keto Mug Cake Recipe: Microwave Magic in 2 Minutes - October 4, 2026