
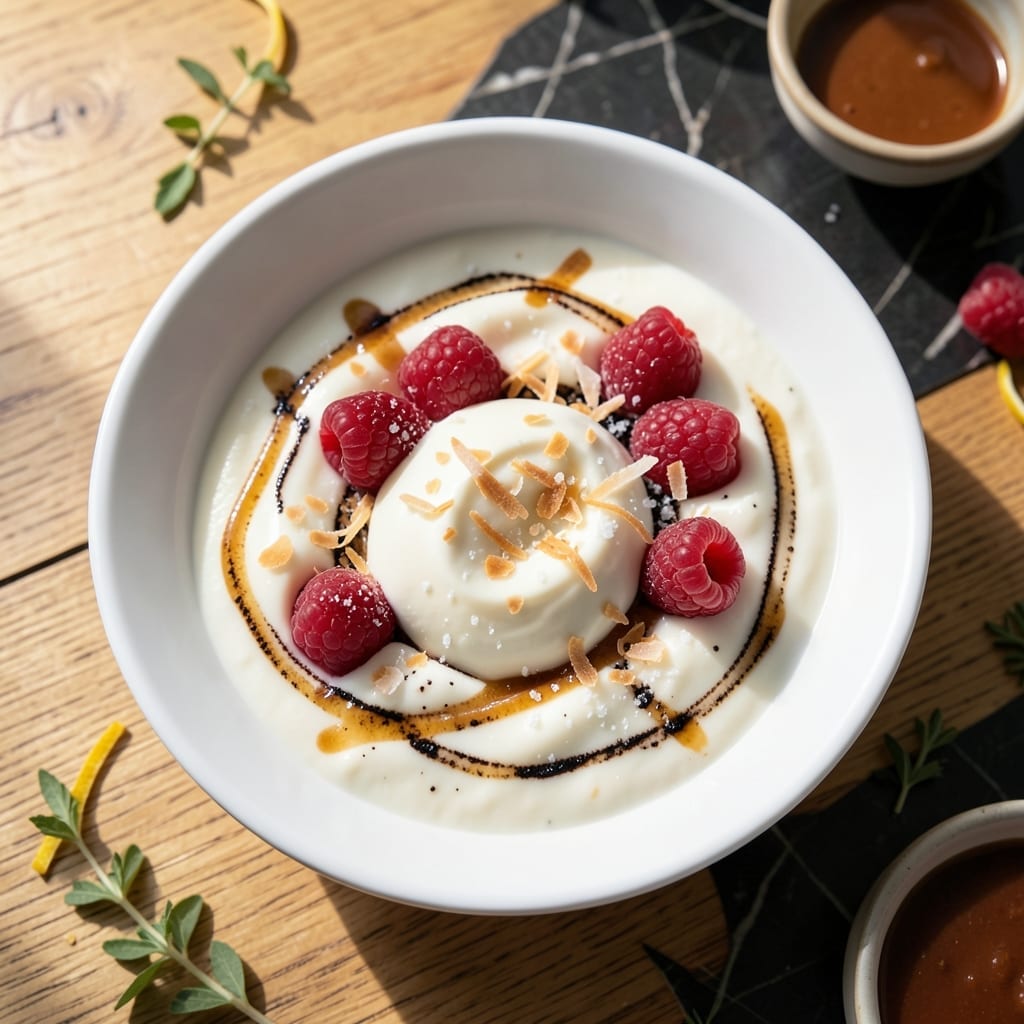
This homemade vanilla yogurt serves as the perfect blank canvas for both sweet and savory creations. The process transforms simple milk into a creamy base that’s infinitely more flavorful than store-bought versions.
The key lies in precise fermentation—maintaining a consistent 110°F environment for 6-8 hours. A touch of vanilla bean paste elevates the flavor, creating a subtle sweetness that complements any add-ins.
Once cultured, the yogurt develops a smooth, tangy richness that works beautifully in parfaits, dips, or dressings. Its versatility makes it a staple for breakfast, snacks, or even as a cooking ingredient.
With just a few ingredients and patience, you’ll have a fresh, customizable yogurt ready for endless culinary applications.
Ingredients for Vanilla Yogurt Recipe Ideas
Transform milk into a creamy, versatile base with these simple ingredients for endless possibilities.
| Ingredient | Amount | Notes |
|---|---|---|
| Whole Milk 🥛 | 1 cup | Full-fat for creaminess |
| Vanilla Bean Paste 🌿 | 1 tbsp | Or vanilla extract substitute |
| Plain Yogurt Starter 🥣 | 2 tbsp | Live active cultures required |
| Granulated Sugar 🍚 | 2 tbsp | Adjust to taste preference |
| Heavy Cream 🥛 | ¼ cup | Optional for extra richness |
| Salt 🧂 | 0.125 tsp | Fine grain for even distribution |
| Honey 🍯 | 1 tbsp | Optional sweetener boost |
| Fresh Berries 🍓 | 1 cup | For serving, optional topping |
| Granola 🥣 | ½ cup | For serving, optional topping |
| Chopped Nuts 🌰 | ¼ cup | For serving, optional topping |
The milk quality is paramount—Whole Foods or organic brands yield the best texture. Full-fat is non-negotiable for that luxurious mouthfeel. Vanilla bean paste (from Nielsen-Massey or Heavenly Vanilla) delivers superior flavor over extract. For the starter, use Fage or Stonyfield plain yogurt with live cultures. Heavy cream, while optional, creates an ultra-rich final product worth the splurge.
No vanilla paste? Pure vanilla extract at double the amount works. Prefer less sweetness? Reduce or omit the sugar—the natural tang shines through. For a dairy-free version, coconut milk yogurt starter works, but texture varies. The honey can be replaced with maple syrup or agave. Berries not in season? Frozen works perfectly (just thaw first).
Finished yogurt keeps for 10-14 days refrigerated in a sealed container. The flavor deepens after 24 hours. Toppings are best added fresh—store granola separately to maintain crunch. For cooking applications, use within 1 week for optimal freshness.
Why You’ll Love This Recipe
- Set and Forget: I mix the ingredients the night before and wake up to thick, creamy yogurt—no babysitting required.
- Vanilla Bean Magic: The vanilla bean paste gives it those tiny black specks and a rich, warm flavor that store-bought just can’t match.
- Breakfast to Dessert: I use it in smoothies, top it with granola, or drizzle honey for a quick dessert.
- Pocket-Friendly Luxury: A gallon of whole milk and a spoonful of starter make batches for pennies—way cheaper than fancy grocery brands.
Step-by-Step Instructions for Vanilla Yogurt
Master this foolproof method for creamy, perfectly flavored yogurt every time.
Step 1: Heat and Temper the Milk Base
In a medium saucepan, combine the 1 cup Whole Milk and 0.25 cup Heavy Cream. Heat over medium-low heat until the mixture reaches 180°F, stirring occasionally to prevent scorching. This process denatures the proteins and creates a smoother final texture.
Once heated, remove from heat and let cool to 110°F—this is the optimal temperature for the live cultures. I use a candy thermometer for precision, as temperature accuracy is crucial. Too hot will kill the cultures; too cool will prevent proper fermentation.
Step 2: Incorporate Starter and Sweeteners
In a small bowl, whisk together the 2 tbsp Plain Yogurt Starter, 2 tbsp Granulated Sugar, 1 tbsp Vanilla Bean Paste, and 0.125 tsp Salt. This ensures even distribution of flavors and cultures before combining with the warm milk.
Temper the mixture by slowly adding about ½ cup of the warm milk to the starter blend while whisking constantly. This prevents shocking the cultures with sudden temperature changes. Then pour the tempered mixture back into the remaining milk, stirring gently to combine.
Step 3: Ferment for Optimal Texture
Transfer the mixture to clean glass jars or a bowl, cover with a lid or plastic wrap, and place in a warm location (I use an oven with the light on, which maintains about 110°F). Allow to ferment undisturbed for 6-8 hours.
The longer the fermentation, the tangier and thicker the yogurt will become. You’ll know it’s ready when the mixture has set with a slight jiggle when gently shaken and a clean spoon inserted comes out with yogurt clinging to it.
Step 4: Chill and Sweeten to Taste
Once fermented, refrigerate the yogurt for at least 4 hours to halt fermentation and develop the final texture. This chilling step is non-negotiable—it firms up the yogurt and enhances the flavor.
Before serving, stir in the 1 tbsp Honey if using, adjusting sweetness to preference. The honey adds a floral note that complements the vanilla beautifully. For a smoother texture, strain the yogurt through a cheesecloth for 30 minutes to remove excess whey.
Step 5: Assemble with Toppings
Spoon the chilled yogurt into serving bowls. Top with 1 cup Fresh Berries, 0.5 cup Granola, and 0.25 cup Chopped Nuts for a balanced combination of textures and flavors. The berries add freshness, the granola provides crunch, and the nuts introduce a satisfying contrast.
Serve immediately for the best experience, as the granola will soften over time if left sitting in the yogurt. This versatile base also works beautifully in smoothies, parfaits, or as a topping for pancakes.
Pro Tips For Making Vanilla Yogurt Recipe Ideas
- Heat Milk Slowly: Warm the whole milk to 180°F over medium-low heat—rushing this step can scald the milk and ruin your yogurt base. I learned this the hard way after a few grainy batches.
- Use Real Vanilla: Skip the imitation extract and go for vanilla bean paste; the flecks of real vanilla make a noticeable difference in flavor and appearance.
- Cool Before Culturing: Let the milk cool to 110°F before adding the yogurt starter, or you’ll kill the live cultures and end up with a pot of sad, liquid milk.
- Strain for Creaminess: After incubating, strain the yogurt through a cheesecloth for 10-15 minutes to remove excess whey—it turns your batch thick and luxurious, like store-bought Greek yogurt.
Creative Variations of This vanilla yogurt recipe ideas
Fruit Parfait Layers
Layer your yogurt with 1 cup Fresh Berries, 0.5 cup Granola, and a drizzle of honey in a tall glass. I love using strawberries and blueberries for a colorful presentation. Repeat the layers for a stunning parfait that’s perfect for brunch. 🥗
Savory Herb Dip
Mix 1 cup of this yogurt with 1 tbsp chopped dill, 1 minced garlic clove, and a pinch of salt. It makes an incredible dip for veggies or pita chips. The vanilla adds a subtle sweetness that balances the herbs beautifully.
Smoothie Bowl Base
Blend 1 cup yogurt with 1 frozen banana and ½ cup mixed berries for a thick smoothie bowl. Top with 0.25 cup Chopped Nuts and 0.5 cup Granola for crunch. I always add a sprinkle of chia seeds for extra nutrition.
Overnight Oats Mix
Combine ½ cup yogurt, ½ cup rolled oats, and ½ cup milk in a jar. Let it sit overnight, then top with Fresh Berries in the morning. The vanilla yogurt makes this taste like dessert for breakfast.
Frozen Yogurt Bark
Spread a thin layer of yogurt on parchment paper, then sprinkle with Fresh Berries, Chopped Nuts, and a drizzle of honey. Freeze for 4 hours and break into pieces for a refreshing treat. Kids love this one! ✨
Creamy Salad Dressing
Whisk ½ cup yogurt with 1 tbsp olive oil, 1 tbsp lemon juice, and 1 tsp Dijon mustard. This makes a tangy dressing perfect for greens or as a veggie dip. The vanilla adds a unique depth of flavor.
Nutrition Facts
Frequently Asked Questions
Can I use a different type of milk?
Whole milk yields the creamiest texture, but 2% works too. Avoid skim milk as it creates a thinner result. For dairy-free, coconut milk with a yogurt starter works well.
How do I know when fermentation is complete?
It’s ready when the mixture has set with a slight jiggle and a clean spoon comes out with yogurt clinging to it. This typically takes 6-8 hours at 110°F.
Why did my yogurt turn out runny?
This usually happens if the temperature was too low during fermentation or the milk wasn’t heated to 180°F first. Straining through cheesecloth for 30 minutes can help thicken it.
Can I skip the chilling step?
No, chilling for at least 4 hours is essential. It stops fermentation, firms up the texture, and enhances the flavor development.

- 6 Egg Cake Recipe with Oil: Light as Air With Buttery Moisture - October 4, 2026
- 4 Bean Casserole Recipe: One-Pan Heartiness With Smoky Paprika Depth - October 4, 2026
- 3-Ingredient Keto Mug Cake Recipe: Microwave Magic in 2 Minutes - October 4, 2026