
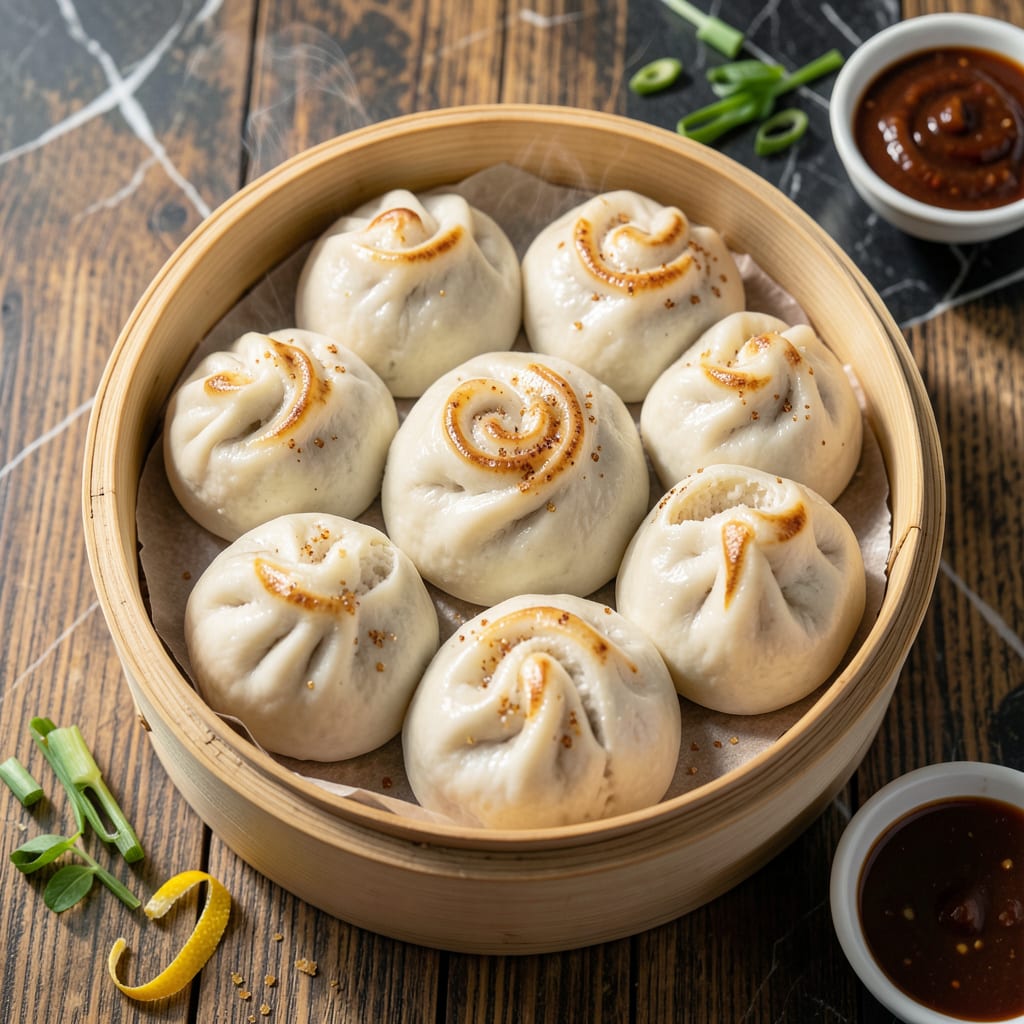
These fluffy buns deliver the classic texture you love with a completely plant-based approach. The dough comes together with simple ingredients and rises to create that signature pillowy softness.
Steaming transforms them into cloud-like bites with a subtle sweetness that pairs perfectly with savory or sweet fillings. This method guarantees light, airy results every time.
Ingredients for Vegan Steam Bun
Simple plant-based ingredients create pillowy soft, lightly sweet steamed buns with perfect texture every time.
| Ingredient | Amount | Notes |
|---|---|---|
| All-Purpose Flour 🌾 | 4 cups | Plus extra for dusting |
| Granulated Sugar 🍚 | ¼ cup | For subtle sweetness |
| Active Dry Yeast 🍞 | 2 ¼ tsp | One packet, proofed |
| Unsweetened Plant-Based Milk 🥛 | 1 cup | Warmed to 110°F |
| Vegan Butter 🧈 | ¼ cup | Melted, unsalted |
| Baking Powder 🧂 | 1 ½ tsp | For extra lift |
| Sea Salt 🧂 | 1 tsp | Fine grain preferred |
| Apple Cider Vinegar 🍏 | 1 tbsp | To activate baking powder |
| Neutral-Flavored Plant-Based Oil 🫒 | 1 tbsp | For bowl greasing |
| Sesame Oil 🫒 | 1 tsp | For brushing buns |
[recipeingredientscaler]
The flour is the foundation here. King Arthur or Gold Medal all-purpose deliver consistent results. For the plant-based milk, oat or soy milk work best due to their protein content, which helps with dough structure. Silk or Califia Farms are reliable brands. The yeast should be fresh—check the expiration date, as old yeast won’t activate properly even in ideal conditions.
No plant-based milk? Coconut milk in a carton (not canned) works, but may add slight flavor. For a richer dough, replace vegan butter with coconut oil. Out of apple cider vinegar? White vinegar or lemon juice at the same amount will do. The sugar can be substituted with coconut sugar, though it may darken the dough slightly. All-purpose gluten-free flour blends require xanthan gum to mimic the elasticity.
Store yeast in the freezer to extend shelf life for 1-2 years. The dough can be refrigerated overnight for a slower rise—enhances flavor development. Once steamed, buns keep at room temperature for 2 days or freeze for 1 month. Reheat by steaming again (don’t microwave, or they’ll dry out).
Why You’ll Love This Recipe
- One-Bowl Wonder: I mix the flour, sugar, yeast, and warm plant milk in a single bowl—no fancy equipment, just my hands and 10 minutes of kneading.
- Meal Prep Magic: I make a big batch on Sunday and freeze them—perfect for quick breakfasts or a side with dinner all week.
- Pantry Staples: All-purpose flour and plant milk are things I always have, so I can whip these up without a last-minute grocery run.
Step-by-Step Instructions for Vegan Steam Buns
Master the technique for achieving ethereally soft, cloud-like buns with consistent results.
Step 1: Activate the Yeast and Proof the Dough
In a stand mixer bowl, whisk together the unsweetened plant-based milk warmed to 110°F with the 0.25 cup Granulated Sugar and 2.25 tsp Active Dry Yeast. Let sit for 5-7 minutes until foamy and bubbly—this confirms the yeast is active.
Add the 0.25 cup Vegan Butter, 1.5 tsp Baking Powder, 1 tsp Sea Salt, and 1 tbsp Apple Cider Vinegar. The vinegar reacts with the baking powder for extra lift. Mix on low until combined, then gradually incorporate all 4 cups All-Purpose Flour until a shaggy dough forms.
Step 2: Knead to Develop Gluten
Switch to the dough hook attachment and knead on medium speed for 8-10 minutes. The dough should become smooth, elastic, and slightly tacky but not sticky. If it sticks to the bowl, add 1 tablespoon All-Purpose Flour at a time until it pulls away cleanly.
Proper gluten development is critical for the pillowy texture. You’ll know it’s ready when you can stretch a small piece thin enough to see light through it without tearing. This windowpane test guarantees the structure needed for steam buns to puff properly.
Step 3: First Rise Until Doubled
Lightly grease a large bowl with the 1 tbsp Neutral-Flavored Plant-Based Oil, then transfer the dough into it. Cover with a damp towel and place in a warm, draft-free spot. Let rise for 1 to 1.5 hours or until doubled in volume.
For consistency, I place the bowl in an oven with the light turned on—this provides an ideal 80-85°F environment. The dough should spring back slowly when poked gently with a finger. Underproofed dough results in dense buns, while overproofed dough collapses during steaming.
Step 4: Shape and Second Rise
Punch down the dough to release air, then divide into 12 equal portions (about 80g each). Roll each into a smooth ball, then flatten slightly into a 3-inch round. Place each on a square of parchment paper to prevent sticking during steaming.
Arrange the shaped buns in a steamer basket, leaving 1 inch between each for expansion. Cover and let rise for 30-45 minutes until puffy and nearly doubled. The parchment squares make it easy to transfer them to the steamer without deflating.
Step 5: Steam to Perfection
Bring 2 inches of water to a rolling boil in a wok or large pot fitted with a steamer basket. Place the basket over the boiling water, ensuring the lid fits tightly. Steam the buns for 15 minutes—do not lift the lid during this time, as the sudden temperature change can cause them to collapse.
After steaming, turn off the heat and let the buns sit covered for 2 minutes to finish setting. Brush the tops with the 1 tsp Sesame Oil for a subtle aroma and glossy finish. Serve immediately while warm, as they’re best fresh from the steamer.
Pro Tips For Making Vegan Steam Bun
- Warm the Milk: Heat your plant-based milk to about 110°F—any hotter and you’ll kill the yeast, any colder and it won’t activate properly. I learned this the hard way after a few dense, sad buns.
- Knead Longer: Vegan dough needs extra love to develop gluten, so knead for at least 8-10 minutes until smooth and elastic. Skip this and your buns won’t rise as high.
- Skip Cold Butter: Use room-temperature vegan butter so it incorporates evenly into the dough. Cold butter leaves lumps, and nobody wants a bite of hard fat in their fluffy bun.
- Steam Properly: Line your steamer with parchment paper and poke holes in it to prevent sticking. Sounds weird, but it works—no more torn buns when you try to lift them out.
Storing and Reheating This Recipe
Room Temperature Storage
After cooling completely, store buns in an airtight container lined with a paper towel to absorb moisture. They’ll stay soft at room temperature for up to 2 days. The paper towel trick prevents that dreaded soggy bottom. 💡
Refrigerator Storage
For longer freshness, refrigerate in an airtight container for up to 5 days. I recommend separating layers with parchment paper to prevent sticking. These buns tend to dry out faster in the fridge, so reheating is essential.
Freezing for Later
Freeze steamed buns for up to 1 month in a zip-top bag with parchment between each layer. Squeeze out excess air to prevent freezer burn. Label with the date—I always forget when I froze things without this simple step. ❄️
Steam Reheating Method
The best way to revive these is by steaming again for 5-7 minutes. Use the same parchment squares from initial cooking to prevent sticking. This method restores that fresh-from-the-steamer texture perfectly.
Microwave Shortcut
For a quick fix, wrap a bun in a damp paper towel and microwave for 20-30 seconds. While not as good as steaming, this works in a pinch. The damp towel adds just enough moisture to prevent dryness.
Avoid the Oven
I don’t recommend oven reheating as it tends to dry out the buns. If you must, wrap tightly in foil and warm at 300°F for 10 minutes, but steam or microwave are far superior methods for maintaining that pillowy texture.
Nutrition Facts
Frequently Asked Questions
Can I use whole wheat flour instead of all-purpose?
Yes, but replace only 50% of the all-purpose with whole wheat. The extra fiber can make the dough heavier, so add 1-2 tbsp extra liquid if needed. The texture will be slightly denser but still delicious.
Why did my buns turn out dense?
This usually means the dough didn’t rise enough. Check your yeast is fresh and active, and ensure the first rise happens in a warm 80-85°F spot. Under-kneading can also cause this issue.
Can I make these without a stand mixer?
Knead by hand for 10-12 minutes on a lightly floured surface. It’s a great workout and achieves the same smooth, elastic dough. Just be patient.
What’s the best way to prevent sticking during steaming?
Use parchment paper squares under each bun. This makes them easy to lift out without tearing. Also, ensure your steamer basket is well-greased or lined with cabbage leaves.

- 6 Egg Cake Recipe with Oil: Light as Air With Buttery Moisture - October 4, 2026
- 4 Bean Casserole Recipe: One-Pan Heartiness With Smoky Paprika Depth - October 4, 2026
- 3-Ingredient Keto Mug Cake Recipe: Microwave Magic in 2 Minutes - October 4, 2026