
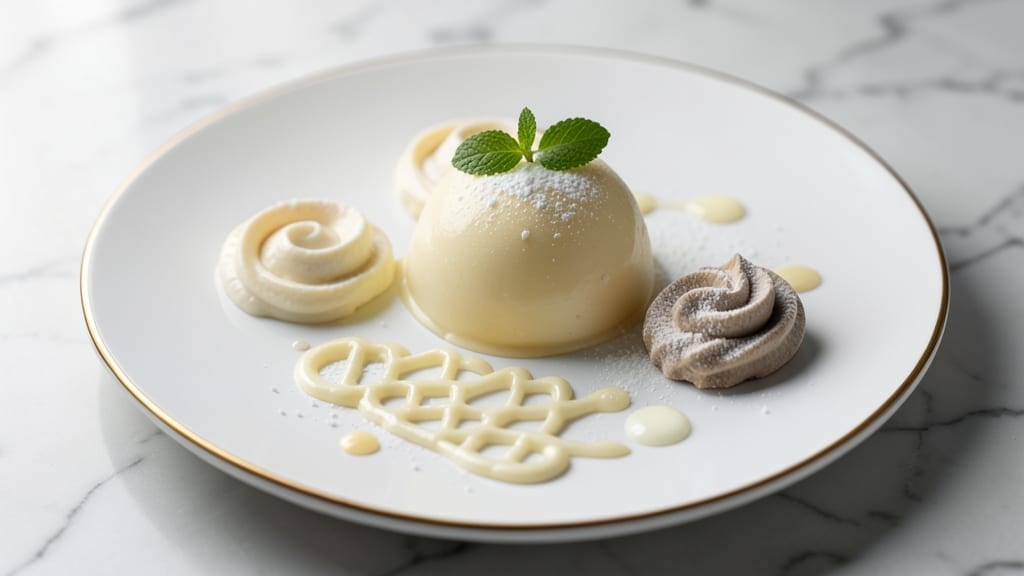
This 1-2-3 icing recipe redefines simplicity without sacrificing stability or flavor—just three ingredients, no fuss, and perfect results every time. The secret lies in the ratio of butter to powdered sugar, which creates a smooth, pipeable consistency that stays firm on cakes while remaining tender enough to spread.
I developed this recipe after years of struggling with overly sweet, grainy icings that collapsed under their own weight, and it never fails to deliver professional-quality results.
The beauty of this recipe is its versatility—whether you’re piping rosettes, flooding layers, or simply spreading over cupcakes, the texture holds its shape without cracking. Buttercream purists will appreciate the balance of richness and sweetness, while beginners will love how forgiving the recipe is.
No need for stabilizers or complicated techniques; this icing is built for reliability, not perfectionism.
What you’ll achieve is a smooth, creamy icing that’s stable enough for intricate decorating but still light enough to taste like a treat, not a coating. The butter adds richness while the powdered sugar provides structure, creating a finish that’s elegant yet effortless.
This is the kind of icing that makes decorating feel like an art—and not a science.
Perfect for birthdays, holidays, or anytime you want a show-stopping finish without the stress. The recipe scales easily, so you can make a small batch for cupcakes or double it for a full sheet cake. Here’s everything you need to transform your baked goods into edible masterpieces.
Ingredients for 1 2 3 icing
Three ingredients transform into the perfect stable, creamy icing every time.
| Ingredient | Amount | Notes |
|---|---|---|
| Unsalted Butter 🧈 | 1 cup | Softened to room temperature |
| Powdered Sugar 🍚 | 3 cups | Sifted for smooth texture |
| Heavy Cream 🥛 | ½ cup | Cold for stability |
| Vanilla Extract 🌿 | 1 tsp | Pure vanilla preferred |
| Salt 🧂 | ¼ tsp | Fine sea salt |
The butter is non-negotiable here—unsalted ensures you control the saltiness, and room temperature is key (not melted, just soft). Plugrá or Land O’Lakes are my go-tos, but any good brand works. Powdered sugar? Sift it first—this eliminates lumps and gives you that silky texture. The heavy cream adds that professional lightness, but cold is critical—it prevents the icing from breaking down too fast. I always grab the heavy cream from the back of the fridge where it’s coldest, and I measure it cold. The vanilla extract? Pure Madagascar bourbon if you want to splurge, but imitation works in a pinch.
No heavy cream? Substitute with cold milk or even coconut cream—just know it’ll be slightly less stable. Powdered sugar clumping? Add 1 tbsp cornstarch to the sifted sugar for extra smoothness. The salt balances the sweetness, but if you’re using unsalted butter, you can halve the amount or skip it entirely. For extra flavor, swap the vanilla for almond extract or lemon zest. This icing is so forgiving that even if you accidentally melt the butter, you can still fix it by chilling the mixture for 10 minutes—just don’t overdo it. The ratio is what matters most here.
This icing stays fresh for 5 days in the fridge, covered tightly with plastic wrap pressed against the surface. For longer storage, freeze portions in 1-tbsp dollops—they thaw perfectly in 10 minutes at room temperature. I always make extra because it’s so versatile: pipe rosettes, flood cakes, or spread on cupcakes. The key to decorating success? Chill your piping bag for 15 minutes before using—this keeps everything sharp and stable. And if it gets too soft? Pop it back in the fridge for 10 minutes. Works every time.
Why You’ll Love This Recipe
- Three-Ingredient Magic: I swear, this is the kind of recipe where you’ll stare at the bowl thinking, “Wait, that’s it?”—then taste it and realize the butter and cream do all the heavy lifting. No fancy tools, no measuring headaches, just fold until it’s smooth.
- Velvet Smooth Finish: That first spoonful where the powdered sugar dissolves into silky perfection? It’s like dessert therapy. The vanilla cuts through the sweetness just enough to make it feel special—no artificial flavors, just real, creamy indulgence.
- Birthday Cake Hack: Honestly, this is my go-to for last-minute cakes or cupcakes when I’ve forgotten to buy frosting. It’s also the secret weapon for turning store-bought cookies into something that feels homemade—no one will guess it’s this easy.
- Fridge-Friendly Luxury: Between us, I make a double batch and keep it in the fridge. A dollop on pancakes in the morning? A quick drizzle over fruit for guests? It stretches for days, and the cost? A fraction of store-bought. Budget win, flavor win.
Step-by-step instructions for perfect 1-2-3 icing
Here’s how to create a stable, professional-quality icing with just five ingredients.
Cream the Butter and Powdered Sugar
In a stand mixer fitted with the paddle attachment, beat the 1 cup unsalted butter on medium speed for 2-3 minutes until completely smooth and pale. This ensures no lumps remain and creates a light, airy base. With the mixer running on low speed, gradually add the 3 cups powdered sugar over 3-4 minutes, scraping down the sides of the bowl as needed.
The powdered sugar should blend in completely, forming a thick, spreadable consistency. If the mixture seems too stiff, add 1 tablespoon of heavy cream at a time until it reaches a smooth, pipeable texture. This step is critical—rushing it can leave graininess in your final icing.
Incorporate the Heavy Cream and Vanilla
Add the 0.5 cup cold heavy cream in a slow, steady stream while mixing on low speed. The cold cream helps stabilize the icing and prevents it from becoming too runny. Once fully incorporated, add the 1 teaspoon vanilla extract and mix for 30 seconds to evenly distribute the flavor.
Here’s the thing—this is where many recipes fail. The heavy cream needs to be cold to maintain structure, but not so cold it separates. If you notice any curdling, reduce the mixer speed to low and let it blend gently until smooth. The icing should now have a thick, glossy appearance with a smooth, velvety texture.
Add Salt and Adjust Consistency
Sprinkle in the 0.25 teaspoon salt and mix on low speed for 15-20 seconds until fully combined. The salt enhances the flavors and helps balance the sweetness. Taste the icing at this stage—it should be sweet but not cloying, with a clean vanilla flavor.
If the icing is too thick to pipe, add 1 teaspoon of heavy cream at a time until it reaches your desired consistency. For a softer, more spreadable icing, you can add an extra 1-2 teaspoons of cream. If it’s too thin, chill the bowl in the refrigerator for 10-15 minutes to thicken it back up. The goal is a texture that holds its shape when piped but still spreads smoothly.
Test and Perfect the Texture
Transfer a small amount of icing to a plate and let it sit at room temperature for 5 minutes. This mimics how it will behave when decorating. If it starts to weep or becomes too soft, return it to the refrigerator for 5-10 minutes to firm up. If it’s too stiff, add another teaspoon of cream and mix gently.
The icing should hold its shape when piped but still be pliable enough to spread or drizzle. For cakes, a slightly firmer consistency works best, while for cookies, a softer, more fluid icing is ideal. Adjust as needed—this final test ensures your icing will perform perfectly for whatever you’re decorating.
Pro Tips For Making 1 2 3 Icing
- Warm Butter First: I learned this the hard way—cold butter from the fridge makes the icing fight you every step. Microwave it for 10 seconds (yes, even if it’s not fully melted) so it softens enough to beat smoothly. You’re not cooking it, just making it cooperative.
- Sift That Sugar: Powdered sugar clumps like a stubborn guest who won’t leave. Sift it directly into your bowl before adding anything else—this cuts down on lumps and saves you from scraping the bottom of the bowl later. (Pro move: Sift it through a fine-mesh sieve or even an old nylons stocking in a pinch.)
- Don’t Rush the Cream: Adding heavy cream too fast turns your icing into a sad, grainy mess. Start with half the cream, mix it in, then add the rest gradually while beating. This keeps the texture silky instead of lumpy. Patience here makes all the difference—trust me, I’ve made the opposite mistake.
- Salt the Butter: Skip salting the butter? Your icing will taste flat, even if you add salt later. Unsalted butter needs a pinch (¼ teaspoon) upfront—it balances the sweetness and rounds out the flavor. Trust me, that little bit makes the whole thing taste more professional. (And yes, it’s worth it.)
Pro cooking tips for this dish
Butter Temperature Matters
The butter’s temperature is the single most critical factor in this icing’s success. Use butter that’s softened to room temperature—not melted, not cold, but just pliable when pressed.
I test this by gently squeezing a pat: if it leaves a slight indentation but holds its shape, it’s perfect. Plugrá or Land O’Lakes are my go-tos because they’re consistently reliable, but any unsalted butter works.
If your butter is too warm, the icing will be greasy and unstable; too cold, and it’ll be grainy and stiff. Pro tip: Let it sit at room temperature for 30-45 minutes before starting. 🧈
Sifting Powdered Sugar
Never skip sifting the powdered sugar—this is non-negotiable for a silky texture. I use a fine-mesh sifter and tap it gently over the bowl to avoid clumping. If you’re short on time, pulse the powdered sugar in a food processor for 10-15 seconds to break up any lumps.
For extra smoothness, mix 1 tablespoon of cornstarch into the powdered sugar before sifting. This trick prevents graininess and gives that professional, velvety finish. The sugar should dissolve completely into the butter during mixing. 🍚
Cold Cream Stabilization
The heavy cream must be cold—straight from the fridge—to stabilize the icing and prevent it from breaking down too quickly. I pull mine from the back of the fridge where it’s coldest, then measure it while still cold.
If the cream is at room temperature, the icing will become too soft and may weep. Add it slowly in a thin stream while mixing on low speed to avoid curdling. If you notice any separation, reduce the mixer speed to low and let it blend gently until smooth.
This step is where many homemade icings fail—don’t rush it! 🥛
Mixing Speed Control
Mixing speed is everything. Start with medium speed for the butter to ensure it’s completely smooth, then drop to low speed when adding the powdered sugar. This gradual approach prevents air from being incorporated too quickly, which can make the icing too light and unstable.
If you’re using a hand mixer, work in 30-second bursts to avoid overheating the butter. The goal is a thick, spreadable consistency—like pipeable frosting but still smooth enough to spread. Overmixing can turn it grainy, so stop as soon as it’s fully combined. 💡
Testing Consistency
Before decorating, always test a small amount of icing on a plate at room temperature for 5 minutes. This mimics how it will behave on your cake or cookies. If it starts to weep or soften too much, return it to the fridge for 5-10 minutes to firm up.
For a firmer texture (ideal for piping), chill the bowl for 10-15 minutes. If it’s too stiff, add 1 teaspoon of cold heavy cream and mix gently. The icing should hold its shape when piped but still be pliable enough to spread or drizzle.
This test ensures your icing will perform perfectly for whatever you’re decorating. ✨
Decorating Pro Tips
For piping rosettes or borders, chill your piping bag in the fridge for 15 minutes before using—this keeps the icing sharp and stable. If the icing gets too soft while decorating, pop the piping bag back in the fridge for 5 minutes to firm it up.
For flooding cake layers, use a spatula to spread the icing in thin, even layers, then smooth with a bench scraper. If the icing is too thick to spread, add 1-2 teaspoons of cold cream and mix gently.
The key is patience—let the icing adjust to room temperature before decorating. 🎂
Nutrition facts
Frequently asked questions
Can I make this icing without heavy cream?
Yes! Substitute the ½ cup cold heavy cream with ¼ cup cold milk or ¼ cup coconut cream for a lighter texture. For extra stability, add 1 teaspoon cornstarch to the powdered sugar before mixing. The icing will still hold its shape but may be slightly less glossy.
Why is my icing too runny or grainy?
Runny icing usually means the butter was too warm or the cream wasn’t cold enough. Chill the bowl for 10 minutes to firm it up. Grainy texture? The powdered sugar wasn’t sifted or the butter wasn’t creamed enough. Re-whip the butter until pale and smooth, then sift the sugar again before adding.
How do I adjust the flavor for different occasions?
For a chocolate twist, replace ½ cup powdered sugar with ½ cup cocoa powder. For citrus, add 1 teaspoon lemon or orange zest. For spice lovers, mix in ½ teaspoon cinnamon or pumpkin pie spice. Always adjust sweetness after adding new flavors—taste as you go!
Can I color this icing without ruining the texture?
Use gel food coloring (liquid can make it too thin). Start with ½ teaspoon and mix well before adding more. For pastel shades, add 1 teaspoon milk to lighten the color. Avoid overmixing—just blend until evenly distributed.
How long will this icing keep?
Store covered in the fridge for 5 days. For longer storage, freeze in 1-tbsp portions. Thaw at room temperature for 10 minutes. If it gets too firm after thawing, let it sit for 5 minutes before using. The texture remains perfect for decorating!

- 3lb Prime Rib Roast Recipe: Juicy Pink Center Guaranteed in 3 Hours - October 31, 2026
- 5 Spice Cake Recipe: Warmly Spiced Layers With Crunchy Top - October 31, 2026
- 1950’s Macaroni and Cheese Recipe: Nostalgic Creamy Cheese Sauce with Buttery Noodles - October 31, 2026