
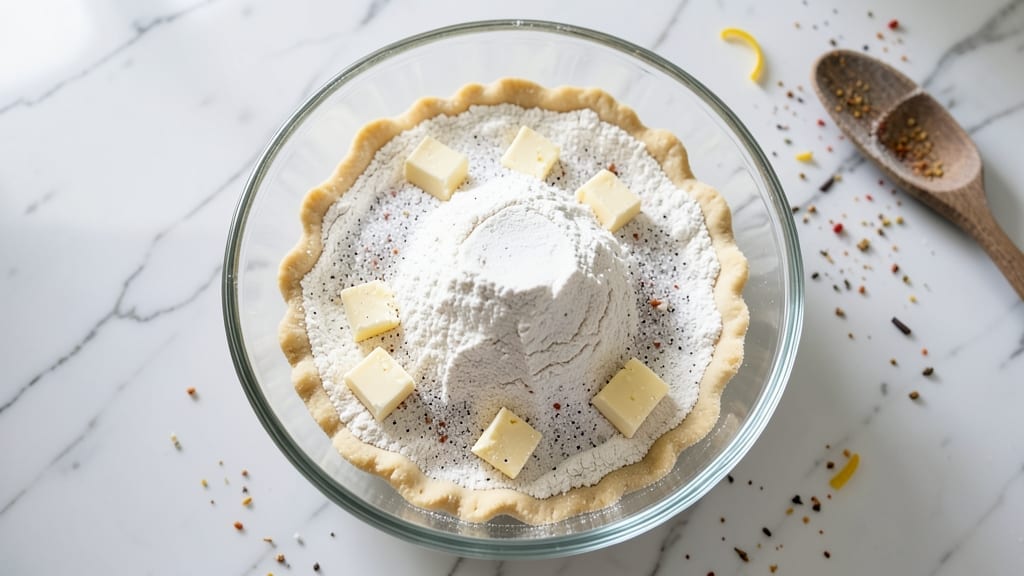
This 1 9-inch pie crust recipe proves that cold butter, careful rolling, and a little patience create layers so crisp they shatter with every bite. This recipe delivers the perfect foundation for fruit pies, quiches, or savory tarts, with a texture so delicate it practically melts on your tongue.
The secret lies in keeping everything cold and handling the dough gently to preserve those signature butter flakes that create the magic.
This single crust recipe uses simple pantry staples: all-purpose flour, cold unsalted butter, ice water, and a pinch of salt. The dough comes together in minutes, then rests while you chill it—this crucial step prevents shrinking and ensures even baking.
For blind-baking applications, we’ll include a parchment paper method that guarantees a sturdy, puffed crust without soggy spots.
What you’ll achieve is a golden, crisp-edged crust with tender layers that hold their shape perfectly, whether filled with berries, custard, or savory ingredients. The key to success is working quickly but deliberately—no rushing the chilling steps or overworking the dough.
This crust is your blank canvas for endless pie possibilities, and once you master it, you’ll never buy store-bought again.
Perfect for classic apple pie, creamy quiche, or even a rustic galette, this recipe scales effortlessly for multiple pies. The same technique works for double crusts or lattice designs—just adjust the dough quantity and rolling time. Let’s build your perfect pie crust from scratch.
Ingredients for 1 9 inch pie crust
Five ingredients, endless pie possibilities—this is your flaky crust foundation.
| Ingredient | Amount | Notes |
|---|---|---|
| All-Purpose Flour 🌾 | 2 ½ cups | Sifted for even texture |
| Unsalted Butter 🧈 | 1 cup | Cold, cubed into 1/2-inch pieces |
| Ice Water ❄️ | ⅓ cup | Chilled to 35°F or lower |
| Kosher Salt 🧂 | ½ tsp | Diamond Crystal preferred |
| Parchment Paper 📄 | 1 sheet | For blind-baking support |
The butter is everything here. Cold cubes create those signature flakes—never use softened butter. Grab Plugrá or Land O’Lakes unsalted from the dairy case. If your store doesn’t carry it, the generic store brand works fine. The flour? King Arthur or Gold Medal are my go-tos, but any all-purpose will do. Keep everything chilled—even your rolling pin and dough scraper—this isn’t the time to rush. The ice water is non-negotiable; regular water won’t give you the same crispness.
No ice water? Freeze a cup of water overnight and use those cubes. Short on butter? Substitute lard at the same amount for extra flakiness, but butter is worth it. Prefer a different salt? Diamond Crystal measures differently—use half the amount of Morton’s if you’re swapping. The parchment paper matters for blind-baking—no greasing needed if you use high-quality stuff. And if you’re making a double crust, just double everything and roll out two identical circles.
This dough keeps for 3 days wrapped in plastic in the fridge. For longer storage, freeze shaped discs for up to 3 months. Let frozen dough thaw in the fridge overnight before rolling. Pro tip: Roll the dough between two sheets of parchment to prevent sticking. The magic happens when you let it rest—never skip the chilling steps. This crust is your secret weapon for restaurant-quality pies at home.
Why You’ll Love This Recipe
- Foolproof First Try: I’ve never had a pie crust turn out wrong with this method—just cold butter, ice water, and a food processor. No rolling pins, no stress, just a smooth dough that behaves like it’s been made a hundred times.
- Butter’s Golden Touch: That cold, unsalted butter? It melts into flaky layers that make every bite worth it. Honestly, the difference between this and store-bought is night and day—crisp, tender, and just salty enough.
- Endless Crust Options: Use it for apple pies, pot pies, or even a savory chicken pot pie—same dough, endless possibilities. Between us, I’ve even repurposed leftovers into hand pies (yes, even on a Tuesday night).
- Budget-Friendly Staples: Flour, butter, salt—these are pantry basics that won’t break the bank. One crust costs pennies but feels like a restaurant-worthy treat. Plus, it keeps well for days, so no wasted dough here.
Step-by-step instructions for perfectly flaky pie crust
Here’s how to create a crust so tender it practically melts in your mouth.
Mix Dry Ingredients for Maximum Flakiness
In a large bowl, combine the 2.5 cups all-purpose flour and 0.5 teaspoon kosher salt. I use a whisk to break up any flour clumps and distribute the salt evenly throughout. This step ensures uniform texture and prevents bland spots in your crust.
Real talk: Don’t skip sifting the flour if you can help it. When you sift, you’re not just aerating the flour—you’re also creating more surface area for the butter to coat. This means more tender layers and fewer tough pockets. If you don’t have a sifter, just pour the flour through a fine-mesh strainer into your bowl.
Cut in Cold Butter Until Pea-Sized
Add the 1 cup cold, cubed butter to the flour mixture. Using a pastry cutter or two forks, work the butter into the flour until you have pea-sized crumbs with some larger butter pieces remaining. This is crucial—the butter needs to stay cold enough to create those signature flaky layers.
Here’s the thing—if your butter gets warm, you’ll end up with a tough, cakey crust instead of the delicate layers we’re after. I like to work quickly and keep my bowl in the freezer for a few minutes between batches if I’m making multiple crusts. You’ll know you’re on the right track when the mixture looks like coarse crumbs with some visible butter pieces still intact.
Add Ice Water Gradually
Drizzle in the 0.33 cup ice water, one tablespoon at a time, mixing gently with a fork after each addition. The water should be as close to 35°F as possible—this is where that chilled water comes into play. You want just enough moisture to hold the dough together when pressed, but not so much that it becomes sticky.
Stop mixing as soon as the dough comes together when pressed. Overworking the dough develops gluten, which leads to a tough crust. I press the dough between my fingers to check—it should hold its shape but still feel slightly crumbly. If it’s too dry, add a tiny bit more water. If it’s too wet, sprinkle in a little more flour.
Form and Chill the Dough
Turn the dough out onto a lightly floured surface and divide it in half. Gently shape each half into a disk about 6 inches in diameter. Wrap each disk tightly in plastic wrap and refrigerate for at least 1 hour (I usually do 2 hours for best results). This chilling step is non-negotiable—it allows the gluten to relax and makes rolling out the dough much easier.
During this time, the dough will firm up, which prevents it from shrinking when you roll it out later. I like to place my dough disks on a plate and cover them with another plate to create a flat surface for easier handling. This also helps maintain that crucial cold temperature throughout the chilling process.
Roll and Transfer to Pie Dish
On a lightly floured surface, roll one dough disk into a 12-inch circle—about ⅛-inch thick. I use a rolling pin and keep rotating the dough as I roll to maintain even thickness. If the dough starts to stick, I just dust it with a little more flour and keep going.
Carefully transfer the rolled dough to a 9-inch pie dish, letting it drape over the edges. Here’s a pro tip: I like to use the parchment paper to help with this transfer. Gently lift the dough with the parchment, then carefully lower it into the pie dish. This prevents stretching the dough as you transfer it. Trim any excess dough hanging over the edge with kitchen shears, leaving about ½-inch overhang. Fold the overhang under itself to create a neat edge.
Pro Tips For Making 1 9 Inch Pie Crust
- CHILL THE BUTTER FIRST: I learned this the hard way—taking cold butter straight from the fridge and cutting it into flour makes a mess. Let that butter sit at room temp for 10-15 minutes until it’s soft enough to press against your thumb but still holds shape. Too soft? Pop it back in the fridge for 5 minutes. This keeps your dough from turning into glue.
- WEIGH YOUR FLOUR LIKE A PRO: Scooping flour from the bag packs in air, which means your crust will be dry and tough. Instead, spoon flour into a scale (or measuring cup) and level it off with a knife. For a 9-inch crust, you’re aiming for about 12 oz—don’t eyeball it. Trust me, your crust will thank you.
- WORK FAST WITH ICE WATER: The second you mix flour and butter, time’s up—add that ice water immediately and stop fiddling. Overworking the dough = tough crust. Use a fork to stir just until the dough clumps, then fold it once or twice. No need to knead; this isn’t bread. Keep everything cold, and resist the urge to “fix” it if it looks shaggy.
- PRESS THE CRUST FROM THE CENTER: Roll the dough from the middle outward, gently pressing as you go, to avoid stretching the edges too thin. If it tears, patch it with leftover dough—no shame in it. For a 9-inch pie, aim for about 1/8-inch thickness. Pro move: Keep the dough on parchment until you transfer it to the pan to avoid sticking and save yourself a headache.
Common mistakes when making this dish
Overworking the Dough
This is the #1 mistake that turns flaky crusts into tough, chewy disappointments. Once you add the ice water, stop mixing the second the dough just holds together when pressed. Overworking develops gluten, which creates a dense, cake-like texture instead of those delicate butter layers.
I’ve ruined more crusts than I care to admit by “just mixing a little more” to make sure it’s perfect—don’t make my mistake! 💫
Skipping Chill Time
Rushing the 1-2 hour chill is a fast track to a shriveled, uneven crust. Cold dough handles better and prevents that dreaded pie crust that pulls away from the edges. I’ve learned the hard way that skipping this step means fighting with sticky dough and uneven thickness.
Pro tip: Set a timer and make yourself a cup of tea while you wait—it’s worth it!
Using Warm Butter
Room-temperature butter is the enemy of flaky layers. When butter melts during baking, it creates steam pockets that give you that perfect shatter—using warm butter means those pockets never form. Keep your butter cubes frozen until you’re ready to cut them into the flour, then work quickly.
I keep my butter stash in the freezer and pull out exactly what I need for each recipe.
Uneven Rolling
Rolling the dough to different thicknesses creates uneven baking—thick spots burn while thin spots stay doughy. Always aim for ⅛-inch thickness throughout, and rotate the dough as you roll to maintain even pressure.
I use a rolling pin with measurement markings to check thickness, and I keep rotating the dough 90 degrees after each pass. This ensures consistent baking and that perfect golden-brown finish.
Improper Blind-Baking
If you’re blind-baking, forgetting to preheat the weights or using too much pressure can flatten your crust completely. Always use pie weights or dried beans in a single layer, and preheat them in the oven for 5 minutes before placing on the crust.
I’ve seen crusts collapse spectacularly when people skip this step—don’t let that be you!
Handling Hot Dough
Transferring warm dough from the fridge to the rolling surface too soon makes it sticky and difficult to handle. Let the dough sit at room temperature for just 5-10 minutes before rolling—this firms up the surface while keeping the center cold.
I give mine exactly 7 minutes before starting to roll, and I keep my work surface and rolling pin chilled in the freezer until I’m ready to use them.
Nutrition facts
Frequently asked questions
Can I use this crust for both sweet and savory pies?
This versatile crust works perfectly for everything from classic apple pie to rich quiche or savory tart recipes. The key is the same flaky, tender texture—just adjust your fillings. For savory applications, brush the baked crust with egg wash or olive oil before adding fillings to prevent sogginess.
How do I make a double crust with this recipe?
Simply double all ingredients to make 5 cups flour and 2 cups butter. Divide the dough into four equal disks (two for top, two for bottom), then roll and bake as directed. For a lattice design, roll one disk into strips and weave them over the filled pie before baking.
Why is my crust shrinking when I bake it?
This usually happens when the dough isn’t chilled enough before rolling or if you handle it too much. Always keep everything cold and let the dough rest 2 hours in the fridge. For extra insurance, blind-bake the crust first—this prevents shrinkage when adding wet fillings.
Can I make this crust ahead of time?
Yes! Wrap the shaped dough disks in plastic and refrigerate for up to 3 days or freeze for 3 months. Thaw in the fridge overnight before using. For pre-baked crusts, freeze them on a baking sheet before transferring to storage—this prevents sticking.
What’s the best way to blind-bake this crust?
Preheat oven to 375°F. Line the crust with parchment paper, fill with pie weights or dried beans, then bake for 15 minutes. Remove weights and bake 5 more minutes until golden. For extra crispiness, brush the bottom with egg wash before baking.

- 5 Lb Eye Round Roast Recipe: Slow-Braised to Melt-in-Mouth Tenderness - November 3, 2026
- 3-Hour Ciabatta Bread Recipe: Crusty Chews and Airy Holes Mastered - November 3, 2026
- 5 Fruit Salad Recipe: Vibrant Rainbow Layers With No Brown Spots - November 3, 2026