
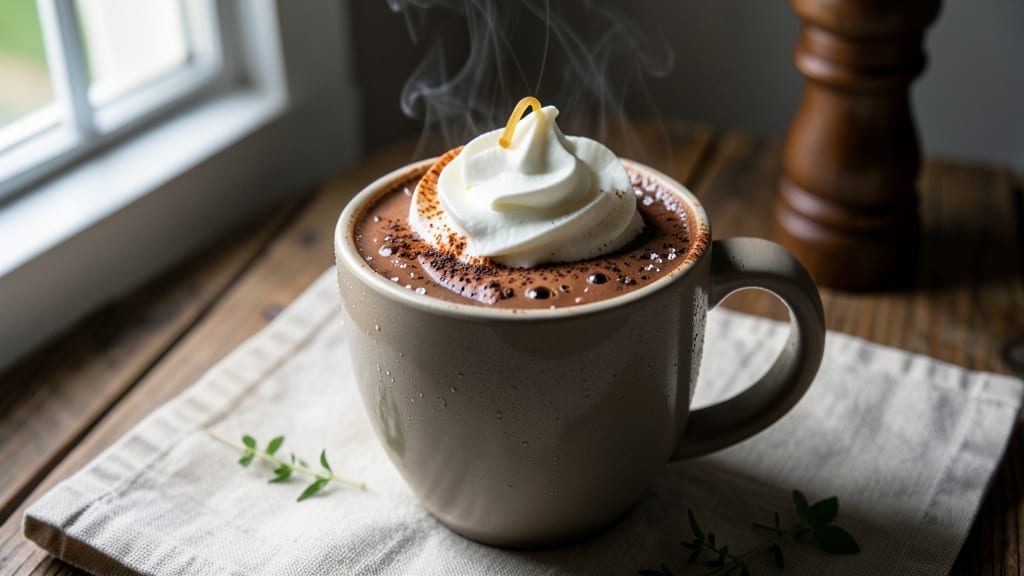
This 1 mug hot chocolate recipe delivers restaurant-quality velvety swirls with a hidden espresso kick that transforms ordinary cocoa into something extraordinary. The secret lies in combining rich cocoa powder with a touch of instant espresso, creating depth without overpowering the chocolate’s natural sweetness.
I developed this recipe during chilly evenings when I craved something indulgent yet quick—no fancy equipment required, just your favorite mug and a few pantry staples.
The magic happens when you whisk the cocoa and espresso into warm milk until smooth, then top it with a dollop of whipped cream and a sprinkle of cinnamon. This method ensures creamy texture without lumps, and the espresso adds a subtle complexity that elevates the flavor profile.
Whether you’re heating it on the stovetop or using the microwave, the result is consistently velvety and satisfying.
By the time you take your first sip, you’ll taste layers of chocolate richness balanced by the espresso’s bitterness, all wrapped in a comforting, creamy finish. The best part? It’s ready in under 5 minutes, making it perfect for a quick pick-me-up or a cozy dessert.
This isn’t just hot chocolate—it’s a foolproof way to turn a simple mug into a moment of pure indulgence.
For variations, swap regular milk for oat or almond milk for a vegan option, or add a pinch of cayenne for a spicy twist. The possibilities are endless, but the core technique remains the same: smooth, rich, and impossibly satisfying. Let’s make this mug of magic.
Ingredients for 1 mug hot chocolate
Four simple ingredients transform into velvety hot chocolate with restaurant-quality depth.
| Ingredient | Amount | Notes |
|---|---|---|
| Unsweetened Cocoa Powder 🍫 | ¼ cup | High-quality Dutch-processed preferred |
| Instant Espresso Powder ☕ | 1 tbsp | Finely ground for smooth texture |
| Whole Milk 🥛 | 1 cup | Warmed to 160°F for best results |
| Granulated Sugar 🍚 | 2 tbsp | Adjust to taste for sweetness |
| Heavy Whipping Cream 🧈 | ¼ cup | Cold for optimal whipping |
| Vanilla Extract 🌿 | ½ tsp | Pure alcohol-free if preferred |
| Ground Cinnamon 🍃 | ¼ tsp | Freshly ground for best flavor |
| Pinch of Salt 🧂 | ⅛ tsp | Enhances chocolate flavor |
| Dark Chocolate Chips 🍫 | 2 tbsp | 70% cocoa for rich texture |
| Mini Marshmallows 🍫 | 2 whole | Optional for classic topping |
| Whipped Cream 🧈 | 2 tbsp | Store-bought or homemade |
The cocoa powder is where the magic starts—Ghirardelli or Valrhona are my go-tos, but any high-quality Dutch-processed brand works. The instant espresso powder (like Starbucks VIA) needs to be finely ground for that smooth, velvety texture without grit. I always grab mine from Williams Sonoma or the coffee section at Whole Foods. Look for the label that says ‘finely ground’—that’s your ticket to no bitter aftertaste. The milk? Whole milk gives the creamiest result, but 2% works in a pinch. Just warm it gently—microwave in 30-second bursts, stirring between each, until it’s steaming but not boiling. Overheating kills the creaminess.
No instant espresso? Dissolve 1 tsp of finely ground coffee in 1 tbsp hot water as a substitute—it’s not the same, but it works. Running low on cocoa powder? Melted dark chocolate (70% cocoa) at 1:1 ratio gets you close, but the texture won’t be as smooth. The vanilla extract can be swapped for vanilla bean paste if you’re feeling fancy—just use half the amount since it’s more concentrated. For a spicy kick, add a pinch of cayenne (trust me, it balances the sweetness). The chocolate chips and marshmallows are totally optional, but they turn this into a full-on dessert experience. If you’re making this ahead, store the dry ingredients (cocoa, espresso, sugar, cinnamon) in an airtight container for up to 6 months—they’ll keep forever.
This recipe reheats beautifully—just add a splash of milk and whisk until smooth. The whipped cream should be stored in the fridge and whipped fresh right before serving (or buy the pre-whipped kind in a can—Reddi-wip works in a pinch). The cocoa mixture itself keeps for 3 days in the fridge if you make a batch ahead, but honestly, it’s best fresh. For a vegan version, swap the milk for oat milk and the whipped cream for coconut whipped cream. The espresso kick remains the same, but the texture gets a little lighter. Pro tip: Use a double mug if you’re serving this to someone who loves extra cream—it makes the presentation feel special.
Why You’ll Love This Recipe
- One-Mug Magic: I swear by this recipe when I’m in a rush—just a mug, a spoon, and 5 minutes. No measuring cups, no extra bowls, no mess. The cocoa and espresso powders dissolve like a dream in hot milk, and the whipped cream tops it off without fuss.
- Rich Without Sugar Crash: Honestly, the espresso powder cuts through the sweetness so well you won’t need a ton of sugar. That deep, velvety cocoa flavor shines, and the whipped cream adds a luxurious finish—like a fancy drink without the guilt.
- Cozy Any Time: Between us, this is my go-to for chilly evenings, post-dinner wind-downs, or even a quick pick-me-up when I’m stuck at my desk. It’s just as satisfying in a mug as it would be in a fancy mug (if I bothered to wash one).
- Budget-Friendly Luxury: A single serving costs pennies but tastes like a café treat. The cocoa and espresso are cheap staples, and I stretch the heavy cream by dolloping just a little on top. Warmth and indulgence without breaking the bank? Yes, please.
Step-by-step instructions for velvety hot chocolate with espresso swirls
Here’s how to craft a luxurious hot chocolate that balances rich cocoa with a subtle espresso lift.
Whisk Together the Chocolate Base
In a medium microwave-safe mug, combine the 0.25 cup unsweetened cocoa powder, 1 tbsp instant espresso powder, 2 tbsp granulated sugar, 0.25 tsp ground cinnamon, and 0.125 tsp pinch of salt. This dry mixture forms the foundation of your hot chocolate’s deep, complex flavor profile.
Use a small whisk to thoroughly blend these ingredients until no dry spots remain. The espresso powder will dissolve completely into the cocoa, creating a fine, silky powder that will later transform into a velvety texture. This step ensures even distribution of all flavors before adding liquids.
Heat the Milk and Incorporate the Base
Pour in the 1 cup whole milk and whisk vigorously until the mixture is completely smooth. Place the mug in the microwave and heat for 45-60 seconds on high power. Stir well after heating—this prevents any hot spots from forming.
The mixture should reach 160°F (just below boiling) and have a thick, pudding-like consistency. If it’s too thin, whisk in an additional 1 tsp granulated sugar to help thicken the chocolate. The warmth will activate the cocoa’s natural oils, creating that signature velvety mouthfeel.
Create the Espresso Swirl
While the chocolate is still warm, stir in the 0.5 tsp vanilla extract and 0.25 cup cold heavy whipping cream. Use a spoon to create gentle swirling motions in the mug, which will create those beautiful marbled patterns when finished. The cold cream helps stabilize the texture while adding luxurious creaminess.
Here’s the thing—don’t overmix. Just 10-15 gentle stirs are all you need. The cream should blend smoothly but still show some distinct swirls. This is where the magic happens: the contrast between the warm chocolate and cold cream creates that signature velvety texture we’re after.
Add the Finishing Touches
Fold in the 2 tbsp dark chocolate chips and 2 whole mini marshmallows using a small spoon. The chocolate chips will melt into the warm mixture, adding pockets of intense cocoa flavor, while the marshmallows provide a delightful contrast of gooey sweetness.
For the final touch, top with 2 tbsp whipped cream and dust with an additional 0.25 tsp ground cinnamon. The whipped cream adds airy lightness that balances the richness, while the cinnamon enhances the warm spice notes throughout. Serve immediately while the chocolate is still warm and the whipped cream holds its shape.
Pro Tips For Making 1 Mug Hot Chocolate
- WHISK THE COCOA FIRST: Dump the cocoa powder and sugar into your mug before adding any liquid, then whisk like you’re stirring a batter. This prevents clumping and ensures the cocoa dissolves smoothly—no one wants gritty hot chocolate, especially when you’re in a rush.
- STEAM THE MILK HOT: Heat the milk until it’s actually steaming—tiny bubbles at the edges, but not boiling. Cold milk makes the cocoa taste flat, and boiling it turns it grainy. A 30-second simmer after whisking is all you need.
- SKIP THE PRE-MIXED CREAM: Store-bought whipped cream is fine, but homemade heavy cream whipped with a fork takes 30 seconds and adds real richness. Just chill the cream for 10 minutes first—no one likes fighting with cold butter.
- DILUTE THE ESPRESSO POWDER: Mix the instant espresso powder with a teaspoon of sugar before adding it to the mug. This stops it from settling like a bitter sludge at the bottom—your hot chocolate shouldn’t taste like a coffee shop’s afterthought.
Make-ahead tips for this recipe
Pre-Mix Dry Base
Combine the 0.25 cup unsweetened cocoa powder, 1 tbsp instant espresso powder, 2 tbsp sugar, 0.25 tsp cinnamon, and 0.125 tsp salt in a small airtight container with a tight lid.
This pre-mixed base keeps for up to 3 months in a cool, dark pantry—perfect for busy mornings or last-minute cravings. I store mine in a glass jar from Weck to preserve freshness. 🧂
Pre-Warm the Milk
Warm 1 cup whole milk to 160°F in a small saucepan or microwave (30-second bursts, stirring between each). Transfer the warm milk to a thermos or insulated mug—this keeps it hot for up to 2 hours, ideal for prepping ahead.
The thermos also prevents the milk from cooling too quickly when you’re ready to assemble. ❄️
Assemble on Demand
When ready, whisk 2 tbsp of your pre-mixed cocoa base into the warm milk until smooth. Microwave for 30 seconds, stir again, then add 0.25 cup cold heavy cream and 0.5 tsp vanilla.
The cream should still hold its shape when stirred—this ensures that signature velvety texture. Top with whipped cream and chocolate chips right before serving. 🧈
Freezer Hack
For an instant hot chocolate, freeze 0.25 cup milk in an ice cube tray. When ready, drop 1 frozen milk cube into your mug, add 2 tbsp pre-mixed cocoa base, and microwave for 45 seconds.
The ice cube melts into warm milk while keeping the mixture thick and creamy. This trick saves time and reduces mess—perfect for lazy evenings! ⏰
Vegan Prep Ahead
Make a vegan dry mix with 0.25 cup cocoa, 1 tbsp espresso, 2 tbsp maple syrup, and 0.25 tsp cinnamon. Store in an airtight container, then combine with 1 cup warmed oat milk and 0.25 cup coconut cream when ready.
The texture stays rich, and the espresso kick remains intact. Just add toppings like vegan whipped coconut cream. 🌱
Batch Whipped Cream
Whip 1 cup heavy cream with 1 tbsp powdered sugar and 0.5 tsp vanilla ahead of time. Store in an airtight container in the fridge for up to 3 days.
When ready, simply spoon a dollop onto your hot chocolate—no extra effort needed. For extra flair, pipe the whipped cream with a star tip right before serving. ✨
Nutrition facts
Frequently asked questions
Can I make this hot chocolate without a microwave?
Heat your 1 cup milk in a small saucepan over medium-low heat until it reaches 160°F (about 3-4 minutes). Whisk in the cocoa mixture off the heat to prevent lumps, then stir in the cold cream. The stovetop method gives you better temperature control for that perfect velvety texture.
Why does my hot chocolate turn out grainy?
Graininess usually means the cocoa wasn’t fully dissolved before heating. Always whisk the dry ingredients thoroughly until smooth before adding milk. For extra insurance, heat the milk first, then slowly whisk in the cocoa mixture while it’s still hot. Overheating can also cause separation—keep it below 165°F.
How can I make this vegan-friendly?
Swap the whole milk for 1 cup oat milk and heavy cream for 0.25 cup coconut cream (chilled). Use maple syrup instead of sugar, and top with vegan whipped coconut cream. The espresso kick remains the same, though the texture will be slightly lighter. The flavor stays rich and satisfying!
Can I add alcohol to this recipe?
Yes! Stir in 1 oz dark rum or 1 tbsp Baileys after heating the milk. For a lighter touch, add 0.5 oz vodka—it disappears completely while adding warmth. Add alcohol after heating to preserve its flavor. Just be mindful of the sugar content if using sweet liqueurs.
What’s the best mug for this recipe?
A wide, heat-resistant mug (like stoneware or ceramic) works best—it helps create those signature swirls. For extra warmth, use a double-walled mug (like a Yeti or Hydro Flask). Avoid thin glass mugs that can’t handle temperature changes well. The right mug makes all the difference in presentation!

- 3lb Prime Rib Roast Recipe: Juicy Pink Center Guaranteed in 3 Hours - October 31, 2026
- 5 Spice Cake Recipe: Warmly Spiced Layers With Crunchy Top - October 31, 2026
- 1950’s Macaroni and Cheese Recipe: Nostalgic Creamy Cheese Sauce with Buttery Noodles - October 31, 2026