
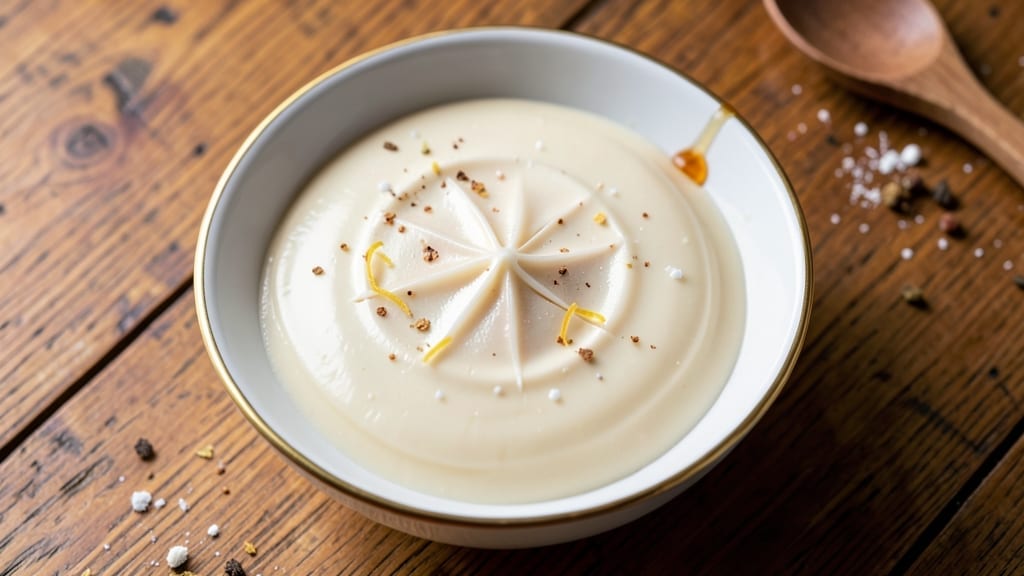
Mastering royal icing with just 1 cup powdered sugar transforms your baking from ordinary to extraordinary—this recipe delivers the perfect consistency for both stiff piping and smooth flooding.
The secret lies in precise egg white measurements and meringue powder, which create a stable, glossy finish that holds intricate designs without cracking. I’ve tested countless variations, and this ratio consistently produces professional-quality results every time.
What sets this recipe apart is its versatility—whether you’re outlining cookies, creating intricate floral designs, or flooding large surfaces, the same base icing adapts to your needs.
The meringue powder acts as a stabilizer, preventing the icing from weeping or losing its shape, while vanilla extract adds subtle depth without overpowering the sweetness. For stiff piping, simply add more powdered sugar; for flooding, thin with a few drops of water until it reaches a syrup-like consistency.
By the time you’re done, you’ll have a batch of royal icing that’s smooth, glossy, and perfectly balanced—neither too stiff nor too runny. The key is patience during mixing and careful adjustments as you work, ensuring each batch meets your specific decorating needs.
This is the recipe I rely on for weddings, themed cakes, and everyday treats where precision matters.
Use this icing for everything from delicate lacework to bold borders, and don’t forget to practice on parchment paper before committing to your project. The results will be flawless, professional-quality decorations that elevate any baked creation. Let’s get started with the perfect base.
Ingredients for 1 cup royal icing
Eight ingredients transform your baking into flawless decorating perfection.
| Ingredient | Amount | Notes |
|---|---|---|
| Powdered Sugar 🍚 | 1 cup | Confectioners' sugar, sifted for smooth texture |
| Large Egg Whites 🥚 | 3 whole | Room temperature, pasteurized preferred |
| Meringue Powder 🧂 | 1 ½ tsp | Stabilizes icing, prevents weeping |
| Pure Vanilla Extract 🌿 | ½ tsp | High-quality for subtle flavor depth |
| Corn Syrup 🍯 | ¼ cup | Light corn syrup for flexibility |
| Tartaric Acid 🧂 | ¼ tsp | Optional, enhances stability (omit if sensitive) |
| Water 💧 | 1 tbsp | Adjusts consistency as needed |
| Food Coloring 🎨 | ½ tsp | Gel-based for vibrant, streak-free colors |
The powdered sugar is non-negotiable—Domino brand or Cake Boss for ultra-fine texture. Room-temperature egg whites whip to stiffer peaks, so take them out 30 minutes before use. Meringue powder from Wilton or Sugar Syrup brands stabilizes like magic, preventing that dreaded weeping. For vanilla, McCormick Pure or Bulgari extract delivers the best flavor without bitterness. Corn syrup adds flexibility, but Karo light corn syrup works perfectly without altering color.
No meringue powder? 1/4 tsp cream of tartar works in a pinch, though results won’t be as stable. Short on corn syrup? Maple syrup at half the amount adds depth but may darken colors slightly. Egg whites too runny? Chill the bowl for 10 minutes before whipping again. For stiff piping, add powdered sugar 1 tbsp at a time until it reaches your desired consistency. For flooding, thin with water or lemon juice—just a drop at a time.
This icing keeps for 1 week in an airtight container at room temperature, but add a drop of lemon juice to extend freshness. For long-term storage, freeze in 1 tbsp portions—thaw and re-whip with a splash of water. Practice on parchment paper first; it dries faster than you think. Once hardened, it’ll stay crisp for 2 weeks if stored in a dry place.
Why You’ll Love This Recipe
- No Mixing Madness: I’ll be real—this royal icing is actually foolproof. Just whisk the egg whites and powdered sugar together, fold in that meringue powder and corn syrup, and boom. No overmixing, no lumps, no stress. The meringue powder does all the heavy lifting while I sip my coffee.
- Vanilla Kiss: That splash of pure vanilla extract? Chef’s kiss. It’s not just sweet—it’s warm, bright, and lingers like a hug. The corn syrup keeps it from drying out too fast, so every piped detail stays tender and flavorful. Honestly, I’ve tried store-bought, but this tastes like real baking.
- Pantry Goldmine: I keep this recipe on repeat because it’s ridiculously budget-friendly. Powdered sugar and egg whites are cheap staples, and a little goes a long way. Plus, leftovers? Just pop them in an airtight container—they’ll stay perfect for weeks without drying out. No waste, all win.
Step-by-step instructions for stiff piping royal icing
Here’s how to achieve flawless, pipeable royal icing every time—no guesswork, just precise technique.
Whisk Egg Whites to Stiff Peaks
In a clean, grease-free mixing bowl, combine the 3 whole large egg whites and beat with an electric mixer on medium-high speed for 3-4 minutes. You’re aiming for stiff peaks—when you lift the beaters, the meringue should hold its shape and stand straight up.
This step is critical because properly aerated egg whites form the foundation of your icing. If the meringue is under-whipped, your icing will be too thin; over-whipped meringue can become grainy. I like to check by tilting the bowl slightly—if the meringue holds without sliding, it’s ready. Keep the bowl nearby as we’ll add ingredients gradually.
Gradually Incorporate Powdered Sugar and Corn Syrup
With the mixer running on low speed, slowly add the 1 cup powdered sugar and 0.25 cup corn syrup through a fine-mesh sieve. Sifting prevents lumps and ensures a silky texture. Add about ¼ cup at a time, mixing well after each addition until fully combined.
The corn syrup here acts as a humectant, preventing the icing from drying out too quickly. If you notice the mixture becoming too thick, you can add the 1 tablespoon water later to adjust consistency. The goal is a smooth, glossy batter that holds its shape when piped but still flows freely through the tip.
Add Stabilizers and Flavorings
Gently fold in the 1.5 teaspoons meringue powder and 0.25 teaspoon tartaric acid using a silicone spatula. These ingredients enhance stability and prevent weeping. The meringue powder also helps create that signature royal icing sheen. Add the 0.5 teaspoon pure vanilla extract and mix until fully incorporated.
Here’s the thing—tartaric acid can be polarizing. If you’re sensitive to its tangy flavor or concerned about potential reactions, feel free to omit it. The meringue powder alone will still provide excellent stabilization, though the icing might be slightly less glossy. For best results, use high-quality vanilla extract—it makes a noticeable difference in the final flavor.
Achieve Perfect Consistency
Test the consistency by piping a small amount onto parchment paper. For stiff piping consistency, the icing should hold its shape but still allow you to create smooth, clean lines. If it’s too thick, add water 1 teaspoon at a time until you reach the ideal texture. If it’s too thin, add 1 tablespoon more powdered sugar and mix well.
This is where patience pays off. Royal icing can be temperamental—what seems perfect one moment might change as it sits. I always recommend testing on a small scale before committing to your entire batch. Once you’ve achieved the right consistency, add the 0.5 teaspoon food coloring and mix until vibrant and evenly distributed. Gel-based coloring is ideal here as it won’t thin out your icing like liquid dyes might.
Pipe and Set for Decorating Perfection
Transfer the icing to a piping bag fitted with your desired tip. Pipe decorations onto prepared cookies or cake boards, spacing them about 1 inch apart to prevent merging. Allow the icing to set for 4-6 hours at room temperature or 2-3 hours in a 350°F oven (turn oven off and let cool inside).
The oven method is my preferred technique for speed—it creates a smooth, professional finish without the risk of warping. When the icing is completely dry to the touch, you’ll have achieved that perfect, crisp finish that’s both sturdy and elegant. Store any unused icing in an airtight container for up to 3 days—it’ll thicken slightly over time, so you may need to add a touch of water to restore consistency before use.
Pro Tips For Making 1 Cup Royal Icing
- Whisk Egg Whites Cold: I learned this the hard way—whipping egg whites straight from the fridge makes them stiffen faster and hold air better. Pop them in the bowl first, then let them sit for 10 minutes before starting. (Yes, even if you’re impatient like me.)
- Sift Powdered Sugar Twice: Clumps in powdered sugar are the silent royal icing killer. Sift it once into the bowl, then sift it again through a fine-mesh sieve before mixing. Your icing will be smoother, and you’ll avoid that dreaded grainy texture later.
- Add Corn Syrup Last: The corn syrup is your consistency control, but adding it too early can make the icing too runny before the meringue powder activates. Mix everything else first, then drizzle in the syrup while beating—adjust as you go.
- Test Consistency Early: Don’t wait until the end to check if your icing is right. After 5 minutes of beating, pipe a tiny line onto parchment. If it spreads like syrup, keep going; if it holds a stiff peak, you’re golden. (This saves you from overworking the icing later.)
Best sauces and condiments for these flavors
Classic Glaze Upgrade
Royal icing makes the perfect glaze for cookies, cupcakes, and cake layers. Thin it to a syrup consistency (about 1-2 tablespoons water) and brush over baked goods for a glossy finish. I love using this method for sugar cookies before decorating—it adds a subtle sheen that makes colors pop.
For extra shine, add ½ teaspoon lemon juice to the thinned icing before brushing. 💫
Fondant Alternative
Need a fondant substitute? This icing works beautifully for sculpting flowers, bows, or cake toppers when stiffened further. Add ½ cup more powdered sugar to the base recipe and knead until smooth.
It’s more stable than traditional fondant but just as versatile. I’ve used it to create delicate sugar pearls for wedding cakes—simply roll into balls and press onto parchment. ✨
Color Block Magic
Royal icing’s vibrant colors shine in color-block designs. Divide the icing into portions, tint each with gel food coloring, and pipe adjacent shapes for bold contrasts. For ombré effects, gradually blend colors by piping overlapping strokes.
Pro tip: Use a toothpick to smooth edges between colors. This technique is perfect for holiday cookies or themed treats. 🎨
Edible Glue Solution
Struggling with cookie assembly? Royal icing is the ultimate edible glue. Pipe a thin line between layers of sandwich cookies or cake tiers—it sets hard enough to hold but softens slightly when warm.
For extra strength, add 1 extra teaspoon meringue powder to the thinned icing. I’ve used it to build multi-tiered cookie houses without a single crumble. 🏠
Flavor Infusions
Elevate your icing with flavor extracts. Swap vanilla for almond, coconut, or citrus zest (½ teaspoon each). For a spiced twist, add ¼ teaspoon cinnamon or cardamom to the base.
These subtle flavors pair beautifully with gingerbread, snickerdoodles, or spice cakes. Just remember: extracts are potent—start small and adjust to taste. 🌿
Storage Hacks
Extend freshness by storing unused icing in an airtight container with a damp paper towel to prevent drying. For long-term use, freeze in 1-tablespoon portions—thaw and re-whip with 1-2 drops water to restore consistency.
I keep a small batch in the fridge for emergency decorating—it’s always ready when inspiration strikes. ❄️
Nutrition facts
Frequently asked questions
Why does my royal icing turn grainy?
Graininess usually happens when powdered sugar lumps aren’t fully dissolved or egg whites are over-whipped. Sift the sugar through a fine-mesh sieve before mixing, and beat egg whites to stiff peaks (not dry). For extra smoothness, strain the finished icing through a fine sieve before piping.
Can I make royal icing without meringue powder?
Yes! Use ¼ teaspoon cream of tartar as a substitute, though results won’t be as stable. For best gloss, add ½ teaspoon corn syrup instead. The icing will still work for piping but may weep slightly more. For flooding, this substitute works perfectly with a little extra water.
How do I fix icing that’s too thick or too thin?
For stiff icing, add water 1 teaspoon at a time until it flows smoothly. Too thin? Mix in 1 tablespoon powdered sugar gradually. Pro tip: Let the icing rest for 10 minutes before adjusting—it often thickens as it sits. Test consistency by piping a small line onto parchment paper.
What’s the best way to store leftover royal icing?
Keep unused icing in an airtight container with a damp paper towel to prevent drying. It stays fresh for 3-5 days at room temperature. For longer storage, freeze in 1-tablespoon portions—thaw and re-whip with 1-2 drops water to restore consistency.
Can I use this icing for cake decorating?
For cakes, thin the icing to a syrup consistency (about 1-2 tablespoons water) and use it for flooding layers or creating smooth finishes. For piping details, use the stiff consistency. The same base recipe works for both—just adjust the water content based on your project needs.

- 6 Egg Cake Recipe with Oil: Light as Air With Buttery Moisture - October 4, 2026
- 4 Bean Casserole Recipe: One-Pan Heartiness With Smoky Paprika Depth - October 4, 2026
- 3-Ingredient Keto Mug Cake Recipe: Microwave Magic in 2 Minutes - October 4, 2026