
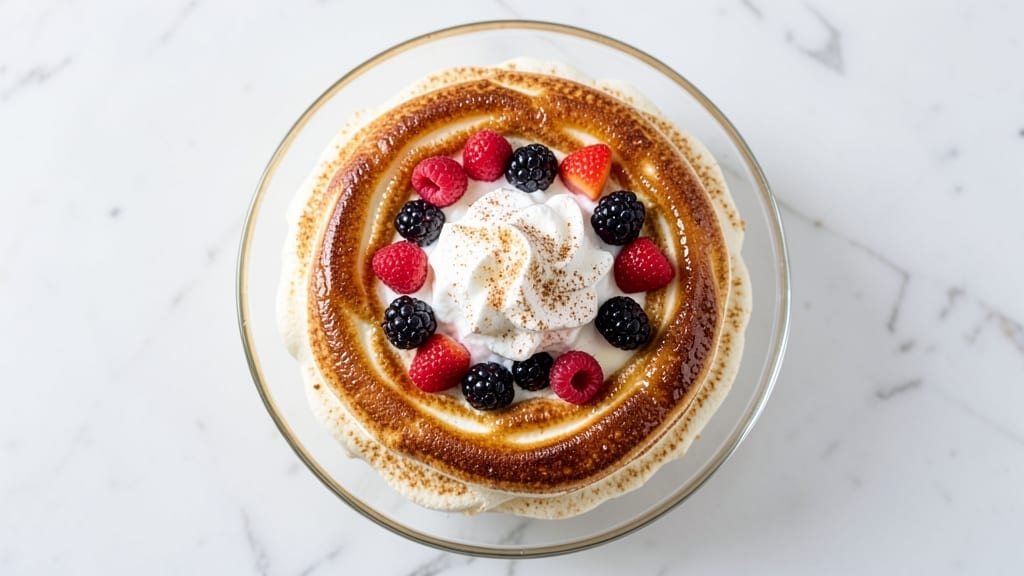
A 5 egg white pavlova recipe transforms simple ingredients into a delicate masterpiece with a crisp shell and marshmallow center. This recipe uses just five egg whites to create a stable, light meringue that bakes into a perfect cloud—no overbeating or soggy results.
The secret lies in low humidity and precise baking, ensuring your pavlova holds its shape while staying airy inside.
Unlike traditional pavlova recipes that rely on whole eggs, this version focuses on egg whites for a lighter texture and crisp edges. You’ll whip the whites to stiff peaks, then bake at a low temperature to develop that signature crackly shell while keeping the inside tender.
Topping ideas range from fresh berries and whipped cream to caramelized citrus for a restaurant-worthy finish.
The result is a dessert that’s foolproof yet impressive—ideal for special occasions or weeknight treats. Each slice delivers a satisfying crunch followed by a melt-in-your-mouth center, making it a crowd-pleaser. With minimal equipment and straightforward steps, even beginners can achieve professional results. Let’s get started on creating your perfect pavlova.
For best results, prepare toppings ahead and assemble just before serving to maintain that signature crispness. This recipe serves 6–8, making it perfect for gatherings or sharing. The key to success?
Patience during baking and cooling—rushing leads to cracks or collapse. Trust the process, and you’ll have a dessert that looks and tastes like it came from a patisserie.
Ingredients for 5 egg white pavlova
Five egg whites and a few pantry staples create this restaurant-worthy dessert masterpiece.
| Ingredient | Amount | Notes |
|---|---|---|
| Large Egg Whites 🥚 | 5 whole | Room temperature preferred |
| Granulated White Sugar 🍚 | 1 cup | Superfine preferred for smooth texture |
| Cornstarch 🌾 | 1 tbsp | For extra stability |
| Vanilla Extract 🌸 | ½ tsp | Pure vanilla preferred |
| White Vinegar 🍶 | ½ tsp | For meringue stability |
| Fresh Berries 🍓 | 2 cups | Strawberries, raspberries or mixed |
| Heavy Whipping Cream 🥛 | 1 cup | Chilled for whipping |
| Powdered Sugar 🍚 | ¼ cup | For dusting |
| Lemon Zest 🍋 | 1 tsp | Optional for brightness |
Egg whites are the star here—room temperature makes all the difference. Grab the freshest carton from the back of the fridge (they keep better there). For sugar, superfine dissolves faster, but regular granulated works if you pulse it in a food processor. The cornstarch might seem odd, but it’s a game-changer for stability—Diamond Crystal works perfectly. Vanilla extract should be pure, not imitation, and Trader Joe’s has a great affordable option. If you’re baking in humid weather, add an extra 0.5 tsp vinegar for extra structure.
No superfine sugar? Pulse regular sugar in a blender for 30 seconds—it’ll work in a pinch. Berries can be fresh or thawed frozen (no need to drain). For the cream, whip it to soft peaks—overwhipping makes it grainy. Lemon zest is optional but adds that bright patisserie touch. The meringue needs to cool completely before adding toppings—patience is key here. If your kitchen is damp, bake the pavlova on a wire rack instead of directly on the tray for better airflow.
Store the pavlova in an airtight container with parchment between layers for up to 2 days—it actually gets better as it sits. The meringue shell keeps its crispness best when stored this way. For serving, assemble just before guests arrive to maintain that perfect crunch. If you make a double batch, freeze one for up to 1 month—thaw overnight in the fridge before serving. The toppings can be prepped ahead, but the cream should be whipped fresh for the best texture.
Why You’ll Love This Recipe
- I’ll be real: this recipe only asks for a whisk and your arm strength. Five egg whites, a splash of vinegar, and steady strokes—no fancy equipment, just elbow grease. That vinegar trick? It’s the secret to stiffer peaks every time, even if you’re not a pro.
- No Stand Mixer Needed: I’ll be real: this recipe only asks for a whisk and your arm strength. Five egg whites, a splash of vinegar, and steady strokes—no fancy equipment, just elbow grease. That vinegar trick? It’s the secret to stiffer peaks every time, even if you’re not a pro.
- Crispy-Creamy Magic: The outside snaps like a meringue should, but the inside stays soft and pillowy—thanks to that cornstarch dusting. Drizzle it with vanilla syrup (just sugar + water + extract) and suddenly, it’s dessert that tastes like effortless luxury. No one will guess it’s just eggs and sugar.
- Dessert for Any Occasion: Too fancy for a Tuesday? Too simple for a party? Not this. Serve it with store-bought whipped cream for a last-minute potluck hit, or add fresh berries for a brunch crowd-pleaser. It’s the one dessert that works everywhere—no stress, no fuss.
Step-by-step instructions for 5 egg white pavlova
Here’s how to create that perfect meringue cloud with a crispy shell and marshmallow center.
Prepare the Meringue Base
Preheat your oven to 250°F and line a baking sheet with parchment paper. In a spotless, grease-free mixing bowl, combine the 5 whole Large Egg Whites with the 0.5 tsp White Vinegar and 0.5 tsp Vanilla Extract. I like to use a stand mixer for this—it gives you more control over the speed and prevents overmixing.
Start beating on medium speed until soft peaks form. Gradually add the 1 cup Granulated White Sugar and the 1 tbsp Cornstarch through the feeder tube, increasing the speed to high as you go. Beat for 8-10 minutes until the meringue is glossy and holds stiff peaks that stand straight up when you lift the beaters. You’ll know it’s ready when the bowl feels cool to the touch and the meringue forms a peak that doesn’t flatten immediately.
Shape the Pavlova
Transfer the meringue to a piping bag fitted with a large round tip. Pipe the meringue onto the prepared baking sheet, creating a 6-inch round nest with slightly higher edges. Use the back of a spoon to gently shape the edges into a defined ring, about ½-inch thick. This creates the classic pavlova shape with a crispy shell and soft center.
Here’s the thing—don’t overwork the meringue when shaping. Too much handling can cause the air to escape, resulting in a dense rather than light texture. Place the baking sheet in the preheated oven and immediately reduce the temperature to 225°F. Bake for 1 hour, then turn off the oven and let the pavlova cool completely inside with the door slightly ajar. This slow cooling prevents cracking and ensures that crispy shell we’re after.
Prepare the Berry Topping
While the pavlova cools, prepare the berry topping. In a medium bowl, gently toss the 2 cups Fresh Berries with the 1 tsp Lemon Zest. I like to use a mix of strawberries and raspberries for a balance of sweetness and tartness. Set aside until ready to use.
Whip the Cream and Assemble
In a chilled mixing bowl, whip the 1 cup Heavy Whipping Cream until soft peaks form. Gradually add the 0.25 cup Powdered Sugar and continue whipping until the cream holds stiff peaks. You want it thick enough to hold its shape but still light enough to spread easily.
Once the pavlova has cooled completely (this can take up to 2 hours), carefully transfer it to a serving plate. Spoon about half of the whipped cream onto the pavlova, spreading it evenly over the base. Add the berry mixture, arranging the berries in a circular pattern. Top with the remaining whipped cream, creating a beautiful swirl pattern on top. The contrast of the crispy meringue shell with the creamy filling and fresh berries is what makes this dessert truly special.
Serve Immediately
Serve the pavlova immediately to maintain its perfect texture. The crispy shell should hold its shape while the marshmallow center stays soft and airy. Each bite should offer a delightful combination of textures—crunchy meringue, creamy filling, and juicy berries. For the best experience, serve it at room temperature, allowing everyone to enjoy the full range of flavors and textures.
Pro Tips For Making 5 Egg White Pavlova
- Whip Until Stiff Peaks: Stop when you can flip the bowl upside down and nothing drips—no more, no less. Over-whipping adds air but collapses the structure later, and under-whipping means a dense, sad center. I used to eyeball it and ended up with a pancake instead of a meringue.
- Use Room-Temp Egg Whites: Cold egg whites whip slower and trap more fat, which kills volume. Pop them in a bowl of warm water for 10 minutes before starting. Yes, it’s an extra step, but your pavlova will stand taller and crisper—no more flat-top disasters.
- Sift the Sugar Twice: Clumps in sugar mean uneven sweetness and a gritty texture. Sift it into the egg whites before folding, then sift again after mixing. I learned this after biting into a pavlova with a sugar lump the size of a pea—trust me, it’s worth the effort.
- Bake Low and Slow: Crank the oven to 250°F (120°C) and bake for 1 hour—don’t rush it. High heat makes the outside crisp too fast while the inside stays wet. The edges should be golden, but the center should still jiggle slightly when you tap it. Patience here makes the difference between a crumbly mess and a perfect crack.
Common mistakes when making this recipe
Overbeating the Meringue
I’ve ruined more pavlova shells than I’d like to admit by overbeating the egg whites. Once those stiff peaks form, stop immediately—keep whipping, and you’ll trap too much air, leading to a dense, flat mess.
The meringue should hold its shape when you lift the beaters, but it shouldn’t look like whipped cream. If it’s glossy and stands tall, it’s ready. 🥚
Skipping the Vinegar
The 0.5 tsp white vinegar is non-negotiable for stability, especially in humid weather. Without it, your meringue might collapse or weep syrup. I’ve tested this recipe in both dry and damp conditions—vinegar makes all the difference. If you forget it, add an extra 1 tsp cornstarch as a backup.
Baking Too Fast
Rushing the bake is a surefire way to end up with cracks or a soggy center. That initial 250°F blast helps set the meringue, but reducing to 225°F for 1 hour is crucial.
Then, let it cool inside the oven with the door slightly open—this gradual process builds that perfect crisp shell. Skipping this step often leads to a sad, flat pavlova.
Humidity Nightmares
If your kitchen feels sticky, your meringue will suffer. The solution? Bake the pavlova on a wire rack over a baking sheet instead of directly on parchment. This allows airflow to prevent weeping.
I’ve learned this the hard way—especially in summer—when my meringues turned into syrup puddles. A small fan aimed at the oven can also help dry the meringue faster.
Assembling Too Soon
Patience is key here. The meringue needs to cool completely—up to 2 hours*—before adding toppings. If you rush, the whipped cream will melt the shell, and the berries will make it soggy.
I’ve seen beautiful pavlovas ruined in minutes because someone couldn’t wait. Trust the process, and your dessert will stay crisp and impressive.
Using Old Egg Whites
Old egg whites beat like water and lack the structure needed for pavlova. Always use the freshest carton possible—check the date and store them in the back of the fridge where it’s coldest.
If your whites are past their prime, whisk them with 1 tbsp lemon juice to help stabilize them, but fresh is always best. 💡
Nutrition facts
Frequently asked questions
Why does this recipe use only 5 egg whites instead of 6?
This version delivers the same perfect texture with fewer whites by using cornstarch for extra stability. Five egg whites create a lighter, airier meringue that’s easier to handle for beginners while still forming that signature crisp shell. The reduced quantity also makes it more budget-friendly without sacrificing quality.
Can I make this pavlova ahead of time?
Yes! Assemble the meringue base up to 1 day ahead and store it in an airtight container at room temperature. Add toppings just before serving to maintain crispness. For the full dessert, prepare the meringue 24 hours ahead, then assemble with fresh whipped cream and berries 4-6 hours before serving—this actually enhances the flavor.
What if my meringue cracks during baking?
Cracking usually happens from humidity or temperature changes. To prevent it, bake on a wire rack over a tray for better airflow, and avoid opening the oven door during the 1-hour bake. If cracks appear, don’t worry—they won’t affect taste! Just decorate around them. For extra insurance, chill the meringue 30 minutes before baking to stabilize it.
Can I substitute whipped cream with coconut cream?
For a dairy-free option, use 1 cup chilled coconut cream whipped with 2 tbsp powdered sugar until thick. It adds a subtle tropical flavor that pairs beautifully with berries. Just ensure it’s fully chilled before whipping to achieve stiff peaks. The texture will be slightly denser but still delicious.
How do I know when the meringue is fully cooled?
The meringue is ready when it’s completely room temperature (about 2 hours total cooling time). Tap the top gently—it should sound hollow, not soft. The edges should be crisp, and the center should still feel marshmallow-like but firm. If it’s still warm, leave it another 30 minutes to avoid soggy toppings. Patience here makes all the difference!

- 6 Egg Cake Recipe with Oil: Light as Air With Buttery Moisture - October 4, 2026
- 4 Bean Casserole Recipe: One-Pan Heartiness With Smoky Paprika Depth - October 4, 2026
- 3-Ingredient Keto Mug Cake Recipe: Microwave Magic in 2 Minutes - October 4, 2026