
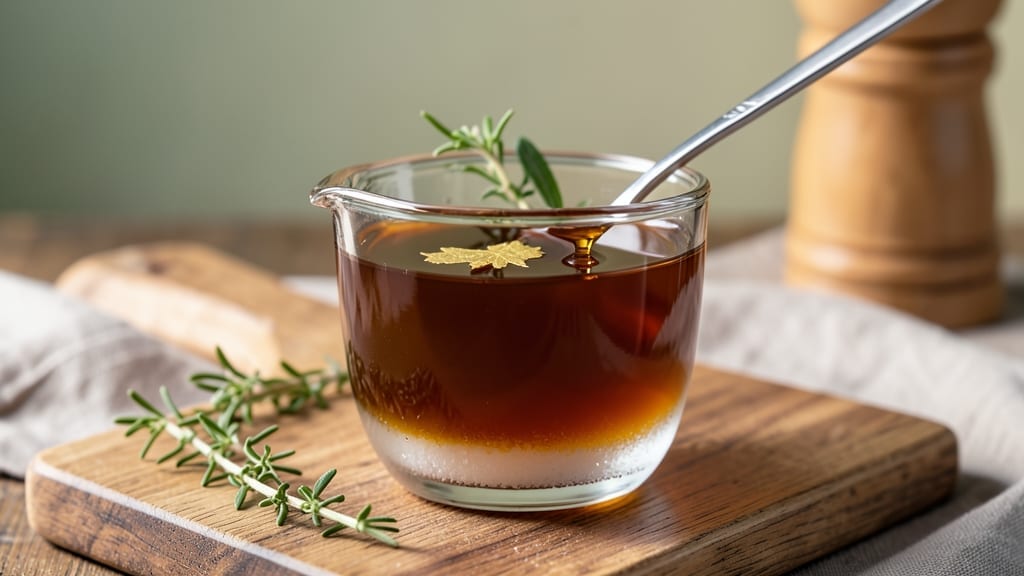
Making 1 cup simple syrup is the foundation for perfectly balanced cocktails, silky desserts, and even coffee enhancements—without any complicated techniques. This 1:1 sugar-to-water ratio dissolves completely on the stove with just 5 minutes of gentle heat, creating a smooth, versatile liquid that elevates everything from margaritas to fruit salads.
The key is patience: rushing the process leaves undissolved sugar crystals that ruin textures and flavors, so we’ll focus on a foolproof method that guarantees crystal-clear results every time.
The beauty of this recipe lies in its endless versatility—use it straight from the fridge for chilled drinks or warm it slightly for hot beverages. For cocktails, it balances sweetness without overpowering, while in desserts, it adds moisture to cakes, custards, or fruit compotes without altering their structure.
The 1:1 ratio (by volume) ensures consistency, whether you’re scaling up for a party or making just enough for a single recipe.
Storage is simple too: keep it refrigerated for up to 2 weeks or extend its shelf life by sterilizing the jar and storing it in the freezer for months.
What sets this syrup apart is its neutral profile—it enhances flavors rather than competing with them. Start with plain simple syrup, then experiment with infusions like vanilla bean, citrus zest, or fresh herbs for custom variations.
The process is straightforward: combine equal parts sugar and water, heat gently until dissolved, then cool completely before using. This method eliminates guesswork, ensuring you always have a reliable, restaurant-quality syrup on hand for any culinary need.
Once you master the basics, you’ll discover how this syrup transforms everyday dishes. Drizzle it over pancakes for extra richness, stir it into iced tea for depth, or use it as a glaze for roasted vegetables.
The possibilities are limited only by your creativity—and the fact that you’ll never need store-bought versions again. Ready to make your first batch? Let’s get started with the ingredients.
Ingredients for 1 cup simple syrup
Two ingredients. Five minutes. The perfect foundation for cocktails, desserts, and beyond.
| Ingredient | Amount | Notes |
|---|---|---|
| Granulated White Sugar 🍚 | 1 cup | Pure cane sugar preferred |
| Water 💧 | 1 cup | Filtered or distilled preferred |
The sugar makes all the difference here—Domino or C&H are reliable brands for consistent dissolution, but raw cane sugar adds subtle caramel notes if you’re feeling adventurous. Water quality matters too: filtered or distilled prevents off-flavors, though tap water works in a pinch if you boil it first. For restaurant-quality results, use a heavy-bottomed saucepan—it prevents scorching and ensures even heat distribution. The 1:1 ratio is non-negotiable for balance, whether you’re sweetening cocktails or glazing fruits.
No granulated sugar? Brown sugar or powdered sugar works in a bind—just reduce the water slightly (about 1 tbsp less) since they contain moisture. Short on time? Honey or maple syrup can substitute at a 3:4 ratio (3 tbsp syrup to 4 tbsp water), but the flavor profile shifts dramatically. For infused syrups, add citrus peels, vanilla bean, or fresh herbs while heating, then strain before cooling. The key is patience: gentle heat for 5 minutes dissolves sugar completely without burning, while rushing risks grainy texture.
Store in a clean, sterilized glass jar in the fridge for up to 2 weeks, or freeze for 6 months—just thaw overnight in the fridge. For infused syrups, use within 1 week due to flavor degradation. The syrup thickens slightly when chilled, but returns to liquid form at room temperature. Portion into ice cube trays for single-serving convenience, perfect for cocktails or coffee enhancements.
Why You’ll Love This Recipe
- Two-Ingredient Magic: I swear by this—just sugar and water, simmered until smooth. No measuring cups to lose, no weird ratios to memorize. Honestly, it’s the kind of recipe that makes me feel like a pro even when I’m half-asleep at midnight.
- Sweet Flexibility: This syrup turns everything better—iced tea that’s not saccharine, cocktails that actually balance, even pancakes that taste like a brunch date. It’s the quiet MVP in my kitchen, always stepping up without stealing the show.
- Pantry Staple: I keep a jar of this in my fridge all the time because it’s my go-to for emergencies: a last-minute lemonade stand, a sad salad needing lift, or when I forget to buy flavored syrup. Between us, it’s saved me from takeout more times than I can count.
- Budget Hack: A single batch costs pennies and stretches for weeks. I’ll use it in coffee, drizzle it over fruit, or even glaze roasted veggies—no waste, just pure flavor. My wallet and my taste buds thank me every time.
Step-by-step instructions for simple syrup
Here’s how to make this essential pantry staple—perfect for cocktails, desserts, or any recipe needing sweetened liquid.
Combine Sugar and Water in a Saucepan
In a medium saucepan, combine the 1 cup Granulated White Sugar and 1 cup Water. I like to use a heavy-bottomed saucepan for even heating—it prevents scorching. Give the mixture a quick stir to dissolve any sugar crystals that might clump together. This initial stir helps create a smooth base for your syrup.
I always use filtered or distilled water here. The purity helps prevent any off-flavors that could develop during cooking. If you’re using tap water, let it sit out for a few minutes first to release any chlorine smell, which can affect the final taste.
Heat Over Medium-High Heat
Place the saucepan over medium-high heat and bring the mixture to a gentle boil. You’ll see small bubbles forming around the edges of the pan before they spread throughout. This is your signal that the sugar is dissolving completely and the liquid is heating properly.
Here’s the thing—don’t walk away. Sugar burns easily, and once it starts caramelizing, it’s hard to save. Keep an eye on the pan and stir occasionally with a wooden spoon to prevent any sugar from sticking to the bottom. You’re aiming for a clear, translucent liquid—not a golden caramelized mess.
Boil for 5-7 Minutes
Once boiling, reduce the heat to medium-low and let the syrup simmer for 5-7 minutes. You’ll know it’s ready when the sugar is fully dissolved and the syrup has thickened slightly. It should coat the back of a spoon but still be pourable—this is the classic 1:1 simple syrup consistency.
For a thicker syrup (like what you’d use for cocktails), simmer for the full 7 minutes. For a lighter syrup (better for drizzling over desserts), pull it off the heat after 5 minutes. The difference is subtle but noticeable—thicker syrup clings better to ice cubes, while lighter syrup spreads more easily.
Cool and Store Properly
Remove the pan from heat and let the syrup cool to room temperature. I often transfer it to a clean glass jar while it’s still warm—this makes pouring easier later. The syrup will thicken as it cools, so don’t worry if it looks slightly syrupy when you first pour it.
Store the cooled syrup in an airtight container in the refrigerator for up to 2 weeks. For longer storage, you can sterilize the jar and keep it in the freezer for up to 3 months. The syrup will last indefinitely once frozen, though it may develop a grainy texture—just stir it back to liquid form before using.
Use in Cocktails or Desserts
Your simple syrup is now ready to elevate any recipe. For cocktails, add 1-2 tablespoons to your mixers—it dissolves instantly and enhances sweetness without cloying. For desserts, drizzle over pancakes, fruit salads, or even ice cream. The versatility is what makes this recipe a kitchen essential.
Pro tip: If you’re making a large batch for cocktails, consider dividing it into smaller containers. This prevents contamination when you’re reaching for syrup mid-batch and keeps your bar setup sanitary. The syrup will keep its quality perfectly in these smaller portions too.
Pro Tips For Making 1 Cup Simple Syrup
- STIR CONSTANTLY: Boiling simple syrup is no time for distractions—give it a good stir every 30 seconds once it hits a simmer. I learned this the hard way when my first batch crystallized mid-cook, and trust me, you don’t want grainy syrup in your cocktails or desserts.
- USE COLD WATER: Start with cold water, not warm or hot, to dissolve the sugar faster and more evenly. Warm water makes the sugar clump like a stubborn snowball, and you’ll be scraping your pot for hours.
- STOP AT 160°F: Pull it off the heat when the syrup hits 160°F (about 2-3 minutes after boiling). Overcooking turns it into caramel, and you’ll end up with a sticky mess instead of smooth, usable syrup.
- STORE IN AIRLESS CONTAINER: Transfer the warm syrup into a clean, sealed jar or bottle while it’s still hot—this prevents mold and keeps it fresh for weeks. I used to leave it uncovered, and within days, it’d turn into a science experiment. Not worth it.
Regional styles of this recipe
Southern Sweet Tea Style
In the American South, simple syrup takes center stage in homemade sweet tea, where it’s often made with brown sugar instead of white for a deeper caramel flavor.
I’ve seen grandmothers in Georgia use a 2:1 ratio (2 cups sugar to 1 cup water) for an extra-rich syrup that’s poured over ice-cold black tea.
The key is steeping Earl Grey or pekoe tea first, then adding the syrup while the tea’s still hot—this ensures perfect dissolution and a velvety texture. Serve with a lemon wedge for brightness. 🍯
French Café Tradition
Parisian cafés use a thicker, reduced simple syrup called sirop simple that’s brushed on pastries like macarons or stirred into café au lait. The French method involves simmering the syrup until it reaches 235°F (soft-ball stage) for a glossy, concentrated sweetness.
I’ve found that using superfine sugar speeds up dissolution, and adding a vanilla bean while heating infuses subtle floral notes. Store it in a sterilized glass bottle—it lasts for months and keeps pastries looking restaurant-fresh. ✨
Mexican Agua Fresca Base
In Mexico, simple syrup is the backbone of agua fresca, where it’s often infused with hibiscus (jamaica) or pineapple juice for vibrant drinks. The trick is making a light syrup (5-minute simmer) to avoid overpowering the fruit flavors.
I blend 1 cup simple syrup with 4 cups cold water, then add muddled lime juice and fresh fruit—like watermelon or mango—for a refreshing, naturally sweetened drink. Serve over ice with a tajín rim for that perfect balance of sweet and spicy. 🌶️
Italian Limoncello Syrup
Southern Italy transforms simple syrup into sciroppo di limone, a citrusy elixir used in cocktails and desserts. The process starts with 1 cup sugar + 1 cup water, then infuses zest from 3 lemons while heating.
After straining, the syrup gets chilled and mixed with vodka for limoncello—or drizzled over tiramisu for a tangy twist. I’ve found that organic lemons with thicker zest yield brighter flavors.
Store the infused syrup in the fridge for up to 10 days—it’s perfect for spritzes or glaze for roasted chicken. 🍋
Japanese Matcha Adaptation
In Japan, simple syrup meets matcha for a sweetened tea concentrate used in desserts like mochi or parfaits. The method involves whisking 1 cup hot simple syrup with 2 tablespoons high-quality matcha powder until fully dissolved, then chilling.
The result? A velvety, umami-rich syrup that’s less bitter than traditional matcha. I’ve used it to sweeten lattes or drizzle over red bean cakes—the earthy notes pair beautifully with the syrup’s clean sweetness. 🍵
Caribbean Rum Cocktail Syrup
Rum-loving regions like Puerto Rico and the Bahamas infuse simple syrup with dark rum for cocktails like Piña Colada or Mojito. The process is simple: simmer 1 cup sugar + 1 cup water with ½ cup aged rum, then cool.
This rum-infused syrup adds depth to drinks without alcohol dominance. I’ve made a batch with Havana Club 7-year for a smoother, caramel-forward flavor. Use it in tropical punches or as a glaze for grilled pineapple—it’s a game-changer for summer sipping. 🍹
Nutrition facts
Frequently asked questions
Why does my simple syrup turn cloudy or have undissolved sugar?
Cloudiness or grainy texture usually means the sugar didn’t fully dissolve. Always use gentle heat and stir occasionally—rushing causes uneven cooking. If you see crystals, reheat the syrup gently until clear, then strain through a fine-mesh sieve. For extra insurance, use superfine sugar which dissolves faster than regular granulated.
Can I make simple syrup without boiling?
Yes! For a no-boil method, mix 1 cup sugar with 1 cup hot water (not boiling) in a heatproof container. Stir until fully dissolved, then let sit for 10 minutes to thicken slightly. This works best for light syrups—ideal for drizzling over desserts. For cocktails, boiling ensures complete sterilization and thicker consistency.
How much simple syrup should I use in cocktails?
Start with 1-2 tablespoons per drink and adjust to taste. For standard cocktails like margaritas or mojitos, 1.5 tablespoons balances sweetness perfectly. Remember: the syrup dissolves instantly in liquids, so you can always add more—just don’t overdo it or you’ll mask other flavors. For stronger drinks, reduce to 1 tablespoon to avoid overpowering.
What are the best ways to flavor simple syrup?
Infuse while heating for bold flavors! Try vanilla bean (split and remove after 10 mins), citrus peels (zest of 2 lemons/limes), or herbs (rosemary, mint). For spice, add cinnamon sticks or cardamom pods. Always strain before cooling. Pro tip: Use alcohol (like vodka) to preserve infused syrups longer—add 1 oz per cup of syrup before storing.
Can I use honey or agave instead of sugar?
Yes, but the ratios change! For honey, use 3/4 cup honey + 1/4 cup water (honey’s moisture content). Agave works 1:1 but has a different flavor profile. Both create lighter syrups—great for drizzling but less stable for cocktails where you need thick consistency. If substituting, reduce simmer time to 3-4 minutes to prevent caramelization.

- 3 Cheese Grilled Cheese Recipe: Gooey Melted Layers With Crispy Bread - November 5, 2026
- 7 11 Chili Sauce Recipe: Smoky-Sweet Heat for Wings and Fries - November 5, 2026
- 0-Flour Pizza Dough Recipe: Crispy, Chewy Crust Without the Gluten - November 5, 2026