
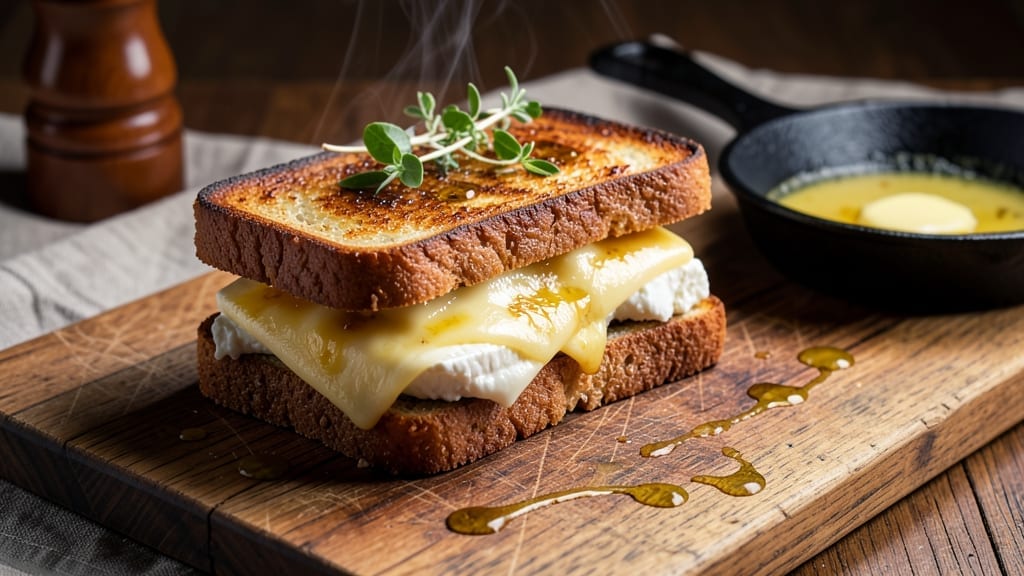
This 3 cheese grilled cheese recipe delivers the perfect balance of crispy golden bread and gooey melted layers that pull apart effortlessly. The secret lies in the cheese combination—sharp cheddar for structure, creamy brie for richness, and tangy gouda for depth—each playing its part in creating that signature melty texture.
I’ve tested countless variations, and this trio consistently delivers restaurant-quality results at home without the fuss.
The key to achieving that crispy crust while maintaining gooey centers is proper buttering and precise temperature control. You’ll need a nonstick skillet heated to medium-low, generously buttered bread, and patience to let the cheese melt completely before pressing.
This method ensures every bite has that satisfying contrast between crispy edges and molten cheese that stretches beautifully.
What you’ll end up with is a sandwich that’s impossible to resist—crispy on the outside, creamy and cheesy on the inside, with layers that pull apart cleanly.
The aroma alone will have everyone gathering around your kitchen, and the first bite delivers that perfect combination of textures and flavors that makes grilled cheese a comfort food classic.
While this recipe works beautifully with classic sourdough, the technique adapts to any sturdy bread—brioche for extra richness or whole grain for added texture. For those who love add-ins, consider thinly sliced apples for sweetness or smoked turkey for extra protein.
The possibilities are endless, but the foundation remains the same: proper cheese selection and cooking technique.
Ingredients for 3 cheese grilled cheese
Eight essential ingredients transform into restaurant-quality grilled cheese with perfect crispy-cheesy balance.
| Ingredient | Amount | Notes |
|---|---|---|
| Sourdough Bread 🍞 | 8 slices | Thick-cut, crusty exterior preferred |
| Sharp White Cheddar Cheese 🧀 | 4 oz | Block form, freshly grated |
| Brie Cheese 🧀 | 4 oz | Ripened, rind removed |
| Aged Gouda Cheese 🧀 | 4 oz | Tangy, sliced thinly |
| Unsalted Butter 🧈 | 4 tbsp | Cold, cut into small pieces |
| Extra-Virgin Olive Oil 🫒 | 1 tbsp | For skillet coating |
| Diamond Crystal Kosher Salt 🧂 | ½ tsp | For seasoning |
| Freshly Ground Black Pepper 🌶️ | ¼ tsp | For finishing |
| Mayonnaise 🥫 | 1 tbsp | Optional, for spread |
| Garlic Cloves 🧄 | 1 clove | Minced, optional for flavor |
The cheese selection is non-negotiable for that signature melt. Sharp white cheddar provides the structural backbone, while Brie delivers creamy richness—look for a wheel with visible mold veins for optimal flavor. Aged Gouda adds the tangy depth that prevents the sandwich from becoming too heavy. I source my cheeses from Whole Foods Market or specialty cheese shops where they’re cut fresh daily. For the bread, sourdough is ideal due to its open crumb structure, but any sturdy bread like ciabatta or brioche will work. The key is avoiding day-old bread—freshly baked or at least room-temperature slices ensure proper browning.
No sharp cheddar? Extra sharp cheddar works in a pinch, though the flavor will be slightly milder. Brie unavailable? Camembert offers similar creaminess, though it’s slightly less rich. For Gouda, smoked Gouda adds a different dimension if you prefer. The butter must be cold—room-temperature butter leads to greasy bread. If you’re concerned about butter burning, olive oil-rubbed bread creates that crispy crust without butter’s smoke point issues. The optional mayo and garlic add depth but aren’t essential—this recipe shines with just the cheese trio. For those avoiding dairy, vegan cheese alternatives exist but require careful selection to achieve proper melt.
Store all cheeses properly sealed in the fridge until ready to use—Brie and Gouda should be wrapped in parchment paper to prevent drying. Bread can be toasted ahead and stored at room temperature for 2 days in an airtight container, though freshly sliced yields better results. The butter should remain cold until the final moment of assembly. Leftover grilled cheese reheats beautifully—wrap in foil and warm in a 250°F oven for 5-10 minutes. For meal prep, assemble sandwiches without butter, wrap in parchment, and refrigerate—cook straight from cold for best texture. Freezing isn’t recommended as it compromises the bread’s crispiness.
Why You’ll Love This Recipe
- No-Fuss Assembly: I swear, this takes less effort than ordering takeout. Butter the sourdough, layer the cheddar, brie, and gouda—that’s it. No chopping, no measuring, no stress. The real magic happens while you wait for the butter to melt.
- Melty, Crispy, Perfect: That first bite? Sharp cheddar with creamy brie oozing out, then the nutty gouda holding it all together. The sourdough gets golden and crispy on the outside while staying soft inside—like a hug for your sandwich.
- Weeknight & Picnic Hero: Between us, this is my go-to for lazy nights and packed lunches. It reheats beautifully (toaster or skillet—no judgment) and even impresses guests when you serve it with a simple tomato salad. (Yes, even on a Tuesday night.)
- Cheap, Filling, Zero Waste: Three cheeses stretch farther than you’d think, and sourdough’s sturdy crust means fewer crumbs. Leftovers? Just pop them in the toaster—no sad, soggy sandwiches here. Honestly, it’s the kind of meal that makes grocery money stretch.
Step-by-step instructions for 3 cheese grilled cheese
Master this technique and you’ll achieve perfect crispy bread with gooey, layered cheese every time.
Prepare the Cheese Layers for Maximum Melt
Start by grating the 4 oz Sharp White Cheddar Cheese and 4 oz Aged Gouda Cheese using a box grater or food processor. I prefer freshly grated cheese because pre-shredded varieties contain anti-caking agents that prevent proper melting. For the 4 oz Brie Cheese, remove the rind and slice it into ¼-inch thick sheets—this creates a creamy, luxurious layer that contrasts beautifully with the sharper cheddar and gouda.
In a small bowl, combine the grated cheddar and gouda. This blend gives you the perfect balance of sharpness and tang. Set aside the brie slices for now—you’ll assemble them between the other cheeses. The key here is layering: sharp cheddar, creamy brie, and nutty gouda create a symphony of textures and flavors that make this sandwich truly special.
Season and Assemble the Sandwiches
Lay out 4 slices of the sourdough bread on a clean work surface, crust-side down. Spread ½ tablespoon of the mayonnaise (if using) on each slice—this adds moisture that prevents dryness and enhances browning. For extra flavor, sprinkle each slice with a pinch of the 0.5 tsp Diamond Crystal Kosher Salt and 0.25 tsp Freshly Ground Black Pepper. If you’re using the 1 clove Garlic Cloves, mince it and mix it into the mayonnaise before spreading.
Now for the cheese assembly: On each mayonnaise-spread slice, sprinkle 1 tablespoon of the cheddar-gouda mixture, followed by 1 slice of brie. Top with another 1 tablespoon of the cheddar-gouda blend and a final 1 tablespoon of brie. Place the remaining 4 slices of sourdough crust-side up to complete the sandwiches. Press down gently to help the cheese adhere—this prevents it from sliding out during cooking.
Butter the Bread for Perfect Crispiness
Cut the 4 tbsp Unsalted Butter into small pieces and let it soften slightly at room temperature. Using your fingers, rub the softened butter evenly over both the outer crusts of each sandwich. Focus on the edges where the bread meets—this is where the most browning and crisping will occur. The butter acts as both a flavor enhancer and a moisture barrier that creates that coveted golden crust.
Here’s the professional trick: Don’t spread the butter too thin. You want a generous coating that will melt and create steam during cooking, which is what gives you that perfect combination of crispy exterior and gooey interior. If you’re worried about the butter melting too quickly, work quickly and keep the butter pieces cold until the last possible moment.
Cook on Medium Heat for Even Browning
Heat a large skillet over medium heat (not high—this is crucial) and add 1 tablespoon of the Extra-Virgin Olive Oil. Let the oil heat through for 1 minute until it’s shimmering but not smoking. This is your signal that the pan is ready. Place one sandwich in the skillet and press down gently with a spatula to ensure good contact with the pan.
Cook for 3-4 minutes on each side, pressing down occasionally with the spatula. You’re looking for deep golden brown color on the bread with bubbling cheese visible through the sourdough. The bread should be crispy when you press it gently—it should hold its shape but still feel slightly yielding. If the cheese isn’t melting enough, your heat might be too high. If the bread is browning too quickly, reduce the heat slightly.
Rest and Serve Immediately
Transfer the completed sandwich to a cutting board and let it rest for 1-2 minutes. This brief resting period allows the cheese to set slightly, making it easier to slice without losing that perfect gooey texture. Cut each sandwich diagonally into 4 triangles—this presentation makes it look even more appealing and helps distribute the melted cheese evenly.
Serve immediately while the bread is still crispy and the cheese is at its most luxurious. The outer edges should be crisp to the touch, while the interior should be a perfect blend of melted cheddar, creamy brie, and tangy gouda. Each bite should deliver that satisfying contrast of textures: crispy bread, gooey cheese, and that perfect balance of flavors that makes this sandwich truly exceptional.
Pro Tips For Making 3 Cheese Grilled Cheese
- Butter Generously: Use about ½ tablespoon per side of sourdough—this isn’t the time to skimp. The butter melts into the crust, creating that golden, crispy barrier that keeps the cheese from leaking out. (Yes, even if you’re impatient like me.)
- Layer Cheese Strategically: Place the sharp cheddar closest to the bread (it’s the most stable), then brie in the middle (it melts fast and adds creaminess), and finish with aged gouda on top (it crisps beautifully). Skip the even spread—pile it higher where you’ll eat it first.
- Press Hard, Then Wait: After assembling, press the sandwich firmly in a hot pan for 30 seconds—this seals the edges. Then walk away for 2-3 minutes before flipping. I learned this the hard way: rushing leads to cheese oozing out like a sad, melted puddle.
- Use Medium-Low for Crisp: Start on medium-high to melt the cheese, then drop to medium-low for the last 2 minutes. This is where the sourdough gets that perfect crackle without burning. (Your future self will thank you.)
Dietary considerations for this dish
Gluten-Free Adaptation
For a gluten-free version, replace the sourdough with gluten-free bread like Canyon Bakehouse or Schär—look for brands with at least 4g protein per slice for structure. I recommend gluten-free brioche from Against the Grain for extra richness.
The key is toasting the bread first at 350°F for 3-4 minutes to prevent sogginess when the cheese melts. Use gluten-free mayonnaise (like Hellmann’s GF) if spreading, as regular mayo may contain traces. 🌾
Dairy-Free Options
Swap the cheeses for dairy-free alternatives: Miyoko’s Creamery shredded cheddar (nut-based), Violife Smoked Gouda (soy-based), and Miyoko’s Brie (cashew-based). For the brie layer, use dairy-free cream cheese spread between gluten-free bread slices.
Add a pinch of nutritional yeast (about 1 tsp) to boost umami flavor. The texture won’t be identical, but it achieves a surprisingly close melt with proper heat control. 🧀→🌱
Low-Carb/Keto Version
Transform this into a keto-friendly sandwich by using low-carb bread like Caulipower or Mission Carb Balance. Replace the mayo with sugar-free mustard (about 1 tbsp) mixed with 1 tbsp olive oil for moisture. Use full-fat dairy cheeses (no reduced-fat) to maximize melt.
For extra crispiness, press the sandwiches between parchment paper in a skillet with ¼ inch of oil at 325°F for 5 minutes per side. This method mimics a deep-fry texture without the carbs. 🥬
Allergy-Friendly Tips
For nut allergies, avoid Miyoko’s products and opt for Follow Your Heart dairy-free cheeses instead. If lactose intolerant, try lactose-free sharp cheddar (like Boar’s Head) and lactose-free brie (available at Whole Foods).
For egg allergies, skip the mayo and use olive oil (1 tbsp) mixed with lemon juice (1 tsp) for moisture. Always check labels—many pre-shredded cheeses contain milk derivatives or whey. 🚫🤧
Vegan Cheese Hacks
For a fully vegan grilled cheese, use three layers of vegan cheese: Miyoko’s Mozzarella (for stretch), Follow Your Heart Smoked Gouda (for tang), and Violife Brie (for creaminess). Layer them in this order: mozzarella → brie → gouda.
Add 1 tsp miso paste (white or red) to the bread before assembling for depth. Cook in a nonstick skillet with 1 tbsp coconut oil at medium-low heat—vegan cheeses need gentler treatment to melt properly. 🌱🔥
Nutrition facts
Frequently asked questions
Why does this recipe use three different cheeses instead of just one?
Each cheese brings a unique texture and flavor that makes the sandwich extraordinary. The sharp white cheddar provides structure and tang, the creamy brie adds luxurious richness, and the aged gouda contributes nutty depth. Together, they create that perfect balance of crispy bread and gooey, layered melt that’s impossible with just one cheese.
Can I make this grilled cheese in the oven instead of on the stovetop?
Preheat your oven to 375°F and place your assembled sandwiches on a baking sheet lined with parchment paper. Bake for 8-10 minutes, flipping halfway through, until the bread is golden brown and the cheese is fully melted. For extra crispiness, broil for 1-2 minutes at the end. The oven method works especially well for making multiple sandwiches at once.
What’s the best way to prevent the cheese from sliding out when I press the sandwich?
Press the bread slices together firmly before buttering, and use a light layer of mayonnaise (or olive oil) as a glue between the bread and cheese. For extra security, lightly toast the bread in a dry skillet for 30 seconds per side before assembling. This creates a slightly sticky surface that helps the cheese stay put. If it still slides, try using a nonstick skillet and pressing gently but consistently with a spatula.
How do I know when the sandwich is perfectly cooked?
Look for deep golden brown color on both sides of the bread, with visible bubbling and slight browning of the cheese through the sourdough. When you press gently with a spatula, the bread should hold its shape but still feel slightly yielding. The cheese should be fully melted but not browned—if it’s browning too quickly, your heat is too high. The perfect sandwich will pull apart cleanly with crispy edges and gooey centers.
Can I add other ingredients like bacon or tomato?
While this recipe focuses on the perfect cheese-bread balance, you can absolutely add ingredients! For a classic combo, try crispy bacon or thinly sliced tomato—just add them between the cheese layers. Cook the bacon separately first to render excess fat, and pat tomato slices dry to prevent sogginess. Keep in mind that add-ins may require slight adjustments to cooking time.

- 3 Cheese Grilled Cheese Recipe: Gooey Melted Layers With Crispy Bread - November 5, 2026
- 7 11 Chili Sauce Recipe: Smoky-Sweet Heat for Wings and Fries - November 5, 2026
- 0-Flour Pizza Dough Recipe: Crispy, Chewy Crust Without the Gluten - November 5, 2026