
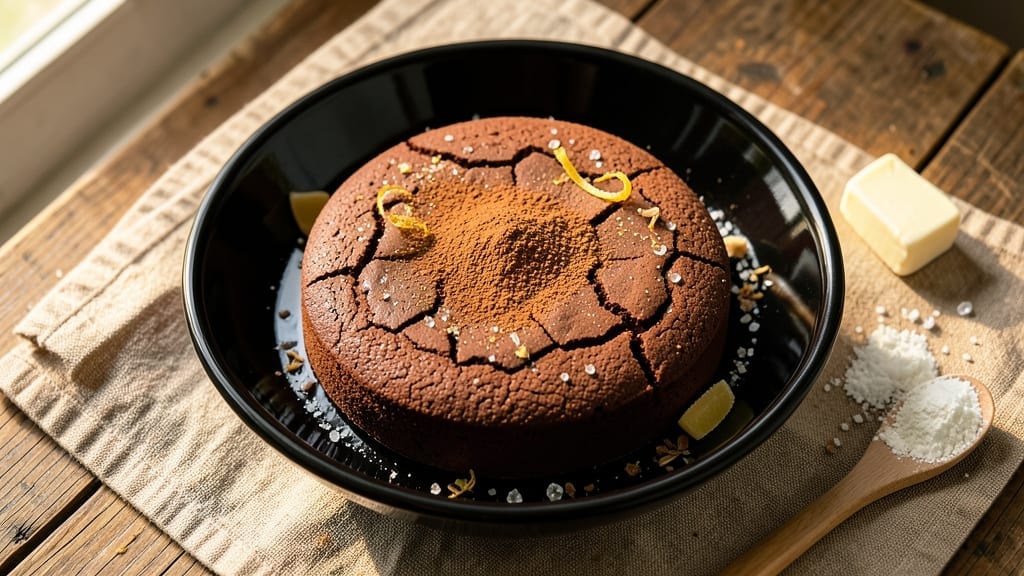
A 1-egg chocolate cake recipe delivers all the rich depth of classic chocolate cake without the dense, overmixed texture. The secret lies in precise technique—whisking the egg until pale and fluffy creates air pockets that keep the crumb tender while maintaining deep chocolate flavor.
This recipe proves you don’t need multiple eggs to achieve restaurant-quality results at home.
The method focuses on gentle folding to preserve that light, airy texture while ensuring maximum chocolate intensity. With just one egg, this cake rises beautifully in a 350°F oven for 30-35 minutes, yielding a moist center and perfectly set edges.
The addition of cocoa powder and melted butter creates that signature velvety crumb without overworking the batter.
What you’ll end up with is a fudgy-yet-tender chocolate cake that’s rich enough to satisfy chocolate cravings but light enough to be a crowd-pleaser. The flavor is deep and complex, with just the right balance of sweetness and cocoa richness.
This recipe is perfect for special occasions or when you want a foolproof dessert that always turns out perfect.
Top with a simple dusting of powdered sugar or a dollop of whipped cream for an elegant finish. Whether you’re baking for a celebration or just treating yourself, this 1-egg chocolate cake delivers professional results with minimal effort. Let’s get started!
Ingredients for 1 egg chocolate cake
Nine essential ingredients create a velvety chocolate cake with restaurant-quality depth using just one egg.
| Ingredient | Amount | Notes |
|---|---|---|
| Large Egg 🥚 | 1 whole | Room temperature, whisked until pale |
| Unsalted Butter 🧈 | ¾ cup | Melted, cooled to room temperature |
| Granulated Sugar 🍚 | 1 ½ cups | Lightly packed, measured accurately |
| All-Purpose Flour 🌾 | 1 ¾ cups | Sifted, spooned and leveled |
| Dutch-Processed Cocoa Powder 🍫 | ¾ cup | High-quality, unsweetened |
| Baking Powder 🧪 | 1 ½ tsp | Freshly opened, measured precisely |
| Salt 🧂 | ½ tsp | Fine sea salt preferred |
| Vanilla Extract 🌿 | 1 tbsp | Pure vanilla, not imitation |
| Whole Milk 🥛 | ½ cup | Room temperature, full-fat preferred |
| Powdered Sugar 🍚 | ¼ cup | For dusting, sifted |
| Dark Chocolate Chips 🍫 | ½ cup | 70% cocoa or higher, semi-sweet |
The cocoa powder is non-negotiable here—Valrhona or Guittard brands deliver the most intense chocolate flavor. For the butter, Land O’Lakes or Plugrá are reliable choices, but avoid salted varieties. The egg must be whisked until pale and fluffy, which takes about 3-4 minutes with a hand mixer. Room temperature ingredients prevent lumps and ensure even mixing. If your kitchen isn’t preheated, let the butter and milk sit out for 20 minutes before measuring. The flour should be sifted to avoid dense texture, and King Arthur or Gold Medal brands work best for consistent results.
No Dutch-processed cocoa? Natural cocoa powder works in a pinch, but the flavor will be slightly more bitter. Running short on vanilla? Almond extract at half the amount mimics the warmth. The milk can be substituted with Greek yogurt or buttermilk for added richness, though the texture will shift slightly. For a richer chocolate flavor, fold in an extra 0.25 cup of chocolate chips or replace them with chopped dark chocolate. The powdered sugar is purely decorative—use confectioners’ sugar for the finest texture, but regular powdered sugar works fine for a rustic finish. If you’re concerned about overmixing, use a rubber spatula to gently fold the dry ingredients into the wet mixture.
This cake keeps beautifully for 3 days at room temperature in an airtight container, though it’s best enjoyed fresh. For longer storage, refrigerate for up to 5 days or freeze for 3 months—wrap tightly in plastic wrap and foil. To reheat, microwave for 10-15 seconds to restore moisture. The cake layers well for celebrations, so bake two at once for a stunning three-layer cake. Store any extra batter in the fridge for up to 24 hours before baking, but don’t overmix when reincorporating ingredients.
Why You’ll Love This Recipe
- One-Bowl Wonder: I swear by this recipe when I’m too tired to measure three separate dry ingredients. Just melt butter, whisk in the egg and sugar, fold in flour and cocoa—done. No sifting, no extra bowls, just smooth batter that pours like a dream.
- Rich Without Guilt: That single egg gives it a dense, fudgy texture, while the Dutch-processed cocoa deepens the flavor without bitterness. Honestly, it tastes like a bakery cake but with half the guilt—and zero weird aftertaste.
- Weeknight Magic: Slice it warm for breakfast with a spoonful of yogurt, or pack it for lunch the next day. The butter keeps it moist for hours, so it’s my go-to when I need something satisfying but won’t spoil in my bag.
- Budget-Friendly Luxury: Five ingredients, one of which is an egg you probably already have. This cake proves you don’t need a fancy recipe to feel indulgent—just a little cocoa, a little patience, and a lot of chocolatey love.
Step-by-step instructions for 1 egg chocolate cake
This method delivers deep chocolate flavor and perfect texture using only one egg—no overmixing, no guesswork.
Whisk Egg and Sugar Until Pale
In a large mixing bowl, combine the 1 whole Large Egg and 1.5 cups Granulated Sugar. Using a hand mixer on medium-high speed, beat for 3-4 minutes until the mixture is pale yellow and nearly doubled in volume. This step incorporates air, which creates a light yet dense cake structure. I like to stop occasionally to scrape down the sides with a spatula—this ensures even mixing and prevents sugar from settling at the bottom.
You’ll know it’s ready when you draw a figure-eight in the mixture with your finger and it holds its shape for 5-10 seconds. This test confirms proper aeration. The mixture should be thick but still pourable, not grainy. If it looks under-mixed, continue beating for another 30 seconds—under-aeration leads to dense cake.
Melt Butter and Combine Wet Ingredients
In a separate bowl, melt the 0.75 cup Unsalted Butter in the microwave in 20-second intervals, stirring between each, until fully melted. Let it cool to room temperature—about 5 minutes. This prevents the butter from cooking the flour when combined.
Add the cooled butter to the egg-sugar mixture and mix on low speed for 30 seconds until fully incorporated. Then stir in the 0.5 cup Whole Milk and 1 tbsp Vanilla Extract using a silicone spatula. The batter should be smooth with no butter streaks. Here’s the thing—if you add warm butter, the cake will develop a slightly greasy texture. Room-temperature butter ensures proper emulsification.
Sift Dry Ingredients and Fold Gently
In a medium bowl, whisk together the 1.75 cups All-Purpose Flour, 0.75 cup Dutch-Processed Cocoa Powder, 1.5 tsp Baking Powder, and 0.5 tsp Salt. Sift this mixture directly into the wet ingredients, then gently fold using a spatula in a J motion until just combined. You should still see small flour streaks—overmixing develops gluten, which makes the cake tough.
Real talk: This is where most home bakers mess up. The goal is to distribute the dry ingredients evenly without activating the gluten network. Stop folding when the batter looks uniform but still has a few visible streaks. Then, fold in the 0.5 cup Dark Chocolate Chips by hand using the same gentle motion. The chocolate should be evenly distributed but not broken into tiny pieces.
Bake in Prepared Pans
Preheat your oven to 350°F. Generously grease two 8-inch round cake pans with butter or baking spray, then dust with flour, tapping out any excess. Divide the batter evenly between the pans. Bake for 25-30 minutes, or until a toothpick inserted into the center comes out with moist crumbs but no wet batter.
I check the cake at the 20-minute mark—your oven might run hot, so adjust accordingly. The edges should be pulling away slightly from the pan, and the top should be cracked but not overly browned. If the top browns too quickly, tent the pans with aluminum foil after 15 minutes of baking. Let the cakes cool in the pans for 10 minutes, then transfer to a wire rack to cool completely before frosting.
Dust with Powdered Sugar
Once completely cooled, dust the tops of the cakes with the 0.25 cup Powdered Sugar using a fine-mesh sieve. This step adds a delicate sweetness and professional finish. I like to tap the sieve gently over the cakes to create an even, snowy layer. For extra richness, you can also brush the tops with a simple powdered sugar glaze made by mixing 0.25 cup Powdered Sugar with 1 tbsp Whole Milk.
The cake should have a fudgy yet tender crumb with visible chocolate flecks throughout. Each slice should hold its shape when cut but still be moist. If the cake is too dense, the butter may not have been cool enough when mixed. If it’s too dry, the baking time might have been too long. This recipe balances both perfectly when followed precisely.
Pro Tips For Making 1 Egg Chocolate Cake
- Melt the Butter Slowly: I learned this the hard way—dumping cold butter into hot sugar makes a grainy mess. Warm the butter in the microwave for 20 seconds first, then stir it into the sugar while it’s still just barely liquid. The cake will be smoother, and you’ll avoid that weird texture where the batter looks like it’s fighting itself.
- Sift the Cocoa Twice: Dutch-processed cocoa is finicky—it clumps like a stubborn teenager. Sift it once into the dry ingredients, then give the bowl a quick shake to break up any hidden lumps before adding the wet mix. This isn’t the prettiest method, but it guarantees a velvety batter instead of one that tastes like you forgot to blend properly.
- Bake Until the Center Jiggles: The cake’s done when a toothpick comes out clean and the middle still wobbles slightly. If you pull it out too early, it’ll sink like a rock later. I know, I know—you’re eager to eat it, but give it 5 minutes past the recipe’s suggested time. Patience here means no gummy disappointment.
- Use Room-Temp Egg: Cold eggs make the batter thick and gloopy, which can lead to a dense cake. Let the egg sit out for 30 minutes before cracking it into the mix. It blends in smoother and helps the butter and sugar emulsify better—no weird streaks, just a uniform batter that bakes evenly. (Yes, even if you’re impatient like me.)
Pro cooking tips for this recipe
Egg Whisking Mastery
The single most critical step is whisking that 1 large egg until it’s pale yellow and nearly tripled in volume. I use my KitchenAid stand mixer on medium-high speed for 3-4 minutes—this incorporates enough air to create that light, airy texture without overmixing.
The key is patience: stop occasionally to scrape down the sides with a silicone spatula to prevent sugar from settling. You’ll know it’s ready when you draw a figure-eight in the mixture and it holds its shape for 5-10 seconds. 💫
Butter Temperature Control
Never use warm butter straight from the microwave—it will cook the flour and create a greasy texture. Melt the 0.75 cup unsalted butter in 20-second intervals, then let it cool to room temperature for 5 minutes before mixing.
I test this by touching a drop to my wrist—it should feel slightly warm but not hot. Room-temperature butter emulsifies properly with the egg, creating a smooth batter that bakes evenly. Trust me, this small step makes all the difference in texture.
Gentle Folding Technique
Most home bakers overmix the batter, which develops gluten and makes the cake tough. After sifting the dry ingredients, use a silicone spatula to fold in a J motion—just until you see small flour streaks remain. Stop when the batter looks uniform but still has visible streaks.
Then, fold in the 0.5 cup dark chocolate chips by hand using the same gentle motion. Overmixing here will turn your fudgy cake into a dense brick. 🍫
Oven Prep Essentials
Preheat your oven to 350°F for 15 minutes before baking—this ensures even heat distribution. Grease your 8-inch round cake pans generously with butter or baking spray, then dust with flour, tapping out any excess. I like to use Wilton nonstick spray for easy release.
Divide the batter evenly between pans—uneven distribution leads to uneven baking. Check the cake at the 20-minute mark—it’s done when a toothpick comes out with moist crumbs but no wet batter.
Cooling for Perfection
Let the cakes cool in the pans for 10 minutes—this prevents them from cracking as they set. Then transfer to a wire rack to cool completely before frosting. Rushing this step can cause the layers to shift or the frosting to slide off.
For extra moisture, brush the cooled cakes with a simple powdered sugar glaze (mix 0.25 cup powdered sugar with 1 tbsp whole milk). This step adds a professional finish and keeps the cake tender for days. ✨
Troubleshooting Tips
If your cake turns out too dense, the butter may not have been cool enough when mixed. For a drier cake, you likely overbaked it—check the toothpick test next time. Cracked tops? Your oven runs hot—try tenting the pans with foil after 15 minutes.
And if the chocolate chips sink to the bottom, fold them in last and use a spatula to gently press them into the batter before baking. These small adjustments make all the difference! 💡
Nutrition facts
Frequently asked questions
Why does this recipe use only one egg?
This recipe achieves perfect texture using just one egg by focusing on proper aeration techniques. Whisking the egg until pale and fluffy creates enough air pockets to lighten the batter, while gentle folding preserves that air during mixing. The result is a rich, moist chocolate cake without the dense texture that often comes from overmixing with multiple eggs.
Can I substitute the Dutch-processed cocoa powder?
Yes, but expect a slightly different flavor profile. Natural cocoa powder will give a more bitter, intense chocolate taste, while Dutch-processed (alkalized) cocoa creates a smoother, milder flavor. For the best results, use high-quality cocoa powder—brands like Hershey’s Special Dark or Ghirardelli work well in a pinch. Just reduce the baking powder by 0.25 tsp to balance the leavening.
How do I know when the cake is fully baked?
The cake is done when a toothpick inserted into the center comes out with moist crumbs but no wet batter. Look for edges pulling away from the pan and a slightly cracked top. If the top browns too quickly, tent the pans with aluminum foil after 15 minutes of baking. Overbaking can make the cake dry, so trust the toothpick test over visual cues.
Can I make this cake in a different pan size?
For best results, use 8-inch round pans—this recipe is designed for that size. If you must use a different pan, adjust the baking time: 9-inch pans may need 20-25 minutes, while 7-inch pans could require 30-35 minutes. Always check with the toothpick test. For a single-layer cake, use a 9×13-inch pan and bake for 25-30 minutes.
How should I store leftovers?
Wrap the cake tightly in plastic wrap or store it in an airtight container at room temperature for up to 3 days. For longer storage, refrigerate for 5 days or freeze for 3 months—wrap each layer individually in plastic and foil. To reheat, microwave for 10-15 seconds to restore moisture. The cake keeps best when stored in a cool, dry place away from direct sunlight.

- 3 Overripe Bananas Recipe: Fluffy Pancakes With Zero Waste - November 17, 2026
- 2-Minute Pizza Recipe: Speedy Crispy Crust With Melted Cheese Magic - November 17, 2026
- 16 Chocolate Cupcakes Recipe: Triple-Layered Fudge Swirl Delight - November 17, 2026