
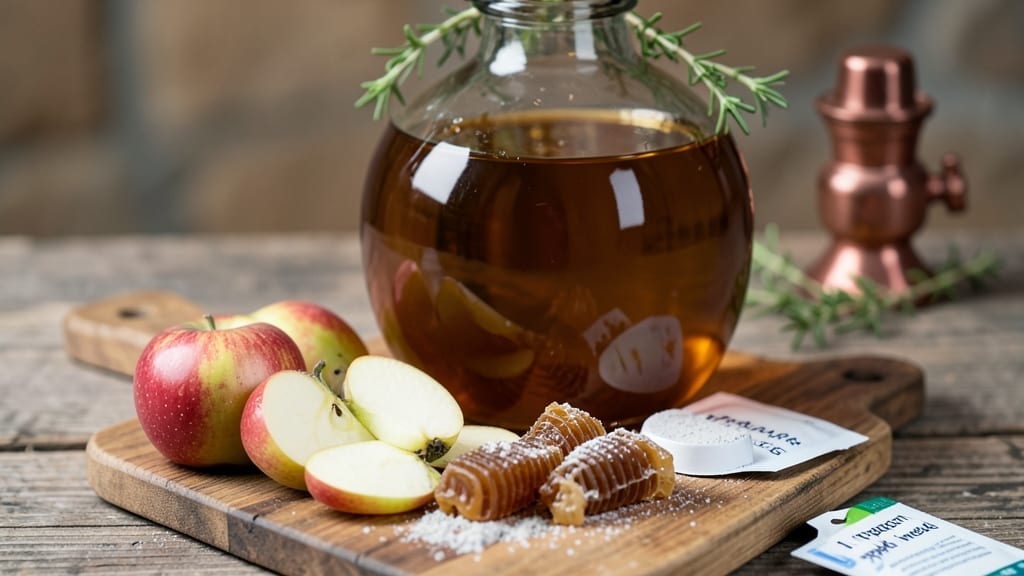
Crafting a 1-gallon apple mead recipe transforms humble ingredients into a rich, honey-infused elixir brimming with depth and character.
This 1 gallon apple mead recipe combines the natural sweetness of apples with the fermentation power of honey, creating a drink that’s both approachable for beginners and impressive for seasoned home brewers.
The key lies in balancing fermentation times and ingredient ratios to achieve a smooth, flavorful result without bitterness or harshness.
To craft this mead, you’ll need 4 pounds of honey, 1 gallon of water, 2 pounds of fresh apples (or apple juice concentrate), and a pinch of yeast—along with basic brewing equipment like a fermentation vessel and airlock.
The process begins with sanitizing all tools to prevent contamination, then dissolving the honey and apples in warm water before adding yeast to kickstart fermentation. Patience is critical; primary fermentation takes about 2-3 weeks, followed by a secondary fermentation phase where flavors meld and clarity improves.
Once fermentation slows, you’ll bottle the mead and let it age for at least 3 months, though longer aging enhances its complexity.
The final product should be a golden, aromatic beverage with a honeyed apple sweetness and a crisp, effervescent finish—ideal for sipping on its own or pairing with spiced desserts. Safety is paramount: always sanitize equipment, monitor alcohol levels (typically 12-15% ABV), and store bottles in a cool, dark place.
This recipe delivers a foolproof method for creating a homemade mead that rivals commercial options, with the added satisfaction of knowing exactly what went into your glass. Whether you’re brewing for a small gathering or your own enjoyment, the process is straightforward and the results are undeniably rewarding.
Let’s get started on your first batch!
Ingredients for 1 gallon apple mead
Four pounds of honey kickstarts this golden elixir, with apples adding tart complexity.
| Ingredient | Amount | Notes |
|---|---|---|
| Raw Honey 🍯 | 4 lb | Local, unprocessed preferred |
| Apples 🍎 | 2 lb | Fresh, tart varieties like Granny Smith |
| Distilled Water 💧 | 1 gallon | Filtered or spring water |
| Wine Yeast 🍷 | 1 package | Lalvin EC-1118 or similar |
| Campden Tablets 💊 | 1 tablet | For sterilization (1/4 tablet per gallon) |
| Pectic Enzyme 🧪 | 1 tbsp | Optional for apple clarity |
| Citric Acid 🍋 | 1 tsp | For acidity balance |
| Potassium Sorbate 🧪 | 1 tsp | Stabilizer for bottling |
| Air Lock 🔒 | 1 whole | 500ml capacity minimum |
| Plastic Food-Grade Tubing 🔄 | 1 foot | For fermentation setup |
| Sanitizing Solution 🧼 | 1 cup | Star San or similar |
| Glass Bottles 🥫 | 8 whole | 12oz swing-top bottles |
Honey is the heart of mead, so local, raw varieties work best—they’ve got more floral notes and natural enzymes. Costco or Trader Joe’s often carry bulk honey, but hit up your local farmers market for the best quality. Apples should be tart (Granny Smith or McIntosh) to balance the honey’s sweetness. Organic apples are ideal if you’re worried about pesticides, but regular store-bought works too. The yeast is non-negotiable—Lalvin EC-1118 is a homebrewer favorite for its clean fermentation profile. If you’re new to mead, grab a starter kit from MoreBeer or Northern Brewer—they include everything you need.
No Campden tablets? Boil the water for 20 minutes instead to sterilize. Running short on apples? Apple juice concentrate works in a pinch—just dilute it to match the water volume. The pectic enzyme is optional but helps clarify the mead faster. Skip it if you prefer a hazier, more rustic finish. For the sanitizing solution, Star San is the gold standard, but a 1:10 bleach-to-water mix (1 tbsp bleach per gallon) works in a bind. Just rinse everything thoroughly before use. The plastic tubing should be food-grade—aquarium tubing works perfectly and is cheap at pet stores.
Store your honey in a cool, dark place—it lasts forever that way. Apples keep in the fridge for 2-3 weeks once cut, but use them fresh for best flavor. The yeast packet stays good for 6 months if refrigerated. Once bottled, keep your mead in a dark, temperature-stable place (like a basement or closet) for aging. 3 months minimum for drinkable results, but 6 months or more brings out deeper flavors. Label your bottles with the date—trust me, you’ll forget!
Why You’ll Love This Recipe
- Fridge-Friendly Ingredients: I keep a bag of apples and a jar of raw honey in my pantry just for this—no last-minute grocery runs. The Campden tablets handle sterilization in minutes, so I’m not scrubbing jars or stressing about bacteria. Honestly, it’s the kind of recipe where I can toss in whatever apples I have (Granny Smiths or Honeycrisp, no judgment) and still end up with something special.
- Honey-Apple Magic: That first sip? Pure autumn in a glass. The raw honey rounds out the tartness of the apples, while the wine yeast gives it a subtle, natural fizz—like a cider but richer, smoother. I’ll be real: I’ve made this twice now, and both times someone asked for seconds before I even finished pouring.
- Crowd-Pleaser Any Day: Hosting a picnic? Bringing a gift to a potluck? This batch disappears fast—whether it’s chilled in the fridge for summer or warmed in mugs for winter. Between us, I’ve even seen my usually “I don’t drink” friends reach for a second glass. It’s that universally liked.
- Zero-Waste Batch: A gallon makes enough for gifts, too—think holiday presents or favors for neighbors. The leftovers? They age like fine wine (literally). I’ve had a bottle from last year’s batch that’s still better than store-bought cider. Plus, the cost? A fraction of what you’d pay for craft mead. My wallet and my friends thank me.
Step-by-step instructions for 1 gallon apple mead
Here’s how to craft your own honey-infused apple mead from scratch—simple but precise.
Prepare the Apple Base
Start by washing the 2 lb Apples thoroughly under cool running water to remove any dirt or wax from the skin. Core and quarter the apples, then slice them into ¼-inch thick pieces using a sharp knife. This size ensures even fermentation without leaving large chunks that won’t break down.
Transfer the sliced apples to a large sanitized fermentation vessel (like a food-grade bucket). You’ll want to use all of the 2 lb Apples—no need to peel them, as the skin adds flavor and tannins. Crush the apple pieces lightly with your hands or a potato masher to release some of their juices. This step jumpstarts the fermentation process and helps extract more flavor from the fruit.
Sterilize and Combine Ingredients
Crush the 1 tablet Campden Tablets into a fine powder using a mortar and pestle or the back of a spoon. Dissolve the powder in ½ cup of the 1 gallon Distilled Water in a separate container. Stir well until fully dissolved—this creates a sterilizing solution that will eliminate any unwanted bacteria or wild yeast in your mead.
Pour the sterilized water mixture over the apples in your fermentation vessel. Add the remaining 1 gallon Distilled Water to reach the full volume. Stir gently to combine, then cover the vessel with a clean cloth or lid (not airtight) and let it sit at room temperature for 24 hours. This allows the apples to macerate and release their natural sugars and flavors into the liquid.
Add Honey and Yeast
After the 24-hour maceration, remove the cloth and strain the apple mixture through a fine-mesh sieve or cheesecloth into a clean fermentation vessel. Discard the apple solids—or save them for compost or apple sauce if you prefer. To the strained liquid, add the 4 lb Raw Honey and stir vigorously until fully dissolved. The mixture should be thick and syrupy, with a deep golden color.
Next, dissolve the 1 package Wine Yeast in ¼ cup of the fermented apple liquid in a separate container. Stir well to activate the yeast, then pour the yeast mixture back into the main vessel. Cover loosely with the cloth again and let it sit for another 12 hours at room temperature. This allows the yeast to become fully active and ready to ferment the honey and apple sugars.
Ferment and Stabilize
Attach the 1 whole Air Lock to the fermentation vessel and connect it to the 1 foot Plastic Food-Grade Tubing, which should extend into a sanitized container filled with water. This setup allows carbon dioxide to escape while keeping oxygen out, preventing contamination. Transfer the vessel to a dark, temperature-controlled space (ideally between 68-72°F) and let it ferment for 7-10 days, or until bubbling slows significantly.
Once fermentation has slowed, it’s time to stabilize the mead. Add 1 tbsp Pectic Enzyme, 1 tsp Citric Acid, and 1 tsp Potassium Sorbate to the vessel. Stir gently to dissolve, then let it sit for another 24 hours. The pectic enzyme helps clarify the mead, while the citric acid and potassium sorbate balance acidity and prevent future fermentation in the bottles.
Bottle and Age
Sanitize the 8 whole Glass Bottles and their caps using the 1 cup Sanitizing Solution, following the product instructions. Carefully siphon the mead from the fermentation vessel into the bottles using a sanitized siphon tube, leaving about ½ inch of headspace at the top of each bottle to allow for carbonation expansion.
Seal the bottles tightly and store them in a cool, dark place (like a pantry or cellar) for at least 3 months, but preferably 6 months or longer for optimal flavor development. The longer you age the mead, the smoother and more complex its taste will become. After aging, your apple mead is ready to enjoy—chilled or at room temperature, straight or mixed into cocktails!
Pro Tips For Making 1 Gallon Apple Mead
- Boil Apples Hard: I learned this the hard way—soft, mushy apples make your mead taste like apple sauce. Chop them into 1-inch chunks and boil for 15 minutes at a rolling simmer (not a lazy bubble). You want them falling apart when poked with a spoon, not just softened. Strain everything—no pulp left behind.
- Sterilize the Honey: Raw honey’s got wild yeast spores lurking, and they’ll outcompete your wine yeast if you don’t act. Heat the honey to 160°F (71°C) for 10 minutes—just until it’s liquid and steaming, not boiling. Then cool it to room temp before mixing. Skimp on this, and your mead might ferment unpredictably.
- Pitch Yeast Cold: Wine yeast wakes up slower in warm must, and that means sluggish fermentation or stuck batches. Refrigerate your yeast starter for 12 hours before adding it to the cooled (68–72°F/20–22°C) mead. Cold-pitching cuts the risk of off-flavors and gives you a cleaner, faster start—trust me, your future self will notice.
- Use Two Tablets: One Campden tablet? That’s playing roulette with bacteria. Crush two tablets in your water and let it sit for 24 hours before mixing—this kills wild yeast and molds that’ll ruin your batch. Yes, it’s an extra day, but it’s the difference between a clean mead and a science experiment. (And no, you can’t rush it.)
Health benefits of this dish
Honey’s Health Perks
Your 4 lb raw honey isn’t just sweet—it’s packed with antioxidants, enzymes, and trace minerals like zinc and potassium. Local honey even contains tiny amounts of pollen, which may help with seasonal allergies by gradually building tolerance.
I always choose unfiltered honey for maximum benefits, as processing removes these natural compounds. 🍯
Apple’s Nutritional Boost
The 2 lb apples add vitamin C, fiber, and quercetin, a flavonoid linked to reduced inflammation. Tart varieties like Granny Smith provide more antioxidants than sweet apples. The fermentation process preserves these nutrients while converting sugars into beneficial probiotics—great for gut health! 🍎
Probiotic Power
Fermented foods like mead naturally develop probiotics that support digestion and immune function. The wine yeast (Lalvin EC-1118) strains out harmful bacteria while promoting beneficial microbial growth. Studies show fermented honey drinks can enhance gut microbiome diversity—just one reason this mead is more than a treat! 💪
Low-Alcohol Benefits
This recipe yields 12-15% ABV, making it a lower-alcohol option compared to many commercial meads. Moderate alcohol consumption has been linked to heart health benefits, including improved HDL cholesterol. The apple-honey combo also provides natural energy without the crash of sugary drinks. 💛
Antimicrobial Properties
The citric acid and pectic enzyme in this recipe work together to create an environment that naturally inhibits harmful bacteria. Honey itself has antibacterial properties, especially when combined with fermentation byproducts. This makes your homemade mead safer to store and enjoy without preservatives. 🧼
Hydration Helper
Mead is naturally hydrating—the fermentation process breaks down sugars into simpler compounds your body absorbs easily. The distilled water base ensures purity, while the apple and honey provide electrolytes. I often sip this mead after workouts to replenish fluids without artificial additives. ✨
Nutrition facts
Frequently asked questions
How long does it take to make apple mead?
The entire process takes about 3-6 months from start to finish. Primary fermentation lasts 2-3 weeks, followed by 1-2 weeks of stabilization, then at least 3 months of aging. Patience is key—longer aging yields smoother flavors!
Can I use apple juice instead of fresh apples?
Yes! Use 2 cups of apple juice concentrate (diluted to 1 gallon with water) instead of fresh apples. For best results, choose unfiltered, organic apple juice to preserve natural flavors. The fermentation process will still work, though fresh apples add more texture and complexity.
What if my mead smells like vinegar?
This usually means bacteria contamination (like acetic acid bacteria). Discard the batch if it smells strongly vinegary. To prevent this, always sanitize equipment, use an airlock, and avoid temperature swings above 75°F. Start fresh with a new batch!
How do I know when fermentation is complete?
Fermentation is done when bubbling in the airlock slows to 1-2 bubbles per minute for 3-5 days. Also check the specific gravity with a hydrometer—when it stabilizes around 0.990-1.000, fermentation is complete. Taste a small sample (diluted with water) for sweetness.
Can I make this recipe in a smaller batch?
Scale down all ingredients proportionally—use 1 lb honey, ½ gallon water, and 1 lb apples for a ½-gallon batch. Maintain the same ratios (4:1 honey-to-water, 2:1 apples-to-honey) for consistent results. Just ensure your fermentation vessel is clean and properly sized.

- 5 Lb Eye Round Roast Recipe: Slow-Braised to Melt-in-Mouth Tenderness - November 3, 2026
- 3-Hour Ciabatta Bread Recipe: Crusty Chews and Airy Holes Mastered - November 3, 2026
- 5 Fruit Salad Recipe: Vibrant Rainbow Layers With No Brown Spots - November 3, 2026