
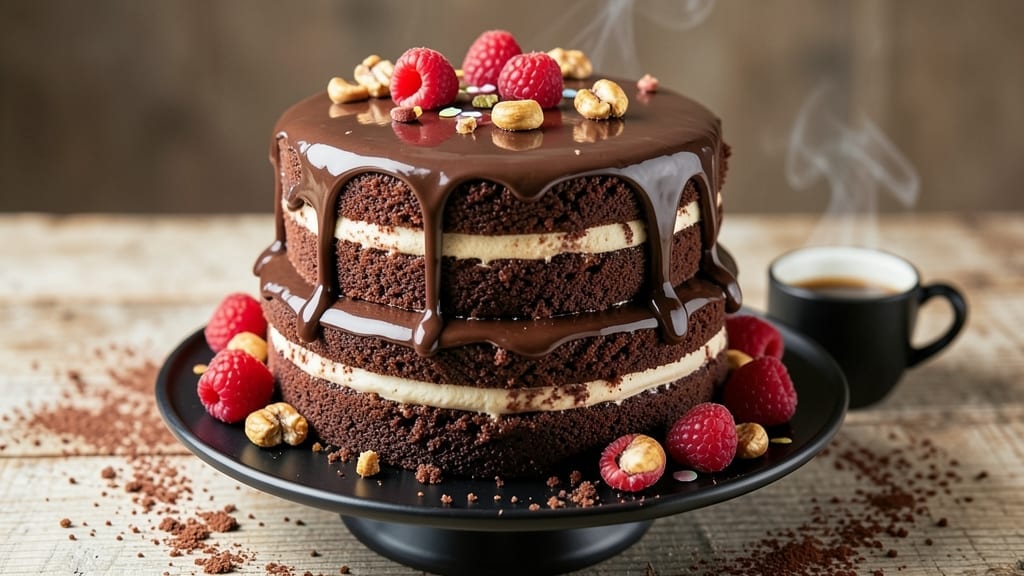
This 4-egg chocolate cake delivers the kind of dense, moist crumb that defies the dryness so many chocolate cakes suffer from—thanks to a precise technique that leverages eggs for structure without sacrificing tenderness.
The secret lies in properly beating the eggs and incorporating them at the right moment, ensuring every slice stays rich and fudgy. I’ve baked countless versions, and this method consistently produces a cake that’s so moist it practically oozes with flavor.
What sets this recipe apart is the foolproof approach to balancing moisture and structure. The eggs create a stable foundation while keeping the texture velvety, not cakey, and the butter content ensures that signature chocolate flavor shines through.
No special equipment is needed—just a few essential ingredients and patience for the eggs to do their magic. The result? A slice that’s so satisfying, it’ll become your go-to dessert.
Once baked, the cake develops a golden, crackly top with a perfectly tender crumb inside, making it ideal for layering with ganache or dusting with cocoa powder.
The recipe also allows for easy variations—add a splash of coffee for depth, fold in chopped nuts for texture, or adjust the sweetness to your preference. Every bite is proof that dense, moist chocolate cake doesn’t require complicated techniques—just the right balance of ingredients and timing.
Perfect for birthdays, holidays, or whenever you crave a slice of pure chocolate indulgence, this cake is designed to impress without the fuss. The instructions are straightforward, and the results are consistently restaurant-quality—so you can confidently serve it to guests or enjoy it solo. Let’s get baking!
Ingredients for 4 egg chocolate cake
Precision matters here—these ingredients balance moisture, structure, and rich chocolate flavor flawlessly.
| Ingredient | Amount | Notes |
|---|---|---|
| Large Eggs 🥚 | 4 whole | Room temperature for even mixing |
| Unsalted Butter 🧈 | 1 ½ cups | Cold, cubed for proper creaming |
| Granulated Sugar 🍚 | 2 cups | Superfine preferred for smoother texture |
| All-Purpose Flour 🌾 | 1 ¾ cups | Sifted for lightness, plus extra for pan |
| Cocoa Powder 🍫 | ¾ cup | Natural or Dutch-processed, high quality |
| Baking Powder 🧂 | 1 ½ tsp | Aluminum-free for best results |
| Salt 🧂 | ½ tsp | Diamond Crystal preferred |
| Vanilla Extract 🌿 | 1 tbsp | Pure Madagascar bourbon preferred |
| Milk 🥛 | ½ cup | Whole milk for richness |
| Espresso Powder ☕ | 1 tsp | Optional for enhanced depth |
| Dark Chocolate Chips 🍫 | 1 cup | 70% cacao, chopped for even distribution |
| Vegetable Oil 🫒 | ¼ cup | Lightens texture without dryness |
The eggs are non-negotiable for that signature velvety crumb. Room temperature is crucial—they should slide through your fingers like warm honey. Whole eggs provide both structure and moisture, unlike egg whites alone. For butter, European-style brands like Plugrá or President have higher fat content, which translates to richer flavor. The cocoa powder makes all the difference—Valrhona or Ghirardelli deliver that deep, velvety taste that generic brands can’t match. Store your cocoa in an airtight container away from light to preserve its potency. The flour should be sifted before measuring to prevent dense pockets in the cake.
No vanilla extract? Vanilla bean paste works beautifully, or a scraped vanilla bean if you’re feeling fancy. Running out of milk? Heavy cream or buttermilk both add richness, though buttermilk will make the cake slightly tangier. The espresso powder is optional but recommended—it enhances the chocolate flavor without making the cake taste like coffee. For chocolate chips, Ghirardelli or Lindt are my go-tos, but any 70% cacao will work. If you prefer a smoother texture, pulse the chips in a food processor before folding them in. The vegetable oil is what keeps this cake moist without adding greasiness—don’t skip it.
This batter keeps 2 days in the fridge, covered tightly. For longer storage, portion into airtight containers and freeze for up to 3 months. Once baked, the cake develops a crackly top that’s perfect for dusting with cocoa powder. I always bake mine in a 9-inch round pan, but an 8-inch will work if you prefer a taller cake. The cake reheats beautifully—wrap a slice in foil and warm in the oven at 300°F for 5-10 minutes to restore its fudgy texture. Leftovers? Store in the fridge and bring to room temperature before serving.
Why You’ll Love This Recipe
- No Mixer Needed: I swear by this—just fold the eggs, butter, and sugar until it’s almost fluffy, then gently toss in the dry stuff. The eggs do all the work; no electric mixer required, no sticky hands from overmixing.
- Rich Without Fuss: That cocoa powder and four eggs? It’s like a secret handshake for deep chocolate flavor. No fancy add-ins, no weird ratios—just butter, sugar, and flour doing their thing. Honestly, it tastes like a bakery cake but with half the ingredients.
- Weekday Dessert Hero: Slice it warm for breakfast (yes, really), pack it in a lunchbox, or serve it at 7 p.m. when you’re too tired for anything else. It keeps for days in the fridge, so you’re never stuck scrambling for a treat.
- Budget-Friendly Luxury: Four eggs and a stick of butter? That’s it. No specialty flours, no pricey extracts—just pantry staples that deliver a decadent slice every time. Between us, this is how I justify buying good cocoa powder.
Step-by-step instructions for 4 egg chocolate cake recipe
This method delivers a rich, fudgy chocolate cake with perfect moisture—no dry crumbs in sight.
Cream Butter and Sugar to Lighten the Batter
In a stand mixer fitted with the paddle attachment, beat the 1.5 cups unsalted butter and 2 cups granulated sugar on medium speed for 5-7 minutes. You’re aiming for a pale, fluffy mixture that nearly doubles in volume—the sugar should dissolve completely and the texture should be light and airy. This step incorporates air, which creates a tender crumb.
Here’s the thing—don’t rush this part. I’ve found that using superfine sugar speeds up the process slightly, but regular granulated works fine if you give it the full time. The butter should be cold when you start, which helps create stable fat crystals that trap air. When you lift the paddle, you should see clean ribbons that hold their shape for a few seconds.
Incorporate Eggs and Dry Ingredients
Add the 4 whole large eggs, one at a time, mixing on low speed after each addition until fully incorporated. Then add the 1 tbsp vanilla extract and mix for another 30 seconds. Remove the bowl from the mixer and whisk in the 1.75 cups all-purpose flour, 0.75 cup cocoa powder, 1.5 tsp baking powder, 0.5 tsp salt, and 1 tsp espresso powder using a silicone spatula.
At this stage, the batter will look thick and slightly curdled—this is normal. The cocoa powder and espresso powder work together to deepen the chocolate flavor while keeping the cake moist. Mix just until combined (about 1 minute), being careful not to overmix. Overworking the batter develops gluten, which can make the cake tough. The batter should be smooth with no visible flour streaks.
Add Wet Ingredients and Fold in Chocolate
Return the bowl to the mixer and add the 0.5 cup milk and 0.25 cup vegetable oil. Mix on low speed for 1 minute until the batter is completely smooth and homogeneous. Remove the bowl again and gently fold in the 1 cup dark chocolate chips using a spatula, ensuring even distribution throughout the batter.
The vegetable oil here plays a crucial role—it lightens the texture without adding dryness, while the milk ensures proper hydration of the flour. The chocolate chips should be scattered throughout but not clumped. If you’re using pre-chopped chips, they’ll distribute more evenly than whole chunks. This is where the cake gets its signature fudgy pockets—don’t skip this folding step.
Bake in a Prepared Pan
Preheat your oven to 350°F. Generously grease and flour an 8-inch round cake pan (or line it with parchment paper for easy removal). Pour the batter into the prepared pan and smooth the top with a spatula. Bake for 35-40 minutes, or until a toothpick inserted into the center comes out with a few moist crumbs (not wet batter).
The cake is done when the edges pull away slightly from the pan and the top springs back when pressed gently with a finger. Here’s a pro tip: I like to tent the pan with foil during the last 10 minutes of baking if the top is browning too quickly. This helps prevent over-browning while maintaining even cooking. The cake should have a slightly domed top with a crackly crust but remain moist throughout.
Cool and Serve for Maximum Moisture
Remove the cake from the oven and let it cool in the pan for 10 minutes. Then transfer it to a wire rack to cool completely. This gradual cooling prevents the cake from developing a dry crust on the outside while staying moist inside. For the best texture, serve the cake at room temperature—this allows the flavors to fully develop.
The key to maintaining moisture is timing. If you cut into the cake too soon, the internal heat will continue cooking the center and potentially create a gummy texture. The cake should be firm enough to slice cleanly but still tender. For an extra layer of moisture, you can brush the warm cake with a simple syrup made from equal parts sugar and water, heated until dissolved. This step is optional but enhances the fudgy quality.
Pro Tips For Making 4 Egg Chocolate Cake
- Melt Butter Slowly: I learned this the hard way—dumping cold butter into hot sugar makes a greasy mess. Instead, melt the butter first, then mix it into the sugar while it’s still warm. The butter will emulsify properly, giving you a smoother batter and a richer cake.
- Sift the Cocoa Twice: Cocoa powder clumps like a grumpy cat if you don’t handle it right. Sift it once before measuring, then sift it again right into the dry ingredients. This keeps the cake light and prevents those annoying dense pockets.
- Don’t Overmix the Batter: The moment your batter turns from velvety to tough, you’ve gone too far. Mix just until the flour disappears—about 10-12 strokes. Overmixing makes the cake dense and chewy, not moist and tender.
- Bake Until Springy: Your cake’s done when the edges pull away from the pan and the center bounces back when pressed. A toothpick with moist crumbs (not wet batter) is the real test. Underbaking leaves a gummy center; overbaking dries it out.
Storing and reheating this dish
Room-Temp Storage
Store your fully cooled cake in an airtight container at room temperature for up to 3 days. I use a glass cake carrier with a tight-sealing lid to preserve moisture—plastic containers can trap condensation and make the cake soggy.
Place it on a wire rack inside the container to prevent a damp bottom layer. The cake will stay perfectly moist at room temperature, but avoid direct sunlight to prevent the chocolate from developing a bitter taste. 🌟
Refrigerator Refresh
For longer storage, refrigerate the cake for up to 5 days. The cold temperature actually enhances the fudgy texture, but the cake may develop a slightly dry crust. To restore moisture, wrap a slice in aluminum foil and warm it in the oven at 300°F for 5-7 minutes.
For the whole cake, cover it tightly with plastic wrap before refrigerating to prevent drying. I like to bring it to room temperature before serving—this allows the flavors to meld beautifully. ✨
Freezer Magic
This cake freezes exceptionally well for up to 3 months without losing texture. Wrap each slice individually in plastic wrap, then place them in a freezer bag with all the air squeezed out.
For the whole cake, wrap it tightly in plastic wrap followed by foil to create an airtight seal. Thaw overnight in the fridge or at room temperature for 2-3 hours. The texture remains tender, though you may want to reheat slices briefly to restore maximum fudginess. 💫
Reheating Secrets
For the best results, reheat individual slices wrapped in foil in the oven at 300°F for 5-10 minutes. This method prevents the edges from drying out while warming the center.
A quick microwave zap on 50% power for 15-20 seconds works in a pinch, but I find it can make the cake slightly rubbery. For a restaurant-quality touch, brush the warm cake with a simple syrup (equal parts sugar and water, heated until dissolved) before serving.
This step restores moisture and adds a subtle sweetness. 🔥
Layering Tips
If you’re assembling a layered cake, store the cooled layers between parchment paper in an airtight container. For best results, assemble the cake within 24 hours of baking to prevent the layers from drying out.
If you need to store a partially assembled cake, keep it refrigerated and bring all components to room temperature before final assembly. The frosting will adhere better to a slightly warm cake, creating a smoother finish. 🍫
Nutrition facts
Frequently asked questions
Why does this recipe use 4 eggs instead of 2 or 3?
The 4 eggs create the perfect balance of structure and moisture in this dense chocolate cake. Each egg contributes both protein (for stability) and fat (for richness), while the yolks add that signature velvety texture. Fewer eggs risk a crumbly cake, while more could make it too heavy. The eggs also help incorporate air during mixing, ensuring a tender crumb throughout.
Can I substitute the vegetable oil with melted butter?
You can try, but the texture will differ slightly. The vegetable oil keeps the cake moist without adding dryness, while melted butter would contribute more fat and potentially make the cake denser. If substituting, use 1/4 cup melted butter cooled slightly plus 1/4 cup milk to maintain the same moisture level. The cake will still be delicious, just with a richer butter flavor.
How do I prevent the cake from cracking on top?
Cracking is normal but can be minimized by ensuring your oven is fully preheated to 350°F and the batter is at room temperature. Avoid opening the oven door during the first 20 minutes of baking—the sudden temperature drop causes cracks. If you notice browning too quickly, tent the pan with foil during the last 10 minutes of baking. The crackly top is actually desirable, but for a smoother finish, try baking in a water bath (place the cake pan in a larger pan with hot water halfway up the sides).
What’s the best way to make this cake gluten-free?
Replace the 1.75 cups all-purpose flour with a 1:1 gluten-free baking flour blend (like Bob’s Red Mill 1-to-1). Add 1/2 tsp xanthan gum to help bind the structure. For extra moisture, increase the milk to 3/4 cup. Note that gluten-free versions may be slightly denser but will still be delicious. Test your blend first in a small batch to adjust ratios if needed.
Can I bake this cake in a different pan size?
Yes, but adjust the baking time. For an 8-inch pan, bake 35-40 minutes; for a 9-inch pan, use 30-35 minutes. If using an 8×8-inch square pan, reduce time to 25-30 minutes**. The key is checking doneness with a toothpick—it should come out with moist crumbs, not wet batter. Always preheat your oven thoroughly and avoid overcrowding if baking multiple pans simultaneously.

- 5 Lb Eye Round Roast Recipe: Slow-Braised to Melt-in-Mouth Tenderness - November 3, 2026
- 3-Hour Ciabatta Bread Recipe: Crusty Chews and Airy Holes Mastered - November 3, 2026
- 5 Fruit Salad Recipe: Vibrant Rainbow Layers With No Brown Spots - November 3, 2026