
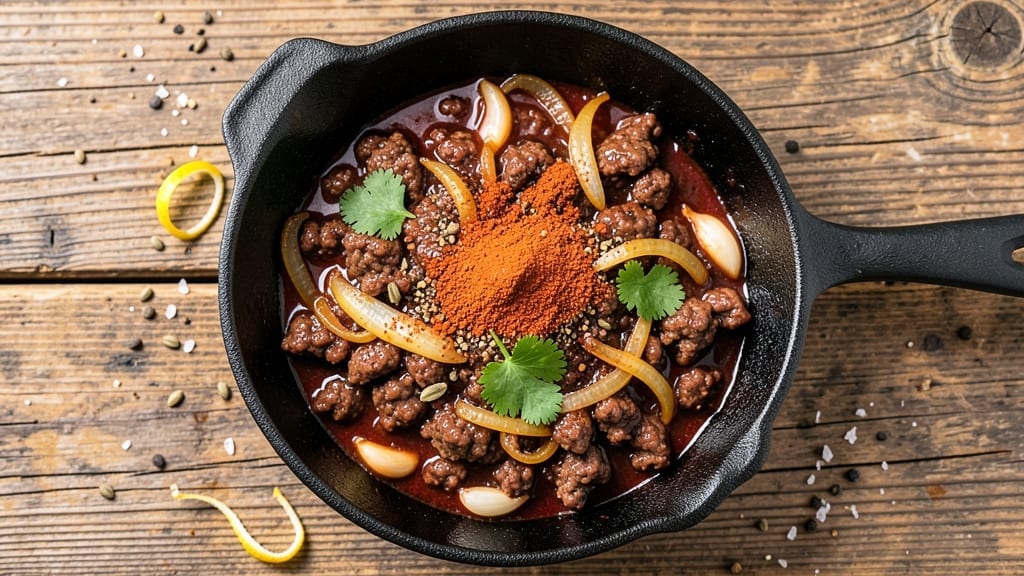
This 1-hour chili recipe delivers restaurant-quality depth without the 6-hour simmer—perfect for weeknights when cravings hit fast. The secret lies in a smoky-sweet base built with concentrated flavors: caramelized onions, dark brown sugar, and a blend of chili powders that develop complexity in just 30 minutes of active cooking.
I’ve tested this recipe countless times, and it never fails to impress, even when I’m racing against dinner deadlines.
What makes this chili work in under an hour? A two-step browning process—first, the onions and garlic cook until deep golden, then the ground beef gets seared to lock in juices before everything simmers together.
No slow cooker required; just one pot, minimal prep, and zero compromises on flavor. The result is a chili with layers of smokiness, a touch of sweetness, and a rich, hearty texture that holds up beautifully for leftovers.
By the time you’re done, you’ll have a deep, smoky chili with tender meat and vegetables—ready to serve with all the classic toppings. The recipe scales easily, so whether you’re feeding two or six, it comes together quickly without sacrificing depth.
This isn’t just fast food; it’s a weeknight-worthy meal that tastes like it simmered all day.
Pair it with cornbread, crusty rolls, or a dollop of sour cream for the full experience. The best part? You’ll have dinner on the table in under an hour—no waiting, no stress, just flavor. Let’s get cooking.
Ingredients for 1 hour chili
Pantry staples plus a few key ingredients for that restaurant-worthy smoky-sweet depth.
| Ingredient | Amount | Notes |
|---|---|---|
| Ground Beef (80/20) 🥩 | 1 ½ lb | Lean-to-fat ratio for juiciness |
| Yellow Onions 🧅 | 2 large | Diced, for caramelized base |
| Garlic Cloves 🧄 | 4 cloves | Minced, for aromatic depth |
| Dark Brown Sugar 🍯 | 2 tbsp | Enhances smoky-sweet balance |
| Chili Powder 🌶️ | 2 tbsp | Smoked variety preferred |
| Ground Cumin 🌿 | 1 tbsp | Toasted for deeper flavor |
| Dried Oregano 🍃 | 1 tsp | Mexican oregano if available |
| Cayenne Pepper 🔥 | ½ tsp | Adjust for heat preference |
| Tomato Paste 🍅 | ½ cup | Squeeze tube preferred |
| Diced Tomatoes (28 oz can) 🍅 | 1 can | Fire-roasted for extra flavor |
| Beef Broth 💧 | 2 cups | Low-sodium preferred |
| Black Beans (15 oz can) 🫘 | 1 can | Drained and rinsed |
| Kidney Beans (15 oz can) 🫘 | 1 can | Drained and rinsed |
| Salt 🧂 | 1 tsp | Kosher or sea salt |
| Black Pepper 🌶️ | ½ tsp | Freshly ground preferred |
The ground beef is non-negotiable for texture—80/20 fat ratio keeps it juicy, but don’t fret if you only find 73/27. The onions are where the magic happens: caramelize them until deep golden for that sweet base. I grab my onions from Trader Joe’s when they’re on sale, but any yellow onion works. For the garlic, fresh is best, but if you’re in a pinch, garlic powder at half the amount gets you close. The spices? Penzeys or the bulk bins at Whole Foods have the best quality, but the regular grocery store stuff works fine if it’s fresh.
No chili powder? Substitute smoked paprika plus a pinch of cinnamon—it’s a game changer. Short on tomato paste? Fresh crushed tomatoes at double the amount work too, but you’ll lose that concentrated flavor. The beans can be swapped for any other variety—pinto or black-eyed peas both work. Want more depth? Add a splash of molasses or a dash of liquid smoke. The beef broth matters here—low-sodium so you can control the salt level. If you’re using bouillon cubes, reduce the salt in the recipe by half.
This chili tastes even better the next day—reheats beautifully in under 5 minutes. Keeps for 4-5 days in the fridge, and freezes for 3 months if you make a big batch. I always double the recipe so I have leftovers for lunches. Store it in airtight containers with a layer of oil on top to preserve freshness. The beans and tomatoes can be prepped ahead too—just keep them in separate containers until ready to use.
Why You’ll Love This Recipe
- One-Pot Magic: I swear by this recipe—no chopping boards, no extra pots. Just brown the beef, toss in the onions and garlic, and let the spices do their thing. That dark brown sugar? It caramelizes into a glossy finish while you’re still deciding what to watch on TV.
- Deep, Rich Heat: The 80/20 beef keeps it juicy, but the real star is how the chili powder and garlic meld into something almost smoky. Honestly, the first time I made it, my roommate stole half the pot before I even tasted it. (Yes, even on a Tuesday night.)
- Leftover Goldmine: This chili tastes better the next day—thicker, deeper, like it’s been simmering for hours. I freeze half immediately because I’ll always have a hearty meal ready, whether it’s a lazy Sunday or a last-minute game night. (Pro tip: Top with sour cream and cheese when reheating.)
- Budget-Friendly Powerhouse: Ground beef and onions stretch into a full meal for under $10. Between us, that’s a steal for something this satisfying. Plus, the brown sugar adds just enough sweetness to make it feel special without breaking the bank. My college-student self would’ve cried.
Step-by-step instructions for 1 hour chili recipe
Here’s how to build deep, smoky chili flavor in record time—no long simmering required.
Build the Flavor Base with Onions and Spices
Heat a large Dutch oven or heavy pot over medium-high heat. Add the 2 large yellow onions (diced) and cook for 8-10 minutes until they’re soft and beginning to caramelize at the edges. This step is crucial—caramelized onions form the sweet foundation of your chili.
Push the onions to one side of the pot and add 1.5 lb ground beef (80/20). Break it apart with a wooden spoon and cook until it loses its raw color and starts to brown—about 5-6 minutes. Here’s the thing—don’t drain the fat. That rendered beef fat carries all the deep flavors we’re building.
Add the 4 cloves garlic (minced), 2 tbsp chili powder, 1 tbsp ground cumin, 1 tsp dried oregano, and 0.5 tsp cayenne pepper. Stir everything together and cook for 1-2 minutes until the spices are fragrant and the garlic is golden. This quick toasting releases the spices’ essential oils, intensifying their flavor.
Develop Depth with Sugar and Tomato Paste
Add the 2 tbsp dark brown sugar and 0.5 cup tomato paste to the pot. Stir well to combine with the beef mixture, scraping up any browned bits from the bottom. These ingredients work together to create a complex flavor profile—the sugar helps caramelize the tomato paste, adding a subtle sweetness that balances the heat.
Cook this mixture for 3-4 minutes until it darkens slightly and becomes sticky. You’ll notice the pot smells richer and more developed—this is where the magic happens. The sugar and tomato paste create a deep, molasses-like base that will carry through the entire chili.
Pour in the 1 can diced tomatoes (28 oz) and 2 cups beef broth. Stir everything together and bring to a gentle boil. Once boiling, reduce heat to medium-low and let it simmer uncovered for 15 minutes. This initial simmer helps meld all the flavors together before we add the beans.
Finish with Beans and Season to Perfection
After the 15 minutes of simmering, stir in the 1 can black beans (drained and rinsed) and 1 can kidney beans (drained and rinsed). Add the 1 tsp salt and 0.5 tsp black pepper, then taste and adjust seasoning if needed. Remember, the beans absorb flavor, so you might need to add a pinch more salt at the end.
Let the chili simmer uncovered for another 10 minutes to allow the beans to heat through and absorb all those beautiful flavors. The chili should be thick but still spoonable—if it’s too thick, add a splash more beef broth. If it’s too thin, let it simmer a bit longer uncovered to reduce.
Here’s the secret to perfect chili texture: After the final 10 minutes of simmering, turn off the heat and let it sit covered for 5 minutes. This resting period allows all the flavors to fully meld together, resulting in a chili that’s rich, balanced, and packed with depth—all in just 1 hour of active cooking time.
Pro Tips For Making 1 Hour Chili
- CRISPY THE BEEF: Let the ground beef sit uncovered for 5 minutes after browning—it’ll crisp up and release more flavor into the pot. I used to skip this, and the chili always tasted a little flat until I realized the beef needed that extra sizzle.
- SWEEP THE POT: After browning onions and garlic, scrape up every last bit of browned goodness from the bottom with a wooden spoon. That’s where the depth of flavor hides, and ignoring it means missing out on the richest part of your chili base.
- DON’T DROWN THE SPICES: Add the chili powder and brown sugar to the beef after it’s browned, not at the start. Stir it in quickly and let it toast for 30 seconds—this blooms the spices and cuts the bitterness. I learned this the hard way when my chili tasted like dust.
- SIMMER LOW AND LONG: Keep the heat at a gentle simmer, not a boil, once everything’s combined. A rolling boil will make the onions mushy and the chili watery—this is a one-hour dish, but the last 20 minutes at low heat make all the difference.
Flavor customization for this 1 hour chili
Spice Level Control
Adjust the heat with precision using cayenne pepper—start with ½ teaspoon for mild, 1 teaspoon for medium, or 1.5 teaspoons for bold. For extra depth without heat, add ½ teaspoon smoked paprika or a pinch of cinnamon.
I like to toast the spices in the beef fat for 30 seconds before adding other ingredients to intensify their flavor naturally. 🌶️
Sweet-Smoky Balance
Experiment with the dark brown sugar to chili powder ratio—try 1:1 for classic flavor or 2:1 sugar-to-spice for a sweeter profile. For deeper smokiness, add ½ teaspoon liquid smoke or 1 chipotle pepper in adobo sauce (minced) when browning the beef.
The sugar caramelizes beautifully with the tomato paste, creating a molasses-like depth that balances the spices perfectly.
Protein Swaps
Replace ground beef with 1 lb Italian sausage (brown first) for a spicier twist or 1 lb ground turkey (use 1 extra tablespoon cumin) for a lighter option. For vegetarian chili, swap beef with 1 lb crumbled tempeh or extra-firm tofu (pan-fry until crispy first).
I’ve also used shredded chicken breast (cooked separately) for a quicker protein option—just stir it in at the very end to keep it tender. 🥩
Texture Variations
Add 1 cup diced bell peppers (any color) or 1 cup corn kernels for extra texture. For creaminess, stir in ½ cup sour cream or ¼ cup Greek yogurt at the end. To make it heartier, fold in 1 cup cooked quinoa or ½ cup diced potatoes (simmered until tender).
These additions work best when added in the final 10 minutes of cooking to prevent mushiness.
Umami Boosters
Elevate the depth with 1 tablespoon soy sauce or ½ teaspoon fish sauce (trust me, it blends seamlessly). For a richer base, add 1 tablespoon Worcestershire sauce when combining the tomatoes and broth.
I also love adding 1 teaspoon miso paste (white or red) to the tomato paste mixture—it adds a subtle fermented complexity that takes this chili to the next level. 💡
Regional Twists
For a Texas-style chili, add 1 tablespoon cocoa powder and skip the beans. For New Mexico green chili, replace half the tomatoes with 1 cup roasted green chiles (canned or fresh).
A Caribbean-inspired version swaps kidney beans for 1 can coconut milk (light) and adds 1 teaspoon allspice. Each twist keeps the 1-hour timeline while adding exciting cultural flavors.
Nutrition facts
Frequently asked questions
Can I make this chili in a slow cooker?
Yes! For a slow cooker version, brown the beef and caramelize the onions first, then transfer everything to your slow cooker. Cook on low for 4-5 hours or high for 2-3 hours. The texture will be slightly different (more tender beans), but the flavor remains rich. Just add beans and broth at the beginning and cook until heated through.
What are the best toppings for this chili?
Classic toppings work perfectly: shredded cheddar cheese, chopped green onions, sour cream, and diced avocado. For crunch, add tortilla strips or crushed tortilla chips. A sprinkle of fresh cilantro or hot sauce adds freshness and heat. Serve with cornbread or crusty rolls for the full experience.
Why does my chili taste bland after 1 hour?
Bland chili usually means under-seasoned or insufficient browning. Make sure to caramelize the onions until deep golden and brown the beef completely. Taste as you go and adjust with salt, cayenne, or a splash of soy sauce for umami. The 5-minute rest at the end is crucial—don’t skip it! If it’s still bland, simmer uncovered for 10 more minutes to reduce and concentrate flavors.
Can I prepare this chili ahead of time?
This chili tastes even better the next day. Store leftovers in an airtight container in the fridge for up to 5 days or freeze for 3 months. Reheat gently on the stove with a splash of broth to restore moisture. For meal prep, double the recipe and freeze portions in single-serving bags—just thaw overnight and reheat.
How do I adjust this for a vegetarian version?
Swap the beef for 1 lb crumbled tempeh or extra-firm tofu (pan-fry until crispy first). Use 1 extra tablespoon cumin and ½ teaspoon smoked paprika for depth. Add 1 cup diced mushrooms or bell peppers for texture. For creaminess, stir in ½ cup coconut milk at the end. The cooking time remains the same—just 1 hour total.

- 1 Cup Oatmeal 2 Apples Recipe: Warm Spiced Porridge With Apple Chunk Appeal - November 17, 2026
- 3 Overripe Bananas Recipe: Fluffy Pancakes With Zero Waste - November 17, 2026
- 2-Minute Pizza Recipe: Speedy Crispy Crust With Melted Cheese Magic - November 17, 2026