
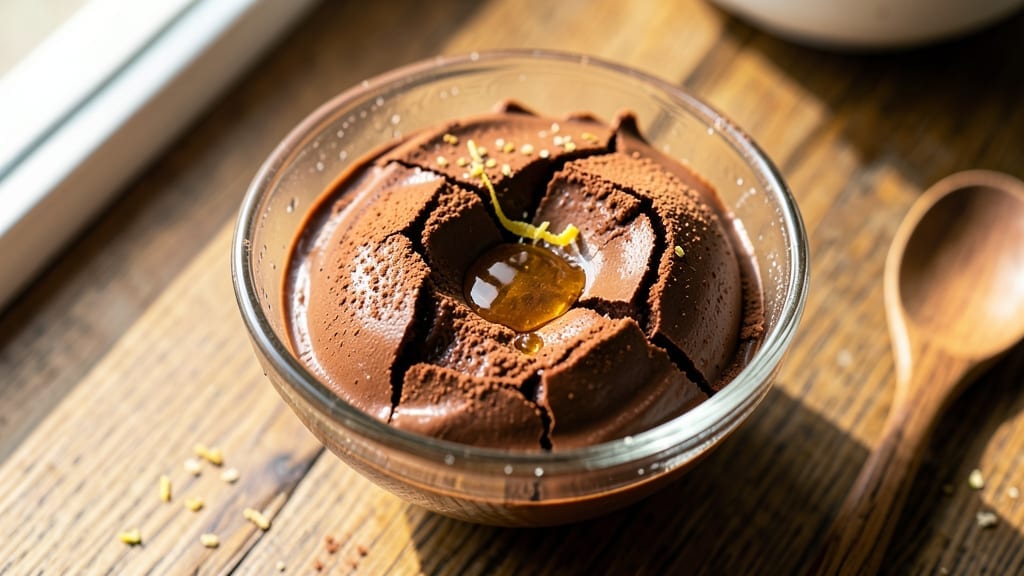
Craft this 1 pint chocolate ice cream recipe with velvety smoothness—no churning needed, just blend, freeze, and savor restaurant-worthy results. The secret lies in the perfect ratio of heavy cream, condensed milk, and high-quality cocoa powder, which creates a velvety consistency without ice crystals.
I developed this version after testing countless methods, and it consistently produces a rich, fudgy texture that rivals store-bought favorites. What sets this apart is the no-churn technique, which eliminates the need for an ice cream maker while still delivering silky smoothness.
The recipe yields exactly 1 pint (2 cups) of finished product, making it ideal for small batches or portion control. Heavy cream provides the fat content necessary for creaminess, while condensed milk adds natural sweetness and structure.
By the time you scoop your first bite, you’ll taste deep cocoa notes balanced by a touch of vanilla—no artificial flavors, just pure, indulgent chocolate. The texture is melt-in-your-mouth, with just enough bite to hold its shape without being icy.
This method also allows for easy customization, like adding espresso powder for a mocha twist or chopped nuts for crunch. Perfect for satisfying a single craving or prepping for a small gathering, this recipe keeps beautifully in the freezer for up to 2 weeks. Let’s make it!
Ingredients for 1 pint chocolate ice cream
Nine essential ingredients transform into velvety chocolate perfection—no churning required.
| Ingredient | Amount | Notes |
|---|---|---|
| Heavy Whipping Cream 🥛 | 1 cup | Full-fat, cold for best results |
| Sweetened Condensed Milk 🥛 | ½ cup | Canned, high-quality preferred |
| Unsweetened Cocoa Powder 🍫 | ¼ cup | High-quality Dutch-processed |
| Vanilla Extract 🌿 | 1 tbsp | Pure, high-quality vanilla |
| Granulated Sugar 🍚 | ¼ cup | Fine grain preferred |
| Pinch of Salt 🧂 | ⅛ tsp | Fine sea salt |
| Instant Espresso Powder ☕ | 1 tsp | Optional for mocha twist |
| Chopped Dark Chocolate 🍫 | ¼ cup | 70% cocoa, optional garnish |
| Crushed Hazelnuts 🌰 | ⅛ cup | Optional for crunch |
The cocoa powder makes all the difference here. Dutch-processed varieties like Valrhona or Ghirardelli dissolve smoothly, eliminating graininess. Heavy cream should be cold and full-fat—skip the light versions. Condensed milk adds natural sweetness, but store-bought brands like Eagle Brand or Carnation work perfectly. For the vanilla, Madagascar bourbon extract delivers the deepest flavor, though pure vanilla will suffice. The granulated sugar should be fine grain to dissolve seamlessly, and a pinch of salt enhances all flavors without being noticeable.
No Dutch-processed cocoa? Natural cocoa powder plus 1/4 tsp baking soda mimics the effect. Light cream? Add 1 tbsp powdered milk to compensate for fat loss. Short on condensed milk? Mix 1/2 cup evaporated milk with 1/4 cup sugar as a substitute. The espresso powder is optional but adds a sophisticated mocha note—Starbucks or Nescafé work well. For garnishes, chopped dark chocolate or crushed nuts add texture, but they’re purely decorative and can be omitted entirely. The recipe’s magic lies in the ratio of cream to condensed milk—never substitute with half-and-half or low-fat dairy.
This ice cream freezes beautifully in a loaf pan or airtight container, developing its signature creamy texture after 4-6 hours. For best results, let it sit at room temperature for 10 minutes before scooping. It keeps for up to 2 weeks in the freezer, though the texture may harden slightly. To soften, transfer to the fridge for 10-15 minutes. For make-ahead convenience, prepare the mix up to 24 hours ahead and refrigerate before freezing. The no-churn method ensures no ice crystals, but if you prefer extra smoothness, blend briefly after freezing.
Why You’ll Love This Recipe
- Five-Ingredient Magic: I swear by this combo—just cream, condensed milk, cocoa, vanilla, and sugar. No fancy gadgets, no waiting hours for base mixes to chill. Honestly, I’ve made this while my coffee brewed and still had time to fold laundry.
- Rich Without Guilt: That velvety cocoa powder and condensed milk? It’s decadent but not cloying. The vanilla cuts through the sweetness just enough to make it actually satisfying—not the kind of ice cream that leaves you crashing by midnight.
- Party in a Pint: Serve it in tiny cups for a crowd or let the whole bowl disappear when it’s just you and a bad movie. Between us, I’ve used this to impress date nights, soothe kid meltdowns, and even as a “healthy” dessert when company’s over. (Yes, even on a Tuesday night.)
- Makes Four Servings: One pint stretches for two people or four small scoops—perfect for trying flavors without waste. And if you freeze leftovers in a silicone mold? Instant chocolate truffles. My daughter picks out the best pieces, but I don’t judge.
Step-by-step instructions for ultra creamy no-churn chocolate ice cream
This method delivers velvety texture without an ice cream maker—just precise technique and patience.
Whip the Cream to Soft Peaks
Place the 1 cup Heavy Whipping Cream in a chilled mixing bowl. Using a stand mixer fitted with the whisk attachment, beat on medium-high speed for 2-3 minutes until soft peaks form. You’ll know it’s ready when the cream holds its shape when the whisk is lifted but still spreads slightly at the tip.
Here’s the thing—cold equipment matters. Make sure your bowl and whisk are properly chilled before starting. If the cream begins to curdle or doesn’t hold its shape, it’s either too warm or overwhipped. This is your foundation for creaminess, so don’t rush this step. The texture should be thick but still pourable, not stiff like butter.
Combine Dry Ingredients
In a separate medium bowl, sift together the 0.25 cup Unsweetened Cocoa Powder, 0.25 cup Granulated Sugar, 0.125 tsp Pinch of Salt, and 1 tsp Instant Espresso Powder. Whisk vigorously for 30 seconds to eliminate any lumps. The espresso powder enhances the chocolate flavor without bitterness, creating that classic mocha profile.
If you prefer pure chocolate flavor, omit the espresso powder entirely. The cocoa powder should be evenly distributed with no visible streaks. This dry mixture will dissolve completely into the cream, creating a smooth chocolate base. I always sift first—it makes a noticeable difference in the final texture.
Fold Ingredients Together
With the mixer running on low speed, gradually add the dry mixture to the whipped cream. Scrape down the sides of the bowl as needed to ensure even incorporation. Then, add the 1 tbsp Vanilla Extract and 0.5 cup Sweetened Condensed Milk, mixing just until fully combined—about 1 minute total.
This is where the magic happens. The condensed milk adds natural sweetness and helps stabilize the mixture, while the vanilla rounds out the chocolate flavor. Don’t overmix here—just until everything is evenly distributed. You want to maintain those air pockets from the whipped cream to achieve that signature light, creamy texture.
Add Mix-Ins and Freeze
Gently fold in the 0.25 cup Chopped Dark Chocolate and 0.125 cup Crushed Hazelnuts using a rubber spatula. Be careful not to deflate the whipped cream. Transfer the mixture to a 1-pint freezer-safe container, pressing down lightly to eliminate air pockets. Cover with plastic wrap pressed directly onto the surface to prevent ice crystals.
Place the container in the freezer and freeze for 6-8 hours or until completely firm. For best results, I recommend freezing overnight. The longer it freezes, the smoother the texture becomes. When ready to serve, let it sit at room temperature for 5-10 minutes before scooping to achieve that perfect creamy consistency.
Serve with Perfect Texture
Using a spatula, gently break up any ice crystals that may have formed on the surface. Scoop the ice cream into bowls and serve immediately. The texture should be smooth and creamy, with visible chocolate chunks and hazelnut pieces throughout. If it’s too hard, let it sit at room temperature for another minute or two before serving.
This no-churn method delivers professional-quality results without the fuss. The combination of whipped cream and condensed milk creates that signature ultra-creamy texture that separates this from ordinary chocolate ice cream. Enjoy immediately for the best experience—each bite should be rich, smooth, and perfectly balanced in sweetness.
Pro Tips For Making 1 Pint Chocolate Ice Cream
- Whisk the Cocoa First: Mix the unsweetened cocoa powder into the condensed milk before adding cream—this prevents clumping like I used to get when tossing it in last. A quick 30-second whisk with a fork makes all the difference in a smooth texture.
- Chill the Mix Longer: Skip the rush and let the mixture sit in the fridge for at least 4 hours (overnight is even better). I learned this the hard way when my ice cream turned grainy from not giving it enough time to fully cool before churning.
- Use Cold Cream: Grab the heavy whipping cream straight from the fridge—cold is non-negotiable. Warm cream separates when mixed with cocoa, and you’ll end up with a sad, watery mess instead of rich, creamy ice cream.
- Add Vanilla Last: Stir in the vanilla extract right before churning so it doesn’t get cooked out by the heat of the condensed milk. A little goes a long way—start with ½ teaspoon and adjust if you’re feeling extra fancy.
Flavor customization for this 1 pint chocolate ice cream
Mocha Twist
Add 1 tsp instant espresso powder to the dry ingredients for a sophisticated mocha flavor that enhances the chocolate without bitterness. For a stronger coffee kick, increase to 1.5 tsp and add ½ tsp vanilla bean paste instead of extract.
I recommend Starbucks or Nescafé espresso powder—they dissolve smoothly without graininess. This variation works especially well with dark chocolate chunks for a decadent dessert. 🍫☕
Peanut Butter Swirl
Stir 2 tbsp creamy peanut butter (like Jif Natural) into the whipped cream before folding in the dry ingredients. For a marbled effect, spoon dollops of peanut butter into the container before freezing, then swirl gently with a knife.
The peanut butter adds rich, nutty depth that pairs perfectly with chocolate. This version tastes like a classic Reese’s Peanut Butter Cup in every bite. 🥜
Salted Caramel Version
Replace 1 tbsp vanilla extract with 1 tbsp caramel extract> and fold in ¼ cup salted caramel sauce> (homemade or store-bought like Trader Joe’s) after freezing.
Sprinkle flaky sea salt> (like Maldon) on top before serving. The caramel adds sweetness while the salt balances the richness—this combo is pure indulgence. 🍯
Spiced Orange Zest
Add 1 tsp orange zest> and ¼ tsp ground cinnamon> to the dry ingredients for a bright, citrusy twist. The orange zest cuts through the richness while cinnamon adds warmth.
I recommend using Valencia orange zest> for its sweet, floral notes. This variation works beautifully with white chocolate chunks> instead of dark. 🍊
Nutella-Inspired
Replace the vanilla extract with 1 tbsp hazelnut extract> and fold in 2 tbsp Nutella> (or homemade hazelnut-chocolate spread) after freezing. For extra texture, sprinkle crushed hazelnuts> on top.
This version tastes like a creamy, melt-in-your-mouth Nutella dessert. The hazelnut extract adds that signature Nutella flavor without the need for store-bought spread. 🌰
Cooked Chocolate Boost
For a deeper chocolate flavor, replace ¼ cup cocoa powder> with ½ cup melted dark chocolate> (like Ghirardelli 70% cocoa) mixed with 2 tbsp heavy cream>. Stir this into the whipped cream before adding the dry ingredients.
The result is a richer, more intense chocolate flavor with a fudgy texture. This works especially well with sea salt flakes> on top. 🍫✨
Nutrition facts
Frequently asked questions
Can I make this recipe without an ice cream maker?
This is a no-churn recipe designed specifically to skip the ice cream maker. The key is using cold heavy cream whipped to soft peaks combined with condensed milk—these ingredients naturally create a creamy texture when frozen. The no-churn method eliminates ice crystals while delivering that signature smoothness. Just follow the freezing instructions carefully for best results.
Why did my ice cream get icy after freezing?
Ice crystals typically form when air gets trapped in the mixture. To prevent this, press plastic wrap directly onto the surface before freezing to minimize air exposure. Also, avoid overmixing after adding the condensed milk—this deflates the whipped cream’s air pockets. For extra smoothness, let the ice cream sit at room temperature for 5-10 minutes before scooping.
How long does this recipe keep in the freezer?
This chocolate ice cream maintains its best quality for up to 2 weeks when stored properly in an airtight container. For longer storage, you can extend it to 1 month by wrapping tightly in plastic wrap plus aluminum foil. The texture may harden slightly over time—simply let it soften at room temperature for 10-15 minutes before serving.
Can I substitute condensed milk with something else?
While condensed milk is ideal for this recipe, you can make a substitute by mixing ½ cup evaporated milk with ¼ cup granulated sugar. Heat gently until the sugar dissolves, then cool completely before using. The texture won’t be identical, but it will still work. For best results, stick with the original recipe’s condensed milk—it’s what creates that signature creamy texture.
What’s the best way to serve this ice cream?
For a restaurant-style presentation, scoop into chilled bowls and top with chocolate shavings, crushed nuts, or a drizzle of melted chocolate. Serve with warm cookies or caramel sauce for extra indulgence. The contrast of warm and cold makes every bite more enjoyable! For a quick treat, simply scoop into cones or bowls and enjoy immediately.

- 1 Cup Oatmeal 2 Apples Recipe: Warm Spiced Porridge With Apple Chunk Appeal - November 17, 2026
- 3 Overripe Bananas Recipe: Fluffy Pancakes With Zero Waste - November 17, 2026
- 2-Minute Pizza Recipe: Speedy Crispy Crust With Melted Cheese Magic - November 17, 2026