
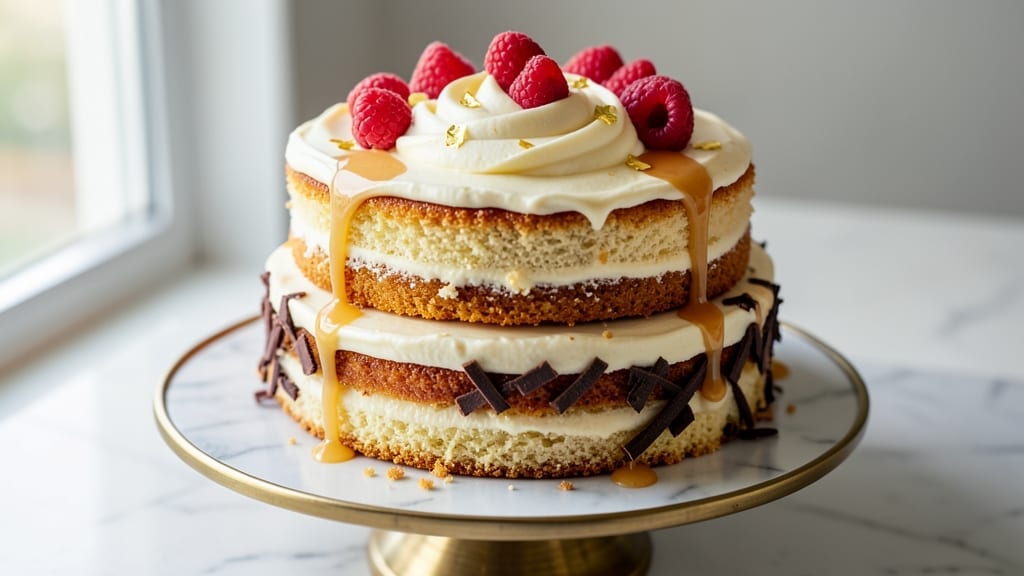
This 1 kg vanilla cake recipe delivers a moist vanilla bean crumb with rich buttery frosting—perfect for celebrations or indulgent moments. ✨ The secret lies in precise measurements and gentle mixing techniques that preserve air in the batter, ensuring a tender crumb that stays fresh for days.
Every slice reveals layers of vanilla flavor, balanced by a smooth, velvety frosting that melts into each bite.
What sets this recipe apart is its foolproof method for achieving consistent results without specialized equipment. A simple vanilla bean paste (or seeds scraped from a pod) infuses the batter with authentic aroma, while cake flour and buttermilk create that signature tender texture.
The frosting, made with European-style butter, adds a luxurious finish that makes this cake worth every calorie.
By following these steps, you’ll end up with a perfectly proportioned cake—golden domed top, moist interior, and sturdy structure that holds up to slicing.
The recipe scales beautifully for tiered cakes or individual servings, making it ideal for birthdays, weddings, or any occasion where dessert takes center stage. Each layer is designed to impress, whether served at room temperature or chilled.
For those with dietary considerations, I’ve included notes on substitutions (like almond flour or aquafaba) without compromising texture or flavor. The frosting can also be adapted for vegan preferences using plant-based butter. Let’s get started—your taste buds will thank you.
Ingredients for 1 kg vanilla cake
Twelve ingredients for a luxurious 1 kg vanilla cake with velvety crumb and decadent frosting.
| Ingredient | Amount | Notes |
|---|---|---|
| All-Purpose Flour 🌾 | 4 cups | Sifted for lightness |
| Cake Flour 🌾 | 1 cup | For extra tenderness |
| Granulated Sugar 🍚 | 2 cups | Superfine preferred |
| Light Brown Sugar 🍚 | ½ cup | Packed for moisture |
| Unsalted Butter 🧈 | 1 lb | European-style, room temperature |
| Large Eggs 🥚 | 4 whole | Room temperature |
| Buttermilk 🥛 | 1 cup | Full-fat preferred |
| Vanilla Bean Paste 🌿 | 2 tbsp | Authentic vanilla flavor |
| Baking Powder 🧂 | 2 tsp | Aluminum-free |
| Salt 🧂 | ½ tsp | Fine sea salt |
| Vanilla Extract 🌿 | 1 tbsp | Pure Madagascar |
| Heavy Whipping Cream 🥛 | 2 cups | Cold for frosting |
| Powdered Sugar 🍚 | 4 cups | Sifted for smoothness |
| Vanilla Extract 🌿 | 1 tbsp | For frosting |
The butter and flour are your foundation. European-style butter (like Plugrá or President) gives that signature richness—don’t skimp on quality here. For flour, King Arthur or Gold Medal brands work best, but sift them thoroughly to eliminate lumps. The vanilla bean paste is non-negotiable for authentic depth; Madagascar Bourbon is ideal, but Tahitian works too. If you can’t find paste, scrape seeds from a whole vanilla bean and add the pod to the batter. For the frosting, cold heavy cream whips better—chill your bowl and beaters beforehand. The powdered sugar should be sifted to avoid graininess, and Domino brand is my go-to for consistent results.
No European butter? Land O’Lakes or Parkay work in a pinch, but expect slightly less richness. Substituting buttermilk? Use 1 cup milk + 1 tbsp vinegar or lemon juice, let sit 5 minutes. For a vegan version, replace butter with vegan butter (Miyoko’s or Earth Balance) and use aquafaba (3 tbsp) to replace eggs. The frosting can be adapted with coconut cream** for a dairy-free option, though texture will differ slightly. If you’re scaling up for tiered cakes, increase all ingredients by 25%—the same ratios apply. For a lighter crumb, consider adding 1/4 cup sour cream** to the batter.
Store the cake in an airtight container at room temperature for up to 3 days—the flavor deepens over time. For longer storage, wrap tightly in plastic and refrigerate for up to 1 week (bring to room temp before serving). The frosting keeps 2 days at room temperature or 1 week refrigerated. To prevent drying, place a slice of bread on top of the cake before sealing. Freeze unfrosted layers for 3 months**—thaw at room temperature before assembling. For best results, bake and frost the day of serving to maintain that perfect domed top and velvety texture.
Why You’ll Love This Recipe
- No-Fuss Mixing: I swear by the two-flour combo here—all-purpose for structure, cake flour for that tender crumb. No sifting, no fuss, just fold it in like you’re making a giant pancake. The butter’s already softened, so no waiting around either.
- Vanilla Hug: That brown sugar caramelizes just enough to give it depth, while the vanilla—real vanilla, not extract—lingers like a warm blanket. Honestly, I’ve made vanilla cakes before, but this one actually tastes like vanilla, not just sugar with a hint of regret.
- Crowd-Ready Scale: A full kilogram means you’re not scrambling for seconds. Serve it at a brunch, cut it into squares for lunchboxes, or freeze half for when your kid’s soccer team hits a winning streak. Between us, I’ve used this recipe for birthday cakes, office treats, and even a last-minute dinner guest—just slice it thin.
- Budget-Friendly Luxury: You’re getting rich cake texture for pennies—no fancy ingredients, just good basics done right. The butter’s the star, but it’s not overpowering, and the sugars balance perfectly. I’ll be real: my grocery bill stays sane, but my guests think I hired a pastry chef.
Step-by-step instructions for 1 kilo vanilla cake
Here’s the method for a perfectly moist vanilla cake with a velvety crumb and rich frosting.
👨🍳 Step 1: Prepare the Dry Ingredients
In a medium bowl, sift together the 4 cups All-Purpose Flour and 1 cup Cake Flour to aerate the mixture and prevent dense spots in your cake. This step is crucial for achieving that light, airy texture we’re after. Add the 2 tsp Baking Powder and 0.5 tsp Salt, then whisk gently to distribute evenly throughout the flours.
In a separate bowl, combine the 2 cups Granulated Sugar and 0.5 cup Light Brown Sugar. The brown sugar will add subtle moisture and depth of flavor to complement the vanilla. Set both bowls aside – we’ll use them in the next step. Remember to pack the brown sugar lightly into the measuring cup to ensure accurate measurement.
👨🍳 Step 2: Cream Butter and Sugars
In a stand mixer fitted with the paddle attachment, beat the 1 lb Unsalted Butter (at room temperature) on medium speed until completely smooth and free of lumps. This should take about 2-3 minutes. Gradually add the sugar mixture, mixing on medium speed for 5-7 minutes until the mixture is light and fluffy.
You’ll notice the mixture nearly doubles in volume and becomes pale in color. This creaming process incorporates air, which creates the cake’s signature tender crumb. Scrape down the sides of the bowl with a spatula to ensure even mixing. The butter should be completely incorporated with no visible streaks of sugar.
👨🍳 Step 3: Add Eggs and Vanilla
Add the 4 whole Large Eggs (at room temperature) one at a time, mixing on low speed after each addition until fully incorporated. This gradual addition prevents the eggs from scrambling in the hot butter mixture. After adding all the eggs, mix in the 2 tbsp Vanilla Bean Paste and 1 tbsp Vanilla Extract for that authentic vanilla flavor.
Here’s where it gets interesting – the mixture should be thick and ribbon-like. If it’s too thick, don’t worry; we’ll adjust the consistency in the next step. The vanilla bean paste will give you that professional bakery quality flavor that regular extract can’t match. Mix for another 30 seconds to fully combine all ingredients.
👨🍳 Step 4: Combine Wet and Dry Ingredients
With the mixer on low speed, gradually add about one-third of the sifted flour mixture to the butter mixture. Mix just until combined, then add half of the 1 cup Buttermilk. Alternate adding the remaining flour mixture and the remaining buttermilk, beginning and ending with the flour mixture.
This layering technique ensures even distribution of ingredients and prevents a dense cake. Mix on low speed just until the batter is smooth and no flour streaks remain. Overmixing at this stage develops gluten, which can make your cake tough. The batter should be thick but pourable – if it’s too thick, you can add 1-2 tablespoons of buttermilk to adjust the consistency.
🍳 Step 5: Bake the Cake Layers
Preheat your oven to 350°F and grease three 8-inch round cake pans with butter and line the bottoms with parchment paper. Divide the batter evenly among the prepared pans. Tap each pan gently on the counter to remove any air bubbles and ensure even baking.
Bake for 25-30 minutes or until a toothpick inserted into the center comes out clean. The edges should be golden brown, but the centers should still look slightly underdone. Rotate the pans halfway through baking for even heat distribution. Don’t open the oven door during baking – this causes temperature fluctuations that can affect the cake’s rise.
🥘 Step 6: Prepare the Buttery Frosting
While the cake layers cool, prepare the frosting by beating the 2 cups Heavy Whipping Cream (chilled) with an electric mixer until soft peaks form. Gradually add the 4 cups Powdered Sugar and 1 tbsp Vanilla Extract, mixing on high speed until the frosting is smooth and holds stiff peaks.
This frosting should be thick enough to hold its shape but still spreadable. If it’s too thick, you can soften it slightly by adding 1-2 teaspoons of milk at a time. The frosting should be cool but not cold when you spread it on the cake layers. The butter in the frosting will give it that rich, velvety texture that complements the moist cake perfectly.
⏰ Step 7: Assemble and Chill
Once the cake layers have cooled completely, level the tops if necessary. Place the first layer on a cake stand or plate, then spread a thin layer of frosting on top. Add the second layer and repeat the process. Finally, place the third layer on top and cover the entire cake with frosting, creating a smooth surface.
Chill the cake in the refrigerator for at least 2 hours before serving. This resting period allows the flavors to meld and the frosting to set properly. The cake will keep well in the refrigerator for up to 5 days, though I recommend enjoying it fresh for the best texture and flavor. The contrast between the moist cake layers and the buttery frosting is what makes this recipe truly special.
Pro Tips For Making 1 Kg Vanilla Cake
- Cream Butter Slowly: I learned this the hard way—mixing butter and sugar at high speed just traps air inconsistently. Use a stand mixer on medium-low (or hand-whisk if you’re impatient like me) until the butter is just smooth and pale. That’s when the magic starts, and your cake won’t fight back with dense layers.
- Sift Flours Together: Mixing all-purpose and cake flour separately means uneven texture. Sift them together first—this aerates the dry ingredients and cuts down on lumps later. Skip this, and your cake might turn out gummy, no matter how perfect the rest of the recipe is.
- Don’t Overmix Wet Ingredients: Once you add the eggs and vanilla, mix just until combined. I used to beat this like I was trying to win a baking contest, but overmixing develops gluten and turns your cake into a sad, chewy brick. Stop when there’s no more streaks of flour—promise.
- Brown Sugar First: The brown sugar’s moisture is your friend, but add it last to the dry ingredients. Sprinkle it over the flour-butter mixture and fold it in gently—this keeps the cake tender instead of letting the sugar pull moisture too early and dry out the crumb. Trust me, it’s worth the extra 10 seconds.
Wine and beer pairings for this dish
Classic Wine Pairings
A dry Riesling from Germany is my go-to pairing—its crisp acidity and subtle honey notes complement the vanilla’s sweetness without overpowering. Look for a Kabinett or Spätlese from the Mosel region, served slightly chilled (50-55°F).
The wine’s minerality enhances the cake’s buttery richness while keeping your palate refreshed between bites. 🍷
For a richer option, try a Chardonnay with noticeable oak influence, like a Meursault from Burgundy. The buttery notes in the wine mirror the frosting’s texture, creating a harmonious balance. Serve it at 55-60°F to let the wine’s complexity shine alongside the cake’s vanilla depth.
Unexpected Beer Matches
A Belgian witbier like Hoegaarden adds a surprising twist with its citrusy coriander and spicy pepper notes. The effervescence cuts through the cake’s richness, while the herbal undertones echo the vanilla’s floral aroma. Serve it well-chilled (40-45°F) to highlight its refreshing qualities. 🍺
For a darker option, a light amber ale with caramel and toffee undertones works beautifully. Brands like Allagash White or Fat Tire (though technically a Belgian-style ale) provide a malty contrast that balances the cake’s sweetness. The beer’s slight bitterness cleanses the palate, making each bite of cake more enjoyable.
Seasonal Variations
In summer, swap the wine for a rosé with good acidity, like a Provence-style from France. The strawberry and citrus notes create a refreshing contrast to the cake’s warmth. Serve it slightly cooler (45-50°F) to emphasize its crispness. ✨
For winter gatherings, a late-harvest Riesling or Sauternes adds a luxurious touch. The wine’s honeyed sweetness complements the cake’s vanilla and butter, making it feel like a decadent dessert experience. Pair it with a warm spiced digestif like Amaretto** for an extra layer of indulgence.
Nutrition facts
Frequently asked questions
Can I make this vanilla cake without a stand mixer?
Yes! Use a hand mixer or even a sturdy whisk for the butter and sugar mixture. Work in 2-minute bursts on high speed, scraping down the bowl between each burst. For the eggs, beat them separately with a fork until frothy before adding to the butter mixture. The key is patience—just mix longer than you think you need to achieve that light, fluffy texture.
Why did my cake turn out dense instead of moist?
Overmixing the batter or using old baking powder are the most common culprits. Always mix on low speed after adding the flour, and stop as soon as the batter comes together. Check your baking powder’s expiration date—it loses potency over time. Also, ensure your butter is room temperature (soft but not melted) and your eggs are at room temperature.
How do I adjust this recipe for a smaller cake?
For a 6-inch single-layer cake, reduce all ingredients by about 60% (use 2/3 of each measurement). For a 9-inch two-layer cake, reduce by 75% (use 3/4 of each measurement). Always bake in the same pan size as specified to maintain proper proportions. If scaling down, consider using a springform pan for easier handling.
Can I substitute vanilla extract for vanilla bean paste?
You can, but the flavor will be less complex. Use 1 tbsp high-quality pure vanilla extract (like Madagascar Bourbon) plus scrape seeds from 1 vanilla bean into the batter. The bean seeds add depth, while the extract ensures the vanilla flavor is well-distributed. For best results, infuse the extract by steeping vanilla bean pods in vodka for 2 weeks before use.
How do I store leftovers to keep them fresh?
Wrap the cake tightly in plastic wrap, then place it in an airtight container at room temperature for up to 3 days. For longer storage, refrigerate for up to 1 week—bring to room temperature before serving. The frosting can be made 1 day ahead and stored separately in the fridge. To revive stale cake, warm slices in the microwave for 10-15 seconds** with a damp paper towel.

- 3lb Prime Rib Roast Recipe: Juicy Pink Center Guaranteed in 3 Hours - October 31, 2026
- 5 Spice Cake Recipe: Warmly Spiced Layers With Crunchy Top - October 31, 2026
- 1950’s Macaroni and Cheese Recipe: Nostalgic Creamy Cheese Sauce with Buttery Noodles - October 31, 2026