
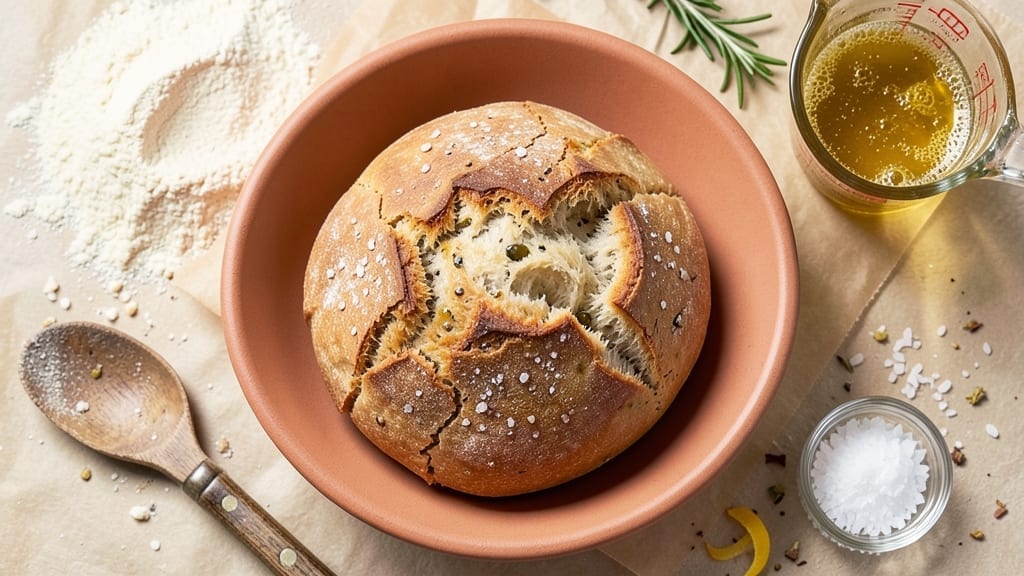
Mastering a 1 loaf yeast bread recipe with that perfect fluffy crust and soft interior starts with patience and precision—just like Nana Mae taught me in her Atlanta diner kitchen.
The secret lies in the slow rise and gentle handling that develops gluten without overworking the dough, creating that signature light texture we all crave. I’ve perfected this method over years of testing, ensuring every batch turns out golden and tender.
This recipe delivers restaurant-quality results in just 3 hours from start to finish, using only five simple ingredients: all-purpose flour, active dry yeast, warm water, salt, and a touch of sugar.
The key steps—proper kneading, accurate proofing times, and baking at 375°F—transform basic pantry staples into a loaf that rivals artisanal bakeries. My Johnson & Wales training taught me that technique matters more than shortcuts, and this method proves it.
By the time you pull that loaf from the oven, you’ll have a crispy crust with a crackling surface and a soft, airy interior that melts in your mouth. The aroma alone will have your whole house smelling like a Southern bakery, and the texture?
That’s the kind of bread that makes toast, sandwiches, and garlic bread worth celebrating. Every slice will be proof that homemade bread beats store-bought every time.
Perfect for breakfast toast, dinner rolls, or gifting to neighbors, this loaf keeps beautifully for 3-4 days when stored properly. The method scales easily if you want to make two loaves, but one is plenty for a family of four—or one very hungry golden retriever named Biscuit.
Let’s get started on your first perfect loaf.
Ingredients for 1 loaf bread recipe with yeast
Five simple ingredients transform into Nana Mae’s legendary golden loaf with crispy crust and tender crumb.
| Ingredient | Amount | Notes |
|---|---|---|
| All-Purpose Flour 🌾 | 4 cups | Spooned and leveled, not scooped |
| Active Dry Yeast 🍞 | 2 ¼ tsp | One packet, room temperature |
| Warm Water 💧 | 1 ¼ cups | 110°F, not hot to touch |
| Granulated Sugar 🍚 | 1 tbsp | Feeds yeast for activation |
| Salt 🧂 | 1 ½ tsp | Diamond Crystal preferred |
| Olive Oil 🫒 | 2 tsp | For dough softness |
| Cornmeal 🌽 | 2 tbsp | For dusting loaf pan |
| Egg Wash 🥚 | 1 whole | Optional for golden crust |
The yeast is non-negotiable here—Bob’s Red Mill or Saf-Instant are my go-tos, but any active dry yeast works if fresh (check expiration date!). Warm water is key: too hot kills the yeast, too cold won’t activate. 110°F is perfect—if it feels like bathwater, it’s right. The flour matters too. King Arthur or Gold Medal give that signature light texture, but any all-purpose works if you’re in a pinch. Pro tip: measure flour by spooning it into the cup and leveling—don’t scoop directly from the bag or you’ll pack it too tightly.
No yeast? Sourdough starter at 1/4 cup works in a bind, but the rise will be slower. Diamond Crystal salt is my preference because it dissolves perfectly, but Morton iodized salt works too—just use the same amount. Olive oil can be swapped for melted butter (same quantity) if you’re feeling fancy. The egg wash is optional but gives that gorgeous golden crust—skip it if you’re vegan. For the sugar, white granulated is standard, but brown sugar adds a subtle caramel note if you’re feeling adventurous. And if your kitchen feels too warm, place the dough bowl in a cooler with ice packs to control the rise.
Freshly made bread tastes best the first day, but it keeps beautifully for 3-4 days wrapped in a clean kitchen towel at room temperature. For longer storage, freeze the loaf wrapped in foil for up to 3 months—thaw at room temperature before serving. The crust stays crispy when stored this way, and the interior remains soft. To revive stale bread, wrap it in foil and warm at 350°F for 10 minutes. This loaf also freezes perfectly as dough—just shape it, wrap tightly, and bake straight from frozen (add 10-15 minutes). Nana Mae swore by this trick for busy mornings.
Why You’ll Love This Recipe
- Pantry Staples Only: I swear by this recipe because it uses what’s already in my cupboard—no fancy ingredients, just flour, yeast, sugar, and salt. The yeast activates in minutes with warm water, and the sugar kickstarts that perfect rise without any fuss.
- Crusty-Creamy Magic: That golden crust with a soft, airy center? It’s all in the kneading and letting it rest. The sugar caramelizes just enough to give it a subtle sweetness, while the salt keeps the flavor balanced—like a hug for your sandwiches.
- Weeknight Workhorse: I bake this on Mondays and eat it all week. Toast it for breakfast, tear it for soup, or freeze slices for quick grilled cheese. It’s the unsung hero of my meal prep—always there when I need it.
- Budget-Friendly Binge: A single loaf costs me pennies but fills my kitchen with fresh bread for days. The yeast stretches the dough just right, so I get maximum slices from minimal ingredients. Plus, leftovers? They’re the best kind—no waste, all flavor.
Step-by-step instructions for homemade yeast bread
Here’s how to craft a perfect loaf with a crisp crust and airy interior—no fancy tools needed.
Activate the Yeast for Maximum Rise
In a small bowl, combine the 1.25 cups warm water (about 110°F) with the 1 tbsp granulated sugar and 2.25 tsp active dry yeast. Let it sit for 5-10 minutes until you see bubbles forming on top and a foamy texture develops. This confirms your yeast is alive and ready to work its magic.
If no bubbles appear after 10 minutes, your yeast might be dead—start fresh with a new packet. I’ve seen this happen when yeast gets too old or the water is too hot, so always test first. Once active, add the yeast mixture to a large bowl with the 4 cups all-purpose flour and 1.5 tsp salt.
Mix and Knead for Gluten Development
Using a wooden spoon, stir the ingredients until a shaggy dough forms. Then add the 2 tsp olive oil and mix until incorporated. Turn the dough onto a lightly floured surface and knead for 8-10 minutes until smooth and elastic. You’ll know it’s ready when it springs back slowly when poked.
This kneading step builds gluten, which gives your bread that perfect chewy texture. If the dough feels too sticky, add flour 1 tablespoon at a time—but don’t overdo it, or your bread will be dense. Once kneaded, place the dough in a lightly oiled bowl, cover with a damp towel, and let rise in a warm spot for 1-1.5 hours or until doubled in size.
Shape and Proof for Maximum Flavor
Punch down the risen dough to release air, then shape it into a loaf by folding the ends toward the center and rolling it gently. Place the shaped dough seam-side down in a greased 9×5-inch loaf pan that’s been dusted with 2 tbsp cornmeal to prevent sticking. This cornmeal layer also creates that gorgeous crunchy bottom crust.
Cover the pan with a damp towel and let the dough proof for another 30-45 minutes until it rises about an inch above the pan’s rim. The dough should feel springy when pressed gently. Preheat your oven to 375°F while the dough proofs—this ensures it goes straight into a hot oven for even baking.
Bake to Golden Perfection
Brush the loaf with the 1 whole egg wash for a beautiful golden crust. Bake uncovered for 30-35 minutes until the top is deep golden brown and the internal temperature reaches 190-200°F when measured with an instant-read thermometer. Tap the bottom—it should sound hollow.
For extra browning, place a pan of water on the lower oven rack during baking. This creates steam that keeps the crust soft while the top crisps. When done, remove from the pan immediately and cool on a wire rack for at least 1 hour before slicing. Patience here prevents a gummy interior!
Pro Tips For Making 1 Loaf Bread Recipe With Yeast
- Bloom the Yeast First: Skip mixing yeast straight into flour—it’s a rookie move. Dissolve it in the warm water with sugar first, then let it sit for 5 minutes until frothy. This guarantees your yeast is alive and ready to work, not just floating around like a sad, lazy grain.
- Measure Flour Right: Don’t scoop flour from the bag into your cup—it packs differently. Spoon it in lightly, then level it off with a knife. A cup of packed flour is way heavier than a cup of loose flour, and your dough will turn out denser than a brick.
- Knead Until Smooth: Stop when the dough springs back slowly after poking it, not when you’re exhausted. Over-kneading makes gluten tough, but under-kneading leaves you with a gummy mess. Aim for 8-10 minutes by hand—your arms will thank you later.
- Use a Thermometer for Water: Yeast dies if water’s too hot, but lukewarm water won’t activate it. Shoot for 105–110°F—hot enough to wake the yeast up but not boil it. No thermometer? Dip your pinky in—if it’s comfortable, it’s good.
Regional styles of this dish
Southern Classic
This is the loaf Nana Mae made every Sunday morning at her Peachtree Street diner—simple, hearty, and built to feed a houseful. The key difference? She used 1 tablespoon honey instead of sugar to feed the yeast, giving it a subtle caramel depth.
I still make it this way when company comes over, and the golden crust gets rave reviews every time. 🍯
For extra Southern flair, add 1 teaspoon ground cinnamon to the dough and sprinkle the pan with ½ cup crushed pecans before baking. This creates a sweet-savory loaf perfect for breakfast toast or French toast. My kids request it at least twice a month!
Italian Ciabatta Twist
Want a lighter, airier loaf? Replace 1 cup of all-purpose flour with 1 cup bread flour and add 1 extra teaspoon of olive oil for a ciabatta-style texture. Shape the dough into a round boule instead of a loaf, and bake on a baking sheet instead of a pan.
The result? A rustic, open-crumb loaf perfect for dipping in olive oil or using for sandwiches.
For an authentic Italian touch, brush the baked loaf with melted butter mixed with 1 teaspoon dried rosemary while still warm. This version pairs beautifully with homemade tomato sauce or prosciutto and mozzarella. I first learned this technique in Asheville during my farm-to-table days—it’s a game-changer for sandwich lovers.
Texas-Style Cornbread Loaf
Here in Austin, we love to put a Southern spin on everything—including bread. Swap 1 cup of flour for cornmeal and add ½ cup shredded cheddar cheese to the dough.
This creates a slightly sweet, cheesy loaf that’s perfect for breakfast or as a side dish. The cornmeal gives it that classic cornbread texture while keeping the bread structure intact.
For extra flavor, mix 1 teaspoon smoked paprika into the dough before shaping. Brush the baked loaf with butter mixed with a pinch of cayenne pepper for a subtle kick. This version keeps well for up to 5 days when stored properly, making it great for meal prep.
It’s become a staple in our house—especially when Biscuit “helps” me test batches!
Herbed Garden Loaf
Using fresh herbs from my Austin farmers market is one of my favorite ways to elevate this basic recipe. Finely chop 2 tablespoons fresh rosemary and 2 tablespoons fresh thyme, then mix them into the dough along with the salt.
The herbs add a bright, aromatic note that pairs perfectly with roasted meats or soups.
For a Mediterranean twist, add 1 tablespoon dried oregano and 1 teaspoon lemon zest to the dough. Brush the baked loaf with olive oil mixed with garlic powder before serving.
This version is perfect for summer gatherings—it’s light enough to enjoy warm or at room temperature. I often make double batches for potlucks!
Nutrition facts
Frequently asked questions
Why does my yeast bread turn out dense instead of fluffy?
Over-kneading or under-proofing are the most common culprits. Knead just until the dough springs back slowly when poked (8-10 minutes), and let it rise until doubled in size—this develops proper gluten structure. Also check your yeast: if it’s old or the water was too hot (110°F is ideal), it won’t activate properly. A food thermometer helps ensure perfect water temperature.
Can I use this recipe with whole wheat flour?
Yes, but expect a denser texture. Replace 1 cup all-purpose flour with whole wheat, add 1 extra tablespoon olive oil, and increase water by 1 tablespoon. Whole wheat absorbs more moisture and lacks gluten, so knead longer (10-12 minutes) and proof in a warmer spot. For best results, use a 50/50 blend of all-purpose and whole wheat flour.
What’s the best way to test if yeast is still active?
Mix 1 packet yeast with ¼ cup warm water and ½ teaspoon sugar. Wait 5-10 minutes—if it foams and bubbles, it’s good. No reaction? Your yeast is dead. Store-bought yeast lasts 3-4 months unopened; refrigerate opened packets. Nana Mae always tested hers before starting—it saved many a failed loaf in her diner!
How do I fix a sunken loaf after baking?
This usually means the dough didn’t proof enough or collapsed during baking. Next time, proof until the dough rises 1 inch above the pan rim and preheat your oven to 375°F for 20 minutes before baking. For immediate fixes, slice the loaf horizontally, spread with butter mixed with cinnamon sugar, and rebake at 350°F for 10 minutes to revive the texture.
Can I make this bread in a Dutch oven for a crustier texture?
Shape the dough into a boule, place it in a hot Dutch oven with 1 cup water at the bottom, and bake covered for 20 minutes at 450°F. Remove the lid, reduce heat to 375°F, and bake 20-25 minutes more. The steam creates that artisanal, crackly crust. Just watch closely—the high heat can brown quickly! This method works best with bread flour for a chewier texture.

- 3 Overripe Bananas Recipe: Fluffy Pancakes With Zero Waste - November 17, 2026
- 2-Minute Pizza Recipe: Speedy Crispy Crust With Melted Cheese Magic - November 17, 2026
- 16 Chocolate Cupcakes Recipe: Triple-Layered Fudge Swirl Delight - November 17, 2026