
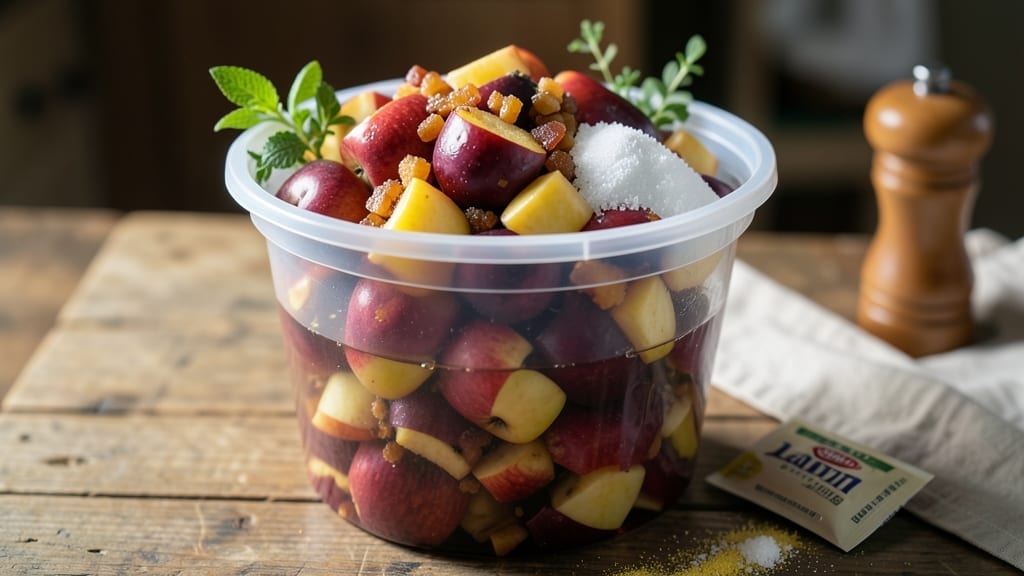
Making 5-gallon apple wine without a press transforms ordinary apples into a rich, complex homemade beverage with just patience and basic equipment. This recipe delivers authentic fermentation magic—no specialized tools required—using crushed apples, sugar, and yeast to create a drink that improves with age.
The process may take six months, but the reward is a smooth, aromatic wine perfect for sipping or gifting.
Sanitation is the foundation of success here—sterilizing all equipment prevents contamination and ensures a clean fermentation. You’ll start with crushed apples (no press needed), then add sugar for fermentation fuel and yeast to kickstart the process.
The primary fermentation happens in a sealed container, where the magic of natural yeast conversion transforms sugars into alcohol and flavor compounds.
After the initial fermentation, you’ll rack the wine into a clean container to separate it from sediment, then clarify it through natural settling or fining agents. Bottling comes next, followed by aging—where the wine develops its signature depth and smoothness.
Each step builds on the last, creating a drink that’s unmistakably homemade and far superior to store-bought options.
This recipe is designed for beginners, with clear instructions and safety notes to guide you through the process. Whether you’re making it for personal enjoyment or to share with friends, the result is a rich, flavorful apple wine that reflects your own craftsmanship. Let’s get started on your fermentation journey!
Ingredients for 5 gallon apple wine recipe without a press
Crushed apples, sugar, and yeast transform into rich homemade apple wine with just patience and basic equipment.
| Ingredient | Amount | Notes |
|---|---|---|
| Fresh Apples (Mixed Varieties) 🍎 | 12 lb | Core and crush thoroughly |
| Granulated White Sugar 🍚 | 5 lb | For fermentation fuel |
| Wine Yeast (Lalvin EC-1118 or K1-V1116) 🍶 | 1 package | Active dry yeast |
| Campden Tablets (Potassium Metabisulfite) 💊 | 2 tablets | For sterilization (dissolve in water) |
| Non-Chlorinated Water 💧 | 4 gallons | Use filtered or bottled |
| Lemon Juice (Fresh) 🍋 | ½ cup | For acidification |
| Pectic Enzyme (Optional) 🧪 | 1 tsp | For clearer wine |
| Bentónite Clay (Optional) 🏺 | 1 tbsp | For fining (dissolve in water) |
| 5-Gallon Food-Grade Plastic Bucket 📦 | 1 whole | With airlock lid |
| Airlock Fermentation Lock 🔒 | 1 whole | For sealed fermentation |
| Sanitizing Solution (Star San or Potassium Sorbate) 🧴 | 1 package | For bottling sanitation |
| Glass Wine Bottles (12 oz) 🍷 | 12 whole | Food-grade, sterilized |
The apples are the heart of this wine—mixed varieties give the most complex flavor. Local orchards or farmers markets often have discounted bins of imperfect fruit perfect for crushing. Look for firm, ripe apples with minimal bruising. If you can’t find a mix, Granny Smith and Honeycrisp make a solid combo. The sugar is non-negotiable—it feeds the yeast during fermentation. Domino brand is reliable and affordable, but any granulated white sugar works. Yeast is the magic ingredient here—Lalvin EC-1118 is my go-to for crisp, clean apple wines, but K1-V1116 works well too. Store all dry ingredients in airtight containers away from direct light to preserve freshness.
No Campden tablets? Potassium metabisulfite powder works just as well—just dissolve it in a small amount of water first. Short on non-chlorinated water? Boil tap water for 10 minutes to remove chlorine, then cool completely before using. The lemon juice is crucial for acidity—fresh-squeezed is best, but bottled works in a pinch. For cloudy wine, the pectic enzyme is a game-changer, but it’s optional. If you skip it, your wine will just be slightly hazier. The bentonite clay is another optional fining agent that helps clarify the wine—WineScience sells it in small quantities perfect for homebrew. Don’t have a 5-gallon bucket? Clean food-grade plastic containers from restaurant supply stores work just as well.
All equipment must be sanitized before use—Star San solution is the gold standard for home winemakers. The crushed apple mixture can be stored in the fridge for up to 3 days before fermentation if needed. Once fermentation starts, keep the bucket in a cool, dark place (65-75°F is ideal) for about 6 months. The wine will continue improving in flavor as it ages—12+ months is even better. Bottles should be stored horizontally in a dark cellar or pantry to prevent sediment buildup. This wine keeps indefinitely once properly bottled, though flavor peaks around 18-24 months.
Why You’ll Love This Recipe
- Here’s what sold me: I can ferment this in my kitchen, then bottle it for holidays or housewarming gifts. No store-bought wine can compete with the pride of giving someone something you made from your own backyard apples.
- No Press, No Problem: I swear by this method—just toss those bruised apples straight into the bucket, no fancy equipment needed. The Campden tablets handle the sulfur dioxide work while I’m still deciding what to have for dinner, and the yeast does the rest.
- Sweet & Tart Magic: That mix of tart and sweet apples? It’s like autumn in a glass—bright, balanced, and just a touch of residual sugar keeps it from being too dry. Honestly, the first sip makes me want to make another batch immediately.
- Gift-Worthy in Months: Here’s what sold me: I can ferment this in my kitchen, then bottle it for holidays or housewarming gifts. No store-bought wine can compete with the pride of giving someone something you made from your own backyard apples.
Step-by-step instructions for crafting homemade apple wine
Transforming fresh apples into smooth, fermented wine takes patience—but these steps make it straightforward.
Prepare the Apple Must and Sanitize Equipment
Begin by coring and crushing the 12 lb fresh apples (mixed varieties) using a food processor or clean potato masher. Transfer the crushed apples to the 5-gallon food-grade plastic bucket, ensuring all pulp is submerged. Dissolve the 2 tablets Campden tablets (potassium metabisulfite) in 1 cup of non-chlorinated water and stir into the apple mixture. This sterilizes the must and prevents unwanted bacteria.
While the must sits, sanitize your equipment thoroughly. Prepare the airlock fermentation lock by filling it halfway with non-chlorinated water—this creates the seal for fermentation. Clean the 12 whole glass wine bottles (12 oz) and the bucket with the sanitizing solution (Star San or potassium sorbate) according to package instructions. Let everything air-dry completely before use. This step is critical; any contamination here can ruin your entire batch.
Add Sugar, Yeast, and Acidification Agents
Dissolve the 5 lb granulated white sugar into the apple mixture, stirring until fully incorporated. The sugar serves as the primary food source for the yeast during fermentation. Add the 0.5 cup fresh lemon juice to lower the pH, creating a more stable environment for the yeast. If using, sprinkle in the 1 tsp pectic enzyme (optional) and stir gently—this helps clarify the wine by breaking down pectin in the apple pulp.
Next, add the 1 package wine yeast (Lalvin EC-1118 or K1-V1116) to the bucket. Cover the bucket with a clean cloth or lid (without sealing it) and let it sit at room temperature for 12-24 hours. You’ll notice small bubbles forming on the surface—this indicates the yeast is activating and beginning fermentation. If you see excessive foam, gently stir it down to prevent spillage during the next steps.
Top Off with Water and Seal for Primary Fermentation
After the initial activation, fill the bucket with the remaining 3 gallons non-chlorinated water to reach the 5-gallon mark. Stir the mixture gently to distribute the yeast and sugar evenly. Attach the airlock fermentation lock to the bucket lid, ensuring it’s sealed tightly. Place the bucket in a dark, temperature-controlled space between 65-75°F—this range is ideal for yeast activity without overheating.
Primary fermentation will begin immediately, and you’ll see vigorous bubbling in the airlock for the first 3-5 days. Stir the must gently every 2-3 days to prevent a skin from forming on top, which could block oxygen and slow fermentation. This phase typically lasts 7-10 days, until the bubbling in the airlock slows significantly. Patience here is key—rushing this step can lead to off-flavors or incomplete fermentation.
Rack and Clarify the Wine
Once primary fermentation slows, carefully transfer the wine to a clean 5-gallon food-grade plastic bucket using a siphon tube. Leave behind any sediment at the bottom of the original bucket—this includes dead yeast cells and apple solids. If using, dissolve the 1 tbsp bentónite clay (optional) in 1 cup of non-chlorinated water, stir it into the wine, and let it sit for 24 hours. The clay will bind to impurities, helping clarify the wine. After 24 hours, siphon the wine off the clay sediment into a fresh bucket.
Repeat this racking process every 4-6 weeks for 3-4 months, until the wine appears clear and the airlock shows minimal activity. This secondary fermentation stage refines the flavor and ensures a smooth, polished final product. Store the wine in a cool, dark place during this time to prevent unwanted flavors from developing.
Bottle and Age for 6 Months
After the wine has clarified, sanitize the 12 whole glass wine bottles (12 oz) once more and fill them using the siphon tube, leaving about ½ inch of headspace at the top. Attach clean airlocks to each bottle and store them in a dark, temperature-stable location for 6 months. This aging period allows the wine to mellow, blending its flavors and developing complexity.
During aging, check the bottles periodically for sediment. If you notice excessive cloudiness or sediment, you may need to rack the wine again before final bottling. After 6 months, taste a small sample to check for balance. If the wine tastes dry and well-integrated, it’s ready to enjoy. If it’s still slightly sweet or underdeveloped, age it another 2-3 months. Serve chilled for a refreshing, crisp apple wine that captures the essence of your harvest.
Pro Tips For Making 5 Gallon Apple Wine Recipe Without A Press
- Smash Apples Thoroughly: Grab a potato masher or the back of a wooden spoon and actually work those apples—no half-hearted taps. You’re not just bruising them; you’re breaking down the cells to release juice and flavor. I used to skimp here, and my wine always tasted dull.
- Boil Juice 20 Minutes: After crushing, bring that apple mash to a rolling boil for a full 20 minutes. This isn’t optional—it sterilizes the juice, concentrates the flavors, and kills off wild yeast that’ll outcompete your Lalvin. Skim off the foam like you’re making stock, but don’t rush it.
- Cool Juice Fast: Dump the hot juice into a clean 5-gallon bucket, then fill a sink with ice water and submerge the bucket halfway. Yeast hates heat, and if you pitch it into warm juice, you’re inviting sluggish fermentation or even contamination. Get it to room temp (70–75°F) within an hour.
- Pitch Yeast at Night: Add your Lalvin EC-1118 or K1-V1116 right before bed—fermentation peaks overnight when temps are stable. If you pitch in the morning, the yeast might get stressed by midday heat, slowing things down. Trust me, your future self will notice the difference in clarity and finish.
Creative variations of this 5 gallon apple wine recipe without a press
Spiced Winter Blend
For a cozy, aromatic twist, add 1 cinnamon stick, 3 whole cloves, and 1 star anise pod during primary fermentation. These spices infuse beautifully into the wine, creating warm, baking-spice notes perfect for winter sipping.
I like to remove them after 3 months of fermentation to avoid bitterness. Pair with McIntosh and Braeburn apples for a sweeter, more aromatic base. 🌟
Dry Cider-Style
Reduce sugar to 3 lb instead of 5 lb for a drier, cider-like apple wine with more tartness. Use Granny Smith and Fuji apples for crisp acidity, and ferment at 68-72°F for a cleaner, brighter profile.
This version works well as a refreshing summer drink or paired with spicy dishes. Let it age 8-12 months for balanced dryness. 🍏
Berry-Infused Fusion
Add 2 cups crushed blackberries or raspberries to the must during primary fermentation for a fruity, jammy twist. The berries add natural sweetness and depth, reducing the need for added sugar.
I recommend Honeycrisp and Gala apples for this variation, as their mild sweetness complements the berry flavors. Strain out the berry solids after 1 week of fermentation. ✨
Honey-Sweetened
Replace 2 lb of sugar with 1 cup raw honey for a naturally sweeter, more complex wine. The honey adds floral notes and a smoother finish. Use Pink Lady and Jonagold apples for a balanced acid-sweet profile.
This version benefits from a longer fermentation (10-12 days) to allow the honey flavors to integrate fully. 🍯
Herbal Twist
Steep 1 tbsp dried rosemary or 1 tbsp fresh thyme in 1 cup hot non-chlorinated water for 10 minutes, then strain and add to the must.
These herbs add earthy, aromatic notes that pair beautifully with Fuji and Golden Delicious apples. Remove the herbs after 48 hours to prevent over-extraction. 🌿
Carbonated Sparkling
For a fizzy version, transfer the wine to a plastic soda bottle with a one-way valve (like a Blichmann Bottle Rocker) after aging. Add ½ cup sugar to the bottle and shake daily for 2 weeks to carbonate naturally.
This creates a crisp, effervescent apple wine perfect for celebrations. Serve well-chilled. 🥂
Nutrition facts
Frequently asked questions about homemade apple wine
Can I use frozen apples instead of fresh?
Frozen apples work in a pinch, but fresh apples are ideal for the best flavor. If using frozen, thaw them completely first and drain any excess liquid. Frozen apples may lack the natural enzymes that help clarify the wine, so you might need to add 1 extra tsp of pectic enzyme to improve clarity. For optimal results, fresh apples are recommended.
How do I know when fermentation is complete?
Fermentation is complete when the airlock stops bubbling for 24-48 hours and the wine smells clean and fruity (no harsh alcohol or vinegar aromas). You can also test by checking the specific gravity with a hydrometer—when it stabilizes around 0.990-1.000, fermentation is done. Taste a small sample too; it should be dry with no remaining sweetness.
Why did my wine turn cloudy?
Cloudiness usually means your wine needs more time to clarify or you skipped racking steps. Try racking the wine again after 1-2 weeks to remove sediment. If cloudiness persists, consider adding 1 tbsp bentonite clay during the next racking. Always use sanitized equipment and avoid temperature fluctuations, which can also cause cloudiness.
Can I speed up the fermentation process?
Fermentation can’t be rushed safely—it takes 7-10 days for primary fermentation to complete. However, you can optimize conditions by keeping the temperature between 65-75°F and stirring gently every 2-3 days to prevent a skin from forming. Avoid heating the mixture, as this can kill the yeast and create off-flavors. Patience ensures a smoother, more flavorful final product.
How long will my homemade apple wine last?
Properly bottled and stored in a cool, dark place, your apple wine will last 5-10 years or longer! The flavor actually improves with age, developing deeper complexity over time. Check bottles periodically for sediment and rack if needed. Once opened, refrigerate and consume within 1-2 weeks to preserve freshness.

- 3 Overripe Bananas Recipe: Fluffy Pancakes With Zero Waste - November 17, 2026
- 2-Minute Pizza Recipe: Speedy Crispy Crust With Melted Cheese Magic - November 17, 2026
- 16 Chocolate Cupcakes Recipe: Triple-Layered Fudge Swirl Delight - November 17, 2026