
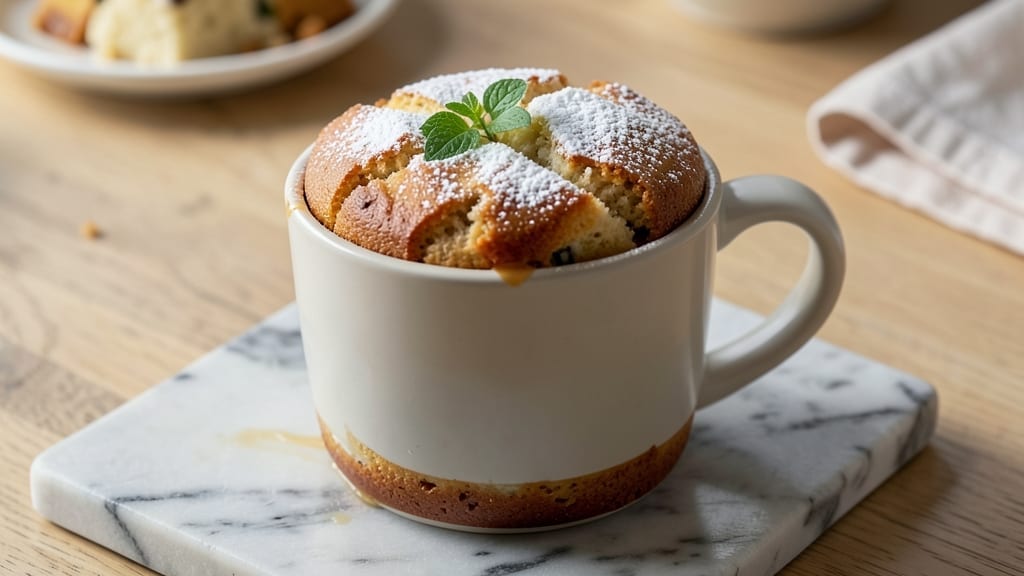
A 1-minute cake in a mug transforms a simple microwave into your dessert shortcut—no oven, no mess, just three ingredients and pure convenience. This recipe solves the problem of cravings when you’re short on time or patience, delivering a warm, moist cake that tastes like it came from a bakery.
The magic happens in the microwave, where flour, sugar, and eggs combine into a fluffy treat faster than you can say “dessert time.”
The beauty of this method lies in its simplicity: no measuring cups, no mixing bowls, just a mug and a microwave. You’ll achieve a perfectly textured cake with a tender crumb and just the right amount of sweetness—no soggy bottoms or dry edges here.
The recipe is foolproof, making it ideal for beginners or anyone who wants a quick, satisfying treat without the fuss of traditional baking.
What you’ll end up with is a warm, golden cake that’s ready in under a minute, perfect for satisfying late-night cravings or serving as a surprise dessert. The texture is light and airy, with a subtle caramelized edge that adds depth to every bite.
It’s the kind of dessert that feels indulgent but requires almost no effort, making it a game-changer for busy schedules.
This recipe isn’t just about speed—it’s about flexibility. Whether you’re craving something sweet after dinner or need a quick pick-me-up, this mug cake delivers. Plus, the portability means you can enjoy it anywhere, from your kitchen to your desk. Let’s get started on this effortless dessert solution!
Ingredients for 1 minute cake in a mug
Three core ingredients plus a few pantry staples—this mug cake needs nothing more.
| Ingredient | Amount | Notes |
|---|---|---|
| All-Purpose Flour 🌾 | ¼ cup | Sifted for light texture |
| Granulated Sugar 🍚 | ¼ cup | White or light brown |
| Large Eggs 🥚 | 1 whole | Room temperature preferred |
| Unsalted Butter 🧈 | 1 tbsp | Melted, cooled slightly |
| Vanilla Extract 🌸 | ½ tsp | Pure vanilla preferred |
| Baking Powder 🧂 | ¼ tsp | For fluffiness |
| Salt 🧂 | ⅛ tsp | Fine grain preferred |
| Milk 🥛 | 1 tbsp | Any kind works |
The flour is your secret weapon here—King Arthur or Gold Medal brands work best for that perfect rise. Sugar? Domino or C&H are reliable, but honestly, whatever you’ve got in your cabinet does the trick. Eggs should be at room temperature (pop them in warm water for 5 minutes if they’re cold). The butter? Land O’Lakes or Earth Balance both melt beautifully—just don’t let it get too hot or it’ll seize up your batter. Vanilla extract is where you can splurge if you want, but imitation works fine in a pinch. I always grab the Walmart Great Value vanilla for everyday baking—it’s cheap and consistent.
No butter? Coconut oil or olive oil works in a bind (use the same amount). Short on milk? Water or almond milk keeps things simple. The baking powder is non-negotiable—it’s what gives you that cloud-like texture. No baking powder? Baking soda plus a pinch of vinegar can substitute, but it’ll taste slightly tangy. Eggs too cold? Microwave them for 10 seconds to warm them up. The mug matters too—microwave-safe ceramic or glass heats evenly. Paper or plastic mugs? They’ll melt or steam your cake into oblivion.
This cake is best eaten immediately—it’s designed that way! But if you must wait, cover it loosely with plastic wrap and microwave for 10 seconds to revive. Leftovers? None exist—this disappears faster than you can say ‘dessert.’ Store any unused dry ingredients (flour, sugar, baking powder) in airtight containers. The baking powder loses potency after 6 months, so check the date if you’ve had it a while. Make a double batch—you’ll want seconds.
Why You’ll Love This Recipe
- I’ll be real: I’ve burned cakes before trying to fold in butter. This one? Just melt the butter into the sugar and eggs—no whisking, no stress. The microwave does all the work while I’m still scraping the bowl.
- No Mixing Required: I’ll be real: I’ve burned cakes before trying to fold in butter. This one? Just melt the butter into the sugar and eggs—no whisking, no stress. The microwave does all the work while I’m still scraping the bowl.
- Rich Without Effort: That butter-sugar combo at the start? It’s basically a little cake hug for your mug. The vanilla cuts through the sweetness just enough to make it taste like a bakery slice, not a sad microwave experiment.
- Mug Magic for Any Moment: Craving dessert after dinner? Need a last-minute treat for a friend? Honestly, I’ve even sneaked one in my lunchbox—no one questions a “healthy” mug cake. It’s that versatile.
Step-by-step instructions for 1 minute cake in a mug
Here’s how to whip up this magical dessert in seconds—no fancy tools, no mess.
Melt the Butter and Mix Wet Ingredients
Place the 1 tablespoon unsalted butter in a microwave-safe mug. Microwave it for 10-15 seconds until completely melted. The butter should be smooth and liquid—if it looks grainy, microwave for another 5 seconds. Let it cool slightly for about 10 seconds so it doesn’t cook the egg when you add it next.
In the same mug, crack in the 1 whole large egg and stir it with a fork until fully combined with the melted butter. The mixture should look like a pale yellow custard. Add the 0.5 teaspoon vanilla extract and stir again. The vanilla will blend right in, giving that classic cake flavor without overpowering.
Combine Dry Ingredients
In a small bowl, whisk together the 0.25 cup all-purpose flour, 0.25 cup granulated sugar, 0.25 teaspoon baking powder, and 0.125 teaspoon salt. Sift the flour first if you can—this prevents lumps and gives that light, fluffy texture we’re after. The sugar and baking powder will create tiny air pockets that make the cake rise beautifully.
Pour the dry mixture into the mug with the wet ingredients. Stir vigorously with a fork for about 10 seconds until everything is fully incorporated. You should see a smooth batter with no visible streaks of flour. If it looks too thick, add the 1 tablespoon milk and stir again. The batter should coat the back of the spoon but still be pourable.
Microwave to Perfection
Place the mug in the microwave and cook on high power for exactly 60 seconds. Don’t peek! The cake needs that full minute to set properly. When the timer goes off, you’ll see the edges pull away slightly from the mug—this is your perfect doneness signal. The center should still look slightly undercooked, but it’ll finish cooking as it sits.
Let the cake cool in the mug for 1 minute before attempting to remove it. The heat will redistribute, and the cake will firm up just enough to slide out easily. Run a butter knife around the edges if needed—this helps release it cleanly. Serve warm for the gooey, molten center or let it cool slightly for a firmer texture.
Pro Tips For Making 1 Minute Cake In A Mug
- Melt Butter First: I learned this the hard way—dumping cold butter straight into the mug makes the batter clump like a science experiment gone wrong. Melt it first (even just 10 seconds in the microwave), then cool slightly before mixing. The batter will be smoother, and your cake won’t turn out dense or greasy.
- Sift That Flour: Yes, even for a mug cake. Packed flour absorbs too much liquid, leaving you with a dry, crumbly mess. Give it a quick sift into the mug before adding wet ingredients—it aerates the batter and guarantees a lighter texture. (I know, I know, but trust the process.)
- Microwave 10 Seconds Longer: The recipe says “1 minute,” but your microwave’s wattage might lie. If the edges look set but the center’s still wet, hit it for another 10 seconds. A slightly overdone cake is easier to fix (with a fork) than one that’s gummy in the middle. Test with a toothpick—it should come out clean or with one moist crumb.
- Room-Temp Eggs Matter: Cold eggs make the batter separate like a sad salad dressing. Crack them into a small bowl first, let them sit for 5 minutes, then mix. Warm eggs blend better and help the cake rise instead of sinking. (Your future self will thank you when the cake doesn’t collapse.)
Storing and reheating your leftovers
Microwave Revival
If you must reheat your mug cake later, pop it back in the microwave for 10-15 seconds on high power. This restores that warm, gooey center without drying it out.
I always cover it loosely with a damp paper towel to keep moisture in—just don’t let it touch the cake directly. For a crispier edge, add 5 seconds to the reheating time. 🔥
Storage Hacks
Store any unused dry ingredients in airtight containers with labels—flour and baking powder lose potency over time. Keep the sugar in its original container, but transfer baking powder to a sealed bag with the date written on it.
The baking powder is good for about 6 months after opening, so check the expiration date before using. I like using OXO Good Grips containers for dry ingredients—they’re easy to grip and stack neatly.
Portability Perks
This cake’s genius is its portability—eat it straight from the mug or transfer it to a paper plate for serving. For parties, make a batch in individual ramekins instead of mugs. They look elegant and heat evenly in the microwave.
I’ve even wrapped the mug itself in a festive napkin for a fun presentation—no one will guess it took just one minute to make! 💫
Freezer-Friendly?
While this cake isn’t designed for long-term storage, you can freeze the batter for up to 1 month in a ziplock bag. Thaw overnight in the fridge, then microwave as directed.
The texture will be slightly denser after freezing, but it’s still delicious. For best results, make fresh batter each time—this cake truly shines when made from scratch in under a minute.
Mug Maintenance
Clean your mug immediately after use to prevent stuck-on batter. Soak it in warm water with 1 tablespoon baking soda for 5 minutes before scrubbing with a sponge. For stubborn residue, microwave ½ cup water with 1 tablespoon vinegar for 2 minutes, then let it sit before cleaning.
I keep a dedicated mug for baking—it’s worth the investment for stress-free cleanup. 🧼
Nutrition facts
Frequently asked questions
Can I make this mug cake without eggs?
Yes! For a vegan version, replace the 1 egg with 1 tablespoon ground flaxseed mixed with 3 tablespoons water. Let it sit for 5 minutes to thicken before using. The texture will be slightly denser but still delicious. For a non-vegan alternative, try 1 tablespoon applesauce or 1 tablespoon yogurt—both work well in a pinch.
Why does my mug cake come out gummy?
Gummy texture usually means the cake wasn’t cooked long enough or the batter was too wet. Always microwave for the full 60 seconds—don’t peek! If your batter seems thick, add 1 extra teaspoon of milk to help with moisture balance. Also, make sure your mug isn’t too large (a standard 12-16 oz mug works best).
Can I add mix-ins like chocolate chips?
Stir in 1 tablespoon chocolate chips or ½ teaspoon cinnamon with the dry ingredients. For nuts, use 1 tablespoon chopped walnuts or pecans—just make sure they’re finely chopped so they distribute evenly. Avoid large chunks that might not cook through properly in 60 seconds.
What’s the best mug material for this recipe?
Use a microwave-safe ceramic or glass mug—they heat evenly and won’t melt. Paper or plastic mugs won’t work (they’ll melt or steam the cake). For best results, choose a mug with a 12-16 oz capacity. A dark-colored mug might make the cake cook slightly faster, so reduce time to 50 seconds if needed.
How do I make this cake gluten-free?
Swap the 0.25 cup all-purpose flour for 0.25 cup gluten-free 1:1 baking flour (like Bob’s Red Mill). Add ½ teaspoon xanthan gum to help with structure. The texture will be slightly denser but still moist. For best results, let the batter rest for 2 minutes before microwaving to help the gluten-free flour hydrate properly.

- 6 Egg Cake Recipe with Oil: Light as Air With Buttery Moisture - October 4, 2026
- 4 Bean Casserole Recipe: One-Pan Heartiness With Smoky Paprika Depth - October 4, 2026
- 3-Ingredient Keto Mug Cake Recipe: Microwave Magic in 2 Minutes - October 4, 2026