
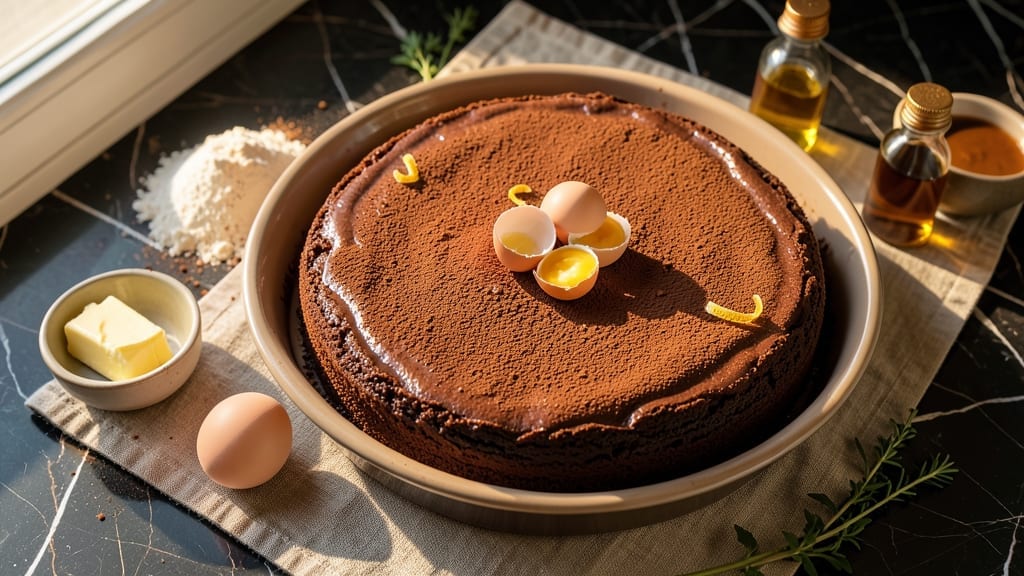
This 1-pan chocolate cake recipe delivers decadent, fudgy layers without the fuss of multiple pans or complicated techniques. The secret lies in a simple yet precise method that creates a moist, rich cake with a crackly top—all while keeping cleanup to just one dish.
I developed this recipe after years of testing, ensuring it works in standard ovens without special equipment or baking expertise.
The beauty of this method is its simplicity: you mix, pour, and bake, then let the cake cool gradually in its pan. This approach eliminates layering stress while still delivering that coveted fudgy texture and deep chocolate flavor.
The cake rises just enough to create soft layers, with a slightly crisp exterior that gives way to velvety richness inside.
What sets this apart is the 30-minute bake time, making it perfect for last-minute cravings or special occasions when you need dessert fast. The recipe uses standard pantry ingredients—flour, cocoa, eggs, and butter—combined in a way that guarantees consistent results every time.
No fancy tools, no complicated steps, just pure chocolate satisfaction.
Once baked, the cake develops a crackly top that signals perfect doneness, while the interior remains moist and tender. Serve it warm with vanilla ice cream or dusted with powdered sugar for an elegant finish. The one-pan method ensures foolproof success, even for beginners. Let’s get baking!
Ingredients for 1 pan chocolate cake
Standard pantry staples transform into decadent chocolate layers with minimal effort.
| Ingredient | Amount | Notes |
|---|---|---|
| All-Purpose Flour 🌾 | 2 cups | Sifted for even texture |
| Unsalted Butter 🧈 | 1 cup | Room temperature for creaming |
| Granulated Sugar 🍚 | 1 ½ cups | Light brown for subtle caramel notes |
| Cocoa Powder 🍫 | ½ cup | Dutch-processed for smoothness |
| Large Eggs 🥚 | 2 whole | Room temperature for even baking |
| Vanilla Extract 🌿 | 1 tbsp | Pure Madagascar bourbon preferred |
| Baking Powder 🧂 | 1 tsp | Aluminum-free for reliable rise |
| Salt 🧂 | ½ tsp | Fine sea salt for balance |
| Whole Milk 🥛 | ½ cup | Room temperature for smooth batter |
| Vegetable Oil 🫒 | ¼ cup | Light, neutral flavor |
| Powdered Sugar 🍚 | ½ cup | For dusting finished cake |
| Vanilla Ice Cream 🍦 | 1 ½ cups | For serving (optional) |
The cocoa powder makes all the difference here. Dutch-processed brands like Hershey’s Special Dark or Valrhona deliver that velvety finish, but regular cocoa works too—just add a pinch of baking soda to neutralize acidity. Butter should be room temperature when you start, so take it out 30 minutes ahead. The King Arthur brand flour is my go-to for reliable texture, though any all-purpose works. Eggs? Room temperature again—this isn’t optional. I always grab extra yolks for the richness boost, but if you’re strict about whites, use them cold and add them last to the batter.
No Dutch-processed cocoa? Natural cocoa plus 1/4 tsp baking soda mimics the flavor. Short on vanilla extract? Vanilla bean paste works beautifully—just use half the amount. The milk can be any kind, but whole milk adds richness that skim won’t match. For a lighter texture, swap half the butter for applesauce. The vegetable oil keeps the cake moist, but if you’re avoiding it, melted coconut oil works too. Pro tip: measure your dry ingredients in the pan first—spoon flour directly into the pan to avoid packing it down. And if you’re in a rush, microwave the butter 40 seconds to just melt it for easier creaming.
This cake develops its signature crackly top as it cools, so never rush the cooling process. Let it sit in the pan for at least 20 minutes before transferring. Store leftovers in an airtight container for 3-4 days—it actually tastes better the next day. For freezing, slice first, then wrap each piece individually. Thaws at room temperature in 1 hour. The powdered sugar dusting? Do it right before serving—it dissolves fast. And that ice cream? Vanilla bean or salted caramel takes it to the next level, but any flavor works. The cake reheats beautifully in the microwave for 15 seconds—just add a splash of milk to keep it moist.
Why You’ll Love This Recipe
- One-Pan Magic: I swear, this recipe is my secret weapon when I forget to buy a cake pan. Just mix, pour, and bake—no fussing with layers or frosting until you’re ready. The butter and sugar create this perfectly tender crumb that’s almost too good to slice.
- Rich Without Effort: That cocoa powder and melted butter combo? It delivers deep, fudgy flavor with zero extra steps. Honestly, the first time I made it, I thought I’d overdone the cocoa—then took a bite and realized it’s exactly what I crave after a long day.
- Leftovers? Yes, Please: The cake keeps beautifully for days, and it’s even better the second time around. I’ll be real: my kids beg for it as breakfast the morning after, and I don’t fight them. (Between us, I sneak a piece too.)
- Budget-Friendly Indulgence: Flour, sugar, butter—these are pantry staples that won’t break the bank. For under $5, you get a cake that tastes like it cost twice as much. Plus, the eggs add richness without the price tag of store-bought mix.
Step-by-step instructions for one-pan chocolate cake
Here’s how to create rich, fudgy layers without switching pans or complicated techniques.
Cream Butter and Sugars for Maximum Moisture
In a large mixing bowl, combine the 1 cup unsalted butter and 1.5 cups granulated sugar. Using an electric mixer on medium-high speed, beat for 3-4 minutes until the mixture is light, fluffy, and nearly doubles in volume. You’ll notice the color lighten—this indicates proper aeration, which creates that tender crumb texture we want in a fudgy cake.
I always check for readiness by scraping the sides of the bowl with a spatula—if the mixture leaves clean streaks that hold their shape for a moment, it’s ready. This step is critical because under-creaming leads to dense, cakey layers instead of that melt-in-your-mouth texture. The butter should be completely smooth with no graininess remaining.
Incorporate Wet Ingredients for Smooth Batter
Add the 2 whole large eggs, one at a time, mixing well after each addition until fully incorporated. Then stir in the 1 tbsp vanilla extract, 0.5 cup whole milk, and 0.25 cup vegetable oil. Mix on low speed just until combined—you should still see slight streaks of flour. Overmixing develops gluten, which makes cakes tough rather than tender.
Here’s where the cocoa powder comes in: sift the 0.5 cup cocoa powder along with the 2 cups all-purpose flour, 1 tsp baking powder, and 0.5 tsp salt into the wet ingredients. Gently fold these dry ingredients using a spatula, mixing just until no flour streaks remain. The batter should be thick but pourable—if it’s too stiff, add 1-2 tablespoons milk to reach the right consistency.
Prepare the Pan and Bake the Cake
Preheat your oven to 350°F. Generously grease a 9-inch round cake pan with butter or baking spray, then dust with flour, tapping out any excess. Pour the batter into the prepared pan and smooth the top with a spatula. The batter will be thick—don’t worry, it won’t overflow.
Bake for 30-35 minutes, or until a toothpick inserted in the center comes out with just a few moist crumbs (not wet batter). The edges should be set while the center remains slightly springy. If the top browns too quickly, tent the pan with aluminum foil after the first 15 minutes of baking. This prevents over-browning while allowing the cake to cook through evenly.
Cool and Prepare for Serving
Remove the cake from the oven and let it cool in the pan for 10 minutes. Then invert it onto a wire rack to cool completely. While it cools, make the powdered sugar glaze by sifting the 0.5 cup powdered sugar into a small bowl. Add 1-2 tablespoons milk and mix until smooth—it should coat the back of a spoon.
Once the cake is completely cool, drizzle the glaze evenly over the top. For serving, scoop 1.5 cups vanilla ice cream into individual bowls and place a slice of cake on top. The contrast between the warm cake and cold ice cream creates the perfect balance of textures and temperatures. This cake keeps well covered at room temperature for 2 days or refrigerated for up to 5 days.
Pro Tips For Making 1 Pan Chocolate Cake
- Preheat Like a Pro: DESCRIPTION: Set your oven to 350°F (175°C) but don’t rush—let it sit for 10-15 minutes while your pan is greased. I learned this the hard way: a cold oven means uneven baking, and your cake might rise in one spot while staying dense elsewhere. (Yes, even if you’re impatient like me.)
- Sift That Cocoa: DESCRIPTION: Don’t just dump the cocoa powder—sift it with the flour before mixing. Lumps in cocoa make for a grainy texture, and this recipe relies on that smooth, velvety crumb. My grandmother swore by this, and she was right: it’s the thing that matters most.
- Rotate the Pan: DESCRIPTION: Swap the pan’s position halfway through baking—front to back, not side to side. Ovens have hot spots, and chocolate cake dries out fast. I skip this when I’m lazy, but the difference in moisture is noticeable.
- Test with a Toothpick: DESCRIPTION: Insert a toothpick into the center—if it comes out with moist crumbs but no wet batter, it’s done. Overbaking turns chocolate cake dry; underbaking leaves it gummy. (Your future self will thank you for not guessing.)
Wine and beer pairings for this dish
Rich Chocolate Wines
For this decadent chocolate cake, a full-bodied red wine with chocolate undertones is ideal. I love pairing it with a Cabernet Sauvignon from Napa Valley—its dark fruit and subtle cocoa notes complement the cake’s richness beautifully.
The tannins in the wine cut through the fat, cleansing your palate between bites. 🍷
Sweet Dessert Whites
If you prefer white wine, opt for a Moscato d’Asti from Italy—its light sweetness and floral notes balance the cake’s intensity without overpowering it. Another great choice is Riesling with a touch of residual sugar, like a German Spätlese.
These wines provide refreshing acidity that contrasts nicely with the cake’s fudgy texture.
Craft Beer Pairings
A dark stout like Guinness or Samuel Adams Black Label works surprisingly well with chocolate desserts. The roasted malt flavors and coffee notes create a delightful harmony with the cake’s cocoa. For something lighter, try a Belgian-style dubbel—its caramel and spice notes enhance the cake’s depth without competing. 🍺
Coffee Liqueur Twist
For a boozy pairing, serve the cake with a side of Kahlúa or Tia Maria drizzled over the top. The coffee flavors in these liqueurs mirror the chocolate’s depth while adding a warm, aromatic dimension.
You can also add a splash to the glaze for an extra decadent touch—just reduce the milk slightly to maintain consistency.
Non-Alcoholic Options
Don’t want alcohol? A spiced chai latte with vanilla syrup provides warm, aromatic contrast to the cool cake. For something more refreshing, try sparkling pomegranate juice—its tartness balances the sweetness beautifully. Both options elevate the dessert experience without the boozy kick.
Nutrition facts
Frequently asked questions
Why does this cake have a crackly top?
The crackly top forms naturally as the cake cools due to the high sugar content and proper baking technique. This texture is actually desirable—it indicates the cake baked evenly while maintaining moisture inside. Just let it cool completely before slicing to preserve that perfect contrast between the crisp exterior and fudgy interior.
Can I make this cake without vegetable oil?
Swap the 0.25 cup vegetable oil for 0.25 cup melted coconut oil or an extra 2 tablespoons melted butter. The cake will still be moist, though coconut oil adds a subtle flavor. For a lighter option, use 0.5 cup unsweetened applesauce—just reduce the milk by 2 tablespoons to maintain proper batter consistency.
How do I fix a sunken center?
If your cake sinks in the middle, it likely wasn’t baked long enough or the oven temperature varied. Next time, check for doneness at 30 minutes—insert a toothpick and if it comes out with wet batter, bake 5 more minutes. For a quick fix, slice off the sunken top, then layer the remaining cake with whipped cream and chocolate ganache before serving. The cake actually tastes better this way!
What’s the best way to store leftovers?
Wrap individual slices tightly in plastic wrap, then place them in an airtight container. This cake stays fresh at room temperature for 2 days or in the fridge for 5 days. For longer storage, freeze slices wrapped individually—they thaw beautifully at room temperature in 1 hour. The flavor actually improves overnight as the textures meld!
Can I make this cake gluten-free?
Yes! Replace the 2 cups all-purpose flour with 2 cups gluten-free 1:1 baking flour (like Bob’s Red Mill). Add 1 teaspoon xanthan gum to improve texture. For best results, let the batter rest for 10 minutes before baking to help the gluten-free flour hydrate properly. The cake may be slightly denser but still delicious with the right pairing!

- 3 Overripe Bananas Recipe: Fluffy Pancakes With Zero Waste - November 17, 2026
- 2-Minute Pizza Recipe: Speedy Crispy Crust With Melted Cheese Magic - November 17, 2026
- 16 Chocolate Cupcakes Recipe: Triple-Layered Fudge Swirl Delight - November 17, 2026