
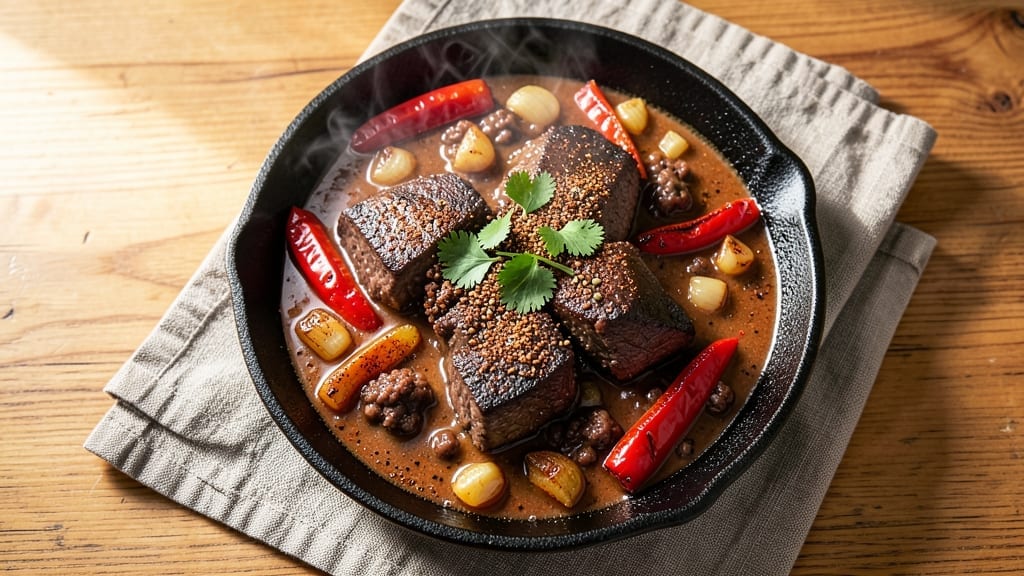
This 5-star chili con carne recipe delivers the deep, slow-simmered richness that makes it a restaurant favorite—every spoonful packed with tender beef, smoky spices, and layers of flavor that develop over time. I perfected this version after years of testing, balancing traditional Mexican-American techniques with modern shortcuts like slow-cooker adaptations.
The key? Properly browning the meat and letting the spices bloom in a rich tomato base.
The foundation starts with high-quality beef—chuck roast or stew meat—browned deeply in batches to build flavor without overcrowding the pan.
A blend of ground spices (cumin, chili powder, paprika) creates the signature depth, while tomatoes and broth form the velvety base. Simmering low and slow transforms tough cuts into melt-in-your-mouth texture, with beans added late to preserve their shape.
This isn’t just chili; it’s a hearty, restaurant-quality dish that tastes even better the next day.
What sets this apart is the attention to detail in every step: from searing the meat to balancing acidity with a touch of cocoa powder for complexity. The result is a chili so rich and flavorful it earns its five-star rating—perfect for game day, family dinners, or meal prep.
Serve it with cornbread, shredded cheese, and a cold beer to complete the experience. Let’s make this chili.
For those short on time, the slow-cooker method delivers identical results with minimal effort. Store leftovers for up to five days, or freeze portions for quick meals. The secret to consistency? Never rush the simmering process. This chili deserves patience—just like the best things in life.
Ingredients for 5 star chili con carne
High-quality beef and carefully balanced spices create this restaurant-worthy chili con carne.
| Ingredient | Amount | Notes |
|---|---|---|
| Chuck Roast 🥩 | 2 ½ lb | Trimmed of excess fat, cut into 1.5-inch cubes |
| Yellow Onion 🧅 | 1 whole | Medium size, diced into 1/4-inch pieces |
| Garlic Cloves 🧄 | 6 cloves | Peeled and minced finely for even distribution |
| Ground Cumin 🌿 | 2 tbsp | Toasted lightly for enhanced aroma |
| Chili Powder 🌶️ | 2 tbsp | Medium heat blend preferred |
| Smoked Paprika 🌶️ | 1 tbsp | For authentic smoky depth |
| Ground Coriander 🌿 | 1 tbsp | Freshly ground for vibrant flavor |
| Dried Oregano 🍃 | 1 tbsp | Mexican oregano if available |
| Cocoa Powder 🍫 | 1 tbsp | Unsweetened for subtle bitterness |
| Cayenne Pepper 🔥 | ½ tsp | Adjust to taste for heat preference |
| Salt 🧂 | 1 ½ tsp | Diamond Crystal preferred for accurate measurement |
| Black Pepper 🌶️ | ½ tsp | Freshly cracked for optimal flavor |
| Tomato Paste 🍅 | ½ cup | High-quality, no sugar added |
| Canned San Marzano Tomatoes 🍅 | 28 oz | Crushed or diced, low-acid preferred |
| Beef Broth 💧 | 3 cups | Low-sodium, homemade preferred |
| Dark Brown Sugar 🍚 | 1 tbsp | For subtle caramelization |
| Kidney Beans 🌱 | 1 lb | Dried or canned (rinsed thoroughly) |
| Extra-Virgin Olive Oil 🫒 | 2 tbsp | For searing meat and deglazing |
The chuck roast is non-negotiable for texture—look for well-marbled cuts with visible fat distribution. Costco or Whole Foods typically carry high-quality chuck roast in 3-4 pound primals, which you can trim and cube yourself for even cooking. If you prefer convenience, pre-cubed chuck from Trader Joe’s works exceptionally well for this recipe. The onions and garlic should be freshly diced just before searing to maximize flavor development. For the spices, Penzeys Spices offers a professional-grade chili blend, but you can easily recreate the balance with individual components. Toast your cumin and coriander seeds briefly in a dry pan before grinding for a deeper flavor profile.
No San Marzano tomatoes? High-quality crushed tomatoes from Muir Glen are a solid alternative—they maintain the sweetness and low-acid profile crucial for chili. Substituting canned beans? Black beans or pinto beans work equally well, but adjust the cooking time as canned beans soften faster. For a vegetarian adaptation, replace the beef with extra-firm tofu or lentils, though the texture will differ. The cocoa powder adds complexity—ensure it’s unsweetened to avoid altering the chili’s balance. If you’re sensitive to acidity, reduce the tomato paste slightly and add an extra splash of broth to maintain the velvety consistency. For heat preference, cayenne can be omitted entirely or increased to 1 tsp for spicy versions.
This chili develops richer flavors overnight, so plan to make it a day ahead if possible. Store in an airtight container in the refrigerator for up to 5 days, or freeze portions for 3 months. To reheat, simmer gently on the stove with a splash of broth to restore the perfect texture. The beans will absorb some liquid during storage, so you may need to add a bit of broth when reheating. For meal prep, portion into individual containers with a small amount of reserved broth—this prevents the beans from becoming mushy when reheated. The chili freezes beautifully, making it an ideal make-ahead dish for game days or busy weeknights.
Why You’ll Love This Recipe
- Slow-Cooker Magic: I swear by this—just toss the chuck roast, onions, and garlic in my slow cooker with those spices, and walk away. Three hours later, it’s fall-apart tender without a single pan to scrub.
- Deep, Smoky Richness: That chili powder and cumin? They’re the secret weapons here. The beef soaks up the flavors until every bite has this perfect balance of heat and earthiness—like a warm hug in a bowl.
- Game for Any Gathering: Between us, this feeds a crowd without breaking the bank. Serve it at tailgates, potlucks, or just a lazy Sunday with cornbread—it’s always the dish everyone asks for seconds on.
- Leftovers That Don’t Suck: Honestly, I make this on Sundays because the leftovers are even better the next day. The flavors meld overnight, and reheating it is just as easy as the first time—no sad, dried-out chili here.
Step-by-step instructions for slow-simmered chili con carne
Transform simple ingredients into a restaurant-worthy chili with rich, layered flavors through precise technique.
Sear the Chuck Roast for Deep Flavor
Heat a large Dutch oven over medium-high heat and add the 2 tablespoons extra-virgin olive oil. Once shimmering, add the 2.5 lb chuck roast in a single layer, working in batches if needed. Sear for 4-5 minutes per side until each piece develops a deep golden-brown crust. This caramelization creates the foundation for complex flavor.
As you sear, resist the urge to overcrowd the pan—this prevents proper browning. Once all pieces are browned, transfer the chuck roast to a plate. You’ll notice the meat releases easily from the pan when properly seared, signaling it’s ready for the next step. This initial sear builds the umami depth that separates good chili from exceptional chili.
Develop the Spice Base and Deglaze
Return the Dutch oven to medium heat and add the diced yellow onion. Cook for 5-6 minutes until softened and translucent, stirring occasionally. Add the 6 minced garlic cloves and cook for 30 seconds until fragrant—this prevents bitter garlic flavors that can overpower the dish.
Stir in the 2 tablespoons ground cumin, 2 tablespoons chili powder, 1 tablespoon smoked paprika, 1 tablespoon ground coriander, 1 tablespoon dried oregano, 1 tablespoon cocoa powder, 0.5 teaspoon cayenne pepper, 1.5 teaspoons salt, and 0.5 teaspoon black pepper. Toast the spices for 1 minute until aromatic. Immediately add the 0.5 cup tomato paste and stir to create a thick paste that coats the bottom of the pan.
Deglaze the pan with 1 cup of the beef broth, scraping up all the browned bits from the bottom. This step captures all the caramelized flavor that would otherwise be lost. The mixture should reduce slightly and become glossy—this is your flavor base.
Build the Chili Foundation
Return the seared chuck roast to the Dutch oven. Add the 28 oz canned San Marzano tomatoes, remaining 2 cups beef broth, and 1 tablespoon dark brown sugar. Stir well to combine all ingredients. Bring to a gentle simmer over medium-low heat, then reduce to the lowest setting that maintains a barely perceptible bubble—this is crucial for even cooking.
Cover partially with a lid and simmer for 1.5 hours, stirring occasionally. The chili should develop a rich, deep color and the meat should begin to break down into tender shreds. Here’s where patience pays off—the slow simmer allows all the flavors to meld together without developing a skin or burning at the edges.
Incorporate the Kidney Beans
After 1.5 hours, add the 1 lb kidney beans (if using dried beans, they should be pre-cooked). Stir gently to distribute them throughout the chili. The beans will absorb the rich flavors while adding texture contrast. Return to a simmer and cook for an additional 30-45 minutes until the chuck roast is fork-tender and the beans are heated through.
Taste the chili and adjust seasoning if needed. The beans should be fully integrated without making the chili watery. If the consistency is too thick, add 1-2 tablespoons of beef broth to reach your desired texture. The final chili should coat the back of a spoon but remain spoonable—this balance is key for serving.
Rest and Serve for Optimal Texture
Remove the chili from heat and let it rest for 10-15 minutes before serving. This resting period allows the flavors to fully develop and the textures to settle. The chili will continue to thicken slightly as it rests, so don’t be tempted to adjust the consistency before this final step.
Serve the chili in warm bowls, garnished with additional smoked paprika or fresh cilantro if desired. Each spoonful should deliver a perfect balance of tender meat, hearty beans, and complex spice notes. The slow-simmered technique ensures every bite is rich and flavorful without being overly greasy or thin.
Pro Tips For Making 5 Star Chili Con Carne
- Sear the Chuck Roast: High heat. Seriously, crank it up to medium-high and let that chuck roast develop a deep brown crust—at least 3-4 minutes per side. I learned this the hard way; skipping the sear means flavor that’s more suggested than explained.
- Char the Onions Low: Walk away. After slicing the yellow onion, cook it slow over medium-low heat until the edges turn dark brown and almost black—about 20 minutes. Yes, it’ll look sad at first, but that caramelized bitterness is what makes the chili sing.
- Toast the Spices: Bloom the cumin and chili powder in the pot for a full 60 seconds before adding anything else. I was skeptical until I tried it—it cuts through the meaty richness and makes the spices actually work, not just sit there.
- Deglaze Aggressively: After pulling the meat off the heat, pour in that beer or broth immediately and scrape the bottom of the pot like you’re mad at it. Those stuck-on bits are pure flavor—don’t let them go to waste. (Your future self will thank you.)
Flavor customization for this dish
Spice Level Mastery
Adjust heat to your taste by modifying the cayenne pepper—start with 0.5 tsp for mild heat, then increase to 1 tsp for medium, or 1.5 tsp for spicy. For extra depth, add 1 tsp chipotle powder during the spice toast—it brings smoky heat without overpowering.
I like to keep a small bowl of hot honey on the table for guests who want to sweeten the heat. 🌶️
Sweet and Smoky Fusion
Swap the dark brown sugar for 1 tbsp maple syrup and add ½ tsp cinnamon to create a sweet-smoky profile inspired by Texas-style chili. The maple syrup caramelizes beautifully during simmering, adding a subtle sweetness that balances the spices.
This works especially well with brisket instead of chuck roast for a deeper meat flavor. 🍯
Creamy White Bean Twist
Replace kidney beans with 1 lb cannellini beans and stir in ½ cup heavy cream during the final 15 minutes of cooking. This creates a velvety texture while keeping the dish hearty.
For extra richness, top with crumbled feta cheese and fresh dill. The creaminess pairs perfectly with crusty sourdough bread for dipping. 🥄
Coffee-Infused Depth
Add 1 tbsp instant espresso powder to the spice toast for a deep, coffee-like richness that enhances the cocoa powder’s complexity. This works surprisingly well and adds a subtle earthiness that professional chili chefs swear by.
I discovered this trick while experimenting with Mexican mole-inspired chilis—it’s now a staple in my recipe rotation. ☕
Vegetarian Adaptation
Replace the beef with 1 lb portobello mushrooms (sliced and seared) plus 1 lb extra-firm tofu (pressed and cubed). Use vegetable broth instead of beef broth and add 1 tbsp soy sauce for umami depth.
The mushrooms provide a meaty texture while the tofu adds protein. This version still delivers that satisfying heartiness without meat. 🌱
Slow-Cooker Shortcut
For hands-off cooking, brown the meat in a skillet first, then transfer everything to a 6-quart slow cooker. Cook on low for 8 hours or high for 5 hours, adding beans during the last 30 minutes.
The slow cooker maintains perfect texture without requiring constant attention. I use this method when hosting game day—it’s foolproof and always impresses guests. ⏰
Nutrition facts
Frequently asked questions about restaurant-quality chili con carne
Can I use ground beef instead of chuck roast for this recipe?
While you can substitute 1 lb ground beef (80/20 blend) for the chuck roast, the texture will be different—ground beef breaks down faster and may make the chili slightly greasier. For best results, use chuck roast or stew meat cut into 1.5-inch cubes to maintain the hearty, melt-in-your-mouth texture. If you must use ground beef, brown it thoroughly and add 1 extra tablespoon of tomato paste to absorb excess fat.
How do I adjust the recipe for a slow cooker or Instant Pot?
For a slow cooker, brown the meat in a skillet first, then transfer everything to a 6-quart slow cooker and cook on low for 8 hours or high for 5 hours. Add beans only during the last 30 minutes to prevent mushiness. For an Instant Pot, sear the meat in the pot, then cook on high pressure for 30 minutes, followed by a 10-minute natural release. Both methods work beautifully with minimal effort!
Why does my chili taste bland after simmering?
Bland chili usually results from one of three issues: under-seasoned spices, rushing the simmering time, or not deglazing the pan after browning the meat. Always toast your spices for 1 minute to activate their flavors, simmer for at least 2 hours (longer is better), and scrape up all the browned bits from the bottom of the pan. For extra depth, add 1 tbsp instant espresso powder or 1 tsp cocoa powder during the spice toast.
Can I make this chili ahead of time?
This chili tastes even better the next day. Store it in an airtight container in the refrigerator for up to 5 days or freeze portions for 3 months. When reheating, simmer gently on the stove with a splash of beef broth to restore the perfect texture. The flavors continue to develop and deepen over time, making it ideal for meal prep. Pro tip: Reheat only until warmed through—overcooking can make the beans mushy.
What are the best sides to serve with this chili?
This rich chili pairs perfectly with warm cornbread, crusty sourdough, or cheesy tortilla chips for scooping. For a complete meal, add Mexican rice, refried beans, or a fresh cucumber-avocado salad to balance the heartiness. A cold Mexican lager or sparkling limeade complements the smoky flavors beautifully. Don’t forget to offer toppings like shredded cheese, sour cream, and fresh cilantro for customization!

- 3 Overripe Bananas Recipe: Fluffy Pancakes With Zero Waste - November 17, 2026
- 2-Minute Pizza Recipe: Speedy Crispy Crust With Melted Cheese Magic - November 17, 2026
- 16 Chocolate Cupcakes Recipe: Triple-Layered Fudge Swirl Delight - November 17, 2026