
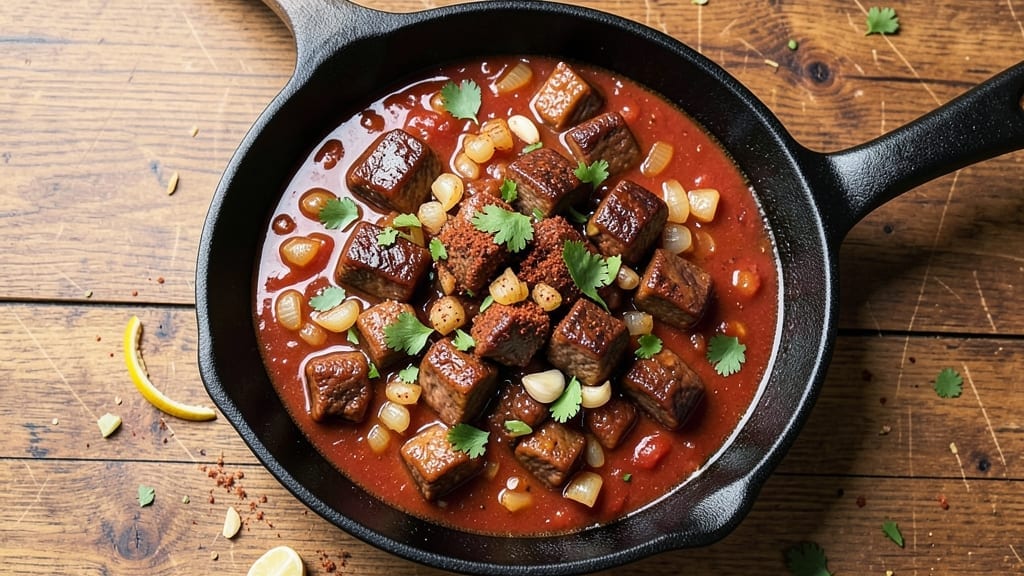
This 1-pound beef chili recipe delivers restaurant-quality depth in a single pot, with smoky, layered flavors that build over time—no overpowering spice here, just rich, satisfying heat. The secret lies in browning the meat properly (never skip this step) and letting the spices bloom in hot oil before adding liquid, creating a complex base that transforms simple ingredients into something extraordinary. I developed this version after years of testing, ensuring every bite delivers that perfect balance of tender beef, caramelized onions, and a sauce that’s thick enough to cling to every spoonful.
What sets this chili apart is the two-stage cooking process: first, a deep browning of the beef creates a flavorful crust that dissolves into the sauce, while the onions and garlic caramelize slowly to form the foundation.
Then, a long simmer (2-3 hours on the stove or 6-8 in a slow cooker) allows the flavors to meld without developing that bitter edge many home cooks struggle with. The result?
A chili that’s hearty enough to serve as a main dish but flexible enough to stretch into leftovers that taste even better the next day.
By the time you’re ladling this into bowls, you’ll have a chili with deep, smoky richness—where the beef remains tender, the beans are perfectly integrated, and the spices (cumin, chili powder, and a touch of cocoa powder) create layers of warmth without overpowering.
The texture is just right: thick enough to coat the back of a spoon but still fork-friendly, with a slight sheen from the tomato base that signals true depth of flavor. It’s the kind of chili that makes people ask for seconds before they even finish their first bowl.
Serve it with a sprinkle of fresh cilantro, a dollop of sour cream, and crusty bread for soaking up every last drop. This recipe scales beautifully—double it for a crowd or halve it for a cozy dinner for two.
The method stays true to traditional chili techniques while allowing flexibility for modern kitchens. Let’s get cooking!
Ingredients for 1 pound beef chili
Pantry staples meet deep flavor in this chili—where every ingredient serves a purpose.
| Ingredient | Amount | Notes |
|---|---|---|
| Chuck Roast 🥩 | 1 lb | Cut into 1-inch cubes, trimmed of fat |
| Yellow Onions 🧅 | 1 whole | Diced, medium size |
| Garlic Cloves 🧄 | 4 cloves | Minced, fresh preferred |
| Canned Tomato Sauce 🍅 | 1 cup | San Marzano preferred, no salt added |
| Tomato Paste 🍅 | 2 tbsp | Smooth, no sugar added |
| Beef Broth 💧 | 1 ½ cups | Low-sodium preferred |
| Dark Brown Sugar 🍚 | 1 tbsp | For depth, not sweetness |
| Ground Cumin 🌿 | 1 ½ tsp | Freshly toasted for aroma |
| Chili Powder 🌶️ | 1 ½ tsp | Medium heat preferred |
| Unsweetened Cocoa Powder 🍫 | ½ tsp | Natural, not Dutch-processed |
| Black Peppercorns 🌶️ | ½ tsp | Freshly cracked |
| Bay Leaves 🍃 | 2 whole | Fresh or dried |
| Kosher Salt 🧂 | 1 ½ tsp | Adjust to taste |
| Dark Beer 🍺 | ½ cup | Stout or porter, optional |
| Black Beans 🌱 | 1 cup | Drained and rinsed |
| Vegetable Oil 🫒 | 2 tbsp | High smoke point |
The chuck roast is non-negotiable here—it’s the only cut that gives you that fall-apart tenderness after hours of simmering. Ask your butcher to cube it if you’re not comfortable with a knife, or buy it pre-cubed from the meat counter. Look for good marbling; that fat renders into the chili, creating a rich sauce. For the onions, yellows work best—they caramelize better than sweet onions. Garlic? Fresh is worth it, but if you’re in a pinch, jarred minced garlic will do (just use half the amount). The tomato sauce should be San Marzano if you can find it—its natural sweetness balances the spices beautifully.
No San Marzano tomatoes? Crushed tomatoes with no added salt work fine, but drain them well to avoid watering down the chili. Running short on cocoa powder? Substitute an extra 0.5 teaspoon of chili powder—it won’t be identical, but you’ll still get that deep, smoky note. The beer is optional but adds a malty richness that rounds out the flavors. If you skip it, add an extra splash of beef broth. For the beans, black beans are traditional, but pinto or kidney beans work too. Just make sure they’re drained and rinsed—no one wants mushy chili. The spices? Toast the cumin seeds whole in a dry pan for 30 seconds before grinding if you want to take it to the next level.
This chili tastes even better the next day—plan ahead. Store leftovers in an airtight container in the fridge for up to 5 days, or freeze for 3 months. For freezing, portion into individual containers so you can pull out exactly what you need. The flavors meld beautifully overnight, so make extra if you can. Reheat gently on the stove with a splash of water or broth to restore the sauce consistency. Serve with crusty bread to soak up every last drop—trust me on this.
Why You’ll Love This Recipe
- One-Pot Magic: I swear by this recipe when I’ve got better things to do than scrub pots—just brown the chuck roast, toss in the onions and garlic, then dump in the tomato sauce and paste. The slow simmer does all the work while I’m scrolling through my phone or watching a show.
- Deep Umami Bomb: That tomato paste? It’s the secret weapon—caramelizes into a rich, slightly sweet base that makes the chuck roast melt in your mouth. Honestly, the first time I tasted it, I nearly burned my tongue from how good it was.
- Game for Any Day: Pack it in a thermos for a picnic, ladle it over rice for a quick dinner, or serve it at a potluck—no one will guess it’s this simple. Between us, it’s my go-to for date nights too, because it’s hearty enough to feel special but easy enough to not stress over.
- Budget-Friendly Powerhouse: A pound of chuck roast stretches for days, and the canned tomatoes keep it cheap without sacrificing flavor. I’ll be real: I’ve made this for $1.50 per serving, and my kids still beg for seconds. Leftovers? They’re the best kind—even better the next day.
Step-by-step instructions for 1-Pound beef chili
This method delivers deep, complex flavor without overpowering heat—every step builds richness.
Sear the Chuck Roast for Maximum Flavor
Heat the 2 tablespoons vegetable oil in a heavy Dutch oven over medium-high heat until shimmering. Add the 1 lb chuck roast, cut into 1-inch cubes, and cook undisturbed for 3-4 minutes until deeply browned on all sides. This step creates the Maillard reaction, which forms the foundation of your chili’s depth.
Don’t overcrowd the pan—work in batches if needed. The meat should release easily from the pan when ready. Once browned, remove the chuck roast and set aside. You’ll hear the sizzling slow down as the fat renders, signaling it’s time to move to the next step.
Build the Flavor Base with Aromatics
In the same Dutch oven, add the 1 whole yellow onions, diced, and cook for 5-6 minutes until softened and golden. Add the 4 cloves garlic cloves, minced, and cook for 30 seconds until fragrant—don’t let it brown or it’ll turn bitter. Stir frequently to prevent burning.
Next, add 2 tablespoons tomato paste and cook for 1 minute, stirring constantly. This creates a rich, concentrated base that prevents the chili from becoming watery. The paste will darken slightly as it caramelizes, deepening the flavor profile.
Combine All Ingredients for Simmering
Return the browned chuck roast to the pot. Add 1 cup canned tomato sauce, 1.5 cups beef broth, 1 tablespoon dark brown sugar, 1.5 teaspoons ground cumin, 1.5 teaspoons chili powder, 0.5 teaspoon unsweetened cocoa powder, 0.5 teaspoon black peppercorns, 2 whole bay leaves, and 1.5 teaspoons kosher salt. Stir well to combine, scraping up any browned bits from the bottom of the pot.
Bring the mixture to a gentle boil, then reduce heat to low and let it simmer uncovered for 1.5 hours. The chili should bubble gently—if it boils vigorously, reduce the heat further. This slow cooking breaks down the meat fibers, creating a tender, melt-in-your-mouth texture.
Finish with Beer and Beans for Balance
After 1.5 hours, stir in the 0.5 cup dark beer (if using) and 1 cup black beans. The beer adds a malty depth that complements the smoky spices, while the beans provide texture and fiber. Simmer for an additional 20-30 minutes until the chili reaches your desired consistency—it should coat the back of a spoon but still be spoonable.
Taste and adjust seasoning with additional kosher salt or chili powder as needed. The cocoa powder and beer give this chili a sophisticated, slightly sweet note without overpowering the meaty depth. Serve immediately with cornbread or crusty bread for the full experience.
Pro Tips For Making 1 Pound Beef Chili
- SEAR THE CHUCK FIRST: Chuck roast isn’t the flashiest cut, but a quick 3-4 minute sear in a hot Dutch oven with 1 tablespoon oil makes all the difference—it builds flavor that won’t dissolve into the sauce. I used to skip this, and the chili always tasted like it needed more seasoning. (Yes, even if it looks like the meat won’t brown properly—just let it sit uncovered for a minute to dry.)
- SWEAT ONIONS LOW AND SLOW: Dice those yellow onions small (¼-inch pieces) and cook them on medium-low with a pinch of salt for 8-10 minutes until translucent but not browned. Rushing this step means they’ll turn bitter and release less natural sweetness into the chili. (I learned this the hard way after burning three batches of chili.)
- STIR IN TOMATO PASTE EARLY: Mix the tomato paste directly into the canned tomato sauce before adding it to the pot—this prevents clumping and ensures even distribution. I was skeptical until I tried it: the chili develops a deeper, richer color and flavor instead of looking streaky. (No need to cook it separately; just stir it in with the sauce.)
- COVER AND SIMMER GENTLY: After adding all ingredients, reduce heat to just a simmer (small bubbles, not rolling) and cover the pot for the first 30 minutes. This keeps the chili from boiling over and helps the chuck roast break down evenly. I used to crank the heat, and half the time, I’d end up with a watery mess. (A lid also traps steam, which makes the onions and garlic work harder to infuse flavor.)
Wine and beer pairings for 1 pound beef chili
Red Wine Pairings
For this rich, smoky chili, a medium-bodied red wine with earthy notes cuts through the depth beautifully. I love Zinfandel—its dark fruit and peppery finish complement the chili’s spices without overpowering.
A California Zinfandel from Ravenswood or Bogle Vineyards is perfect for its balance of jammy richness and subtle oak. If you prefer something lighter, Pinot Noir from Oregon works wonders with its bright acidity and red fruit flavors. 🍷
Malty Beer Options
The beer in this recipe suggests pairing with something similarly malty. A dark ale or porter enhances the chili’s depth. I reach for Guinness for its roasted maltiness—it mirrors the cocoa powder’s richness.
For a craft option, try a Belgian Dubbel like Westmalle Dubbel, which adds caramel and spice notes that harmonize perfectly. Avoid hoppy IPAs; they’ll clash with the chili’s smoky profile.
White Wine for Contrast
If you prefer white wine, a bold, oaked Chardonnay with a touch of vanilla and citrus provides a refreshing contrast. Look for a Sonoma County Chardonnay with noticeable oak—it balances the chili’s heat while complementing the cocoa and beer.
A Viognier with its floral notes also works surprisingly well, especially if your chili leans sweeter from the brown sugar. 🍷
Craft Beer Pairings
For beer lovers, a stout like Founders Kentucky Breakfast Stout (with its coffee and chocolate notes) elevates the chili’s depth. Alternatively, a smoked porter—like Goose Island Bourbon County Stout—adds a complementary smokiness.
If you want something lighter, a wheat beer with a hint of spice, such as Allagash White, provides a crisp contrast to the chili’s richness.
Non-Alcoholic Options
Skip the alcohol? No problem. A spiced apple cider with cinnamon and clove mirrors the chili’s warmth. For something more complex, try a ginger beer—its sharpness balances the smoky depth.
I also love sparkling hibiscus tea (like Jamaica tea) for a tangy, floral contrast that cleanses the palate between bites. 🍹
Nutrition facts
Frequently asked questions
Can I substitute ground beef for chuck roast in this recipe?
While ground beef works in a pinch, chuck roast delivers unmatched tenderness and a deeper, meatier flavor. If you must substitute, use 80/20 ground chuck (not lean ground beef) and brown it thoroughly. The fat content is key for rich sauce development, so avoid extra-lean options.
How do I adjust this recipe for a slow cooker?
For a slow cooker, brown the meat first, then combine all ingredients (except beans) and cook on low for 6-7 hours or high for 4 hours. Add beans during the last 30 minutes to prevent mushiness. The longer cook time enhances tenderness, but check liquid levels halfway.
Why does my chili taste bitter? What went wrong?
Bitterness usually comes from overcooking the garlic or burning the spices. Always cook garlic just until fragrant (30 seconds) and stir spices constantly. Another culprit? Tomato paste left too long—remove it after 1 minute of cooking. For a quick fix, stir in 1 teaspoon sugar or a pinch of baking soda.
Can I make this chili spicier without changing the recipe?
Add ½ teaspoon cayenne pepper or 1-2 diced chipotle peppers in adobo sauce while simmering. For heat lovers, stir in 1 tablespoon hot sauce at the end. Remember: spices build flavor over time, so add them early for even distribution.
How do I store and reheat leftovers?
Store chili in an airtight container for up to 5 days in the fridge. For freezing, portion into single-serving containers for 3 months of quality. Reheat on the stove with 2 tablespoons water or broth per serving to restore thickness. Never microwave directly from frozen—thaw first.

- 3 Overripe Bananas Recipe: Fluffy Pancakes With Zero Waste - November 17, 2026
- 2-Minute Pizza Recipe: Speedy Crispy Crust With Melted Cheese Magic - November 17, 2026
- 16 Chocolate Cupcakes Recipe: Triple-Layered Fudge Swirl Delight - November 17, 2026