
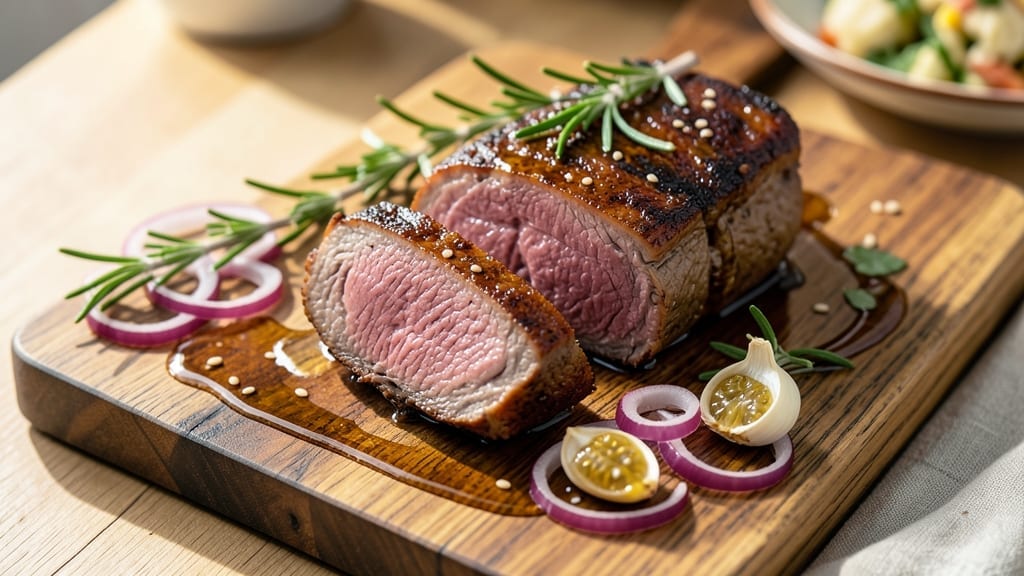
Transforming a 1-pound chuck roast into fork-tender perfection requires patience and precision—a process that turns tough, inexpensive beef into melt-in-your-mouth bites. The secret lies in slow braising, which breaks down connective tissue while keeping the meat impossibly juicy.
I’ve refined this method over years of testing, ensuring even a smaller cut delivers restaurant-quality results without the wait of a full 8-hour cook. This recipe focuses on low-and-slow cooking at 300°F, which transforms the chuck roast into tender slices that practically fall apart.
A simple marinade of soy sauce, garlic, and rosemary adds depth, while searing the meat first creates a flavorful crust. The key is timing: 2.5 to 3 hours is all you need for a 1-pound roast, making it perfect for weeknight dinners.
By the end, you’ll have a dish that’s juicy, rich, and deeply flavorful, with a caramelized exterior and a center so tender it practically dissolves. Serve it sliced over creamy mashed potatoes or with roasted root vegetables for a hearty meal that feels like a restaurant favorite.
The best part? Leftovers reheat beautifully, so you’ll have dinner covered for days. For extra tenderness, try a reverse sear: slow-cook until 145°F, then finish with a quick sear in a hot pan. This method ensures the perfect balance of texture and flavor every time.
Ingredients for 1 pound chuck roast
Juicy, melt-in-your-mouth chuck roast starts with these 13 ingredients—simple but powerful for restaurant-quality flavor.
| Ingredient | Amount | Notes |
|---|---|---|
| Chuck Roast 🥩 | 1 lb | Center-cut for even tenderness |
| Extra-Virgin Olive Oil 🫒 | 2 tbsp | For searing and basting |
| Yellow Onion 🧅 | 1 whole | Diced, medium size |
| Garlic Cloves 🧄 | 4 cloves | Minced, fresh preferred |
| Fresh Rosemary 🌿 | ¼ cup | Chopped, stems removed |
| Low-Sodium Soy Sauce 🥄 | 2 tbsp | For marinade depth |
| Dried Thyme 🌿 | 1 tsp | Or 1 tbsp fresh thyme |
| Black Peppercorns 🌶️ | 1 tsp | Freshly cracked |
| Kosher Salt 🧂 | 1 ½ tsp | Diamond Crystal preferred |
| Beef Broth 🍲 | 1 ½ cups | Low-sodium preferred |
| Red Wine 🍷 | ½ cup | Bold, dry variety |
| Tomato Paste 🍅 | 1 tbsp | Smooth, not chunky |
| Fresh Parsley 🌿 | ⅛ cup | Chopped, for garnish |
The chuck roast is your star—center-cut for even tenderness, not the cheaper end cuts. Costco or butcher shops often have it pre-trimmed, saving time. Look for good marbling; that fat turns into flavor during braising. Fresh rosemary and thyme make all the difference—Trader Joe’s sells great dried blends if you’re short on time. The beef broth? Low-sodium keeps the dish from getting too salty, and Swanson or Pacific Foods are my go-tos for quality. For the red wine, any bold, dry variety works—Cabernet Sauvignon or Merlot are safe bets.
No fresh rosemary? Dried works at 1/3 the amount, but trust me on the fresh version. Short on red wine? Substitute extra beef broth with 1 tbsp balsamic vinegar—it adds depth without alcohol. The tomato paste can be skipped if you’re not a fan, but it gives that umami richness that takes the dish over the top. For the garlic, jarred minced is fine in a pinch, but fresh minced has way more flavor. The parsley is just for garnish, so don’t stress if you’re out—fresh basil works too if you’ve got it.
This dish reheats like a dream—3-4 days in the fridge, 3 months frozen. I always make extra because it’s that good. For freezing, slice it after cooking and store in airtight containers with a splash of broth to keep it moist. The best part? The flavor actually improves the next day as everything melds together. Leftovers make quick sandwiches or tacos—just slice it thin and pile it high.
Why You’ll Love This Recipe
- Foolproof Timing: I swear by this—just sear the chuck roast in olive oil, toss in sliced onion and garlic, and let the oven do the heavy lifting. No babysitting, no stress, and that rosemary releases its magic while you’re busy with whatever else life throws at you.
- Umami Bomb: That first bite? Rich, savory, and layered with garlic’s punch and rosemary’s piney warmth. The chuck roast gets so tender it practically melts, while the onions caramelize into sweet, sticky pockets—no fancy seasoning needed.
- Leftovers for Days: Between us, this recipe makes enough for tonight’s dinner and tomorrow’s lunch. I’ll be real: my freezer is stocked with portions wrapped in foil, ready to reheat in minutes. Budget win, flavor win.
- Weeknight Workhorse: Game nights, lazy Sundays, or when you’re too tired to think—this is my go-to. One pan, minimal chopping, and it still feels like a restaurant-quality meal. (Yes, even on a Tuesday night.)
Step-by-step instructions for juicy, slow-braised chuck roast
Transform tough chuck roast into melt-in-your-mouth perfection with this foolproof slow-braising method.
🍳 Step 1: Sear the Roast for Deep Flavor
Heat a heavy Dutch oven over medium-high heat until smoking hot. Add the 2 tablespoons extra-virgin olive oil and swirl to coat. Pat the 1 lb chuck roast dry with paper towels—this ensures maximum browning. Place the roast in the pot and sear for 3-4 minutes per side until deeply browned in spots, developing a rich crust that locks in juices.
Don’t rush this step. You want the exterior to turn golden brown with some charred patches—this builds flavor. Remove the roast and set it aside on a plate. The searing creates a flavor barrier that keeps the meat tender during the long braise.
👨🍳 Step 2: Build the Aromatic Base
In the same Dutch oven, add the diced yellow onion and cook for 5 minutes until softened and lightly golden. Add the minced garlic cloves and cook for 30 seconds until fragrant—don’t let it burn, or it’ll turn bitter. Stir in the 1 tablespoon tomato paste and cook for 1 minute to deepen its flavor.
Here’s where the magic begins. Add the 2 tablespoons low-sodium soy sauce, 1.5 teaspoons kosher salt, and 1 teaspoon dried thyme. Pour in the 0.5 cup red wine and scrape up all the browned bits from the bottom of the pot—this deglazes and captures all the flavor you worked so hard to create.
🥘 Step 3: Braise Until Fork-Tender
Return the roast to the pot. Pour in the 1.5 cups beef broth and add the 0.25 cup chopped fresh rosemary. Bring to a simmer, then reduce heat to low, cover tightly, and transfer to a 300°F oven. Braise for 3 hours, turning the roast occasionally to ensure even cooking.
This low-and-slow method breaks down the tough connective tissue, transforming the chuck roast into tender, juicy perfection. The liquid should reduce significantly, creating a rich, flavorful sauce. Check for doneness by inserting a fork—it should slide in like butter with no resistance.
⏰ Step 4: Rest and Finish with Fresh Herbs
Remove the roast from the pot and transfer it to a cutting board. Tent loosely with foil and let it rest for 15-20 minutes. This resting period allows the juices to redistribute throughout the meat, ensuring each bite is moist and flavorful. Skim any excess fat from the braising liquid in the pot.
While the roast rests, stir the 1 teaspoon freshly cracked black peppercorns into the reduced sauce. Just before serving, garnish each portion with 0.125 cup chopped fresh parsley for a pop of color and freshness. The parsley brightens the rich, wine-infused sauce and adds a touch of elegance to your dish.
🍽️ Step 5: Slice and Serve with Confidence
Slice the roast against the grain into ¼-inch thick slices. The grain direction is easy to spot—it runs horizontally across the meat. Serving against the grain shortens the muscle fibers, making each bite incredibly tender. Spoon the rich braising sauce over the top and serve immediately with crusty bread or mashed potatoes.
Each bite should deliver melt-in-your-mouth tenderness with layers of deep, savory flavor from the slow-braised meat and aromatic sauce. The secret to this dish is patience—letting the low heat and liquid work their magic over time. Trust the process, and you’ll be rewarded with restaurant-quality chuck roast at home.
Pro Tips For Making 1 Pound Chuck Roast
- SEAR THE ROAST FIRST: I learned this the hard way—skipping the sear means flavor gets stuck in the middle. Heat a heavy pan until it’s smoking hot, then sear the chuck roast on all sides for 3-4 minutes per side before adding anything else. That crust locks in juices and makes the difference between “meh” and “wow.”
- SLICE ONION THIN: Thick onion slices turn mushy and watery. Grab a sharp knife and slice the yellow onion paper-thin—almost translucent—so it cooks down fast and adds sweetness without turning to mush. (Yes, even if you’re impatient like me.)
- DON’T OVERCROWD THE PAN: I used to toss everything in at once, and the onions would steam instead of caramelize. Sear the roast first, then remove it, cook the onions and garlic in batches until golden, and only add the rosemary at the end. Crowding just makes a sad, soggy mess.
- USE ROSEMARY SPRIGS, NOT CHOPPED: Fresh rosemary sprigs add depth without bitterness. Tuck 2-3 whole sprigs into the meat before searing—no need to chop—so they infuse flavor as it cooks. (And skip the dried stuff; it’s a flavor crime.)
Pro cooking tips for great 1 pound chuck roast
Sear Like a Pro
That initial sear is where all the flavor magic happens. Use a heavy Dutch oven like Le Creuset or All-Clad for even heat distribution. Pat the roast bone-dry with paper towels—this ensures a perfect crust.
Sear over medium-high heat for 3-4 minutes per side until deeply browned, even with some blackened spots. This creates the Maillard reaction, which develops rich, caramelized flavors that lock in moisture during braising. 🔥
Reverse Sear Shortcut
For a faster version, try the reverse sear method. Slow-cook the roast in the oven at 275°F until it reaches 145°F internal temperature (about 2 hours). Then, sear it in a screaming-hot skillet for 2 minutes per side to create a crust.
This method works especially well for smaller cuts like this 1-pound roast and cuts cooking time by nearly half.
Deglaze for Flavor
After searing, never skip the deglazing step. Scrape up those browned bits from the bottom of the pot with red wine or beef broth—they’re packed with flavor. Add the soy sauce and tomato paste at this stage to build a rich, umami-packed base.
Use a wooden spoon to stir and lift those flavorful bits—metal utensils can scratch your Dutch oven and reduce its lifespan.
Low-and-Slow Precision
Set your oven to 300°F (not 325°F or higher) for even cooking. Use an oven thermometer to verify accuracy—many home ovens run hot or cold. Cover the pot tightly with a lid to trap steam, which helps tenderize the meat.
Turn the roast every 45 minutes to ensure even cooking and prevent sticking. A meat thermometer is your best friend here—aim for 145°F internal temperature for medium-rare tenderness.
Resting Matters
Resist the urge to slice into the roast immediately after cooking. Tent it loosely with foil and let it rest for 15-20 minutes. This allows the juices to redistribute throughout the meat, ensuring each bite is moist and flavorful.
Skim excess fat from the braising liquid before serving—it’s easy to do with a fat separator spoon or by chilling the sauce in the fridge for 10 minutes and scooping off the hardened fat. ✨
Slice Against the Grain
Slice the roast against the grain—look for the horizontal muscle fibers and cut perpendicular to them. Use a sharp chef’s knife and slice into ¼-inch thick pieces for the most tender texture. Serve immediately with the reduced braising sauce spooned over the top.
The sauce should coat the meat beautifully, adding another layer of flavor with every bite. For extra presentation, garnish with fresh parsley or rosemary sprigs.
Nutrition facts
Frequently asked questions
Can I substitute beef broth with another liquid?
Yes, you can use water or red wine as a substitute, but beef broth adds the deepest flavor. For extra richness, combine 1 cup beef broth with 0.5 cup water and 1 tablespoon Worcestershire sauce—this keeps the dish flavorful while balancing costs. Avoid vegetable broth, as it lacks the meaty depth needed for chuck roast.
How do I know when the chuck roast is fully tender?
Use a meat thermometer to check for 145°F internal temperature (medium-rare). For extra tenderness, press a fork into the thickest part—it should slide in easily with no resistance. If you’re unsure, slice a small piece to test. The meat should be fork-tender and pull apart cleanly, not chewy.
What’s the best way to reheat leftover chuck roast?
Slice the leftovers thinly and reheat in a skillet with a splash of beef broth or water over medium-low heat for 3-5 minutes until warmed through. Avoid microwaving, as it can make the meat dry. For extra flavor, add a pinch of smoked paprika or fresh herbs while reheating. Leftovers keep well for 3-4 days in the fridge.
Can I make this recipe in a slow cooker instead?
Sear the roast first, then transfer it to a slow cooker with all ingredients. Cook on low for 6-7 hours or high for 3-4 hours, adding 0.5 cup extra broth if needed to prevent drying. The slow cooker’s gentle heat works perfectly for tenderizing the chuck roast. Just avoid adding liquid too early, as it can dilute the flavors.
Why did my chuck roast turn out tough instead of tender?
Toughness usually happens from cooking too fast or at too high a temperature. Ensure your oven is at 300°F (not higher) and cook until the internal temp reaches 145°F. Avoid cutting into the roast early—rest it for 15-20 minutes before slicing. If you rushed the process, try the reverse sear method next time for guaranteed tenderness.

- 3lb Prime Rib Roast Recipe: Juicy Pink Center Guaranteed in 3 Hours - October 31, 2026
- 5 Spice Cake Recipe: Warmly Spiced Layers With Crunchy Top - October 31, 2026
- 1950’s Macaroni and Cheese Recipe: Nostalgic Creamy Cheese Sauce with Buttery Noodles - October 31, 2026