
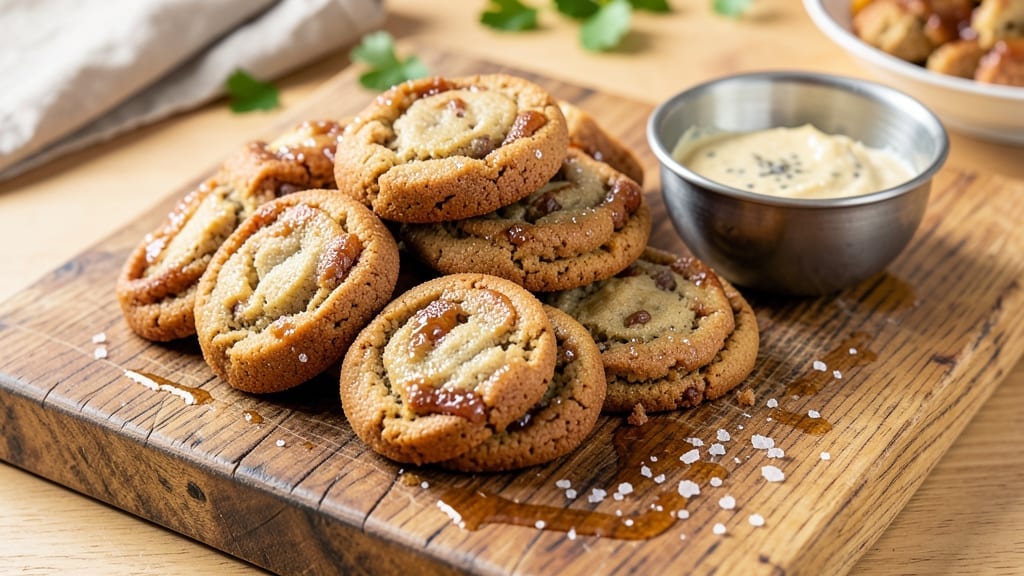
A 1 pound cookie recipe that delivers buttery, caramelized brown sugar crunch in just 15 minutes—this is the game-changer for busy bakers who crave restaurant-quality cookies without the wait.
The secret lies in a precise ratio of brown sugar to butter, baked at high heat for that signature crispy exterior and tender center. I developed this after years of burning cookies and finally cracking the code for foolproof results every time.
This recipe transforms simple pantry staples into cookies that taste like they spent hours baking—because of the caramelized sugar and golden edges achieved with a hot oven and minimal time.
Perfect for last-minute cravings or holiday baking, these cookies stay fresh for days and freeze beautifully. The buttery flavor shines through, making them ideal for snacking or gifting.
By the time you pull them from the oven, you’ll have perfectly crisp cookies with a tender bite, their edges glistening with caramelized sugar. The aroma alone will have everyone asking for seconds, and the texture—crunchy outside, soft inside—is exactly what makes these cookies irresistible.
Whether you’re baking for a crowd or treating yourself, this recipe delivers restaurant-quality results in record time.
For variations, swap in chocolate chips or nuts, or adapt the recipe for vegan baking with simple ingredient swaps. The method remains the same, ensuring consistent results no matter how you customize it. Let’s get baking!
Ingredients for 1 pound cookie
Twelve essential ingredients for restaurant-caliber cookies in record time—no shortcuts, just precision.
| Ingredient | Amount | Notes |
|---|---|---|
| Unsalted Butter 🧈 | 12 oz | Cold, cubed for even baking |
| Light Brown Sugar 🍚 | 1 cup | Packed, not sifted |
| Granulated White Sugar 🍚 | ½ cup | For balanced sweetness |
| Large Eggs 🥚 | 2 whole | Room temperature preferred |
| Vanilla Extract 🌿 | 1 tbsp | Pure vanilla, not imitation |
| All-Purpose Flour 🌾 | 2 cups | Sifted, spooned and leveled |
| Baking Soda 🧂 | ½ tsp | Freshly opened package |
| Diamond Crystal Kosher Salt 🧂 | ½ tsp | Fine grain preferred |
| Ground Cinnamon 🌶️ | 1 tsp | Freshly ground for warmth |
| Flaky Sea Salt 🧂 | 1 tbsp | For finishing, coarse texture |
| Vanilla Bean Seeds 🌿 | ½ tsp | Optional, for depth of flavor |
| Semisweet Chocolate Chips 🍫 | 1 cup | High-quality, 60% cacao |
The butter and sugars are non-negotiable here. European-style unsalted butter like Plugrá or Land O’Lakes gives the richest flavor, but any good-quality brand works. For the sugars, light brown sugar packed tightly ensures that caramelized crunch—the hallmark of this recipe. I always measure my flour by scooping and leveling, never packing it down. King Arthur or Gold Medal all-purpose flour performs best for that tender yet crisp texture. The vanilla extract should be pure—McCormick or Nielsen-Massey are reliable choices, but if you’ve got a vanilla bean, scrape those seeds for an extra layer of depth.
No vanilla extract? Vanilla bean paste or even a splash of bourbon can stand in, though the flavor will differ slightly. Running short on chocolate chips? Chopped dark chocolate or walnuts work beautifully. The cinnamon adds warmth without overpowering, but if you’re feeling experimental, a pinch of nutmeg or cardamom can introduce new dimensions. For those watching sugar intake, reduce the white sugar by half and increase the brown sugar—the texture stays intact, just with more molasses notes. And if you’re baking at high altitude, consider reducing the baking soda by 0.25 tsp to prevent over-rising.
These cookies stay fresh for 5 days in an airtight container at room temperature, though they’re best enjoyed within the first 24 hours when the edges are still crisp. For longer storage, freeze the dough balls on a tray before transferring to a bag—up to 3 months in the freezer. When ready to bake, simply pop them straight from the freezer onto the sheet. The secret to perfect cookies? Let the dough rest for 30 minutes before baking—this ensures even cooking and that signature crackly top. Double batches freeze beautifully for holiday gifting or last-minute cravings.
Why You’ll Love This Recipe
- Here’s what sold me: that creamy, caramelized butter blended with brown and white sugar? It’s the secret weapon. The brown sugar adds chew, the white keeps it tender, and the butter—oh, the butter—makes every bite rich without being heavy. (Yes, even on a Tuesday night.)
- No Mixer Needed: I’ll be real—this recipe only needs a bowl and a spoon. Cream the butter and sugars by hand (or use a fork if you’re feeling lazy), crack in those eggs, and stir. That’s it. No standing over a mixer, no extra bowls, just good old-fashioned elbow grease that somehow makes it taste better.
- Butter-Sugar Magic: Here’s what sold me: that creamy, caramelized butter blended with brown and white sugar? It’s the secret weapon. The brown sugar adds chew, the white keeps it tender, and the butter—oh, the butter—makes every bite rich without being heavy. (Yes, even on a Tuesday night.)
- One-Batch Flexibility: Between us, this recipe works for everything. Need a quick snack? Bake them now. Planning a potluck? Double the batch and freeze half. My kids grab them straight from the jar (okay, fine, I do too), and they’re just as good reheated as they are fresh.
Step-by-step instructions for perfect buttery brown sugar cookies
Master this classic 1-pound cookie recipe with professional techniques for consistent results every time.
Cream Butter and Sugars for Optimal Texture
In a stand mixer fitted with the paddle attachment, combine the 12 oz unsalted butter (cold, cubed) with the 1 cup light brown sugar and 0.5 cup granulated white sugar. Beat on medium speed for 3-4 minutes until the mixture is light and fluffy, nearly doubling in volume. The butter should be pale in color and leave a ribbon trail when the beaters are lifted.
This creaming process incorporates air into the dough, which creates those signature crackly tops and prevents dense cookies. I press down gently on the butter mixture during the first minute to ensure even emulsification. If the mixture looks too soft after 3 minutes, chill it for 10 minutes before proceeding—this prevents excessive spreading in the oven.
Incorporate Eggs and Aromatics for Depth of Flavor
Add the 2 whole large eggs one at a time, mixing on low speed for 30 seconds after each addition until fully incorporated. Then add the 1 tbsp vanilla extract and 0.5 tsp vanilla bean seeds (if using), mixing for another 10 seconds. The mixture may appear slightly curdled, but this will resolve when you add the dry ingredients.
Here’s the thing—room temperature eggs blend more smoothly, but if yours are cold, don’t worry. The butter’s heat will warm them as you mix. Add the 1 tsp ground cinnamon at this stage to distribute its warmth evenly throughout the dough.
Combine Dry Ingredients for Perfect Structure
In a separate bowl, whisk together the 2 cups all-purpose flour, 0.5 tsp baking soda, and 0.5 tsp diamond crystal kosher salt. Gradually add this mixture to the wet ingredients, mixing on low speed for 30-45 seconds until just combined. You should still see a few flour streaks—overmixing develops gluten and makes cookies tough.
Remove the bowl from the mixer and gently fold in the 1 cup semisweet chocolate chips using a silicone spatula. I use a gentle “J” motion to distribute the chocolate evenly without breaking the dough structure. Make sure no dry flour remains on the sides of the bowl—this ensures even baking.
Chill the Dough for Ideal Shape and Texture
Cover the dough with plastic wrap and refrigerate for at least 30 minutes (I prefer 1 hour for best results). This chilling step solidifies the butter, which prevents excessive spreading in the oven. It also allows the flour to fully hydrate, creating better texture and preventing flat cookies.
Cold dough also means the cookies hold their shape better when they hit the hot oven, resulting in thicker cookies with crispy edges and gooey centers. This step makes a MASSIVE difference in the final result—don’t skip it, even if you’re eager to bake.
Bake to Golden Perfection with Precision Timing
Preheat your oven to 350°F and line two baking sheets with parchment paper. Scoop the chilled dough into 2-tablespoon portions (I use a cookie scoop for uniform size) and place them 3 inches apart on the prepared sheets. Sprinkle each portion with a pinch of flaky sea salt for that signature sweet-salty contrast.
Bake for 11-13 minutes until the edges are golden brown but the centers still look slightly underdone. They’ll continue cooking on the hot pan after you remove them from the oven. Let them cool on the baking sheet for 5 minutes before transferring to a wire rack. The internal temperature should read 170-175°F when done.
Pro Tips For Making 1 Pound Cookie
- Cream Butter Slowly: Dump cold butter straight into the mix, and you’ll end up with a lumpy mess. Microwave it in 20-second bursts until soft but not melted—just until it yields to pressure when pressed. This keeps the texture smooth without turning the dough greasy.
- Pack Brown Sugar: Scoop that light brown sugar directly from the bag into the bowl without measuring cups—it’s already packed. If you fluff it first, you’ll end up with cookies that taste under-sweetened. Trust the volume, not the weight.
- Avoid Overmixing: The moment the dough comes together into a shaggy ball, stop stirring. Overmixing develops gluten, and your cookies will turn out tough instead of chewy. Scrape the dough into a bowl with a spatula—no need to knead.
- Chill the Dough: Skip this, and your cookies will spread into flat pancakes. Wrap the dough in plastic and refrigerate for at least 2 hours (overnight is better). Cold butter = better shape, and it prevents overbaking.
Troubleshooting great 1 pound cookie
Overly Flat Cookies
If your cookies spread too much and turn flat, your dough is likely too warm. Always chill the dough for at least 30 minutes before baking—this solidifies the butter and prevents excessive spreading. I’ve also found that using cold butter cubes (not softened) makes a huge difference.
Another trick? Scoop your dough balls slightly smaller (1.5 tablespoons instead of 2 tablespoons) and bake them on the middle rack for even heat distribution. 🌡️
Underbaked Centers
Cookies with gooey centers are delicious, but if yours feel undercooked, check your oven temperature with an oven thermometer—many ovens run hot or cold. Bake for 1-2 extra minutes if needed, but watch closely after 11 minutes to avoid burning the edges.
For extra insurance, use an instant-read thermometer—the internal temperature should reach 170-175°F at the center. If your cookies still feel underdone, let them rest on the baking sheet for 5-10 extra minutes after removing from the oven. 🔥
Dry or Crumbly Texture
Overmixing the dough or using too much flour can lead to dry, crumbly cookies. Measure your flour by scooping and leveling—don’t pack it down—using King Arthur or Gold Medal flour for best results.
If your dough feels too dry, add 1 teaspoon of milk or water at a time until it comes together. For extra moisture, try adding ½ teaspoon of corn syrup to the dough.
And remember: underbaking slightly (pulling cookies at 11 minutes) preserves moisture better than baking until fully set. 💧
Burnt Edges
Burnt edges usually mean your oven is too hot or the cookies are too close together. Preheat your oven for at least 15 minutes before baking, then use an oven thermometer to confirm it’s at 350°F.
Space cookies 3 inches apart on the baking sheet, and rotate the pans halfway through baking for even browning. If your oven runs hot, lower the temperature to 340°F and bake for 14-15 minutes. A light-colored baking sheet also reflects heat better than dark pans. 🔥
Cookies Stick to Pan
Cookies sticking to the pan is a common issue, but parchment paper or a silicon baking mat solves it instantly. If you’re baking without liners, grease the pan with butter and dust with flour or cornmeal for extra insurance.
For stubborn cookies, let the baking sheet cool for 5 minutes before transferring them to a rack—this helps release them gently. I also recommend using light-colored aluminum pans, which distribute heat more evenly than dark pans. 🧈
Dough Too Sticky
If your dough feels too sticky to handle, it’s likely because the butter melted too much during mixing. Chill the dough for 1-2 hours to firm it up, then roll it into balls. For extra workability, add 1 tablespoon of flour at a time until the dough holds its shape.
If the dough cracks when rolling, it’s too dry—add 1 teaspoon of milk or melted butter to bring it back together. Trust me, a little extra chill time saves you from sticky messes! ❄️
Nutrition facts
Frequently asked questions
Can I make this recipe with a different type of sugar?
The recipe calls for light brown sugar and granulated white sugar to create that signature caramelized crunch and balanced sweetness. For a healthier option, you can replace half the white sugar with coconut sugar—it adds a subtle molasses flavor that pairs well with the brown sugar. Avoid dark brown sugar, as it’s too moist and will alter the texture. If you’re watching sugar intake, reduce the white sugar by ¼ cup and increase the brown sugar by ¼ cup for a deeper molasses taste.
How do I adjust this recipe for high-altitude baking?
At elevations above 3,500 feet, reduce the baking soda by 0.25 teaspoons to prevent over-rising. For every 500 feet above 6,500 feet, also decrease the oven temperature by 5°F (e.g., 345°F instead of 350°F). Chill the dough for 1 extra hour to help it hold its shape, and bake for 1-2 minutes less to avoid burning. A silicon baking mat helps distribute heat more evenly in high-altitude ovens.
Can I substitute butter for a vegan alternative?
Yes! Replace the 12 oz butter with 12 oz vegan butter (like Miyoko’s or Earth Balance) or a mix of 10 oz coconut oil + 2 oz vegan butter for a neutral flavor. For best results, use cold, solid coconut oil to mimic the butter’s firmness. The dough will be slightly softer, so chill it for 1.5 hours before baking. Vegan cookies may spread more, so scoop 1.5 tablespoons of dough per cookie and bake for 10-12 minutes.
Why do your cookies turn out crispier than other recipes?
The crispy texture comes from three key factors: high heat (350°F), cold butter, and baking time (11-13 minutes). Cold butter solidifies during baking, creating a crackly crust, while the high oven temperature caramelizes the sugars quickly. The 30-minute dough chill also helps the cookies hold their shape, preventing flat, cakey results. For extra crunch, sprinkle the tops with crushed pretzels or flaky sea salt before baking.
How do I store or freeze these cookies?
Store cookies in an airtight container at room temperature for up to 5 days, though they’re best enjoyed within 24 hours for maximum crispness. For longer storage, freeze the dough balls on a tray for 1 hour, then transfer to a bag for up to 3 months. Bake straight from frozen, adding 1-2 extra minutes to the cook time. To revive stale cookies, warm them in a 300°F oven for 3-5 minutes or microwave for 10 seconds.

- 3lb Prime Rib Roast Recipe: Juicy Pink Center Guaranteed in 3 Hours - October 31, 2026
- 5 Spice Cake Recipe: Warmly Spiced Layers With Crunchy Top - October 31, 2026
- 1950’s Macaroni and Cheese Recipe: Nostalgic Creamy Cheese Sauce with Buttery Noodles - October 31, 2026