
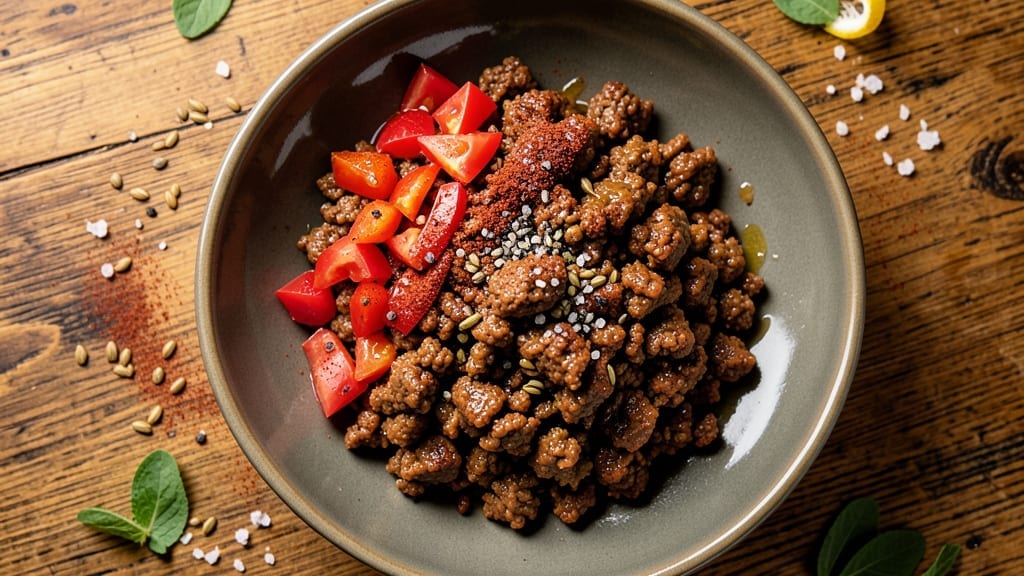
A 1-pound ground beef recipe that delivers crispy, perfectly seasoned results in just 20 minutes is exactly what you need for a quick yet satisfying meal. This method transforms lean ground beef into tender, flavorful bites that work for tacos, burgers, or stuffed peppers—without drying out or losing texture.
The secret lies in high-heat searing and strategic seasoning to lock in moisture while building a flavorful crust.
This approach ensures restaurant-quality results without requiring fancy techniques or expensive ingredients. You’ll start by breaking up the beef into small, even pieces for consistent cooking, then season generously with salt, pepper, and your choice of spices—garlic powder, cumin, or smoked paprika work beautifully.
The key is cooking the beef in batches to avoid overcrowding the pan, which guarantees that crispy exterior we’re after.
By the time you’re done, you’ll have tender, juicy beef with a satisfying crunch that holds up to any dish. The method is simple enough for weeknight dinners but adaptable for meal prep or larger gatherings.
Whether you’re wrapping it in tortillas, piling it onto a bun, or mixing it into pasta, this beef delivers bold flavor and perfect texture every time.
Pair it with roasted vegetables, a fresh salad, or your favorite sides to round out the meal. The versatility of this recipe means you can swap in different seasonings or sauces to match your mood—spicy, tangy, or herby—without sacrificing that crispy, flavorful foundation.
Let’s get started with a method that’s both efficient and impressive.
Ingredients for 1 pound ground beef
Lean ground beef, bold spices, and high-heat technique create restaurant-quality bites in 20 minutes.
| Ingredient | Amount | Notes |
|---|---|---|
| Ground Beef (80/20 lean-to-fat ratio) 🥩 | 1 lb | Break into 1-inch pieces for even cooking |
| Kosher Salt 🧂 | 1 ½ tsp | Diamond Crystal preferred for precise measurement |
| Freshly Ground Black Pepper 🌶️ | ½ tsp | Cracked peppercorns for maximum flavor |
| Garlic Powder 🧄 | 1 tsp | Freshly ground preferred for depth |
| Ground Cumin 🌿 | ½ tsp | Toasted for enhanced aroma |
| Smoked Paprika 🌶️ | ½ tsp | For subtle smoky depth |
| Olive Oil 🫒 | 1 tbsp | High smoke point preferred |
| Yellow Onion 🧅 | ¼ cup | Finely diced, for aromatic base |
| Fresh Parsley 🌿 | 0.1 cup | Chopped, for bright finish |
| Vegetable Oil (for cooking) 🫒 | 2 tbsp | Light oil for high-heat searing |
| Cornstarch 🌾 | 1 tsp | Optional for extra crispiness |
| Lemon Juice 🍋 | 1 tsp | Brightens finished flavor |
The beef’s fat ratio matters—80/20 lean-to-fat gives you that crispy crust without sacrificing tenderness. Kroger or Costco carry this exact blend, or ask your butcher for ‘ground chuck’ if you want to splurge on higher fat content. Look for bright red color and even distribution of fat—this ensures juicy results. Freshly ground spices make all the difference here, so Penzeys or bulk bins at Whole Foods are worth the trip if you’re serious about flavor. Pre-ground spices lose potency fast, so check the date on the package.
No garlic powder? Fresh minced garlic at half the amount works beautifully—just toast it first in the oil for deeper flavor. Smoked paprika unavailable? Regular paprika plus a pinch of liquid smoke mimics that campfire taste. The cornstarch is optional but transforms this from good to extraordinary—it creates that perfect crunch. For the onion, yellow or red work equally well, but avoid sweet onions like Vidalia unless you want a milder flavor. The lemon juice at the end cuts through the richness—freshly squeezed is best, but bottled works in a pinch (just add a pinch more salt).
Prep the spices ahead of time—mix them in a small bowl so you’re not fumbling during cooking. The beef can be seasoned up to 2 hours ahead and stored in the fridge, but cook it immediately for that crispy texture. Leftover cooked beef keeps 3-4 days in the fridge, but it’s best used fresh. Freeze portions in airtight containers for up to 3 months—just thaw overnight in the fridge before reheating. For meal prep, divide into single-serving portions before freezing to make reheating easier.
Why You’ll Love This Recipe
- Foolproof Seasoning: I swear by the combo of cumin and garlic powder—it’s that perfect balance of earthy and bright that makes this beef taste like it’s been simmering for hours. Just toss it in while the meat browns, and suddenly you’ve got depth without extra effort.
- One-Pan Magic: Between us, this is my lazy-day hero. Brown the beef in the same pan you’ll serve it in, dump in a splash of broth or salsa if you’re feeling fancy, and boom—minimal cleanup, maximum flavor. My cast iron pan has never been happier.
- Budget Meal Stretch: A pound of 80/20 beef goes a long way, especially when you’re stretching it with rice, tortillas, or roasted veggies. Honestly, I’ve fed four people with this recipe without breaking the bank—and still had leftovers for lunch the next day.
- Weeknight Workhorse: This isn’t just a recipe; it’s my go-to when I’m exhausted but still need dinner on the table. Taco night? Toss in spices and serve with shells. Stuffed peppers? Mix it with rice and cheese. It’s the ultimate “I don’t know what I’m doing” solution.
Step-by-step instructions for spiced and crispy ground beef
Here’s how to transform your 1 lb of ground beef into perfectly crispy, flavor-packed bites in just 20 minutes.
Prep the Beef and Seasoning
Break the 1 lb ground beef into 1-inch pieces using your hands or a fork—this ensures even cooking and maximum surface area for crisping. In a large bowl, combine the ground beef with the 1.5 tsp kosher salt, 0.5 tsp freshly ground black pepper, 1 tsp garlic powder, 0.5 tsp ground cumin, and 0.5 tsp smoked paprika. Use your hands to mix everything thoroughly, pressing the spices into the meat so they adhere evenly. This step is crucial for developing deep, complex flavors throughout.
Let the seasoned beef sit at room temperature for 5 minutes while you prepare the aromatics. This brief rest helps the meat cook more evenly and prevents cold spots that can lead to uneven crisping. Here’s where the magic starts—those warm spices will infuse the beef as it cooks, creating layers of flavor you can’t get with dry rubs alone.
Build the Aromatic Base
Heat the 2 tbsp vegetable oil in a large skillet over medium-high heat until it shimmers. Add the 0.25 cup finely diced yellow onion and cook for 3-4 minutes until softened and just beginning to turn golden. The onions should release their sweetness without browning—this forms the flavor foundation for your dish. If you notice the onions sticking, give the pan a gentle shake to redistribute the oil.
Here’s a pro tip: Don’t walk away during this step. The onions can easily burn if left unattended, and that bitter taste will ruin your crispy beef. You’ll know it’s ready when you can smell that sweet, caramelized aroma—this is your signal to move to the next phase. The onions should be tender enough to collapse under gentle pressure from your spatula.
Cook the Beef to Perfect Crispiness
Add the seasoned ground beef to the skillet in a single layer, spreading it out evenly. Let it cook undisturbed for 3-4 minutes—this initial resting period allows the meat to develop a proper crust. Resist the urge to stir immediately; you want that beautiful Maillard reaction to occur on the bottom surface. You’ll know it’s ready to stir when you see the edges start to crisp and pull away from the pan.
Once the beef has formed a crust, break it up with a wooden spoon and cook for another 5-6 minutes until it reaches 160°F internally. The pieces should be deep brown with crisp edges and still slightly juicy in the center. If you’re using the 1 tsp cornstarch, sprinkle it over the beef during the last 2 minutes of cooking—this creates an extra-crispy texture that clings beautifully to the meat.
Finish with Bright Freshness
Remove the skillet from heat and stir in the 1 tbsp olive oil and 1 tsp lemon juice. The acidity of the lemon juice brightens all the warm spices, cutting through the richness of the beef while adding a fresh finish. Let the mixture sit for 1 minute to allow the flavors to meld together—this resting period ensures every bite is cohesive and balanced.
Finally, fold in the 0.1 cup chopped fresh parsley. The parsley adds a vibrant color contrast and a fresh herbal note that elevates the dish. Taste and adjust seasoning if needed—you might want to add a pinch more salt or a squeeze of extra lemon juice to suit your preference. Serve immediately while the beef is still crispy and the flavors are at their peak.
Pro Tips For Making 1 Pound Ground Beef
- CRANK THE HEAT FIRST: I learned this the hard way—starting on medium means you’ll end up with greasy, unevenly cooked beef. Sear that pound of 80/20 on high heat for the first 2 minutes, then lower to medium. The crust forms fast, and the fat renders cleanly instead of turning the pan into soup.
- SALT THE MEAT BEFORE SEASONING: Toss the raw ground beef with 1½ teaspoons of kosher salt before adding garlic powder or cumin. This step guarantees the seasoning sticks to every bite—no dry, bland patches. (Yes, even if you’re impatient like me, wait 2 minutes for it to absorb.)
- BREAK IT UP SMALL: Skip the big clumps—use your fingers (or a fork) to break the beef into ½-inch pieces before cooking. This ensures even browning and faster cooking, especially with 80/20’s fat content. I used to skip this, and half my beef would stay gray in the middle.
- REST IT UNDER FOIL: After cooking, pile the beef onto a plate, tent loosely with foil, and let it sit for 5 minutes. The residual heat keeps it juicy while you prep the rest of your dish. I was skeptical until I tried it—now I never skip it. The texture’s noticeably better.
Wine and beer pairings for this dish
Red Wine Pairings
A bold Cabernet Sauvignon from Napa Valley is my go-to choice for this spiced beef—its dark fruit flavors and firm tannins stand up beautifully to the cumin and smoked paprika. Look for a 2019 or newer vintage with notes of blackcurrant and mocha to complement the beef’s caramelized crust.
The wine’s acidity cuts through the richness while enhancing the dish’s smoky depth. 🍷
Lighter White Options
For a refreshing contrast, try a Spanish Albariño with its crisp citrus and mineral notes. The wine’s bright acidity balances the beef’s richness while the peach and green apple flavors create an unexpected but delightful pairing.
I keep a bottle of Pazo de Señorans on hand specifically for these lighter meat dishes. The slight effervescence cleanses your palate between bites.
Craft Beer Matches
A well-hopped American IPA with citrus notes works surprisingly well—try a Sierra Nevada Pale Ale or Dogfish Head 60 Minute IPA. The beer’s piney hops and grapefruit flavors mirror the lemon finish in the beef while the malt backbone stands up to the spices.
For a lighter option, a Belgian witbier like Stella Artois adds a subtle spice complexity that complements the cumin and smoked paprika.
Malty Amber Ales
If you prefer something smoother, an amber ale with caramel and toasted malt notes creates perfect harmony. I love New Belgium Fat Tire for its balanced sweetness and moderate bitterness. The beer’s caramel undertones echo the beef’s caramelized crust while the maltiness rounds out the dish’s overall richness.
This pairing works especially well when serving the beef on toasted buns or in tacos.
Regional Wine Specialties
For Italian-inspired dishes, a Chianti Classico from Tuscany brings rustic charm with its cherry and leather notes. The wine’s earthy undertones enhance the beef’s smoky spices while its acidity balances the dish’s richness.
If you’re serving this beef in tacos with Italian herbs, this becomes my absolute favorite pairing—it feels like a vacation in every sip. 🌍
Nutrition facts
Frequently asked questions
Can I use leaner ground beef (like 90/10) for this recipe?
While you can use 90/10 ground beef, it will be less flavorful and more prone to drying out. The 80/20 ratio is ideal for crispy edges and juicy texture. If you must use leaner beef, add 1 extra tablespoon of oil to the pan and reduce cooking time by 1-2 minutes to prevent overcooking.
How do I adjust this recipe for a larger batch?
For 2 pounds of beef, double all ingredients but cook in batches—never overcrowd the pan. Use a 12-inch skillet for the first batch, then repeat. Increase cooking time by 2-3 minutes per batch to maintain crispiness. The 1-pound method ensures even cooking and perfect texture.
What are the best ways to use this cooked beef?
This versatile beef works perfectly for tacos, burgers, stuffed peppers, or pasta dishes. For tacos, serve with corn tortillas, avocado, and pico de gallo. For burgers, form into patties and cook until 160°F internally. The crispy texture holds up beautifully in all applications!
Why did my beef turn out dry?
Overcooking or using lean beef are the most common causes. Always cook to 160°F (not well-done) and avoid stirring too soon. For extra moisture, add 1 tablespoon of beef broth during the last 2 minutes of cooking. Breaking the beef into 1-inch pieces ensures even cooking and prevents dry spots.
Can I make this recipe ahead of time?
Yes! Cook the beef as directed, then store in an airtight container in the fridge for 3-4 days or freeze for 3 months. Reheat gently in a skillet with 1 teaspoon of oil over medium-low heat until warmed through. For best texture, serve fresh or reheat briefly to restore crispiness.

- 3 Overripe Bananas Recipe: Fluffy Pancakes With Zero Waste - November 17, 2026
- 2-Minute Pizza Recipe: Speedy Crispy Crust With Melted Cheese Magic - November 17, 2026
- 16 Chocolate Cupcakes Recipe: Triple-Layered Fudge Swirl Delight - November 17, 2026