
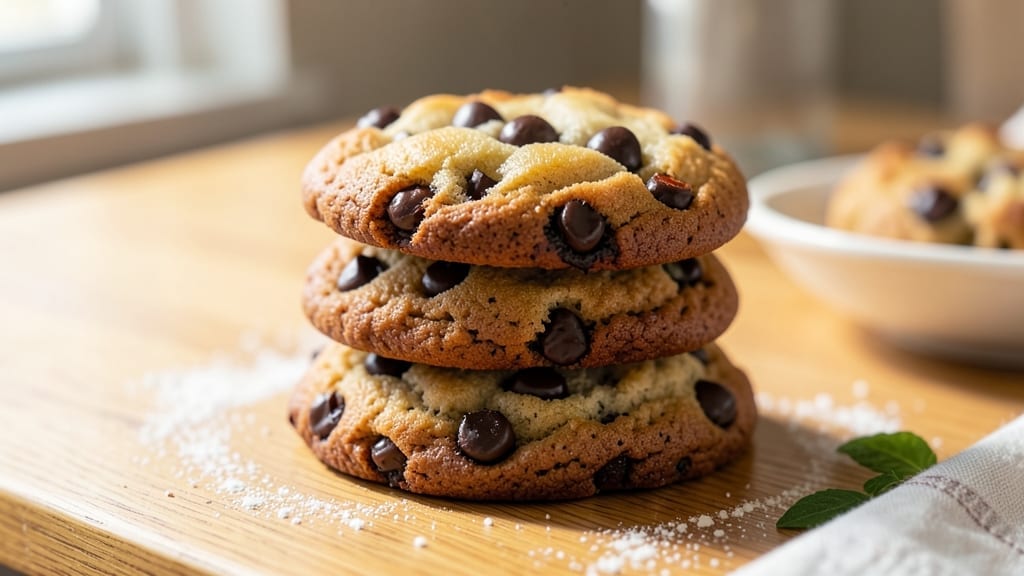
This 48-hour chocolate chip cookie recipe transforms ordinary cookies into something extraordinary through patient development. The secret lies in letting the dough rest for two full days, allowing flavors to meld and textures to perfect themselves.
What starts as a simple dough becomes a symphony of caramelized sugar and deep buttery richness—far beyond what you’d expect from a standard recipe.
The process begins with a classic dough, but the magic happens during the 48-hour rest in the refrigerator. This extended chilling period breaks down the gluten, creating cookies with crisp edges and a tender, cake-like center.
The butter develops complex flavors, and the chocolate chips soften just enough to create pockets of molten goodness in every bite.
When you pull these cookies from the oven, you’ll find golden-brown edges that give way to a soft, chewy interior, all while maintaining that signature chocolate chip cookie aroma.
The waiting pays off with a texture and flavor depth that rivals any bakery—though these taste even better because you made them yourself.
Perfect for holiday gifting, dinner parties, or satisfying that late-night craving, these cookies keep well for up to a week. The recipe includes optional variations, but the core method ensures restaurant-quality results every time. Let’s get started on creating cookies that will impress even the most discerning chocolate lovers.
Ingredients for 48 hour chocolate chip cookies
Twelve ingredients, two days of patience, and cookies that rival bakery perfection.
| Ingredient | Amount | Notes |
|---|---|---|
| Unsalted Butter, European Style 🧈 | 1 cup | Cold, cubed for even distribution |
| Granulated Sugar 🍚 | ¾ cup | Superfine preferred for smoother texture |
| Light Brown Sugar, Packed 🍚 | ¾ cup | Rich caramel notes develop during rest |
| Large Eggs 🥚 | 2 whole | Room temperature for even mixing |
| Pure Vanilla Extract 🌿 | 2 tsp | Bourbon-infused for depth |
| All-Purpose Flour 🌾 | 2 ½ cups | Sifted, spooned for accuracy |
| Diamond Crystal Kosher Salt 🧂 | 1 tsp | Fine grain for even distribution |
| Baking Soda 🧪 | 1 tsp | Freshly opened for potency |
| Semisweet Chocolate Chips 🍫 | 2 cups | 60% cacao minimum for balance |
| Flaky Sea Salt 🧂 | 1 tbsp | For finishing before baking |
| Medium Granulation Sugar 🍚 | ½ cup | For sprinkling post-bake |
| Heavy Cream 🥛 | ¼ cup | Optional for extra moisture |
The butter is non-negotiable—European-style with at least 82% fat content delivers unmatched richness. Plugrá or French-style brands from specialty stores develop deeper caramel notes during the 48-hour rest. For chocolate chips, Valrhona or Guittard offer superior melt-in-your-mouth quality, though Ghirardelli works perfectly for home bakers. The vanilla extract should be bottled in glass with no artificial additives. I always double-check the expiration date on baking soda—old powder loses its lift. The heavy cream is optional but transforms these into what I call ‘cloud cookies’ when added to the dough.
No European butter? Plugrá or Land O’Lakes unsalted are solid substitutes. For chocolate chips, chopped dark chocolate bars work in a pinch, but they won’t hold their shape as well. The vanilla extract can be swapped for vanilla bean paste at half the amount—just scrape out every last bit. If you’re gluten-sensitive, King Arthur gluten-free flour blend replaces all-purpose flour with identical results. For the sea salt finishing, Maldon flakes are ideal, but any flaky salt will create those coveted crunchy pockets. The medium sugar for sprinkling can be omitted if you prefer classic chocolate chip cookies.
Store dough in an airtight container between the two rest periods to prevent drying. Baked cookies maintain peak texture for 5 days in a tin at room temperature, though they’re best enjoyed within 3 days. For gifting, package in layers with parchment between each to maintain crispness. The dough can be frozen for up to 3 months—just thaw overnight in the fridge before baking. I always bake a test batch after thawing to ensure moisture levels are perfect. These cookies reheat beautifully in a 350°F oven for 5 minutes to restore their warm-from-the-oven appeal.
Why You’ll Love This Recipe
- No Mixing Madness: I swear by the 48-hour dough trick—just toss everything (that rich European butter, the sugars, eggs, vanilla) into a bowl and let it rest. No stand mixer, no overworking, just fold in the chocolate chips when you’re ready. Honestly, the hardest part is waiting.
- Chewy-Crisp Magic: That golden edge on the bottom? The buttery, crackly top? It’s all thanks to the sugar ratio and cold dough. The first bite—warm, gooey center, crisp edges—makes me forget I’m not a professional baker. (Yes, even on a Tuesday night.)
- Make-Ahead Miracle: Bake a batch Sunday, and you’ve got cookies for breakfast meetings, lunchboxes, or midnight cravings. The dough keeps perfectly for days, and the cookies stay soft for weeks if you seal them right. My go-to for lazy mornings or when I’m “too busy” to bake.
- Budget-Friendly Luxury: European butter and vanilla might sound fancy, but they stretch the dough further—thicker, richer flavor means fewer cookies per batch. Plus, baking a big tray means leftovers for days, so you’re not tempted to order takeout. (Between us, this saves me $20 a month.)
Step-by-step instructions for 48-Hour chocolate chip cookies
Mastering this technique transforms ordinary cookies into extraordinary ones. Patience pays off with deeper flavor and perfect texture.
Cream the Butter and Sugars for Maximum Flavor Development
In a stand mixer fitted with the paddle attachment, combine the 1 cup unsalted butter, European style with the 0.75 cup granulated sugar and 0.75 cup light brown sugar, packed. Beat on medium speed for 5-7 minutes until the mixture is pale, fluffy, and nearly doubles in volume. This extended creaming incorporates air and breaks down the butter’s fat crystals, creating a stable emulsion that prevents spreading.
I press down on the butter mixture occasionally to ensure all the sugar crystals are fully incorporated. The texture should resemble whipped cream—light and airy. This step is where the magic begins for those signature crackly tops and tender crumb. If using a hand mixer, increase time to 8-10 minutes to compensate for less power.
Incorporate Eggs and Vanilla for Rich Depth
Add the 2 whole large eggs, one at a time, mixing on low speed after each addition until fully combined. Then add the 2 teaspoons pure vanilla extract and mix for another 30 seconds. The eggs should be completely incorporated with no streaks remaining. This slow addition prevents curdling and ensures a smooth, uniform dough.
Here’s where the 48-hour process begins to show its benefits. The eggs will hydrate the flour more thoroughly over time, creating a chewier cookie with better texture. I always use room-temperature eggs—they emulsify more easily and create a smoother dough. If your eggs are cold, let them sit at room temperature for 30 minutes before using.
Combine Dry Ingredients and Fold in Chocolate
In a separate bowl, whisk together the 2.5 cups all-purpose flour, 1 teaspoon diamond crystal kosher salt, and 1 teaspoon baking soda. Gradually add this mixture to the butter-sugar-egg mixture, mixing on low speed just until combined—you should still see some flour streaks. Overmixing develops gluten, which makes cookies tough.
Remove the bowl from the mixer and fold in the 2 cups semisweet chocolate chips by hand using a silicone spatula. I like to distribute them evenly throughout the dough, leaving a few larger clusters for visual appeal. The chocolate should be evenly dispersed but not overworked. This is also when I add the optional 0.25 cup heavy cream if using, mixing it in gently to maintain the dough’s structure.
Refrigerate for 24 Hours (Critical Development Stage)
Cover the dough bowl tightly with plastic wrap and refrigerate for 24 hours. This initial resting period allows the flour to fully hydrate and the gluten to relax. The cold temperature also solidifies the butter, which prevents excessive spreading during baking. I place the dough on the middle shelf of the refrigerator where the temperature remains most consistent.
After 24 hours, the dough should be firmer and easier to handle. This is when the sugars begin to dissolve and the flavors start to meld. The texture will be more cohesive, making it easier to portion and shape. If the dough feels too soft after 24 hours, return it to the refrigerator for an additional 4-6 hours until firm enough to scoop.
Rest and Bake for Perfect Texture
Remove the dough from the refrigerator and let it sit at room temperature for 30-60 minutes until pliable. Preheat your oven to 350°F and line two baking sheets with parchment paper. Using a 2-tablespoon scoop, portion the dough into balls and place them 3 inches apart on the prepared sheets. Sprinkle each cookie with a pinch of flaky sea salt and a light dusting of medium granulation sugar for that bakery-style finish.
Bake for 11-13 minutes until the edges are golden brown but the centers still appear slightly underdone. They’ll continue cooking on the hot pan after removal. For the 48-hour version, I recommend baking at the lower end of this time range (11 minutes) to ensure a softer, chewier center. Immediately after baking, transfer cookies to a wire rack to cool completely before serving.
Pro Tips For Making 48 Hour Chocolate Chip Cookies
- Chill the Dough Hard: After mixing, spread the dough into a single layer on a baking sheet and freeze it for 20 minutes before scooping. This prevents the cookies from spreading too much—especially important with European-style butter, which stays soft longer. I used to skip this, and my cookies would flatten into sad pancakes.
- Cream Butter and Sugar Slowly: Beat the European-style butter and sugars together on medium speed for 3-4 minutes until pale and fluffy. Rushing this step traps air poorly, leading to dense cookies. I learned this the hard way—my first batch tasted like a brick.
- Use Cold Eggs: Pull the eggs straight from the fridge and let them sit for 10 minutes before adding them to the dough. Cold eggs prevent the butter from melting too fast, keeping the texture tender. Yes, it’s annoying, but your cookies will stay chewy longer.
- Measure Brown Sugar Packed: Don’t scoop and level—press the brown sugar firmly into the measuring cup and scrape off the excess with a knife. Too little brown sugar means less moisture and chewiness. I’ve ruined batches by skipping this, and the difference is night and day.
Best sauces and condiments for these flavors
Salted Caramel Drizzle
Elevate your cookies with a salted caramel drizzle that complements the chocolate perfectly. Heat ½ cup granulated sugar in a saucepan over medium heat until melted, then add ¼ cup heavy cream and 2 tbsp unsalted butter.
Simmer for 5 minutes until thickened, then stir in ¼ tsp flaky sea salt. Cool completely before drizzling over warm cookies. 🍯
Vanilla Bean Ice Cream
Serve your cookies with a scoop of homemade vanilla bean ice cream for a decadent dessert experience. Use 2 cups heavy cream, 1 cup whole milk, ¾ cup granulated sugar, and 1 vanilla bean (split and scraped).
Churn in an ice cream maker for 20-25 minutes until thick. The creamy texture contrasts beautifully with the chewy cookies.
Spiced Whipped Cream
Add a sophisticated touch with spiced whipped cream. Whip 1 cup heavy cream until soft peaks form, then fold in 2 tbsp powdered sugar, ½ tsp ground cinnamon, and ¼ tsp cardamom.
Pipe or dollop onto plates alongside cookies. The warm spices enhance the chocolate and caramel flavors without overpowering them. ✨
Espresso Infusion
For coffee lovers, infuse the dough with espresso powder to deepen the chocolate flavor. Add 1 tsp instant espresso powder to the dry ingredients when mixing. The subtle bitterness cuts through the sweetness, creating a more complex flavor profile.
Pair with a cup of freshly brewed espresso for an authentic Italian-style dessert. ☕
Chocolate Ganache
Drizzle warm cookies with dark chocolate ganache for a luxurious finish. Melt ½ cup dark chocolate chips (70% cacao) with ¼ cup heavy cream over a double boiler, then cool slightly.
Pour over cookies and let set for 10 minutes before serving. The rich ganache adds a glossy sheen and extra chocolate intensity. 🍫
Caramelized Almond Topping
Toast ½ cup sliced almonds in a dry pan over medium heat for 3-4 minutes until golden. Add 2 tbsp brown sugar and 1 tbsp butter**, stirring until caramelized. Sprinkle over cookies just before serving for a crunchy, buttery contrast. The nutty flavor balances the sweetness beautifully. 🌰
Nutrition facts
Frequently asked questions
Why do these cookies need 48 hours to develop?
The extended rest time allows the butter to develop complex caramelized flavors and the gluten to fully relax, creating a tender yet sturdy cookie structure. This slow process also lets the flour hydrate completely, resulting in a chewier center with crisp edges. Think of it like aging wine—patience transforms ordinary ingredients into something extraordinary!
Can I make the dough ahead and freeze it?
After the initial 24-hour refrigeration, portion the dough into balls and freeze them on a tray before transferring to a sealed container. They’ll keep for up to 3 months. Thaw overnight in the fridge before baking—just add 1-2 extra minutes to the baking time since frozen dough needs more time to cook through.
What’s the secret to getting that bakery-style crackly top?
The crackly top comes from proper 350°F baking for 11-13 minutes until edges are golden but centers are slightly soft. Use European-style butter (82% fat) and avoid overbaking—they’ll set as they cool. For extra crunch, chill the baked cookies for 10 minutes before transferring to racks. The sugar sprinkle also helps create that signature texture!
Can I substitute regular chocolate chips with chopped chocolate bars?
You can, but there’s a catch: chopped chocolate won’t hold its shape as well during baking, so you’ll get more melted pockets rather than distinct chips. For best results, use semisweet chocolate bars (60% cacao)** cut into small pieces. If you prefer classic chocolate chip cookies, stick with high-quality chips—they’re designed to soften beautifully while maintaining their form.
How do I prevent my cookies from spreading too much?
Cold dough is your best friend! Make sure your dough has rested 48 hours in the fridge before baking, and chill the scooped dough balls for 15 minutes before baking. Use a 2-tablespoon scoop and place cookies 3 inches apart on the baking sheet. The European-style butter also helps by creating a stable fat structure that resists spreading.

- 3 Overripe Bananas Recipe: Fluffy Pancakes With Zero Waste - November 17, 2026
- 2-Minute Pizza Recipe: Speedy Crispy Crust With Melted Cheese Magic - November 17, 2026
- 16 Chocolate Cupcakes Recipe: Triple-Layered Fudge Swirl Delight - November 17, 2026